Advertisement
- 1 INTRODUCTION
- 2 SET UP (Fig. 1)
- 3 REMOVING THE QUICK RELEASE PLATE FROM THE HEAD (Fig. 2)
- 4 FITTING THE QUICK RELEASE PLATE TO YOUR CAMERA (Fig. 3)
- 5 MOUNTING THE CAMERA ON THE HEAD (Fig. 4-5)
- 6 REMOVING THE CAMERA FROM THE HEAD (Fig. 6)
- 7 USING THE HEAD (Fig. 7,1)
- 8 FOLDING BASE (Fig. 8,9)
- 9 HOW TO EXTEND THE MONOPOD LEGS (Fig. 10)
- 10 USE PAN MOVEMENT (Fig. 11)
- 11 TILT MOVEMENT (Fig. 12)
- 12 HOW TO CONVERT THE VIDEO MONOPOD INTO A PHOTO MONOPOD (Fig. 13)
- 13 LEG LOCK TENSION ADJUSTMENT (Fig. 14)
- 14 MAINTENANCE (Fig. 15)
- 15 Documents / Resources
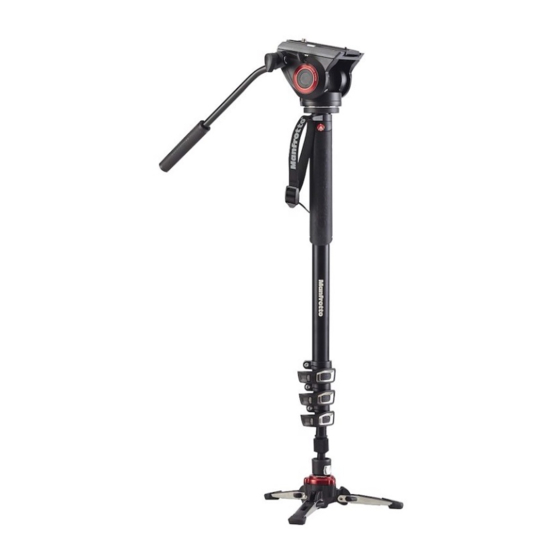
INTRODUCTION
Designed for video cameras up to 4 kg / 8.8 lbs.
KEY FEATURES
- Fluid pan base with folding legs
- Rapid action, lever leg extension locks
- Dedicated video head for monopod
SET UP (Fig. 1)

To adjust the height of the monopod, rotate lever "A" on the locking collar "AB". When the required height is achieved, lock lever "A"
REMOVING THE QUICK RELEASE PLATE FROM THE HEAD (Fig. 2)

To remove plate "G", push down secondary safety mechanism lever "I" and rotate lever "H" fully to the right until it reaches its stop position.
FITTING THE QUICK RELEASE PLATE TO YOUR CAMERA (Fig. 3)

Attach plate "G" to your camera by screwing ¼" male thread "M" into the female thread on the underside of your camera, using ring "Q" to tighten it WITHOUT APPLYING FORCE.
Before the plate is fully tightened in position, align your camera lens with the arrow marked "LENS" on the underside of plate "G".

Please ensure the plate is securely attached to the camera before use.
MOUNTING THE CAMERA ON THE HEAD (Fig. 4-5)

Push ring "Q" down so it lies flat against plate "G".
Insert plate "G", front edge first, into the top of the head (fig. 4), then push the back edge of the plate down into the head until locking lever "H" clicks shut.
Make sure that plate "G" is fully locked by pushing lever "H" to the left (fig. 5). Check that the camera is securely attached to the head.
REMOVING THE CAMERA FROM THE HEAD (Fig. 6)

Whenever the camera needs to be removed from the head, hold the camera securely with one hand; with the other, push down secondary safety mechanism lever "I" and rotate lever "H" fully to the right until it reaches its stop position.
USING THE HEAD (Fig. 7,1)

The head has two fluid settings to allow different camera and lens combinations. Use dial "X" to select the fluid setting bestsuited to your equipment:
- for a camera with a short lens, rotate the dial to position "X1"
- for a camera with a long lens, rotate the dial to position "X2"
The head offers +90°/-60° of vertical tilt rotation. Movement and adjustment of the head is made using pan bar "P" (fig. 1).
- To release or block pan movement, use knob "V".
- To release or block tilt movement, use knob "U".
Knob "N" is a ratchet knob, meaning that the protruding lever can be repositioned as required, without affecting the lock itself: simply pull the lever outward, rotate as desired, then release the lever and it will automatically locate in the adjusted position.
The head is supplied with bubble spirit level "J" for levelling (fig. 1).
FOLDING BASE (Fig. 8,9)

How to open: open the 3 legs "V" by spreading them as shown in figure 8. How to fold: pull the pin "T" as shown in figure 9 and at the same time fold each leg "V".
HOW TO EXTEND THE MONOPOD LEGS (Fig. 10)

Please follow the instructions provided in figure 10 when extending the monopod: avoid letting its sections fall to extend.
USE PAN MOVEMENT (Fig. 11)

The fluid base ensures that the monopod's pan movements are fluid and vibration-free (see fig. 11B).
Push collar "C" downwards: this excludes lateral tilt and enables fluid pan movement (fig. 11A).
TILT MOVEMENT (Fig. 12)

Press to release safety catch "E" and push collar "C" downwards (fig. 12A). The fluid base allows to tilt the monopod outwards from the vertical axis (fig. 12B) We recommend you do not to leave the monopod standing unsupported but always secure it with your hand.
HOW TO CONVERT THE VIDEO MONOPOD INTO A PHOTO MONOPOD (Fig. 13)

The monopod comes with an extra cap for converting it from video monopod to photo monopod.
To replace the base with the cap, please proceed as follows: - Push collar "C" down
- Unscrew collar "D"
- Disengage the monopod from the base
- Mount the cap "X"
LEG LOCK TENSION ADJUSTMENT (Fig. 14)

If the telescopic leg extensions slip even after having tightened the locking lever "A", the locking tension will need to be adjusted.
In order to do this:
- release lock lever "A"
- turn the screw "P" clockwise using the special key "N" provided on one of the tripod legs.
Normally a third of a turn will be sufficient to achieve the correct locking tension.
In order to replace locking collar "AB" (fig. 1), please use a TORX key number 25 (not supplied with product).
MAINTENANCE (Fig. 15)

If the ball becomes too free with use, you can obtain the right friction again:
- Remove the cap "H"
- Tight the screw "Y" the Allen Key (not supplied).

Documents / ResourcesDownload manual
Here you can download full pdf version of manual, it may contain additional safety instructions, warranty information, FCC rules, etc.
Advertisement


Need help?
Do you have a question about the MVMFXPRO2W and is the answer not in the manual?
Questions and answers