Advertisement
Welcome
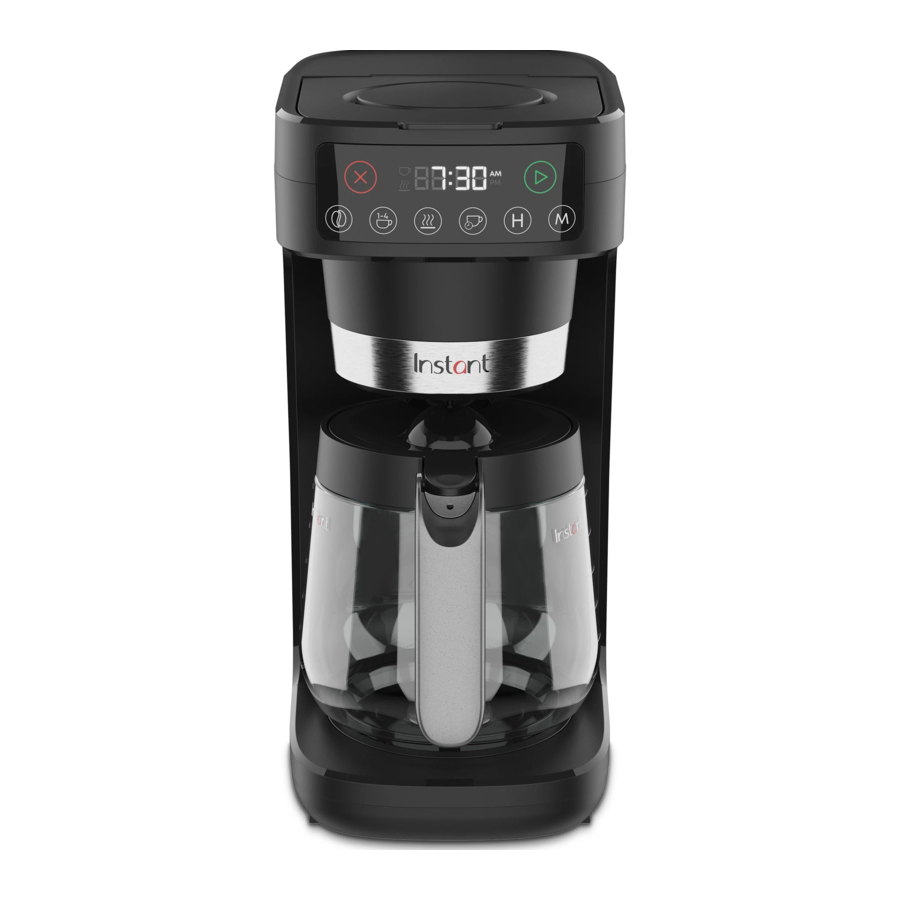
to your new Instant® Infusion Brew Plus 12-Cup Coffee Maker!
Brew delicious, smooth coffee anytime you crave it, with maximum flavor and customization in every cup. Here are some helpful resources as you get to know your new Instant® appliance.
Get started with your Infusion Brew Plus!

WHATS IN THE BOX

Accessories

Illustrations are for reference only and may differ from the actual product.
Remember to recycle!
We designed our packaging with sustainability in mind. Be sure to recycle at a recycling center in your area.
USING YOUR INSTANT® INFUSION BREW PLUS
Control panel
We've designed the control panel to be simple and easy to read.

- Clock/ display
- Cancel
- Start
- Bold setting
- Small batch (1-4 cups)
- Warming Plate
- Auto-Brew/Timer
- Hours
- Minutes
INITIAL SETUP
- Pull the Instant® Infusion Brew Plus and all accessories out of the box.
- Remove all packaging materials from within and around the unit.
- Place the unit on a dry, stable and level surface.
- Plug in your Instant® Infusion Brew Plus.
- You will hear a beep and all display LED buttons will light up.
Note: After 30 minutes of inactivity, your coffee maker will enter standby mode. The LED control panel will dim. To exit standby mode, press any button or lift the coffeemaker lid.
Sound Settings
You can turn sound and reminder beeps on or off. The default sound setting when you open your coffee maker is ON.
- Make sure your Instant® Infusion Brew Plus is on.
- To turn sound off, press and hold the Bold and Small Batch buttons at the same time for 2 seconds. The message display will show SOFF.
- To turn sound back on, repeat step 2. The message display will show S On.
Setting the Clock
When you first turn on your Instant® Infusion Brew Plus, the clock display will show the default time of 12:00 AM. Setting and changing the time is quick and easy.
- Make sure your Instant® Infusion Brew Plus is turned on.
- Press the
![]() and
and ![]() buttons until the correct time is set. To speed up, press and hold for 3 seconds.
buttons until the correct time is set. To speed up, press and hold for 3 seconds. - Press
![]() button to save the new time.
button to save the new time. - Your clock is now set!
Clean before use
- Lift the water reservoir up to remove from the coffee maker.
- Handwash the glass carafe, water reservoir, coffee filter and brew basket with warm water and dish soap. Rinse with warm, clear water. Wipe with a clean, dry cloth.
- With a damp cloth, wipe down the coffee maker base and control panel.
Integrated Carbon Filter
The integrated carbon filter ensures your water is free of chlorine and other impurities before brewing for cleaner, tastier coffee. The filter cartridge contains activated charcoal and should be replaced every 60 days for the best results.
You will need to assemble and install the integrated carbon filter that comes with your machine before your first brew.

To assemble:
- Remove the filter base, top handle and filter cartridge from its packaging.
- Soak the filter cartridge in cool water for 10 minutes to activate it before using.
- Place the fully soaked filter cartridge into the filter base.
- Snap the top handle to the filter base to fully enclose the filter cartridge.
To install:
- Place the assembled Integrated carbon filter into the water reservoir.
- Press the integrated carbon filter into the port at the bottom of the water reservoir until it is firmly in place.
To replace the filter cartridge:
- Pull the top handle to remove the integrated carbon filter from the water reservoir.
- Unsnap the top handle from the filter base to remove the old filter cartridge and replace with a new one. See assembly instructions above.
Always soak your new filter cartridge in water for 10 minutes before using for best results.
Test Run
Before you brew your first carafe of coffee, we recommend flushing your Instant® Infusion Brew Plus to make sure the unit is clean and working correctly. Do not use coffee for the test run.
- Remove the water reservoir lid. Lift the water reservoir from the back of the coffee maker.
- Fill the water reservoir with cold water to the 12-cup fill line as indicated. Be careful not to over-fill.
- Place the water reservoir back onto the coffee maker then replace water reservoir lid.
- Place the glass carafe onto the warming plate, under the removable brew basket.
![]() Ensure the coffee maker lid is closed. The
Ensure the coffee maker lid is closed. The ![]() button should light up.
button should light up.
Press![]() button to begin brewing.
button to begin brewing.- After the brewing cycle ends, the keep warm setting will automatically activate and the warming plate will stay hot for 2 hours. Press the
![]() button or the
button or the ![]() button to turn it off.
button to turn it off. - Carefully remove the glass carafe and discard the water.
![]()
The water and warming plate will be hot.
To stop brewing at any time press the![]() button.
button. - Carefully place the glass carafe back on to the warming plate which may still be hot.
- Your test run is complete and you're ready to start brewing!
 Ensure the coffee maker lid is closed. The
BREWING COFFEE
Once you've cleaned your Instant® Infusion Brew Plus and all parts, and completed a test run, it's time to program your perfect brew.
Brewing the Perfect Coffee
| Water | Coffee | Grind | Ratio |
| Coffee is 98% water. Use great tasting, cool, filtered water for the purest tasting coffee. | The tastiest, high-quality beans make the tastiest, smoothest coffee. Store whole beans in a cool place (or freezer) and grind just before brewing. | For the most flavorful coffee, choose a mediumfine grind when brewing with your Instant® Infusion Brew Plus. If you grind your own beans, grind just before brewing for maximum freshness. | Getting water to coffee ratios correct is key to great tasting brew that isn't too weak or too strong. See coffee measurements guide to start, then adjust to your personal taste. |
Pre-Infusion Process
Your Instant® Infusion Brew Plus uses an innovative showerhead dispenser and pre-infusion process to extract maximum flavor with every brew. Pre-infusion gently soaks the ground coffee evenly with filtered water before brewing. Pre-infusion begins automatically during all brewing programs with your Instant® Infusion Brew Plus.
Brew Preferences and Programs
Your Instant® Infusion Brew Plus lets you choose how you want to brew for maximum taste and customization, and tasty coffee every time.
![]() Bold Brew
Bold Brew
If you prefer a stronger, richer coffee, the Bold Brew setting has been programmed to extract even deeper flavor from the coffee grounds by increasing the brewing time slightly.
The Bold Brew button will illuminate when selected.
You can toggle between Classic and Bold Brew settings depending on your personal preference.
| For brew that tastes... | Choose this brew strength |
| Medium flavor, easy drinking, balanced. Great morning coffee. | Classic |
| Deep, rich flavor, smooth. Holds up well to cream/milk and other flavorings. | Bold |
 Auto-Brew Timer
Set your timer before bed and wake up to perfectly brewed coffee ready for you to enjoy! You can set your brew to automatically start, up to 24 hours in advance.
- Make sure the clock is set to the current time. See 'Setting the Clock'.
- Press the
![]() button then press the
button then press the ![]() and
and ![]() buttons to set the brew time you want.
buttons to set the brew time you want. - Press
![]() . The
. The ![]() button will illuminate and a tone will play confirming the new brew time is set.
button will illuminate and a tone will play confirming the new brew time is set.
 Small Batch Brewing
Use this setting when you are brewing fewer than 4 cups of coffee. Small batch brewing adjusts the brew process to ensure full flavor and less waste, whether you want a lot of coffee or a little.
 Keep Warm
Once your coffee has finished brewing, the Keep Warm setting keeps it fresh and hot for up to 4 hours. The default warming is set at 2 hours on High temperature. Default warming settings can only be changed while in Ready mode, before brewing.
To change the Keep Warm settings:
- Press and hold the
![]() button for 3 seconds to change the default warming temperature or time.
button for 3 seconds to change the default warming temperature or time. - To change the temperature, press the
![]() button to select Low, Medium or High.
button to select Low, Medium or High.
Note: The current warming temperature can be changed during or after brewing, once the warming plate has turned on. - To change the time, press the
![]() and
and ![]() buttons and toggle through Hours and Minutes.
buttons and toggle through Hours and Minutes.
Note: you cannot change the time on the warming plate once warming starts. - Press the
![]() button to confirm choices.
button to confirm choices.
Once you save your preferences, they are stored as your new default settings for quick and easy brewing next time. You can change settings anytime.
Coffee Measurement Chart
We recommend using a medium-fine grind of coffee with your Instant® Infusion Brew Plus. This will give you optimal results and the smoothest flavor.
| Batch Size | Cups | Grounds | Water |
| Small batch button is on | 4 cups | 4 rounded scoops or 6 Tbsp. | 4-cup line |
| Full carafe button is off | 6 cups | 6 rounded scoops or 9 Tbsp. or 1/2 cup + 1 Tbsp. | 6-cup line |
| 8 cups | 8 rounded scoops or 12 Tbsp. or 3/4 cup | 8-cup line | |
| 10 cups | 10 rounded scoops or 15 Tbsp. or 3/4 cup + 3 Tbsp. | 10-cup line | |
| 12 cups | 12 rounded scoops or 18 Tbsp. or 1 cup + 2 Tbsp. | 12-cup line |
How to brew coffee
Prep
- Lift the water reservoir lid to open. Remove the water reservoir by pulling straight up.
- Fill the water reservoir to desired level. See "Coffee Measurements" for suggested quantities above.
![]()
DO NOT attempt to brew if the water level is below the MIN fill line. - If using coffee beans, grind them down to a medium or medium- fine consistency.
Brew
- Lift the coffee maker lid and place the removable brew basket into the basket holder, making sure it's secure. Insert the gold-tone coffee filter (or a #4 cone paper filter) into the removable brew basket.
- Add desired amount of ground coffee into the gold-tone coffee filter. See "Coffee Measurements" table above.
- Close the coffee maker lid. The green
![]() button will turn on. Note: the coffeemaker lid must be closed for brewing to start.
button will turn on. Note: the coffeemaker lid must be closed for brewing to start. - Choose preferred strength: press the
![]() button for stronger, bolder brew flavor, if desired. The button light will illuminate. Press the
button for stronger, bolder brew flavor, if desired. The button light will illuminate. Press the ![]() button again to turn off light and brew at classic strength.*
button again to turn off light and brew at classic strength.* - Choose small batch or full carafe: Press
![]() if you are brewing fewer than 5 cups. The selected button will illuminate. If you are brewing a full carafe leave this off.*
if you are brewing fewer than 5 cups. The selected button will illuminate. If you are brewing a full carafe leave this off.* - If brewing immediately, press
![]() to keep default settings and brew right away. Or see Step 5 to change your default settings. You can set auto-brew for up to 24 hours ahead of time.
to keep default settings and brew right away. Or see Step 5 to change your default settings. You can set auto-brew for up to 24 hours ahead of time. - Choose brew time: press the
![]() button. Either the default time of 12:00 or the previously set time will flash on the display. Press the
button. Either the default time of 12:00 or the previously set time will flash on the display. Press the ![]() and
and ![]() buttons to adjust your desired start time.
buttons to adjust your desired start time. - Press the green
![]() button to confirm time.
button to confirm time.
To accelerate through the selections, press and hold the![]() and
and ![]() buttons.
buttons.
You can cancel brewing and return to Ready mode at any time by pressing the![]() button.
button. - Every brew has an automatic pre-infusion cycle. Brewing will begin, pause briefly as the coffee grounds are saturated, then continue brewing.
- When brewing is complete, automatic warming will begin. See "Keep Warm" above.
- Enjoy your freshly brewed coffee!
*Note: Saved settings will activate when you press![]() button the next time you brew. You can change these at any time.
button the next time you brew. You can change these at any time.
 button for stronger, bolder brew flavor, if desired. The button light will illuminate. Press the
To avoid the risk of burn injury and/or property damage DO NOT open the coffee maker lid during or immediately after the brew process. Water may be extremely hot.
Allow contents to cool before opening the lid.
CARE, CLEANING AND STORAGE
Clean your Instant® Infusion Brew Plus regularly to ensure the best possible flavor and to prevent mineral deposits from building up in the coffee maker.
Always let parts cool to room temperature before cleaning. Never use metal scouring pads, abrasive powders, or harsh chemical detergents on any of the coffee maker's parts.
Let all parts dry thoroughly before use and before storage.
| Instant® Infusion Brew Plus Part/ Accessory | Cleaning methods and instructions |
|
|
|
|
| Coffee maker / LED panel |
|
| Power cord |
|

To avoid fire, electric shock, personal injury and/or property damage:
- Hand wash only.
- DO NOT rinse or immerse the coffee maker, power cord, or plug in water or other liquids.
Any other servicing should be performed by an authorized service representative. For assistance, contact Customer Care at support@instantcare.com.
Descaling / Removing Mineral Deposits
With regular use minerals may accumulate in the coffee maker, which can affect the temperature and strength of your brew.
To make sure your coffee maker stays in tip top shape, descale it regularly to keep mineral deposits from building up. Your Instant® Infusion Brew Plus has a built-in cycle for quick and easy cleaning.
After 90 cycles, the  button light will turn on and the
  and
and  button lights will flash to remind you to clean and descale your coffee maker. You will have two options:
Cancel cleaning
Press the button to exit reminder mode and return to Ready mode. Your coffee maker will not begin cleaning and the brew cycle counter will reset.
Start automatic cleaning cycle.
Follow instructions in "How to Descale your Instant Coffee Maker Plus" below.
Once the cleaning cycle is completed, the brew cycle counter will reset (counting up to 90) and the device returns to Ready mode.
How to Descale your Instant® Infusion Brew Plus
- Combine cleaner and water as shown in the table "Descaling Solution Ratio" below.
- Fill the water reservoir to the MAX line with the cleaning mixture.
- Place the glass carafe under the removable brew basket. Make sure the coffee maker lid is closed.
- Press and hold the
![]() and
and ![]() buttons for 3 seconds.
buttons for 3 seconds. - The
![]() and
and ![]() buttons will flash slowly and the cleaning mixture will pass through the appliance until the water reservoir is empty.
buttons will flash slowly and the cleaning mixture will pass through the appliance until the water reservoir is empty. - Discard the cleaning mixture from the glass carafe. Be careful: the mixture will be HOT.
- Return the emptied glass carafe under the drip nozzle.
- Remove and rinse the water reservoir and fill to the MAX line with cool, clean water. Make sure the coffee maker lid is closed.
![]() Press and hold the
Press and hold the ![]() and
and ![]() buttons for 3 seconds. The cleaning mixture will pass through the appliance until the water reservoir is empty.
buttons for 3 seconds. The cleaning mixture will pass through the appliance until the water reservoir is empty.- Discard the water from the glass carafe. The unit is now clean and ready to use again.
Descaling Solution Ratio
| Cleaner | Cleaner to water ratio |
| Household descaler | 1: 4 |
| Citric acid | 3: 100 |
TROUBLESHOOTING
| Problem | Cause | Solution |
There is sediment/ grounds in my coffee |
|
|
Coffee is too weak |
|
|
Coffee is too strong |
|
|
The carafe overflowed during brewing cycle |
|
|
Brew cycle will not start
|
|
|
| Coffee maker is making unknown or strange sounds and/or buttons are flashing. | Contact Consumer Care at support@instanthome.com |
LEARN MORE
There's a whole world of Instant Coffee Maker information and help just waiting for you. Here are some of the most helpful resources.
Register your product
Instanthome.com/register
Contact Consumer Care
In the Instant Brands Connect App
Instanthome.com/customer-care-center
support@instanthome.com
Instant Brands® Connect App
Instanthome.com iOS and Android app stores


Replacement parts and accessories
Instanthome.com
Join the community

Product specifications
| Model | Volume | Wattage | Power | Weight | Dimensions |
| DCM-1100 | 60 oz / 1774 mL water reservoir | 1400 W | 120V/ 60Hz | 6.57 lb 2.98 kg | in: 14.1 H x 6.9 W x 14.4 D cm: 35.9 H x 17.6 W x 36.6 D |

Documents / Resources
References
![instanthome.com]() Instant Brands Product Registration | Instant Home
Instant Brands Product Registration | Instant Home![instanthome.com]() Customer care center | Instant Home
Customer care center | Instant Home![instanthome.com]() Shop Instant Pot & Instant Appliances | Official Website | Instant Home
Shop Instant Pot & Instant Appliances | Official Website | Instant Home![play.google.com]() Google Play
Google Play![www.apple.com]() App Store - Apple
App Store - Apple
Download manual
Here you can download full pdf version of manual, it may contain additional safety instructions, warranty information, FCC rules, etc.
Download Instant Pod Infusion Brew Plus 12-Cup Coffee Maker 140-0097-01 Manual
Advertisement


Need help?
Do you have a question about the 140-0097-01 and is the answer not in the manual?
Questions and answers