
Related Manuals for Beko Hll74700UF


Summary of Contents for Beko Hll74700UF
- Page 1 Built-in Hob User Manual Hll74700UF 185.9288.81/R.AC/6.09.2021/2-1 7757188684...
- Page 2 Dear Customer, Please read this manual before using the product. Beko thank you for choosing the product. We want your product, manufactured with high quality and technology, to offer you the best efficiency. To do this, carefully read this manual and any other documentation provided before using the product and keep it as a reference.
-
Page 3: Table Of Contents
Hob control ........... 12 Safety instructions General information on hob ....12 Technica! specifications ......14 Purpose of usage ........4 Child, vulnerable person and pet safety ..4 First use Electrical safety ........5 First cleaning ......... 15 Transportation safety ....... 6 lnstallation safety ........ -
Page 4: I] Safety Instructions
• Do not perform technica! • This section contains safety instructions that will help modifications on the product. prevent any risks of personal À Purpose of usage injuries or material damage. • This product is designed for • lf the product is transferred to home use. -
Page 5: Electrical Safety
• Children should not play with • Keep the packaging materials the product. Cleaning and out of the reach of children. user maintenance should not There is a hazard of injury be performed by children and suffocation. unless there is someone •... -
Page 6: Transportation Safety
compliance with the electrical company in order to prevent regulations and separating all possible dangers. poles trom the network. (Not all products are supplied • The product must not be with a plug, so if your connected into the outlet product DOES have a plug) during installation, repair, and •... -
Page 7: Lnstallation Safety
• Check the overall the mains to avoid the risk of appearance of the product electric shock. tor any damage that may • Do not climb on the product have occurred during to reach anything or for any transportation. other reason. •... -
Page 8: Accessory Use
exposed parts will be hot. Do but switch off the appliance not touch the product and and then cover flame e.g. heating elements. Children with a lid or a fire blanket. under the age of 8 should not • Be careful when using be brought close to the alcohol in your food. -
Page 9: Maintenance And Cleaning Safety
not be placed in the hotplate Hot surfaces may cause as they will get hot. burns! • Metal items stored in drawers • Never wash the product by under the oven may become spraying or pouring water on very hot during long and it! There is an electric shock hazard! intensive use. -
Page 10: Waste Regulation
Waste regulation Package information Compliance with the WEEE • Packaging materials of the product Directive and Disposing of the are manufactured from recyclable Waste Product materials in accordance with our National Environment Regulations. Do This product complies with not dispose of the packaging materials EU WEEE Directive together with the domestic or other (2012/19/EU). -
Page 11: E] Your Product
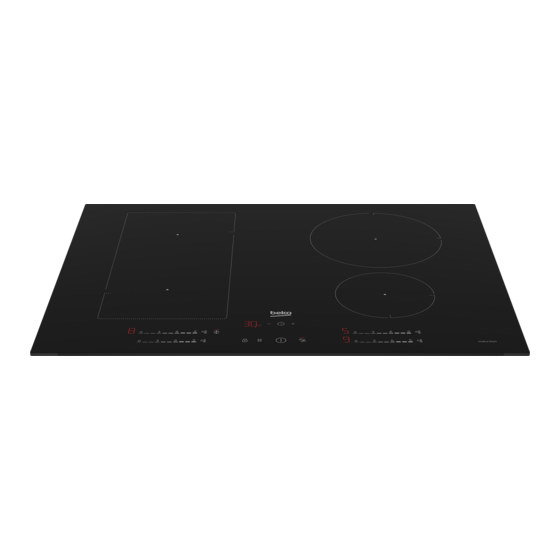
Product introduction Glass cooking surface 4 lnduction cooking zone 2 Lower housing 5 lnduction cooking zone 3 lnduction cooking zone 11/EN... -
Page 12: Product Control Panel Introduction And Usage
Product control panel introduction and usage In this section, you can find the overview and basic uses of the product's control panel. There may be differences in images and some features depending on the type of product. Hob control Keys and symbols : The light indicating that the 1:lf Il Î... - Page 13 3 Front right - lnduction cooking zone these cooking zones and transform them to a single cooking surface for 4 Front left - lnduction cooking zone cooking operations with your large Your cooker is equipped with hob cooking pots. Using proper pots for cooking surfaces with wide surfaces these cooking zones and the (Flexi surfaces).
-
Page 14: Technica! Specifications
Technical specifications 45,2 mm * /580 mm/510 mm(For models that carne with mounting springs and Product external dimensions sealing gasket attached to the product, (height/width/depth) consider the width and depth measurements as 10 mm more than these measurements.) Hob installation dimensions 690 (+2) mm /520 (+2) mm (width/depth) 1 N- 220-240 V/2N- 380-415 V;... -
Page 15: I] First Use
Before you start using your product, it is NOTICE Smoke and smell may emit recommended to do the following in the for a couple of hours during following sections. the initial operation. This is quite normal. Ensure that First cleaning the room is well ventilated 1 . -
Page 16: How To Use The Hob
• Place the pots by centering them on General information on hob the burners/zones. lf you wish to place usage a pot on a different burner/zone, do not slide it towards the desired burner; General warnings • Do not let any objects to fall on the rather, lift it first and then put it on the oven. - Page 17 For a safe operation: • Steel and stainless steel pots/pans • Do not select high heating levels when (with label or warning indicating that it using non-sticking cooking pots/pans is induction compatible) coated with little amount of oil or used Unsuitable pots/pans: without oil (teflon type).
- Page 18 shall be selected as per the size of your hob. The cooking pots/pans sizes recommended for hob sizes are given above. Boiling behavior may vary depending on • Some cooking pots/pans have a base the pot types, size of the pot and size of that contains non-ferromagnetic the cooking zone.
- Page 19 r4- fi ]i i&M�14ti•41ii•i• ) 4MH•W-I t4ötft•jjtiiM�i4fäMii• i •#fä&fi•fü4-I Cooking zones For cooking with wide surface operation with a have two cooking single cooking zones, as front pot/pan, place it and rear. You in the centre of may use these the front or rear zones as two cooking zone.
-
Page 20: Control Panel
2 Setting area for temperature level Turning the hob off 1 . Touch the key on the con trol panel. 3 Quick Heating key/High power » The hob turns off and returns to stand setting (booster) key by mode. Remaining heat indicator 1:lf Il There is a heat indicator for each hob 1_11_11_10... - Page 21 You may turn off the hob by reducing Combination of the hobs with wide the temperature setting to "O" surface (flexi) while one or both of the hobs on the left are operating 2.Using the timer off function for the (if hobs with wide surfaces are desired hob zone When the time is off, the timer turns...
- Page 22 not be available on all hobs. When the panel while the hob is on. The appliance does not draw power during this period. period for High power setting (See Operating period limits table) has Aetivatin the eleanin loek expired, the hob zone is turned off. Seleeting high power setting (BOOSTER) direetly: 1.Turn the hob on by touching the CD...
- Page 23 throughout the cooking period. The hob Turning off the timers zone turns off automatically after the The hob turns off automatically and an period you have selected. audible warning is given when the set time has expired. Activatin the timer Touch any key to turn off the audible p�...
- Page 24 cF:I: Hob-Hood connection setting A Total power value for the power (cFI) 1- Power management setting V management level of 5, 6, 7, 8, 9 You may set the total power of the hob is 3.6 kW in products that with the as you desire with this function.
- Page 25 » Default setting cFI will be displayed on the timer display. 3.Touch twice on 00 key for the Hob- Hood connection setting. 30 seconds » Oon the timer display cF 3 , on the left 1 minute "4" will be displayed. rear hob display 2 minutes 4.
- Page 26 A Your hob may be equipped with V hobs with a diameter of 145, 180, 210 and 280 mm with induction feature depending on the model. Thanks to the induction feature, each hob zone automatically Quick Heating 10 minutes detects the pot placed on it. While the temperature level is increased Energy occurs on the contact as 1,2,3 ...
-
Page 27: General Warnings About Cooking With Hob27
This section describes tips on preparing the heated oil slowly. Make sure that and cooking your food. frozen foods are defrosted before frying. General warnings about • When heating oil, make sure that the cooking with hob pot you use is dry and keep its lid •... -
Page 28: Maintenance And Care
immediately after cooling down the General cleaning cooker by turning it off. information lnox and stainless surfaces General warnings • Do not use acid or chlorine-containing • Wait for the product to cool before cleaning agents to clean stainless or cleaning the product. -
Page 29: Cleaning The Hob
descaling agent, with a descaling cleaned immediately, without waiting agent such as vinegar or lemon juice. for the surface to cool. Otherwise, the • lf the surface is heavily soiled, apply glass cooking surface may be the cleaning agent on the stain with a permanently damaged. -
Page 30: Troubleshooting
Consult the Authorised Service Agent or technician with license or the dealer where you have purchased the product if you cannot remedy the trouble although you have implemented the instructions in this section. Never attempt to repair a detective roduct ourself. Check fuses in the fuse box. - Page 31 Some sounds may be heard from the cooker while cooking. These sounds are due to the composition of the cooking vessel. These sounds are normal, they are not a malfunction and they are a part of induction technology. Possible noises and reasons •...
- Page 32 Turn the induction hob off and E 23 Software error on induction operate again after 30 seconds. E 24 hob. Contact the authorized dealership if the issue is resumed. Turn the induction hob off and Fan operation error on operate again after 30 seconds. E 25 induction hob.
Need help?
Do you have a question about the Hll74700UF and is the answer not in the manual?
Questions and answers