Table of Contents
Advertisement
Before using this unit,
carefully read the sections
entitled: "USING THE
UNIT SAFELY" and
"IMPORTANT NOTES"
(p. 4; p. 6). These sections
provide important
information concerning the
proper operation of the unit.
Additionally, in order to feel
assured that you have
gained a good grasp of every
feature provided by your
new unit, Owner's manual
should be read in its
entirety. The manual should
be saved and kept on hand
as a convenient reference.
Owner's Manual
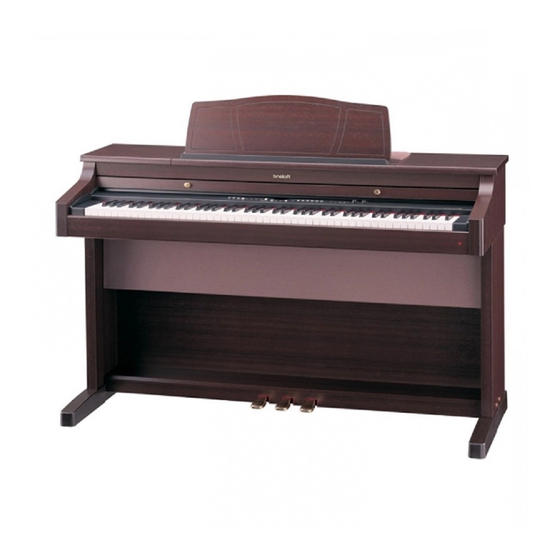
Thank you, and congratulations on your choice of the Roland Digital Piano HP-7/3.
Main Features
Piano sounds with rich resonance and wide-ranging expressiveness
The stereo sampling piano sound generator realistically reproduces even the sound
of the hammers striking the strings, producing the tones of a high-quality concert
grand piano. Maximum polyphony of 64 notes ensures that you can use the pedal
freely without running out of notes.
The HP-7 features a new speaker system to provide sounds with depth and spatial
realism.
Pursuing the playing feel of a grand piano
These instruments feature a progressive hammer action keyboard, which duplicates
the touch of a grand piano, with a heavier touch in the lower register, and a lighter
touch in the upper register. In addition, on the HP-7, even the distinctive "click" that
you feel when pressing a key on a grand piano has been faithfully simulated
(escapement mechanism).
The pedal is designed for good-feeling response, and allows subtle performance
nuances to be expressed.
A variety of practice features to help you develop your musicality
In addition to a metronome, the HP-7/3 features a rhythm function, which
encourages your natural sense of rhythm, and a two-track recorder, which allows
you to experience piano lessons in a way possible only on electronic pianos.
An enjoyable ear-training game is also built-in.
65 piano songs built-in
The built-in songs are mainly classical pieces, and include compositions for listening
enjoyment as well as for lessons. The included music score collection (60 songs) is
also supported.
Piano Customize function lets you adjust details of the sound (HP-7)
This simulates the tonal changes that occur when the lid of a grand piano is opened
or closed, allowing you to play using the piano sound you want.
Adjustable music stand (HP-7)
In addition to allowing you to adjust the angle of the stand, and move it forward or
backward, the music holders accommodates even thick score books.
Copyright © 2002 ROLAND CORPORATION
All rights reserved. No part of this publication may be reproduced in
any form without the written permission of ROLAND CORPORATION.
Advertisement
Table of Contents

Subscribe to Our Youtube Channel
Related Manuals for Roland HP-3


Summary of Contents for Roland HP-3
-
Page 1: Main Features
Owner’s Manual Thank you, and congratulations on your choice of the Roland Digital Piano HP-7/3. Main Features Piano sounds with rich resonance and wide-ranging expressiveness The stereo sampling piano sound generator realistically reproduces even the sound of the hammers striking the strings, producing the tones of a high-quality concert grand piano. -
Page 3: Important Safety Instructions
CAUTION RISK OF ELECTRIC SHOCK DO NOT OPEN ATTENTION : RISQUE DE CHOC ELECTRIQUE NE PAS OUVRIR CAUTION: TO REDUCE THE RISK OF ELECTRIC SHOCK, DO NOT REMOVE COVER (OR BACK). NO USER-SERVICEABLE PARTS INSIDE. REFER SERVICING TO QUALIFIED SERVICE PERSONNEL. INSTRUCTIONS PERTAINING TO A RISK OF FIRE, ELECTRIC SHOCK, OR INJURY TO PERSONS. -
Page 4: Using The Unit Safely
• Do not attempt to repair the unit, or replace parts within it (except when this manual provides specific instructions directing you to do so). Refer all servicing to your retailer, the nearest Roland Service Center, or an authorized Roland distributor, as listed on the “Information” page. - Page 5 • Before using the unit in a foreign country, consult with your retailer, the nearest Roland Service Center, or an authorized Roland distributor, as listed on the “Information” page. • Do not put anything that contains water (e.g., flower vases) on this unit. Also, avoid the use of insecticides, perfumes, alcohol, nail polish, spray cans, etc., near the unit.
-
Page 6: Important Notes
• Do not apply undue force to the music stand while it is in use.(HP-7) • Use a cable from Roland to make the connection. If using some other make of connection cable, please note the following precautions. -
Page 7: Table Of Contents
Connect the Pedal Cable ...10 Connect the Speaker Cable (HP-7) ...10 Connect the Power Cord ...10 Setting Up the Music Stand (HP-3) ...10 Setting Up the Music Stand (HP-7) ...10 Adjusting the position of the music stand...11 Folding down the music stand...11 Using the music holders...11... -
Page 8: Panel Descriptions
Panel Descriptions The panel diagrams shown in this owner’s manual are those of the HP-7. Front Panel HP-7 4 5 6 7 Power [Power] switch Turns the power on/off (p. 12). [Volume] knob Adjusts the overall volume level (p. 12). [Brilliance] knob Adjusts the tone brightness (p. -
Page 9: Rear Panel
Rear Panel HP-7 HP-3 MIDI Out/In connectors Connect to external MIDI devices to exchange performance data (p. 37). Pedal connector Connect the pedal cable of the special stand to this connector (p. 10). Input jacks These jacks can be connected to another sound generating device or an audio device, so that the sound of that device will be output from the HP-7/3’s speakers (p. -
Page 10: Before You Start Playing
Before You Start Playing Connect the Pedal Cable Insert the pedal cable into the Pedal connector on the rear panel of the HP-7/3. fig.00-01 HP-3 HP-7 Connect the Speaker Cable (HP-7) As shown in the diagram, connect the speaker cable leading from the speaker box of the stand to the speaker connector located on the rear panel of the HP-7. -
Page 11: Adjusting The Position Of The Music Stand
Phones plug x 2 NOTE Use Stereo headphones. Make sure to use only Roland headphones. Headphones from other manufacturers may be unable to provide sufficient volume. Some notes on using headphones • To prevent damage to the cord, handle the headphones only by the headset or the plug. -
Page 12: Turning The Power On And Off
Before You Start Playing Turning the Power On and NOTE Turn on power to your various devices in the order specified. By turning on devices in the wrong order, you risk causing malfunction and/or damage to speakers and other devices. To turn the power on, turn the [Volume] knob all the way down, and then press the [Power] switch. -
Page 13: Chapter 1. Enjoying The Built-In Songs And Game
Chapter 1. Enjoying the Built-in Songs and Game Listening to Built-in Songs The HP-7/3 comes with 65 piano songs onboard. ■ Playing back all songs continuously (All Song Play) The built-in songs can be played back consecutively. fig.panel1-1 HP-7 Hold down the [Song/Tempo] button, and press the [ The [Song/Tempo] button’s indicator will light, the [ will blink, and the songs will play back successively, starting with the currently selected song. -
Page 14: Playing The Note-Guessing Game
Chapter 1. Enjoying the Built-in Songs and Game Playing back Press the [ (Play)] button. The button’s indicator will light, and the selected song will play. Stopping the playback Press the [ (Play)] button. The button’s indicator goes out, and playback stops. The next time you press the [ from the beginning. -
Page 15: Chapter 2. Performance
The HP-7 contains 24 different built-in tones. The tones are organized into six tone groups, which are assigned to the Tone buttons. The HP-3 contains 20 different built-in tones. The tones are organized into five tone groups, which are assigned to the Tone buttons. -
Page 16: Playing Two Sounds Together (Dual Performance)
Chapter 2. Performance Playing Two Sounds Together (Dual Performance) Simultaneously playing two tones when one key is pressed is called “Dual performance.” Simultaneously press the two Tone buttons that you want to play together. The indicator of the button you pressed will light. When you play the keyboard, the tones of the two Tone buttons you selected will sound simultaneously. -
Page 17: Playing Different Tones With The Left And Right Hands (Split Performance)
Playing Different Tones with the Left and Right Hands (Split Performance) Dividing the keyboard into right-hand and left-hand areas, then playing different sounds in each is called “Split performance.” The boundary key is called the “split point.” fig.splitpoint.e … A0 B0 C1 D1 E1 F1 G1 A1 B1 Left-hand Tone fig.panel2-3... -
Page 18: Changing The Keyboard's Split Point
Chapter 2. Performance ■ Changing the keyboard’s split point You can change the location where the keyboard is divided (the split point) within the range of B1 through B6. While continuing to hold the [Split] button, press the key that you want to specify as the split point. -
Page 19: Changing The Beat Of Metronome
Changing the beat of metronome Hold down the [ (Rhythm)/Beat] button, and press the [+] or [-] button. The currently selected beat will be displayed. If you hold down the [ the beat will change. If you hold down the [ simultaneously, the beat will go back to what it was before you changed it. -
Page 20: Playing Rhythm
Chapter 2. Performance ■ Playing rhythm The HP-7/3 contains 53 different rhythms. The built-in rhythms can be sounded or stopped by pressing a button, in the same way as the metronome. By playing the rhythm instead of the metronome, you can enjoy performing as if you were playing with a session-like feel. -
Page 21: Applying Effects To The Sound
Applying Effects to the Sound fig.panel2-5 HP-7 ■ Adding reverberation to the sound (Reverb) By applying the reverb effect you can produce a pleasant reverberation, making it sound as though you were performing in a concert hall. Press the [Reverb] button. The button’s indicator will light, and a reverb effect will be applied to the sound. -
Page 22: Transposing The Key Of The Keyboard (Transpose)
Chapter 2. Performance Transposing the Key of the Keyboard (Transpose) By using the “Transpose function,” you can transpose your performance without changing the notes you play. For example, even if the song is in a difficult key with numerous sharps ( ) or flats ( to play. -
Page 23: Adjusting The Keyboard Touch (Key Touch)
Adjusting the Keyboard Touch (Key Touch) You can adjust the touch (playing feel) of the keyboard. fig.panel2-7 HP-7 Press the [Key Touch] button. The button’s indicator will light, and the feel of the keyboard will change. Each time you press the [Key Touch] button, the button’s indicator will change color, and the feel of the keyboard will change. -
Page 24: Making Fine Adjustments To The Piano Sound (Piano Customize) (Hp-7)
Chapter 2. Performance Making Fine Adjustments to the Piano Sound (Piano Customize) (HP-7) You can make fine adjustments to the sound of the piano as desired. [Hammer] Button This adjusts how your playing strength will affect the timing at which the note sounds. -
Page 25: Chapter 3. Playing Along With The Built-In Songs
Chapter 3. Playing Along with the Built-in Songs Here’s how you can play along with the built-in songs. You can slow down the playback tempo of the song, or play back each hand separately. Before you try playing the song, listen to it several times to get a general feel for the song. -
Page 26: Playing Each Hand Separately
Chapter 3. Playing Along with the Built-in Songs Playing Each Hand Separately The built-in songs allow you to select the performance part that will be played back. The left-hand performance of the built-in songs is assigned to the [1] button, while the right-hand performance is assigned to the [2] button. -
Page 27: Chapter 4. Recording Your Performance
Chapter 4. Recording Your Performance You can easily record your performances. A recorded performance can be played back to hear your own playing, or to add additional parts. The following types of recording can be done using the HP-7/3. • Recording just your own keyboard performance (→ “Recording a New Song” (p. 28)) •... -
Page 28: Recording A New Song
Chapter 4. Recording Your Performance Recording a New Song Record only the keyboard performance without playing along with a built-in song or rhythm. fig.panel4-1 HP-7 Recording settings (select “USr”) Press the [Song/Tempo] button, getting its indicator to light in red. The song number appears in the display. -
Page 29: Recording Along With The Rhythm
Recording Along with the Rhythm You can record a performance that uses the Rhythm function. fig.panel4-2 HP-7 As described in steps 1 and 2 of “Recording a New Song” (p. 28), select the song “USr” before you continue. Selecting the tone and rhythm for recording Select the tone that you want to play (p. -
Page 30: Recording Along With A Song
Chapter 4. Recording Your Performance Recording Along with a Song You can record a performance that you play along with an built-in song. Using the [1] or [2] buttons, you can (for example) perform and record just the right- hand part of a song while listening to the left-hand playback of a built-in song. fig.panel4-3 HP-7 Selecting the song to record... -
Page 31: Selecting And Recording The Track For Each Hand Separately
Selecting and Recording the Track for Each Hand Separately The recorder of the HP-7/3 has two recording tracks, allowing you to record the right and left hands separately. Use the [1] button or [2] button to specify the recording track. If you want to re-do the recording, you can re-record just a specific track. -
Page 32: Erasing Recorded Performances
Chapter 4. Recording Your Performance Erasing Recorded Performances You can erase a recorded performance. ■ Erasing a performance from the specified track You can select a recorded track and erase it. Hold down either the [1] or [2] button, and press the [ The indicator of the button you pressed will go dark, and the performance of the selected track will be erased. -
Page 33: Chapter 5. Changing Various Settings
Chapter 5. Changing Various Settings Changing the Damper Pedal’s Resonance On an acoustic piano, depressing the damper pedal makes the notes you play resonate with other strings, adding rich reverberations and fatness to the sound. The damper pedal on the HP-7/3 recreates this resonance (sympathetic resonance) when depressed. -
Page 34: Tuning To Other Instruments' Pitches (Master Tuning)
Chapter 5. Changing Various Settings ■ Tuning to other instruments’ pitches (Master Tuning) In situations such as when playing ensemble with other instruments, you can tune the HP-7/3’s reference pitch to the pitch of another instrument. The standard pitch generally refers to the pitch of the note that’s played when you finger the middle A key. -
Page 35: Setting The Tuning Curve (Stretch Tuning)
■ Setting the tuning curve (Stretch Tuning) A piano is generally tuned to a pitch with a lower bass range and a higher treble range than equal temperament. This special tuning method for pianos is called “Stretch Tuning.” If you press the [Harpsichord] button in step 2 of “Making Detailed Settings (Function)”... -
Page 36: Chapter 6. Connecting External Devices
You can use a USB MIDI interface cable (sold separately) to connect the HP-7/3 to your computer. If the HP-7/3 is connected to a computer in which sequencer software such as Roland’s “Visual MT” is installed, a song you’ve recorded on the HP-7/3 can be saved on your computer. -
Page 37: Connecting Midi Devices
It provides complete details concerning the way MIDI has been implemented on this unit. If you should require this publication (such as when you intend to carry out byte-level programming), please contact the nearest Roland Service Center or authorized Roland distributor. Connection examples... -
Page 38: Midi Send Channel Settings
* When a Roland MT series instrument is connected, it is not necessary to make the Local Off setting. MT units transmit Local Off messages when their power is switched on. If you turn on the power in the order of the HP-7/3 →... -
Page 39: Appendices
dices Troubleshooting If you think there’s a problem, read this first. Case The power doesn’t Is the power cord connected and plugged in correctly? (p. 10) come on The button doesn’t Is the panel locked? (p. 35) Turn the power off, then back on. work Is the volume level of the HP-7/3 turned all the way down? (p. -
Page 40: Error Messages/Other Messages
In the upper range, the damper pedal. There is a difference in the the sound changes timbre as well. Roland pianos faithfully simu- abruptly beyond a late such characteristics of the acoustic piano. certain key... -
Page 41: Tone List
Tone List [Split] Off Button name Tone [Variation] Dark Grand Piano1 [Piano] Grand Piano2 Green Piano + Strings Orange Piano + Choir Dark Electric Piano1 [E. Piano] Electric Piano2 Green Vibraphone Orange Electric Piano+Choir Dark Harpsichord [Harpsi- Organ Flute chord] Green Harpsichord + Strings Orange... -
Page 42: Built-In Song List
Menuett G dur (Beethoven) d. 43 Venezianisches Gondellied d. 44 Alpenabendröte Composer Copyright C. Debussy © 1995 Roland Corporation F. Chopin/ © 2002 Roland Corporation Arranged by John Maul W. A. Mozart © 1996 Roland Corporation J. Maul © 1998 Roland Corporation F. - Page 43 All rights reserved. Unauthorized use of this material for purposes other than private, personal enjoyment is a violation of applicable laws. Appendices Composer Copyright L. v. Beethoven © 1996 Roland Corporation W. Wagner © 1996 Roland Corporation W. Anderson © 1996 Roland Corporation C.
-
Page 44: Rhythm List
Rhythm List Rhythm Beat Rhythm Name r. 1 2/2 March r. 2 2/2 Swing r. 3 2/2 Voice (Japanese) r. 4 2/2 Voice (English) r. 5 2/2 Animal r. 1 Stick r. 1 2/4 March r. 2 2/4 Country r. 3 Samba r. -
Page 45: Easy Operation List
Easy Operation List HP-7 You want to Press the [Game] and [Key Touch] buttons simultaneously, and press the [●] button. Master Tuning Selecting a temperament Specifying the keynote Stretch tuning Applying the damper pedal to the left-hand keyboard area MIDI send channel settings Local Control Transmitting a recorded performance Hold down the [ ] button and press the [-] or [+] button. -
Page 46: Midi Implementation Chart
************** 8n v=64 O (*1) O (0–127) ************** 0...119 O (123–127) *1 0...119 (HP-7), 0...117 (HP-3) Mode 2 : OMNI ON, MONO Mode 4 : OMNI OFF, MONO Date : Dec. 1, 2001 Version : 1.00 Remarks Data entry Volume... -
Page 47: Main Specifications
Weights (including Piano Stand) 66.0 kg/145 lbs 9 oz (HP-3) Accessories Owner’s manual, AC cord, Roland 60 Classical Piano Masterpieces In the interest of product improvement, the specifications and/or appearance of this unit are subject to change without prior notice. -
Page 48: Index
Index AC inlet ... 10 Adjuster ... 12 All Song Play ... 13 Audio equipment ... 36 Beat ... 18, 20 [Brilliance] knob ... 12 Built-in song ... 13 Chorus ... 21 Depth ... 21 Computer ... 36 Count-In ... 25 Damper pedal Resonance ... - Page 49 MEMO...
-
Page 50: Australia/New Zealand
Information When you need repair service, call your nearest Roland Service Center or authorized Roland distributor in your country as shown below. PHILIPPINES AFRICA AFRICA G.A. Yupangco & Co. Inc. 339 Gil J. Puyat Avenue EGYPT Makati, Metro Manila 1200,... -
Page 51: Federal Communications Commission Radio Frequency Interference Statement
This product complies with the requirements of European Directives EMC 89/336/EEC and LVD 73/23/EEC. FEDERAL COMMUNICATIONS COMMISSION RADIO FREQUENCY INTERFERENCE STATEMENT This equipment has been tested and found to comply with the limits for a Class B digital device, pursuant to Part 15 of the FCC Rules. - Page 52 Contents Name Instrument Music Stand (HP-3 only) Manual Set AC Cord Set Collection of Printed Music This owner’s manual is printed on recycled paper. Qty. HP-3 HP-7 02891323 ’04-2-7N...
Need help?
Do you have a question about the HP-3 and is the answer not in the manual?
Questions and answers