Advertisement
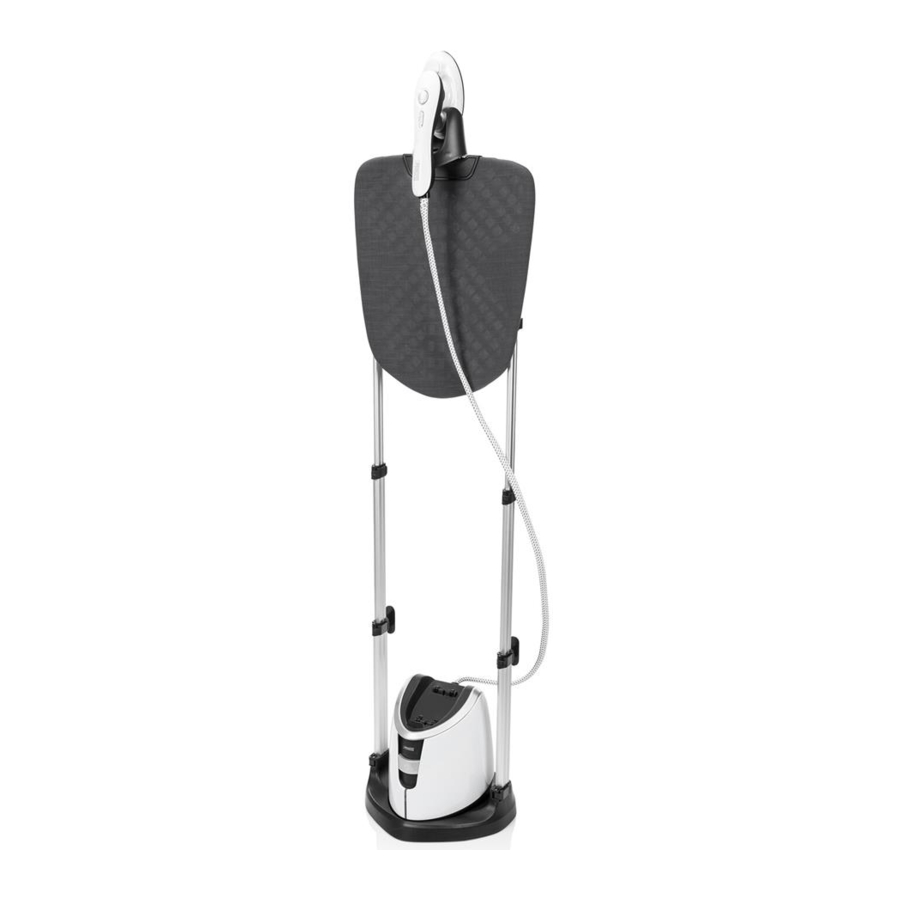
PARTS DESCRIPTION

- Rotate Ironing Board
- Collar Hanger
- Water Tank
- Telescopic Poles
- Rotate Steam Nozzle
- Body Base
- Main Body
- Fabric Boot Cap
- Nozzle Hanger
PRODUCT SPECIFICATION
| Water Tank Capacity | 1.2L |
| Steam Output Time | 60s |
| Input Voltage | 220-240V~50/60Hz |
| Output Power | 1920-2280W |
FUNCTION FEATURES
Main Body Display Panel

Handle function buttons
According to your demand, press the rotate button to adjust the nozzle 90° to the left.


On the top: Steaming Gear (with blue light on) for continuous steam.
At bottom: Ironing Gear(with red light on). To avoid damage to clothes caused by over time ironing, if the switch is not turned on by user for 15 minutes, this steamer will enter Standby Mode automatically, with its indicator light blinking, and steam stops working. Turn on the Power ON/OFF switch again to let it continue to work.
 To avoid being scalded, please don't rotate the nozzle when the nozzle panel doesn't drop down to the room temperature, nor during operation either.
Sensor Switch on Main Body

When the steamer is working, steamer will stop producing steam and continue to heat-up when the Sensor Switch is pressed down. If the Sensor Switch is pressed down, with Standby Sleep Lamp on, for over 5 minute, buzzer will alarm once, buzzer will alarm continually after 30 seconds and enter Standby Mode. If the sensor switch is released during this time, Standby Sleep Light goes off and steamer resume to work.
Pressure release setting

When the pressure inside heater is too high, the setting at the bottom of main body would release pressure automatically.
Be cautious about the steam spraying out from the hole when the appliance is operating, so as not to be scalded.
Standby mode

If the appliance enters standby mode for less than 3 minutes, reboot the appliance, it will return to work without pre-heating.

If the appliance enters standby mode for more than 3 minutes, reboot the appliance, it needs to pre-heat for 25 seconds to return to work.

If the appliance enters standby mode for more than 5 minutes, reboot the appliance, it needs to preheat for 48 seconds to return to work.
PRODUCT INSTALLATION
STEP 1

Unlock both sides of the body base, insert the Telescopic Poles (the direction of both poles needs to be accordant) into the base, and lock in place.
STEP 2

Adjust the telescopic poles to appropriate height, and lock in place.
STEP 3

Insert the collar hanger into the top of the ironing board.
STEP 4

Open the lock of the ironing board, install the board along the telescopic
STEP 5

Put the main body onto the base, then put the steamer nozzle onto the recess above the main body.
STEP 6

Installation finished, product image as above.
INSTRUCTION FOR USE
STEP 1

Fill in the Water Tank and replace & tighten its cap.
STEP 2

Plug in, sound the main body beeps, then the power pilot lamp flicker, and the appliance switches to the stand by mode.
STEP 3

Touch the Power ON/OFF switch on Touching Screen on steamer, buzzer will make a "bee" sound, steamer is turned on, and indicator light is on,  or
or  is on(depends on the gear on Steam Nozzle Handle). Indicator light
  blinks and steamer is ready to use after 48-second heat-up time, then indicator light is on.
STEP 4

Steamer enters Working Mode after 48 seconds. Set the gear on Steam Nozzle Handle upwards to enter Steaming Gear, with blue light on and on, steam will spray out. Set the gear on Steam Nozzle Handle downwards to enter Ironing Gear, with the red light on and on, no steam is produced.
STEP 5

Keep pressing on the red button behind the ironing board, so that you can adjust the slope angle of the ironing board at random.
STEP 6

Ready for garment steaming.
MAINTENANCE AND CLEANING
STEP 1

Touch the Power ON/OFF switch on Touching Screen on steamer to turn off the steamer, buzzer will make a "bee" sound, steamer is turned off, Indicator Light blinks and steamer is under Standby Mode. Pull out the Plug and wait for at least 30 minutes till the steamer cools down completely.
STEP 2

Take out the water tank and drug out the water. Adjust the telescopic poles to appropriate place for easy storage.
DISASSEMBLY INSTRUCTION FOR IRONING CLOTH
STEP 1

Unlock the ironing board on both sides. And remove the ironing board with both hands.
STEP 2

Remove the collar hanger and the decoration board.
STEP 3

Loosen the string behind the ironing board, then remove the ironing cloth.
STEP 4

Cover the ironing board with new ironing cloth and lace in place. Pull the string upward and fix it to the hook. Then install the decoration board back in place, the ironing board is ready for use.
ACCESSORIES INSTRUCTION FOR USE
Rotate nozzle mode changing-over

Fabric Boot Cap Installation

Warm prompt: To prevent the fabric from being damaged by the high temperature, please choose to use the boot cap in appropriate according to how the temperature resistant of the fabric is.
Attention: When the appliance is still operating or the nozzle panel doesn't drop to room temperature, please don't install or dismantle the boot cap so as not to be scalded.
Nozzle Hanger Installation

Install the hanger to the middle of the telescopic poles, adjust it to appropriate height and then lock in place.
Use of Rotate Ironing Board

Attention: Be cautious of being hurt while adjusting the ironing board.
Attention: To prevent fabric and ironing board from being scalded, please don't put the nozzle on the same position for more than 30 seconds.
Separated base

Use of creel

TROUBLE SHOOTING
| Problem | Reason | Solution |
| Unit fails to work. Pilot lamp does not illuminate |
|
|
| Unit fails to steam Pilot lamp illuminates |
|
|
| Nozzle panel heating and works normally, Pilot lamp does not illuminates | Pilot lamp is broken | Call a qualified electrician for help |
| Less steam spraying out | Voltage is too low | Please avoid to use this appliance during the surge in electricity demand |
| Nozzle has water leakage problem |
|
|
| Water tank leakage |
|
|
| Appliance leakage | Inside water tube is broken | Call a qualified electrician for help |
| Water tank is out of shape | Fill the tank with hot water | Call a qualified electrician for help |

Documents / ResourcesDownload manual
Here you can download full pdf version of manual, it may contain additional safety instructions, warranty information, FCC rules, etc.
Advertisement


Need help?
Do you have a question about the 332850 and is the answer not in the manual?
Questions and answers