Table of Contents
Advertisement
Advertisement
Table of Contents

Related Manuals for Rip curl 17146


Summary of Contents for Rip curl 17146
- Page 3 Automatic Mechanical watches Day/Date 24 Hour Time watches Date 24 Hour Time watches Digital surf watches - module 1 Day/Date/Time watches Watch bezel Instructions Strap changing Instructions Adjusting Stainless steel straps Recommended usage table & testing Warranty and care procedures...
-
Page 5: Description Of Modes And Displays
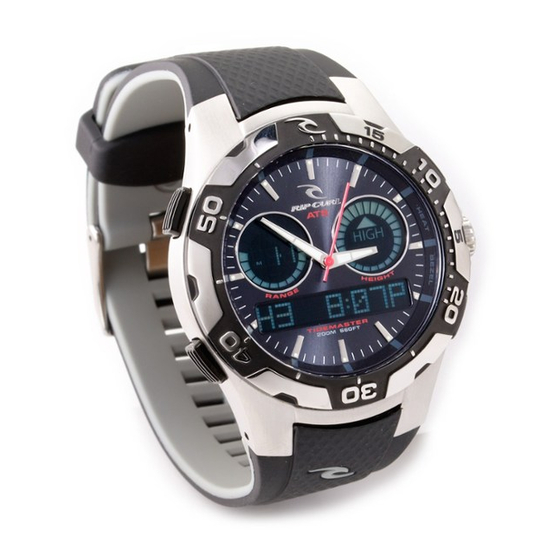
Congratulations on your purchase of a new Tidemaster 2 tide watch. Your watch has been specifically designed to help you score the best surf. Programmed with tide charts for 200 beaches, spot X function easily set to thousands’s of beaches world wide, future tide function, sunrise &... -
Page 6: Analogue Time Setting
4. After setting, push crown back in fully, then carefully screw the crown in slowly to reseal your watch (fig.3). Never force the screw. For your watch to be properly sealed, the crown must be fully screwed in. Never unscrew the crown when your watch is in water or is wet. -
Page 7: Digital Time And Date Setting
- Ensure you have the TIME showing in the digital screen. - HOLD START/STOP in for 5 seconds and your watch will automatically adjust to Daylight Savings Time. A plus (+) icon will appear in left of the screen. This icon indicates the DST function is active. -
Page 8: Tide Setting
The next tide time will appear in the screen. The tide time will be numbered depending on if it’ s the 1st or 4th tide of the day. Some beaches can have up to 6 tides per day so the watch will show all possible tides in any one day up to 6. - Page 9 Just in case you can’t find a preset location that can be customized to your local beach. Your watch is equipped with a Spot X averaging tide function. Spot X follows the world accepted average tide cycle of 6hrs 12mins and 25 seconds from High tide to Low tide.
- Page 10 -Press MODE/SET, the S of Spot X with flash. You can rename Spot X to your local beach name by following procedure below, or to leave the name as Spot X, simply HOLD MODE/SET in for 2 seconds to set and save all new Spot X information. -Or use START/STOP &...
-
Page 11: Alarm Setting
PLEASE SEE PAGE 22 FOR TIDE LOCATIONS BEACH LIST Navigation disclaimer IMPORTANT : Rip Curl tide watches must not be used for navigation at any time. Remember that weather conditions, changes in climate and the coastal environment can affect tidal changes/ranges, sometimes very strongly . Therefore Rip Curl cannot guarantee the information contained in this watch, nor accept responsibility or liability for variances to actual tide conditions. -
Page 13: Oceansearch Tide
Congratulations on your purchase of a new Ocean Search tide watch. Your watch has been specifically designed to help you score the best surf. Tide information for 200 preset beaches, future tide function, moon phase, timer, stop watch, dual time, alarms, light...enjoy! (Compass in Ultimate model) PATENT NUMBERS –... -
Page 14: Time And Date Setting
NOTE: SPECIAL FEATURES: 1. In any mode holding the light button for 2 seconds will return the watch to TIDE/DATE/TIME mode. 2. We have given the TIDE/ DATE/TIME mode a different key tone, this means even in the dark you can always find this mode. -
Page 15: Compass Setting
- To continue calibration press MODE/SET. Your watch will instruct you to TURN CW. This means, take the watch off, hold it level, and rotate it SLOWLY in a clockwise direction. It will take one minute of slow clockwise rotation to complete the calibration. - Page 16 Your watch will instruct you to TURN CW. This means, take the watch off, hold it level, and rotate it SLOWLY in a clockwise direction. It will take one minute of slow clockwise rotation to complete the calibration. Once the calibration is complete, firstly DONE will appear in the screen and then the compass direction will appear.
-
Page 17: Oceansearch Tide Setting
COMMON OFFSETS - Los Angeles New York Houston BRAZIL Rio De Janeiro AUSTRALIA Sydney Brisbane Darwin SOUTH AFRICA Cape Town NEW ZEALAND Aukland INDONESIA Bali EUROPE Lisbon Rome JAPAN Tokyo TIDE SETTING -Press MODE/SET to advance to TIDE MODE. -HOLD MODE/SET in for 2 seconds to enter beach setting. -To toggle between REGIONS use START/STOP &... - Page 18 -Use START/STOP & LAP/RESET to increase or decrease the time offset till correct. -Press MODE/SET to lock in your offset. The watch will then ask you to rename the preset beach to the new beaches name. -Use START/STOP & LAP/RESET to scroll through the alphabet and change the selected letter.
- Page 19 Just in case you can’t find a preset location that can be customized to your local beach. Your watch is equipped with a Spot X averaging tide function. Spot X follows the world accepted average tide cycle of 6hrs 12mins and 25 seconds from High tide to Low tide.
- Page 20 -HOLD MODE/SET in for 2 seconds to save the date you want. -Press START/STOP & LAP/RESET to toggle through the tide data. CHRONOGRAPH (STOP WATCH) SETTING -Press MODE/SET to advance to CHRONO. -Press START/STOP to start or stop the chronograph.
- Page 21 TIMER (COUNTDOWN TIMER) SETTING -Press MODE/SET to advance to TIMER. Your watch timer is preset to 30 minutes, but can be adjusted to count down from 23hr 59min 59secs. Once the timer hits zero an alarm will sound for 30 seconds and the counter will then count upwards. This enables you to know how long ago the alarm sounded.
-
Page 22: Beach List
ASIA PACIFIC AUSTRALIA QUEENSLAND Cairns Townsville Noosa Caloundra Brisbane Bar Surfers Paradise Snapper Spot X NEW SOUTH WALES Byron Bay Ballina Angourie Coff’s Harbour Port Macquarie Forster Merewether Avoca Manly Bondi Cronulla Sandon Point Ulladulla Bermagui Eden Spot X VICTORIA Lakes Entrance Cape Paterson Woolamai... - Page 23 Spot X Navigation disclaimer IMPORTANT : Rip Curl tide watches must not be used for navigation at any time. Remember that weather conditions, changes in climate and the coastal environment can affect tidal changes/ranges, sometimes very strongly . Therefore Rip Curl cannot guarantee the information contained in this watch, nor accept responsibility or liability for variances to actual tide conditions.
- Page 25 OCEANTIDE DIGITAL Patent Numbers – AUSTRALIA # 626400 USA # 5115417 FRANCE & UNITED KINGDOM # 0461181 Automatic Tide System Easily set to thousands of beaches world wide to perpetually display graphic tide and moon phase conditions. DESCRIPTION OF MODES & FUNCTIONS There are SEVEN modes of operation.
- Page 26 CH Chronograph (Stop watch) with lap memory: A chronograph/stop watch (count-up timer) will count in 100th of a second from 0 to 99 hours, 59 minutes, 59 seconds. Simply push the START/STOP to commence and stop the chronograph. Then push and hold the LAP/RESET button for 3 seconds to reset to 00:00:00.
-
Page 27: Setting Alarm Time
Use the MODE button to find the function you wish. (Note: You have 30 seconds to complete each setting, if longer is taken the watch au- tomatically returns to the prior setting and you must start again.) NT SETTING NORMAL TIME AND DATE : •... -
Page 28: Alarm On / Off
Push any button to turn off the chime.) CHRONOGRAPH OPERATION (Stop watch): • From NT mode push the MODE button 3 times. • CH is displayed in the fourth box from the left. 00:00:00 displayed. - Page 29 HIGH TIDE times. (Remember you must complete each section of the programming within 30 seconds or the watch will return to FT MODE and you will need to start again. So get your HIGH TIDE information prior to starting.)
- Page 30 DT tide tables from a surf shop or DT daily newspaper to find HIGH TIDE times. (Remem- ber you must complete each section of the programming within 30 seconds or the watch will return to FT MODE and you will need to start again. So get your DT HIGH TIDE information prior to starting.) Note 2 : During Daylight Saving you must always set DT mode and DT HIGH TIDE information to Standard Time, (not in Daylight Saving Time), and DO NOT add one hour to your DT Tide chart time.
- Page 31 • From NT mode push the MODE button six times. • FT2 is displayed in the seventh box from the left, Month, Date, Hour and Year are displayed. • Hold down MODE for 3 seconds till “SET” appears in the top right corner. The Year will also flash.
- Page 33 NOTE : * When you take your watch off the power reserve is approx 24 to 36 hours. SETTING THE TIME Pull the crown out to position B.
-
Page 35: Setting Procedure
* Do not set the date between the hours 9:00p.m. and 0:30a.m. The date may not change correctly the next day. WARNING! For your watch to be properly sealed, the crown must be fully pushed in. Never pull out the crown when your watch is in water or is wet. -
Page 36: Setting The Date
* Do not set the date between the hours 9:00p.m. and 0:30a.m. The date may not change correctly the next day. WARNING! For your watch to be properly sealed, the crown must be fully pushed in. Never pull out the crown when your watch is in water or is wet. - Page 39 * Please make sure your watch matches the display shown. LIGHT MODE DESCRIPTION OF MODES & FUNCTIONS There are FIVE modes of operation. By depressing the MODE button, there is a visual indication of what function has been chosen. Normal Time: The display shows hour in 24hr Military time or in AM &...
- Page 40 To recall previous lap memory push the LIGHT button while the Chronograph is stopped. Push the LIGHT but- ton again and next lap will display. Push START/STOP or LAP/RESET button to exit and go back to the Chrono- graph screen. Notes: 1.
-
Page 41: Light Function
be exit and returned to Normal Time screen automatically. 3. A chime sounds for 30 seconds if the Timer is counted down to 0 normally. 4. If preset value is less than 1 minute, and count-down repeat is selected, a chime sounds for 1 second only each time the Timer is counted down to 0. -
Page 42: Setting Instructions
All instructions start from ( TIME 1 )Normal Time mode. Use the MODE button to find the function you wish.(Note: You have 30 seconds to complete each setting, if longer is taken the watch automatically returns to the prior setting and you must start again.) SETTING NORMAL TIME AND DATE: •... -
Page 43: Setting Timer
SETTING TIMER: • From Normal Time mode push the MODE button 2 times. • Press firmly the LIGHT button. The Timer-Type will flash. Select [ ] Count Down-Stop, [ Count Down-Repeat or [ ] Count Down - and Up with START/STOP or LAP/RESET until correct. •... -
Page 44: Setting Dual Time
SETTING DUAL TIME: • In the Normal Time mode, push the START/STOP to toggle the Time1 / Time2 displays. • Hold the START/STOP button for 2 seconds to choose Time2 as the default display time. • Press firmly the LIGHT button to enter Time2 setting mode. - Page 45 Please make sure your watch matches the display shown. DESCRIPTION OF MODES & FUNCTIONS There are SIX modes of operation. By depressing the MODE button there is a visual indication of what function has been chosen, just check the top of the screen.
- Page 46 In Chronograph mode, simply push the START/STOP to start and stop the Chronograph. To reset, press and hold the LAP/ RESET button when the Chronograph is stopped. Watch will reset to 00’00”00 To record a Lap-time push the LAP/RESET button while the Chronograph is running.
- Page 47 All instructions start from Normal Time mode. Use the MODE button to find the function you wish.(Note: You have 60 seconds to complete each setting, if longer is taken the watch automatically returns to the prior setting and you must start again.) SETTING NORMAL TIME AND DATE: •...
- Page 48 • Push START/STOP the Hour will flash. Advance the Hour with LAP/RESET until correct. When all new settings are done, you must push the MODE button to save. Your alarm is not set and ON. ALARM ON / OFF: To switch your alarm ON or OFF when in [ AL ] mode press LAP/RESET repeatedly and the alarm signal ( ) will appear or disappear.
- Page 49 * Please make sure your watch matches the display shown. DESCRIPTION OF MODES & FUNCTIONS There are FIVE modes of operation. By depressing the MODE button there is a visual indication of what function has been chosen, just check the middle of the bottom screen.
- Page 50 To record a Lap-time push the LAP/RESET button while the Chronograph is running. The digits will stop to show the lap-time. Push the LAP/RESET button again and the accumulated time will re-appear on your screen. (This procedure can be repeated for any number of laps). Notes: 1.
- Page 51 All instructions start from Normal Time mode. Use the MODE button to find the function you wish.(Note: You have 30 seconds to complete each setting, if longer is taken the watch automatically returns to the prior setting and you must start again.) SETTING NORMAL TIME AND DATE: •...
- Page 52 SETTING ALARM TIME: • From Normal Time mode push the MODE button twice. [ ] is displayed in the middle of the bottom screen. • Press firmly the LAP/RESET. The Hour will flash. Advance the Hour with START/STOP until correct (For quick advance hold in the START/STOP button) •...
- Page 53 SETTING DUAL TIME: • From Normal Time mode push the MODE button four times. [ ] is displayed in the middle of the bottom screen. • Press firmly the LAP/RESET. The Seconds will flash. Return the Seconds to 00 by hitting the START/STOP. •...
-
Page 54: To Set The Time
TO SET THE TIME. Use the MODE button to find the function you wish. (Note: You have 60 seconds to complete each setting, if longer is taken the watch automatically returns to the prior setting and you must start again.) •... -
Page 55: To Set The Date
Use the MODE button to advance to the Alarm mode. (Note: You have 60 seconds to complete each setting, if longer is taken the watch automatically returns to the prior setting and you must start again.) • Press and hold the SET button for 2 seconds, the hour will flash. Press MODE to advance the hour. -
Page 56: To Set The Dual Time
TO SET THE DUAL TIME. Use the MODE button to advance to the Dual Time mode. (Note: You have 60 seconds to complete each setting, if longer is taken the watch automatically returns to the prior setting and you must start again.) •... - Page 59 3.Push crown back in fully to point A. The Day will automatically change just before midnight. WARNING! For your watch to be properly sealed, the crown must be fully pushed in. Never pull out the crown when your watch is in water or is wet.
- Page 61 HEAT BEZEL HEAT BEZEL FUNCTION The unique Rip Curl Heat Bezel, found on many Rip Curl watches, can be used for countdown timing of 20, 30 and 40-minute periods - the common heats in surfing competitions. The Heat Bezel countdown timer can also be used for any other timing requirements (ie.
- Page 63 Note: Rip Curl leather straps are made of the finest oiled leather for long life. But despite other’s claims, real leather cannot be made 100% water- proof. Don’t wear leather in any water.
- Page 64 STAINLESS STEEL STRAPS BAND LENGTH ADJUSTMENT: Major Adjustments to the length of your strap must be made by removing the correct amount of metal links to fit your wrist. Links should be taken out as evenly as possible from both sides. 1.
- Page 65 Minor adjustments: After the correct fit has been achieved final adjustments or changes can be made as follows: 1. Use a thumb tack slowly insert into the spring bar hole at the clasp. (fig. 5) Join will release. 2. Move the spring bar to the desired hole for the perfect fit. (fig. 6). Be sure to align both ends of the spring bar in the same set of holes.
- Page 66 To keep your watch in peak condition for Surfing we recommend every 24 months you have your watch seals replaced and fully tested at the Rip Curl Watch Service Centre. (See page 71 for contact details.) RIP CURL PTY. LTD. assumes no responsibility for any loss, or any claims by...
- Page 68 • Do not wear leather bands in water. • Never try to open the watch. Have batteries changed by Rip Curl technicians. • Avoid exposing your watch to extreme temperatures. • Should moisture appear inside the watch, have it checked by Rip Curl technicians.
-
Page 69: Five Year Limited Warranty
The warranty book is not proof of purchase without a purchase receipt. eg. A purchase receipt is the cash register receipt or your credit card statement. NOTE : Rip Curl reserves the right to repair or replace, with an equivalent style, any warranty watch. - Page 70 The warranty book is not proof of purchase without a purchase receipt. eg. A purchase receipt is the cash register receipt or your credit card statement. NOTE : Rip Curl reserves the right to repair or replace, with an equivalent style, any warranty watch.
- Page 71 Warranty and Service Enquires : Australia Rip Curl Pty Ltd Watch Service Centre 101 Surfcoast Hwy, Torquay, Vic. 3228 Tel: 03 5261 0022 Fax: 03 5261 4700 Hours: 9am to 5.30 pm Mon-Fri E.S.T. Email: service_centre@ripcurl.com.au New Zealand Rip Curl NZ...
- Page 72 Rua Dr. Barbas de Albuquerque, N.°13 Vila de Rei 2670-678 Bucelas Phone: (+351) 219 681 296 Contact Person: Sr. Jorge Augusto Indonesia Rip Curl Indonesia Watch Service Centre Jl. Sunset Road 69 Kuta, Bali Indonesia 80361 Tel. 62 361 754455 ext 401 Fax.
- Page 73 TO BE RETURNED WITH ANY WARRANTY CLAIM NOTE: For any warranty claim proof of purchase must be attached. ie) sales receipt or credit card statement clearly showing the date of purchase. Senders Name: Return Address: Contact Phone: Email: Brief description of fault:...
- Page 74 A-U-1...
Need help?
Do you have a question about the 17146 and is the answer not in the manual?
Questions and answers