Table of Contents
Advertisement
Quick Links
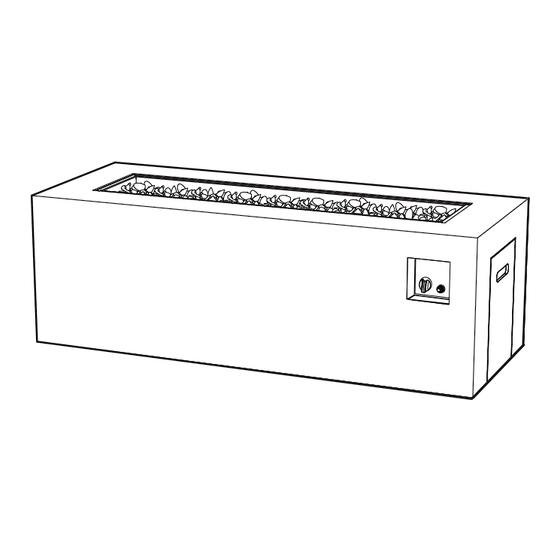
Topanga Propane Fire Table Owner's Manual
Tall Rectangle Style # 42100269/ 42100142
For Technical Support call
1-800-654-1704
!
Warning:
For outdoor use only
DO NOT use for cooking
DO NOT use under any
overhead enclosure
US
Designed and Engineer
Real Flame. Manufactured as
Model # 11506LP
020417
!
If the information in this manual is not
followed exactly, a fire or explosion
may result causing property damage,
personal injury or loss of life.
!
Installation and service must be
performed by a qualified installer,
service agency or gas supplier.
!
Improper installation, adjustment,
alteration, service or maintenance can
cause injury or property damage.
DANGER
!
If you smell gas:
1. Shut off gas to the appliance.
ed by
away from the appliance and
immediately call your gas supplier
or fire department.
!
Warning:
!
Read the installation, operation
and maintenance instructions
thoroughly before installing or
servicing this equipment.
!
Save these instructions for future
reference. If you are assembling
this unit for someone else, give
this manual to him or her to read
and save for future reference.
!
WARNING
Do not store or use gasoline or other
flammable vapors and liquids in the
vicinity of this or any other appliance.
An LP-cylinder not connected for use
should not be stor
this or any other appliance.
PO:
ed in the vicinity of
Advertisement
Table of Contents

Subscribe to Our Youtube Channel
Related Manuals for RealFlame 11506LP


Summary of Contents for RealFlame 11506LP
- Page 1 Real Flame. Manufactured as An LP-cylinder not connected for use away from the appliance and Model # 11506LP should not be stor ed in the vicinity of 020417 immediately call your gas supplier this or any other appliance.
-
Page 2: Table Of Contents
Table of Contents Important Safety Information Propane (LP) Gas Dangers and Warnings Hose and Regulator Assembly and Replacement Parts List Assembly Instructions Lighting Care and Cleaning Gas Component Connection Checks Troubleshooting DANGER CARBON MONOXIDE HAZARD This appliance can produce carbon monoxide which has no odor. -
Page 3: Important Safety Information
Important Safety Information WARNING FIRE TABLE IS FOR OUTDOOR USE ONLY • WARNING Failure to follow the dangers, warning and cautions in this manual may result in serious bodily injury or death, or in a fire or an explosion causing damage to property. •... - Page 4 Important Safety Information (Continued) • This gas fire table must be used ONLY outdoors in a well-ventilated space and shall NOT be used inside a building, garage, or any other enclosed area. • DO NOT use this outdoor gas fire table for indoor heating. TOXIC carbon monoxide fumes can accumulate and cause asphyxiation.
-
Page 5: Propane (Lp) Gas Dangers And Warnings
Important Safety Information (Continued) • Prior to each fire table operation, check the hose for evidence of excessive abrasion or wear. Use a handheld mirror to see hose sections located under the unit. If the hose is damaged, cracked or cut, it must be replaced before using the gas fire table. The hose assembly can only be replaced with a hose assembly specified by the manufacturer. - Page 6 Propane (LP) Dangers And Warnings (Continued) • The LP gas tank must have a tank collar to protect the tank valve. • LP gas cylinder must contain a shuto valve as specified in the Standard for Compressed Gas Cylinder Valve Outlet and Inlet Connection, ANSI/CGA-V-1-1977, CSA B96. •...
-
Page 7: Hose And Regulator Assembly And Replacement
Hose & Regulator Assembly And Replacement 1. This fire table comes equipped with a standard LP gas hose and regulator including the appliance side connection for a CGA No 791 Cylinder Connection Device. The LP gas hose and regulator supplied with this fire table must be used. Only a hose and regulator specified by manufacturer can be used for replacement. -
Page 8: Parts List
Parts List Fire Table LMST - 115064796G WSLT - 115064396G Door LMST - 115064702 WSLT - 115064302 Feet 95600931 1 set Lava Rock (20lb) 66450999 2 boxes AA Battery Ignitor Button 95600938 Control Knob 95600939 95600935 LP Hose and Regulator 95600932 Tank Seat Thumb Screw 10 Touch-up Paint (.75oz) -
Page 9: Assembly Instructions
Assembly Instructions 1.) Install the AA battery as shown in the diagram below. 2.) Make sure the gas supply system is turned to “OFF”. Remove the door. Place propane tank in the square metal supports inside the fire table body. - Page 10 Assembly Instructions 3.) Connecting the LP Gas Tank Check to make sure there is no debris in the head of the LP gas tank or in the head of the regulator valve. Make sure you check the burner and burner ports as well. Connect gas line to tank by turning knob clockwise.
- Page 11 Assembly Instructions Place lava rock by hand. DO NOT dump bag out into tray to avoid clogging the burner with dust. Position the lava rock across the burn pan to a level about 1” above the top of the burner. Make sure that you do not block the pilot housing with lava rock to ensure proper ignition.
- Page 12 Pre-Use Instructions WARNING Before using this outdoor fire table, make sure you have read, understand and are following all information provided in the Important Safety Information section of this manual. Failure to follow those instructions can cause death, serious injury or property damage. Prior to each gas fire table operation, check the hose and valve for evidence of excessive abrasion or wear.
- Page 13 Lighting Instructions Using the igniter 1. Read and understand all operating instructions before lighting. 2. Burner control knob must be in the “OFF” position. 3. Connect propane (LP) cylinder (see previous pages). 4. Slowly open valve on LP gas cylinder. 5.
-
Page 14: Care And Cleaning
Care and Cleaning Inspecting product life. WARNING DO NOT inspect this outdoor re table until the re is COMPLETELY out. 1. Make sure all parts are securely fastened in place. If a part moves when touched, check its connection points to see if they are lose. -
Page 15: Gas Component Connection Checks
Gas Component Connection Checks If the burner will not light or stay lit, please perform the following checks. 1. Make sure the electrode wire is completely and correctly connected. Back of Electronic Ignition 2. Make sure that the pilot housing is unobstructed. Clear any debris on top of the pilot housing and make sure there is no debris between the igniter pin, thermocouple and the burner tube. - Page 16 Gas Component Connection Checks Igniter Pin Pilot Light Thermocouple 3. Make sure that the igniter pin and thermocouple are correctly positioned. - The igniter pin should be pointed straight to the thermocouple. - The thermocouple should be positioned 5mm away from the pilot light. Valve Thermocouple Thermocouple Wire...
-
Page 17: Troubleshooting
Troubleshooting Problem: Burner will not light using igniter Possible Cause 1: Electrode and burners are wet. -Wipe dry with cloth. Possible Cause 2: Igniter battery is dead or backwards. -Check that the AA battery is inserted correctly in the igniter (see page 9) or replace the battery. - Page 18 Troubleshooting Problem: Sudden drop in gas fl ow, or a reduced fl ame height Possible Cause 1: Out of gas. - Refill or exchange your LP tank. Possible Cause 2: Excess fl ow safety device may have been activated. - Your device is equipped with an automatic safety shuto to prevent gas from flowing if the flame goes out.
- Page 19 Warranty & Return Policies Warranty Real Flame® Company warrants Real Flame gas fireplaces and accessories to be free from defects in parts under normal use and service for a period of 2 years from the date of purchase and defective from finish issues for a period of 5 years from the date of purchase. In the event of such defects Real Flame will, at its option, replace the defective product or refund the purchase price.
- Page 20 PO: ______________ Topanga Natural Gas Fire Table Owner’s Manual Tall Rectangle Style # 42100257/ 42100144 For Technical Support call 1-800-654-1704 W ARNING Warning If the information in this manual is not Read the installation, operation For outdoor use only followed exactly, a fire or explosion and maintenance instructions DO NOT use for cooking may result causing property damage,...
-
Page 21: Carbon Monoxide Hazard
Table of Contents Important Safety Information Natural Gas Warnings Parts List and Descriptions Base Assembly Instructions Pre-Use Instructions Assembly Instructions Connecting to Natural Gas Source Lighting Care and Cleaning Gas Component Connection Checks Troubleshooting DANGER CARBON MONOXIDE HAZARD This appliance can produce carbon monoxide which has no odor. - Page 22 Important Safety Information WARNING FIRE TABLE IS FOR OUTDOOR USE ONLY • WARNING Failure to follow the dangers, warning and cautions in this manual may result in serious bodily injury or death, or in a fire or an explosion causing damage to property. •...
- Page 23 Important Safety Information (Continued) • This gas fire table must be used ONLY outdoors in a well-ventilated space and shall NOT be used inside a building, garage, or any other enclosed area. • DO NOT use this outdoor gas fire table for indoor heating. TOXIC carbon monoxide fumes can accumulate and cause asphyxiation.
- Page 24 Important Safety Information (Continued) • Prior to each fire table operation, check the hose for evidence of excessive abrasion or wear. Use a handheld mirror to see hose sections located under the unit. If the hose is damaged, cracked or cut, it must be replaced before using the gas fire table. The hose assembly can only be replaced with a hose assembly specified by the manufacturer.
- Page 25 Natural Gas Dangers And Warnings (Continued) Never store or use gasoline or other volatile substance in the vicinity of this fire table. Natural Gas Connection tape of the type resistant to the action of the Natural Gas on all male pipe threads. Connect valve at the gas supply.
- Page 26 Parts List Fire Table LMST - 115064777G WSLT - 115064377G Feet 95600931 1 set Lava Rock (20lb) 66450999 2 boxes AA Battery NG Hose and 95600937 Quick Connect Igniter Button 95600938 Control Knob 95600939 Touch-up Paint 49490991 WSLT - LMST - 49490992...
- Page 27 Assembly Instructions 1.) Install the AA battery as shown in the diagram below. 2.) Connecting your fire table to the Natural Gas Source: socket is recommended by the National Fuel Gas Code. Socket connection must be made outdoors. The diagram below shows the main components of a standard Natural Gas system.
- Page 28 Assembly Instructions 3.) Connecting the Socket Coat the gas supply pipe nipple with gas resistant pipe compound or approved teflon tape. Screw socket onto gas supply pipe (house gas source) as shown to the right, and wrench tighten. The quick disconnect socket should never be connected to the fire table.
- Page 29 Assembly Instructions Place lava rock by hand. DO NOT dump bag out into tray to avoid clogging the burner with dust. Position the lava rock across the burn pan to a level about 1” above the top of the burner. Make sure that you do not block the pilot housing with lava rock to ensure proper ignition.
- Page 30 Pre-Use Instructions WARNING Before using this outdoor fire table, make sure you have read, understand and are following all information provided in the Important Safety Information section of this manual. Failure to follow those instructions can cause death, serious injury or property damage. Prior to each gas fire table operation, check the hose and valve for evidence of excessive abrasion or wear.
- Page 31 Lighting Instructions Using the Igniter 1. Read and understand all operating instructions before lighting. 2. Burner control knob must be in the “OFF” position. 3. Connect Natural Gas source (see previous pages). 4. Open the Natural Gas supply to the unit. 5.
- Page 32 Care and Cleaning Inspecting product life. WARNING DO NOT inspect this outdoor fire table until the fire is COMPLETELY out. 1. Make sure all parts are securely fastened in place. If a part moves when touched, check its connection points to see if they are lose.
- Page 33 Gas Component Connection Checks If the burner will not light or stay lit, please perform the following checks. 1. Make sure the electrode wire is correctly and completely connected. Back of Electronic Ignition 2. Make sure that the pilot housing is unobstructed. Clear any debris on top of the pilot housing and make sure there is no debris between the igniter pin, thermocouple and the burner tube.
- Page 34 Gas Component Connection Checks (Cont.) Igniter Pin Pilot Light Thermocouple 3. Make sure that the igniter pin and thermocouple are correctly positioned. - The igniter pin should be pointed straight to the thermocouple. - The thermocouple should be positioned 5mm away from the pilot light. Valve Thermocouple Thermocouple Wire...
- Page 35 Troubleshooting Problem: Burner will not light using igniter Possible Cause 1: Electrode and burners are wet. -Wipe dry with cloth. Possible Cause 2: Igniter battery is dead. -Check or replace the AA battery in the igniter. Possible Cause 3: Igniter Pin cracked or broken - sparks at crack. -Call Real Flame at 1-800-654-1704 for technical support.
- Page 36 Troubleshooting Problem: Sudden drop in gas flow, or a reduced flame height Possible Cause 1: Out of Gas. -Call your local gas company. Possible Cause 2: Excess flow safety device may have been activated. -Turn control knob to “OFF”, wait 30 seconds and light outdoor fire table. If the control knob and the gas supply.
- Page 37 Warranty & Return Policies Warranty Real Flame® Company warrants Real Flame gas fireplaces and accessories to be free from defects in parts under normal use and service for a period of 2 years from the date of purchase and defective from finish issues for a period of 5 years from the date of purchase. In the event of such defects Real Flame will, at its option, replace the defective product or refund the purchase price.
Need help?
Do you have a question about the 11506LP and is the answer not in the manual?
Questions and answers