
Subscribe to Our Youtube Channel
Related Manuals for Rheem RHP-5207C Series


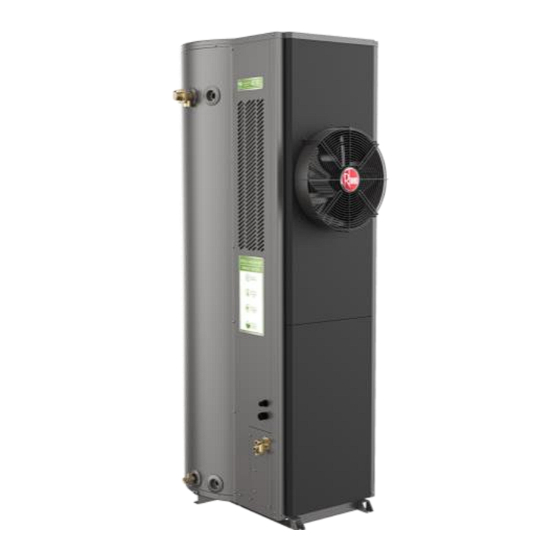
Summary of Contents for Rheem RHP-5207C Series
- Page 1 Owner’s Guide Installation Instructions Rheem Heat Pump Water Heater RHP-5207C Series This water heater must be installed and serviced by a qualified person. Please leave this guide with the householder.
- Page 2 Table of Content Packing List ......................2 Technical Specifications................... 3 Installation......................4 Pipe connection...................... 7 Wire connection....................11 Operation and usage....................14 Maintenance......................21 Common faults and solutions..................23 Replacement Parts..............
- Page 3 Technical Specifications Model RHP400-5207C Power Supply 220V~ 50Hz RHPD120-1505 IP rating IPX4 RHPD150-1505 HP heating capacity (W) 5250 HP heating power/current input (W/A) 1250/5.7 Auxiliary electric heating rated power/ current (W/A) 3600/16.4 Maximum power/current input (W/A) 5500/25 Water heating capacity (L/h) R134a (1.38) Refrigerant (charging amount: kg)...
- Page 4 Dimension Installation ◼ Installation location Do not install this water heater in a place where freezing may occur. The water heater should be installed as close as possible to the hot water point with the highest frequency of use. There should be enough clearance around the water heater so that the entire unit can be removed for repair or replacement if necessary.
- Page 5 ◆ The water heater should be placed on a refractory base with a height of not less than 50mm, and there should be a high temperature resistant floor drain with unobstructed drainage near the base to prevent damage to other facilities in case the water heater or pipeline leaks.
- Page 6 ◼ Installation Precautions Wiring work must be done by a qualified electrician and must meet electrical safety requirements. When the user needs to install and move, please contact the company's after-sales service center for professional help. DO NOT install and shift it by yourself. Otherwise, the company will not be responsible for any damage and failure caused and warranty of water heater will be void.
- Page 7 Pipe Connection ◼ Pipe connection diagram ◼ Connection Instruction ⚫ Material Requirements Because the water heater and its piping system will bear pressure from tap water, all water-side pipes must be made of temperature-resistant, pressure-resistant, and corrosion-resistant metal or new-type plastic material. Pressure resistance performance of the pipes must not be lower than the relief pressure of the T&P valve, while the temperature resistance must not be lower than 99°C.
- Page 8 Pipeline Size To ensure the best performance, the pipe size should be selected according to the specific installation needs. The following are the recommended pipe sizes. Hot water pipe: Main pipe – Rp 3/4" (20mm) Cold water pipe: The size of the cold-water pipe should be the same or larger than the size of the hot water pipe used.
- Page 9 Warning: Regardless of the water supply method, the non-return valve on the cold-water inlet pipe must be installed correctly, otherwise the water heater or its parts might be damaged. ⚫ Condensation drainpipe connection The water heater is equipped with a condensation drain hose, one end of which is connected to the condensation drain and another end to the floor drain.
- Page 10 Warning: Drainpipe of the T&P relief valve shall be installed in forest-free environment and kept inclined downwards. The outlet of the drainpipe should not be blocked at any time, and it should be kept in contact with the atmosphere, and make sure the discharged hot water will not endanger people safety or cause property damage.
- Page 11 Wiring connection ◇ The power supply for the water heater is single-phase AC with rated voltage 220V ~50Hz. The wiring diagram is as below: ◼ Precautions ● A specific power supply must be provided for the water heater, whose maximum voltage fluctuation shall be within 90%-110% of the rated voltage.
- Page 12 ● Power cable outside the unit must be well protected to prevent any hand contact or electric shock even contacted (use tactile double insulated cable or provide insulation protection for normal power cables). ◼ Power specifications Cable diameter (plastic insulation and wire case) Air switch Power Leakage protector...
- Page 13 Warning: For your safety concern, the water heater must be equipped with air switches and leakage protectors in accordance with the power specifications. The power supply must be grounded properly! DO NOT use the water heater if without proper grounding. If the power cord is damaged, for your safety, it must be replaced by professionals from the manufacturer, its maintenance department, or similar departments! Wire controller installation...
- Page 14 ◼ Installation ● Fix the base to installation position. ● Buckle the cover assembly. ● Insert the cable plug to interface. Operation and Usage Filling the Water Heater 1)Cut off power supply of the water heater 2)Turn on the nearest hot water tap to empty air in the system 3)Turn on cold water valve completely to fill the tank and pipes.
- Page 15 Water drainage It is necessary to empty the water heater in case of maintenance or suspending using water heater in winter season: 1)Cut off the power supply. 2)Turn off the cold-water supply valve. 3)Connect one end of hose to the drainage outlet and lead the other end to floor drain. 4)Turn on the nearest hot-water tap and drainage valve.
- Page 16 4)“Setting” button: set time and timing function. 5)“Cycle” button: control the open and close of waterway circulation. 2. Function description 1)ON/OFF Switch on and off the water heater by pressing “ON/OFF” button When the water heater is powered on, the controller switches on and starts self-check, following by a “beep”...
- Page 17 (Wi-Fi icon will flash with 1Hz). If Wi-Fi is successfully set up, the indicator will light up. The Wi-Fi network only needs to be set up at the first time. The detailed connection process is illustrated in “Hi Rheem APP Quick Guide” ② Wi-Fi clocking function Set the clocking period on APP and the water heater will heat and preservation in the corresponding period.
- Page 18 2℃. If the power must be disconnected, please discharge all the water in the tank in advance and make sure it is empty. Otherwise, Rheem will not be responsible for any water heater failure and property loss caused.
- Page 19 10)Sterilization To activate the one-time high-temperature sterilization function, ensure the water heater is powered on. Press both “UP” and “Mode” button simultaneously for 5 seconds to enable the sterilization function. The heating icon will be lightened constantly after flashing for 5 seconds indicating sterilization function is turned on.
- Page 20 Hot Water Usage ◆ Under normal circumstances, the cold-water inlet shut-off valve should always be open, and cold water will be automatically replenished when hot water is discharged. ◆ During the heating process of the water heater, it is normal for the T&P relief valve to discharge a small amount of hot water ◆...
- Page 21 The calcium carbonate in the water can deposit on the surfaces of hot metal, which can cause scaling. When the saturation index of water is greater than 0.4, the scaling will be obvious. The higher the water temperature and water consumption, the more serious the scaling will be. In this case, it is required to install an expansion control valve after the non-return valve on the cold-water pipeline of the water heater.
- Page 22 Jacket clean To maintain the good appearance of the water heater, the surface of the jacket can be cleaned regularly as follow procedures: ◆ Cut off power supply of the water heater. ◆ Use a damp cloth to take a small amount of soap or detergent and lightly wipe the jacket. Do not use gasoline or other corrosive chemicals.
- Page 23 Common Faults and Solutions Faults Possible reason Solution Check power supply No power supply Please call Rheem or authorized distributor No display and Please inspect and confirm the control Loose connection between the buttons failure board and cable are not damaged and well...
- Page 24 Confirm sensors are well connected and Lower temperature sensor short not damaged. "EA" circuit or pen circuit Please call Rheem or authorized distributor Confirm sensors are well connected and Upper temperature sensor short not damaged. "EB" circuit or open circuit...
- Page 25 It is normal to discharge a small amount of hot water for each Normal heating If there is continuous dripping, Lift the valve lever, drain the water for a Water from T&P there may be impurities stuck in few seconds, and repeat several times relief valve the safety valve Normal...
- Page 26 Replacement parts Component Component Anode Main board Temp. Limiter Capacitor Heating element Blower Water pump Fan blade Electric cover Cover Wi-Fi Module Warning: For your safety, DO NOT attempt to repair the water heater without authorization. Please call the service line when you need service.
- Page 27 Warranty Policy The standard warranty applicable for this Rheem product and the term of the warranty may differ based on the country of purchase. Depending on your country of purchase, the warranty may be provided by a member of the Rheem Manufacturing Company group of companies (hereinafter referred to as “Rheem”) or by Rheem’s authorized partners.
- Page 28 The information provided in this form is based on the data provided by the supplier and the test results of Rheem. Some hazardous exceeding the standard are limited by current industry technology level, which cannot be replaced or reduced temporarily. Rheem will continue to work to reduce the use of these substances and elements by improving our technology.
Need help?
Do you have a question about the RHP-5207C Series and is the answer not in the manual?
Questions and answers