
Related Manuals for Rheem 3805 Series


Summary of Contents for Rheem 3805 Series
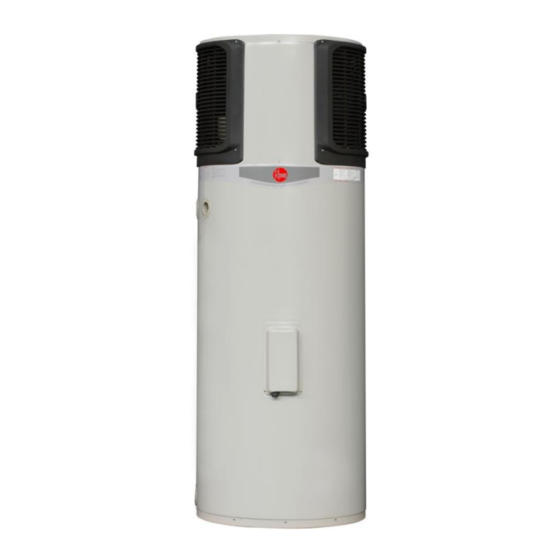
- Page 1 Owner’s Guide Installation Instructions Rheem Heat Pump Water Heater 3805 Series 270,340 Models This water heater must be installed and serviced by a qualified person. Please leave this guide with the householder.
- Page 3 Dear Homeowner: Thank you for selecting the Rheem residential heat pump water heater. NOTE: For continual safe operation of this water heater it must be installed, operated and maintained in accordance with these instructions. This manual provides instruction regarding both installation and operation.
-
Page 4: Table Of Contents
Table of Contents PRECAUTIONS ..............................4 SPECIFICATIONS ............................... 6 DIMENSIONS ..............................8 INSTALLATION ..............................9 PLUMBING CONNECTION ..........................10 ............................10 ATERIAL PECIFICATIONS ..............................10 ONNECTION IZES ................................10 IZING ............................11 ATER ONNECTIONS ............................11 ATER ELIVERY & P ......................... - Page 5 ............................21 AILURE AND OLUTION ..............................21 ONTROL ANEL ............................... 22 SING ATER WIRING DIAGRAM ............................24 WARRANTY ..............................25 HEAT PUMP WATER HEATER MODEL ............E RROR OOKMARK NOT DEFINED TERMS OF THE SOLAHART WARRANTY AND EXCLUSIONS TO IT ....E RROR OOKMARK NOT DEFINED WHAT IS COVERED BY THE SOLAHART WARRANTY .................
-
Page 6: Precautions
Precautions Please read these precautions carefully, failure to follow these instructions may damage your Heat Pump water heater or endanger the safety of persons and property in the vicinity of the water heater. This water heater is only intended to be operated by persons who have the experience or the knowledge and the capabilities to do so. - Page 7 Do not attempt to insert any foreign object (e.g. hand, screwdriver, stick) into the air inlet or outlet of the outdoor unit. Rotating fan blades may cause injury. If the water heater begins to operate abnormally (e.g. excessive noise, emit smoke, peculiar smell, etc) stop operation of the equipment, isolate power supply promptly and contact the Service Department.
-
Page 8: Specifications
Specifications Model RHP270-3805 RHP340-3805 Power Supply 220V~50Hz Circuit Fuse - Model Number 50T T16AL250V Circuit Fuse - Parameters 16A/250V Rated heating volume* 3250 W Power (watts) HP heating rated input Current (amps) Power (watts) 2400 Auxiliary heating input Current (amps) 10.9 Power (watts) 3800... - Page 9 P a g e...
-
Page 10: Dimensions
Dimensions MODEL RHP270-3805 1151 1815 RHP340-3805 1461 2125 P a g e... -
Page 11: Installation
Installation The water heater must be installed: by a qualified person, and in accordance with the installation instructions, and in compliance with all relevant standards, local codes and regulatory authority requirements. This product is not suitable for installation in an area where frost is likely to occur. The water heater should be installed close to the most frequently used outlet and its position chosen with noise, safety and service in mind. -
Page 12: Plumbing Connection
Plumbing Connection All plumbing work must be carried out by a qualified person and in accordance with all local codes and regulatory authority requirements. Material Specifications All piping used must be capable of withstanding the temperature and pressure conditions that may exist within the system. -
Page 13: Water Connections
Water Connections This water heater has either a dip tube or fitting liner in the inlet and outlet fittings. These must be in place for the water heater to function properly. Do not remove or damage them by using heat nearby. -
Page 14: Expansion Control Valve (Ecv)
It is possible for the valve to release a little water through the drain line during each heating period. This occurs as the water is heated and expands by approximately 1/50 of its volume. The temperature pressure relief valve must be fitted before the water heater is operated. Before fitting the relief valve, make sure the probe has not been bent. -
Page 15: Condensation Drain
In locations where water pipes are prone to freezing, drain lines must be insulated, must not exceed 300mm in length and are to discharge into a tundish through an air gap of between 75mm and 150mm. If a drain line discharges into a tundish, the drain line from the tundish must be not less than DN20. The drain line from a tundish must meet the same requirements as for a drain line from a relief valve. -
Page 16: Electrical Connection
Electrical connection NOTE: The power supply to the heater must not be switched on until the water heater is filled with water. All electrical work and permanent wiring must be carried out by a qualified person and in accordance with the Wiring Rules and all local codes and regulatory authority requirements. The water heater must be directly connected to a 220V AC (+/-10%), 50 Hz mains power supply. -
Page 17: Operation And Usage
Operation and usage To Fill And Turn On The Water Heater NOTE: The power supply to the water heater must not be switched on until the water heater is filled with water. Open all of the hot water taps in the house (don’t forget the shower). ... - Page 18 The clock is on 24 hour notation. When a fault occurs an error code will be displayed in place of the clock. During controller setup the temperature display will flash. This indicates the current set point temperature rather than current tank temperature. 1.
-
Page 19: To Turn Off The Water Heater
During normal heat pump operation it is possible to manually activate the supplementary electric heating unit if a faster recovery rate is required. i. Press the ELECTRIC HEATING button to start the electric heating system. Its corresponding symbol will glow on the remote controller display. ii. -
Page 20: Draining The Water Heater
Note: if it is necessary to switch the power off to the water heater and there is a risk of freezing, then it is recommended to drain the water heater; failure to do so may result in damage if freezing occurs. -
Page 21: Saturation Index
the water heater during long periods of no use. In areas where this is likely to occur the installer should instruct the householder on how to dissipate the gas safely. If, under these conditions, the water heater has not been used for two or more weeks the following procedure should be carried out before using any electrical appliances (automatic washing machines and dishwashers) which are connected to the hot water supply. -
Page 22: Major Five Year Service
Note: The five year service and routine replacement of any components, such as the anode and relief valve(s), are not included in the Rheem warranty. A charge will be made for this work. Only genuine replacement parts should be used on this water heater. -
Page 23: Troubleshooting
Troubleshooting Error Code: Code Failure type Reset method Open or short circuit - water temperature sensor Auto Open or short circuit - outlet opening sensor cable Auto Open or short circuit - Evaporator sensor cable Auto Outlet opening over-temperature protection (≥95 Auto Outlet opening over-temperature protection (≥105 Reset power... -
Page 24: Using Hot Water
circuit failure as necessary. “E06” displayed Ambient sensor cable Check ambient sensor cable; make sure it is plugged open or short circuit in and lead is not severed. Repair or replace sensor failure cable as necessary. “E07” displayed Loose connection Repair/replace remote connection cable. - Page 25 during heating cycle Blockage/debris inside Lift the hand lever to discharge water, repeat. Replace the TPR causing T&PR if necessary continual leaking High water supply Ask plumber to install pressure reduction valve. pressure Noise inside water It is normal for slight Normal heater or pipes.
-
Page 26: Wiring Diagram
Wiring Diagram P a g e | 24... -
Page 27: Warranty
WARRANTY 1. WHAT IS COVERED BY THE WARRANTY The period in which the fault must What components are covered What coverage you receive appear in order to be covered Replacement of the faulty component at exwork All components Year 1 price ONLY Years 2 Replacement of the faulty cylinder at exwork price...
Need help?
Do you have a question about the 3805 Series and is the answer not in the manual?
Questions and answers