LG LP1200DXR User Manual
Portable air conditioner
Hide thumbs
Also See for LP1200DXR:
- User's manual & installation instructions (28 pages) ,
- Specifications (2 pages) ,
- User's manual & installation instructions (26 pages)
Table of Contents
Advertisement
Quick Links
To contact LG Electronics, 24 hours a day,
7 days a week:
1-800-243-0000 (US)
1-888-542-2623 (Canada)
Or visit us on the Web at: us.lge.com
PORTAbLE AIR
Pour contacter LG Electronics, 24 heures
par jour, 7 jours par semaine, appelez le :
1-800-243-0000 (US)
CONDITIONER
1-888-542-2623 (Canada)
Ou visitez-nous sur le Web à l'adresse :
USER' S GUIDE & INSTALLATION INSTRUCTIONS
us.lge.com
Please retain this owner's manual for future
Para comunicarse con LG Electronics,
reference.
24 horas al día, 7 días a la semana:
Read and follow all safety rules and instructions
1-800-243-0000
before using this product.
O visítenos en la Web en: us.lge.com
CLImATISEUR
mObILE
GUIDE DE L' UTILISATEUR ET
INSTRUCTIONS D' INSTALLATION
Veuillez conserver ce manuel de l'utilisateur
pour référence future.
Lisez et suivez toutes les règles et les
instructions relatives à la sécurité avant
d'utiliser ce produit.
ACONDICIONADOR
DE AIRE PORTÁTIL
GUÍ A DE USUARIO E
INSTRUCCIONES DE INSTALACIÓN
Guarde este manual de usuario para referencia
futura. Lea y siga todas
las reglas e instrucciones de seguridad antes
de utilizar este producto.
model/modèle/modelo
LP1200DXR
P/No. MFL36812504
Advertisement
Table of Contents

Subscribe to Our Youtube Channel
Related Manuals for LG LP1200DXR


Summary of Contents for LG LP1200DXR
- Page 1 To contact LG Electronics, 24 hours a day, 7 days a week: 1-800-243-0000 (US) 1-888-542-2623 (Canada) Or visit us on the Web at: us.lge.com PORTAbLE AIR Pour contacter LG Electronics, 24 heures par jour, 7 jours par semaine, appelez le :...
-
Page 2: Table Of Contents
Congratulations on your purchase Control Panel and Remote ....7 and welcome to the LG family. HOW TO USE Your new LG Air Conditioner Before Using Your Air Conditioner . -
Page 3: Important Safety Instructions
I m P O RTA N T S A F E T Y I N S T RU C T I O N S READ ALL INSTRUCTIONS BEFORE USE Your safety and the safety of others is very important. We have provided many important safety messages in this manual and on your appliance. Always read and obey all safety messages. -
Page 4: Electrical Safety
I m P O RTA N T S A F E T Y I N S T RU C T I O N S READ ALL INSTRUCTIONS BEFORE USE BASIC SAFETY PRECAUTIONS CAUTION To reduce the risk of fire, electric shock, or injury to persons when using this appliance, follow basic precautions, including the following: •... - Page 5 TEST button then the RESET button. If the TEST button does not cause the circuit breaker to trip, or if the RESET button will not stay engaged, unplug the air conditioner immediately and contact your LG service technician. TEMPORARY GROUNDING METHOD (Use of adapter...
-
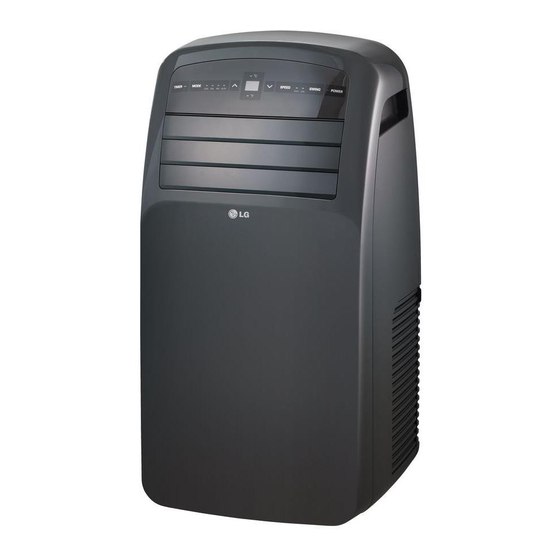
Page 6: Parts And Features
PA RT S A N D F E AT U R E S KEY PARTS AND COMPONENTS CONTROL PANEL AND DISPLAY Easy-to-read digital display shows the set temperature and indicator lights show the operating mode. Simple push buttons make changing settings quick and easy. MOTORIZED AIR DISCHARGE The adjustable louvered air discharge opens automatically when the air conditioner is turned... -
Page 7: Control Panel And Remote
PA RT S A N D F E AT U R E S CONTROL PANEL AND REMOTE Operation of functions is the same when using the remote or the control panel, unless otherwise stated. For detailed instructions on each function, see the following pages. Power POWER ON/OFF Turns the air conditioner on and off. -
Page 8: How To Use
H O W TO U S E BEFORE USING YOUR AIR CONDITIONER PREPARING FOR OPERATION UNPACKING THE AIR CONDITIONER Refer to the Installation Instructions included in Remove and store packing materials for reuse. this manual before using the air conditioner. Remove any shipping tape before using the Once the air conditioner has been properly air conditioner. - Page 9 H O W TO U S E BEFORE USING YOUR AIR CONDITIONER INSERTING BATTERIES IN THE REMOTE Before using your remote, install the provided AAA batteries: Press in the locking tab on the battery cover on the back of the remote and remove the cover.
-
Page 10: Using The Controls
H O W TO U S E USING THE CONTROLS Control panel buttons shown. Operation Always point the remote at the sensor. The using the remote control is the same, unless remote may not work if the sensor is in bright specifically noted. - Page 11 H O W TO U S E USING THE CONTROLS FAN SPEED TIMER 1-24 Hr Pressing the FAN SPEED button cycles the When the TIMER function is selected, you can set circulation fan speed from low (F1) to medium the air conditioner to either automatically turn (F2) to high (F3).
- Page 12 H O W TO U S E USING THE CONTROLS ENERGY SAVER • When FL appears on the display, press AUTO Under normal operation, the exhaust fan cycles Power on and off with the compressor, and the CLEAN button, it will drain out the water circulation fan runs at the set collected in internal tank through upper drain port.
-
Page 13: Installation Instructions
I N S TA L L AT I O N I N S T RU C T I O N S PREPARING FOR INSTALLATION WARNING The air conditioner is heavy! Use two or more people to lift and install the unit! Failure to do so could result in back injury or other injuries. EXHAUST COMPONENTS The following components are used for window venting. -
Page 14: Attaching The Hose And Diffuser
I N S TA L L AT I O N I N S T RU C T I O N S ATTACHING THE HOSE AND DIFFUSER NOTE: The air conditioner is shipped with the hose installed. The hose may be removed for cleaning and storage, if necessary. -
Page 15: Window Vent Panel And Extensions
I N S TA L L AT I O N I N S T RU C T I O N S WINDOW VENT PANEL AND EXTENSIONS The window installation kit allows you to install the air conditioner in most vertical-sliding windows 18" to 48"... -
Page 16: Installation In Vertical Sliding Windows
I N S TA L L AT I O N I N S T RU C T I O N S INSTALLATION IN VERTICAL SLIDING WINDOWS NOTE: The window installation kit can be used with vertical sliding windows between 18" and 48"... - Page 17 I N S TA L L AT I O N I N S T RU C T I O N S INSTALLATION IN VERTICAL SLIDING WINDOWS Security Bracket Type A screws Type B screw Insert the oval end of the diffuser into the Install the security bracket with a type B window installation kit until the locking tabs screw, as shown.
-
Page 18: Installation In Casement Windows
I N S TA L L AT I O N I N S T RU C T I O N S INSTALLATION IN CASEMENT STYLE WINDOWS NOTE: The window installation kit can be used with casement windows between 18 ʺ and 48 ʺ tall. Foam seal C (Adhesive type-shorter) - Page 19 I N S TA L L AT I O N I N S T RU C T I O N S INSTALLATION IN CASEMENT STYLE WINDOWS Type A screws Security bracket Type B screw Insert the oval end of the diffuser into the Install the window security bracket with a window installation kit until the locking tabs type B screw, as shown.
-
Page 20: Care And Cleaning
For maximum efficiency, it is recommended operation with only minimal cleaning and that you have the cooling coils inspected and maintenance. cleaned annually. Your local LG Authorized Service Center can provide this inspection and cleaning service for a nominal fee. WARNING •... -
Page 21: Emptying The Water Collection Tank
C A R E A N D C L E A N I N G EMPTYING THE WATER COLLECTION TANK Using the bottom drain port When the internal water collection tank is full, FL will appear in the display and the air conditioner Drain Outlet will turn off until the tank is emptied. -
Page 22: Storing The Air Conditioner
C A R E A N D C L E A N I N G STORING THE AIR CONDITIONER If the air conditioner will not be used for an Before using the air conditioner again: extended period of time: Make sure the filter and drain cap are Drain the water collection tank completely in place. -
Page 23: Troubleshooting
T RO U b L E S H O OT I N G BEFORE CALLING FOR SERVICE Before you call for service, review this list. It may save you time and expense. This list includes common occurrences that are not the result of a defect in workmanship or materials. Problem Possible Causes Solutions... - Page 24 • The water collection tank is full. • Empty the water collection tank. See the Care and Cleaning section. CH01 • Short or open circuit in the indoor • Unplug the air conditioner and contact your authorized air thermostat. LG service center.
-
Page 25: Product Registration Information
PORTABLE AIR CONDITIONER LIMITED WARRANTY — USA Should your LG Portable Air Conditioner prove to be defective in material or workmanship under normal use during the warranty period listed below, effective from the date of original consumer purchase of the product, LG Electronics will replace the defective part(s). Replacement parts will meet intended fit and function of the original part. - Page 26 P/No. MFL36812504 Printed in Korea...
Need help?
Do you have a question about the LP1200DXR and is the answer not in the manual?
Questions and answers