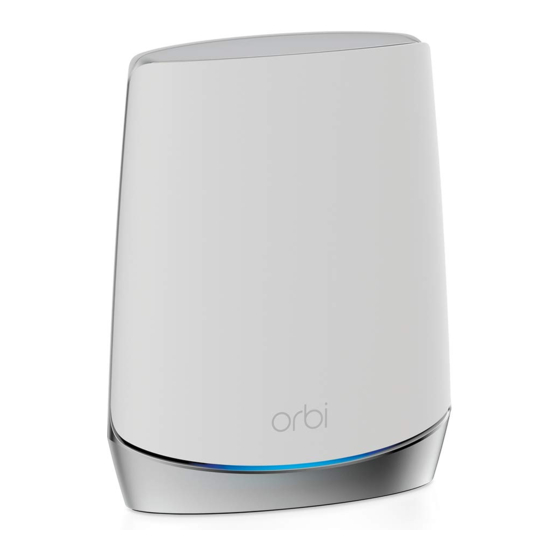
NETGEAR Orbi RBS750 User Manual

Whole home wifi system with built-in cable modem, cable modem router/satellite
Hide thumbs Also See for Orbi RBS750:
Table of Contents

Advertisement

User Manual
Orbi Whole Home WiFi System
With Built-in Cable Modem
Models:
Orbi Cable Modem Router CBR750
Orbi Satellite Model RBS750
September 2020
202-12053-01
NETGEAR, Inc.
350 E. Plumeria Drive
San Jose, CA 95134, USA

Advertisement

Table of Contents
loading

Summary of Contents for NETGEAR Orbi RBS750

  • Page 1 User Manual Orbi Whole Home WiFi System With Built-in Cable Modem Models: Orbi Cable Modem Router CBR750 Orbi Satellite Model RBS750 NETGEAR, Inc. September 2020 350 E. Plumeria Drive 202-12053-01 San Jose, CA 95134, USA...
  • Page 2 Customer-owned cable modem routers might not be compatible with certain Internet service providers (ISPs). Check with your ISP to confirm that this NETGEAR cable modem router is allowed on your ISP’s network. If you are experiencing trouble installing your NETGEAR product, contact NETGEAR at 1-866-874-8924.
  • Page 3: Table Of Contents

    Labels....................11 System Requirements................12 Connect your router................14 Install your Orbi Whole Home WiFi System........16 Set Up and Activate Using the NETGEAR Orbi App....16 Set Up and Activate Using the Orbi Cable Modem Router Web Interface..................17 Perform a Speed Test.................17 Chapter 2 Connect to the Network and Access the Cable Modem Router Connect to the Network..............19...
  • Page 4 Orbi WiFi System Chapter 4 Control Access to the Internet Allow or block access to your network..........31 Use keywords to block Internet sites..........32 Delete keywords that are used to block Internet sites....33 Avoid blocking on a trusted computer..........34 Block services from the Internet............34 Manage network access control lists..........36 Schedule when to block Internet sites and services......36 Set up security event email notifications.........37...
  • Page 5 Orbi WiFi System Manually update satellite firmware..........67 Manually update cable modem router firmware.......68 Change the admin password............69 Enable admin password reset............69 Reset the admin password..............70 View router status and usage information........71 Display Internet port statistics............71 Check the Internet connection status..........72 View satellite status................73 View and manage logs of router activity.........74 View devices connected to the network or edit device...
  • Page 6 Orbi WiFi System Install OpenVPN software on your Mac computer....96 Install OpenVPN software on an iOS device......97 Install OpenVPN software on an Android device......97 Use a VPN tunnel on your Windows-based computer....98 Use VPN to access your Internet service at home......100 Set up VPN client Internet access in the router......100 Block VPN client Internet access in the router......101 Use a VPN tunnel to access your Internet service at home..101...
  • Page 7: Chapter 1 Hardware Setup

    • Orbi Satellite Model RBS750 LEDs • Labels • System Requirements • Connect your router • Install your Orbi Whole Home WiFi System • Perform a Speed Test For more information about the topics covered in this manual, visit the support website at support.netgear.com.
  • Page 8: Orbi Cable Modem Router Model Cbr750 Hardware Overview

    Orbi WiFi System Orbi Cable Modem Router Model CBR750 Hardware Overview Figure 1. Orbi cable modem router model front and rear view 1. Ring LED 2. Power LED 3. Downstream LED 4. Upstream LED 5. Online LED 6. Sync button (also used for WPS connection) 7.
  • Page 9: Orbi Satellite Model Rbs750 Hardware Overview

    Orbi WiFi System Orbi Satellite Model RBS750 Hardware Overview Figure 2. Orbi satellite model RBS20, front and back views 1. Ring LED (not shown in image) 2. Sync button (also used for WPS connection) 3. Ethernet ports 4. Power On/Off button 5.
  • Page 10: Orbi Satellite Model Rbs750 Leds

    Orbi WiFi System Table 1. LED descriptions Description Power • Solid White. The cable modem router is receiving power and is functioning normally. • Off. The cable modem router is not receiving power. • Solid red. The cable modem router is too warm and might overheat. Power off the cable modem router, let it cool, and move it away from heat sources (such as a TV, DVD player, or speakers).
  • Page 11: Labels

    Orbi WiFi System Table 2. Orbi satellite LED descriptions LED Behavior Power The Power LED is located above the Power On/Off button on the rear panel. • Solid green. Power is on. • Solid amber. The satellite is booting. • Blinking amber. The satellite is resetting to factory default settings. •...
  • Page 12: System Requirements

    Orbi WiFi System The satellite label shows satellite's serial number and MAC address. The satellite label also shows the same WiFi network name and password that's on the cable modem router label. Figure 4. Cable modem router label System Requirements You need the following to install your modem router: •...
  • Page 13 Orbi WiFi System Safari® 1.4 or higher Google Chrome™ 11.0 or higher • Cable Internet service Hardware Setup User Manual...
  • Page 14: Connect Your Router

    Orbi WiFi System Connect your router Power on your router and connect it to a modem. To cable your cable modem router: 1. Turn off and disconnect existing modems and routers. If you are replacing a modem that is currently connected in your home, unplug the modem and plug the new cable modem router into the same outlet.
  • Page 15 Orbi WiFi System 6. Launch a web browser and set up your cable modem router. You are automatically redirected to the cable modem router web interface. If you’re not redirected, enter orbilogin.com or 192.168.1.1. 7. Follow the prompts. You are asked to do the following: •...
  • Page 16: Install Your Orbi Whole Home Wifi System

    You can use the NETGEAR Orbi app to set up and activate your Orbi cable modem router and satellite. To find the app, scan a QR code or search for NETGEAR Orbi in the Apple App Store or Google Play Store. Launch the NETGEAR Orbi app on your mobile device and follow the prompts.
  • Page 17: Set Up And Activate Using The Orbi Cable Modem Router Web Interface

    Set Up and Activate Using the Orbi Cable Modem Router Web Interface If you do not want to use the NETGEAR Orbi app to set up and activate your Orbi cable modem router and satellite, you can use the instructions in the following sections to help you install your cable modem router and satellite.
  • Page 18: Chapter 2 Connect To The Network And Access The Cable Modem

    Connect to the Network and Access the Cable Modem Router This chapter contains the following sections: • Connect to the Network • Types of Logins • Use a Web Browser to Access the Cable Modem Router...
  • Page 19: Connect To The Network

    Orbi WiFi System Connect to the Network You can connect to the Orbi network through a wired or WiFi connection. If you set up your computer to use a static IP address, change the settings so that it uses Dynamic Host Configuration Protocol (DHCP).
  • Page 20: Wifi Connection Using Wps

    Orbi WiFi System Your WiFi-enabled computer or mobile device connects to the WiFi network. WiFi Connection Using WPS You can connect to the cable modem router’s WiFi network with Wi-Fi Protected Setup (WPS) or you can find and select the WiFi network. To use WPS to connect to the WiFi network: 1.
  • Page 21: Use A Web Browser To Access The Cable Modem Router

    The first time you access the cable modem router, the NETGEAR installation assistant automatically checks to see if your cable modem router can connect to your Internet service.
  • Page 22: Log In To Orbi Web Interface

    Make sure that you selected the correct options and typed everything correctly. c. Contact your ISP to verify that you are using the correct configuration information. d. Read Troubleshooting on page 102. If problems persist, register your NETGEAR product and contact NETGEAR technical support. Log In to Orbi Web Interface When you log in to the Orbi, the browser displays the cable modem router web interface.
  • Page 23: Chapter 3 Specify Your Internet Settings

    Specify Your Internet Settings Usually, the quickest way to set up the router to use your Internet connection is to allow Orbi to detect the Internet connection when you first access the router with a web browser. You can also customize or specify your Internet settings. This chapter contains the following sections: •...
  • Page 24: View Modem Router Initialization

    Orbi WiFi System View Modem Router Initialization You can track the initialization procedure of the cable modem router and get details about the downstream and upstream cable channel. The time is displayed after the cable modem router is initialized. The cable modem router automatically goes through the following steps in the provisioning process: 1.
  • Page 25: Manually Set Up The Internet Connection

    Orbi WiFi System To change the starting frequency: 1. Launch a web browser from a computer or mobile device that is connected to the modem router network. 2. Enter orbilogin.com or 192.168.1.1. A login window opens. 3. Enter the modem router admin user name and password. The user name is admin.
  • Page 26 Orbi WiFi System The Internet page displays. 5. Select Internet Setup. The Internet Setup page displays. 6. Leave the Does your Internet connection require a login No radio button selected. 7. If your Internet connection requires an account name or host name, type it in the Account Name (If Required) field.
  • Page 27: Manage An Ipv6 Internet Connection

    Orbi WiFi System Manage an IPv6 Internet connection The router supports many different types of IPv6 Internet connections for which you can specify the settings manually. Requirements for entering IPv6 addresses IPv6 addresses are denoted by eight groups of hexadecimal quartets that are separated by colons.
  • Page 28: Change The Mtu Size

    MTU setting than the other devices, the data packets must be split or “fragmented” to accommodate the device with the smallest MTU. The best MTU setting for NETGEAR equipment is often the default value. In some situations, changing the value fixes one problem but causes another. Leave the MTU unchanged unless one of these situations occurs: •...
  • Page 29 Table 4. Common MTU sizes Application 1500 The largest Ethernet packet size. This setting is typical for connections that do not use PPPoE or VPN, and is the default value for NETGEAR routers, adapters, and switches. 1492 Used in PPPoE environments. 1472 Maximum size to use for pinging.
  • Page 30: Chapter 4 Control Access To The Internet

    Control Access to the Internet The router comes with a built-in firewall that helps protect your home network from unwanted intrusions from the Internet. This chapter includes the following sections: • Allow or block access to your network • Use keywords to block Internet sites •...
  • Page 31: Allow Or Block Access To Your Network

    Orbi WiFi System Allow or block access to your network You can use access control to block access to your network. To set up access control: 1. Launch a web browser from a computer or mobile device that is connected to your Orbi network.
  • Page 32: Use Keywords To Block Internet Sites

    Orbi WiFi System 8. To view a list of allowed or blocked devices that are not connected, click one of the following links: • View list of allowed devices not currently connected to the network • View list of blocked devices not currently connected to the network The list displays.
  • Page 33: Delete Keywords That Are Used To Block Internet Sites

    Orbi WiFi System For example: • Specify XXX to block http://www.badstuff.com/xxx.html. • Specify .com if you want to allow only sites with domain suffixes such as .edu or .gov. • Enter a period (.) to block all Internet browsing access. 7.
  • Page 34: Avoid Blocking On A Trusted Computer

    Orbi WiFi System Your settings are saved. Avoid blocking on a trusted computer You can exempt one trusted computer from blocking. The computer that you exempt must be assigned a fixed IP address. You can use the reserved IP address feature to specify the IP address.
  • Page 35 Orbi WiFi System 3. Enter the admin user name and password. The user name is admin. The password is the one that you specified the first time that you logged in. The user name and password are case-sensitive. The BASIC Home page displays. 4.
  • Page 36: Manage Network Access Control Lists

    Orbi WiFi System Your settings are saved. Manage network access control lists You can use access control to block or allow access to your network. To manage devices that are allowed or blocked: 1. Launch a web browser from a computer or mobile device that is connected to your Orbi network.
  • Page 37: Set Up Security Event Email Notifications

    Orbi WiFi System To schedule blocking: 1. Launch a web browser from a computer or mobile device that is connected to your Orbi network. 2. Enter orbilogin.com. A login window opens. 3. Enter the admin user name and password. The user name is admin. The password is the one that you specified the first time that you logged in.
  • Page 38 Orbi WiFi System The user name is admin. The password is the one that you specified the first time that you logged in. The user name and password are case-sensitive. The BASIC Home page displays. 4. Select ADVANCED > Security > E-mail. The E-mail page displays.
  • Page 39 Orbi WiFi System Logs are sent automatically. If the log fills before the specified time, it is sent. After the log is sent, it is cleared from the router memory. If the router cannot email the log and the log buffer fills, the router overwrites the log. Control Access to the Internet User Manual...
  • Page 40: Chapter 5 Optimize Performance

    Optimize Performance This chapter contains the following sections: • Enable or disable Wi-Fi Multimedia Quality of Service • Improve network connections with Universal Plug and Play...
  • Page 41: Enable Or Disable Wi-Fi Multimedia Quality Of Service

    Orbi WiFi System Enable or disable Wi-Fi Multimedia Quality of Service Wi-Fi Multimedia Quality of Service (WMM QoS) prioritizes WiFi voice and video traffic over the WiFi link. WMM QoS is automatically enabled. WMM QoS prioritizes WiFi data packets from different applications based on four access categories: voice, video, best effort, and background.
  • Page 42: Improve Network Connections With Universal Plug And Play

    Orbi WiFi System 7. Click the Apply button. Your settings are saved. Improve network connections with Universal Plug and Play Universal Plug and Play (UPnP) helps devices, such as Internet appliances and computers, access the network and connect to other devices as needed. UPnP devices can automatically discover the services from other registered UPnP devices on the network.
  • Page 43 Orbi WiFi System The time to live for the advertisement is measured in hops (steps) for each UPnP packet sent. Hops are the steps a packet takes between routers. The number of hops can range from 1 to 255. The default value for the advertisement time to live is 4 hops, which should be fine for most home networks.
  • Page 44: Chapter 6 Specify Network Settings

    Specify Network Settings This chapter includes the following sections: • View or change WAN settings • Manage Dynamic DNS • Set up a default DMZ server • Change the router’s device name • Change the LAN TCP/IP settings • Use the router as a DHCP server •...
  • Page 45: View Or Change Wan Settings

    Orbi WiFi System View or change WAN settings You can view or configure wide area network (WAN) settings for the Internet port. You can set up a DMZ (demilitarized zone) server, change the maximum transmit unit (MTU) size, and enable the router to respond to a ping to its WAN (Internet) port. To view the WAN settings: 1.
  • Page 46: Manage Dynamic Dns

    DNS service does not work because private addresses are not routed on the Internet. Set up a new Dynamic DNS account To set up Dynamic DNS and register for a free NETGEAR account: 1. Launch a web browser from a computer or mobile device that is connected to your Orbi network.
  • Page 47: Specify A Dynamic Dns Account That You Already Created

    A message displays the Dynamic DNS status. Specify a Dynamic DNS account that you already created If you already own a Dynamic DNS account with NETGEAR, No-IP, or DynDNS, you can set up the router to use your account. To set up Dynamic DNS if you already created an account: 1.
  • Page 48: Change The Dynamic Dns Settings

    9. For a No-IP account or DynDNS account, in the User Name field, enter the user name for your account. 10. For a NETGEAR account, in the Email field, type the email address for your account. 11. In the Password (6-32 characters) field, type the password for your DDNS account.
  • Page 49: Set Up A Default Dmz Server

    Orbi WiFi System Set up a default DMZ server The default DMZ server feature is helpful when you are using some online games and videoconferencing applications that are incompatible with Network Address Translation (NAT). The router is programmed to recognize some of these applications and to work correctly with them, but other applications might not function well.
  • Page 50: Change The Router's Device Name

    Orbi WiFi System Change the router’s device name The router’s device name is its model number. This device name displays in a file manager when you browse your network. To change the router’s device name: 1. Launch a web browser from a computer or mobile device that is connected to your Orbi network.
  • Page 51 Orbi WiFi System To change the LAN TCP/IP settings: 1. Launch a web browser from a computer or mobile device that is connected to your Orbi network. 2. Enter orbilogin.com. A login window opens. 3. Enter the admin user name and password. The user name is admin.
  • Page 52: Use The Router As A Dhcp Server

    Orbi WiFi System If you changed the LAN IP address of the router, you are disconnected when this change takes effect. 9. To reconnect, close your browser, relaunch it, and log in to the router. Use the router as a DHCP server By default, the router acts as a Dynamic Host Configuration Protocol (DHCP) server.
  • Page 53: Disable The Dhcp Server Feature In The Router

    Orbi WiFi System 7. Click the Apply button. Your settings are saved. The router delivers the following parameters to any LAN device that requests DHCP: • An IP address from the range that you defined • Subnet mask • Gateway IP address (the router’s LAN IP address) •...
  • Page 54: Manage Reserved Lan Ip Addresses

    Orbi WiFi System Manage reserved LAN IP addresses When you specify a reserved IP address for a computer on the LAN, that computer always receives the same IP address each time it accesses the router’s DHCP server. Assign reserved IP addresses to computers or servers that require permanent IP settings. Reserve an IP address To reserve an IP address: 1.
  • Page 55: Edit A Reserved Ip Address

    Orbi WiFi System Edit a reserved IP address To edit a reserved address entry: 1. Launch a web browser from a computer or mobile device that is connected to your Orbi network. 2. Enter orbilogin.com. A login window opens. 3. Enter the admin user name and password. The user name is admin.
  • Page 56: Manage Custom Static Routes

    Orbi WiFi System 5. Select the radio button next to the reserved address. 6. Click the Delete button. The address is removed. Manage custom static routes Typically, you do not need to add static routes unless you use multiple routers or multiple IP subnets on your network.
  • Page 57: Edit A Static Route

    Orbi WiFi System 3. Enter the admin user name and password. The user name is admin. The password is the one that you specified the first time that you logged in. The user name and password are case-sensitive. The BASIC Home page displays. 4.
  • Page 58: Delete A Static Route

    Orbi WiFi System The user name is admin. The password is the one that you specified the first time that you logged in. The user name and password are case-sensitive. The BASIC Home page displays. 4. Select ADVANCED > Advanced > Static Routes. The Static Routes page displays.
  • Page 59: Specify Basic Wifi Settings

    Orbi WiFi System Specify basic WiFi settings The router and satellite come preset with the same WiFi network name (SSID) and the same WiFi security. You can find the SSID and password on the router label and on the satellite label. If you log in to the router and change the WiFi settings, the router automatically sends the new settings to the satellite.
  • Page 60: Change The Wifi Password Or Security Level

    Orbi WiFi System 7. Click the Apply button. Your settings are saved. The router sends the new settings to the satellite. If you are using a WiFi connection and you changed the SSID, you are disconnected from the network. 8. Make sure that you can connect to the WiFi network with its new settings. If you cannot connect using WiFi, check the following: •...
  • Page 61: Set Up A Guest Wifi Network

    Orbi WiFi System 5. Under Security Options, select a WPA radio button: • WPA2-PSK [AES] • WPA-PSK [TKIP] + WPA2-PSK [AES] • WPA3-Personal [SAE] The WPA3 option uses the newest standard for the strongest security. Some older computers and WiFi devices cannot use WPA3 or WPA2. If your network includes old computers and WiFi devices, select the WPA-PSK [TKIP] + WPA2-PSK [AES] radio button.
  • Page 62: Set Up Router Mode

    Orbi WiFi System 6. To change the network name, type a new name in the Guest Wireless Network Name (SSID) field. The name can be up to 32 characters long and it is case-sensitive. If you change the name, make sure to write down the new name and keep it in a safe place. By default, security and encryption are disabled for the guest WiFi network.
  • Page 63: Generate A New Backhaul Password

    Orbi WiFi System 3. Enter the admin user name and password. The user name is admin. The password is the one that you specified the first time that you logged in. The user name and password are case-sensitive. The BASIC Home page displays. 4.
  • Page 64 Orbi WiFi System The router generates a new backhaul password. Specify Network Settings User Manual...
  • Page 65: Chapter 7 Manage Your Network

    Manage Your Network This chapter describes the router settings for administering and maintaining your router and home network. The chapter includes the following sections: • Update the router and satellite firmware • Change the admin password • Enable admin password reset •...
  • Page 66: Update The Router And Satellite Firmware

    Orbi WiFi System Update the router and satellite firmware You can use the router web interface to check if new firmware is available and update your router and satellite, or you can manually update the firmware for your router and satellite.
  • Page 67: Manually Update Firmware

    Orbi device to finish updating before updating your next Orbi device. To manually update the firmware on your Orbi router and satellite, follow these high level steps: 1. Visit netgear.com/support and download the firmware for both your Orbi router and satellite. 2. Update the firmware on your Orbi satellite.
  • Page 68: Manually Update Cable Modem Router Firmware

    Orbi WiFi System 6. Click the Update button. The Orbi satellite Firmware Update window opens. 7. If the browser ask you for the admin password, enter the same password that you entered for the router. 8. Click the BROWSE button. 9.
  • Page 69: Change The Admin Password

    Orbi WiFi System The firmware is updated. Change the admin password This feature let you change the default password that is used to log in to the router with the user name admin. This password is not the one that you use to access the Orbi WiFi network.
  • Page 70: Reset The Admin Password

    Orbi WiFi System forgotten. This reset process is supported in Internet Explorer, Firefox, and Chrome browsers but not in the Safari browser. To enable password reset: 1. Launch a web browser from a computer or WiFi device that is connected to the network.
  • Page 71: View Router Status And Usage Information

    Orbi WiFi System You are requested to enter a new admin password and to set new security questions. 6. Enter your new admin password, set new security questions, and click the Next button. Your settings are saved. 7. Click the Login button. A login window opens.
  • Page 72: Check The Internet Connection Status

    Orbi WiFi System The BASIC Home page displays. 4. Click the ADVANCED tab. 5. In the Internet Port pane, click the Show Statistics button. The Show Statistics window opens and displays following information: • System Up Time. The time elapsed since the router was last restarted. •...
  • Page 73: View Satellite Status

    Orbi WiFi System The user name is admin. The password is the one that you specified the first time that you logged in. The user name and password are case-sensitive. The BASIC Home page displays. 4. Click the ADVANCED tab. 5.
  • Page 74: View And Manage Logs Of Router Activity

    Orbi WiFi System 4. Select Attached Devices. The Attached Devices page displays. 5. In the Connected Satellites section, find your satellite’s IP address. 6. Enter your satellite’s IP address in your web browser’s address bar. A login window opens. 7. Enter the same admin user name and password that you entered for the router. The satellite’s status displays.
  • Page 75: View Devices Connected To The Network Or Edit Device Information

    Orbi WiFi System 7. To email the log immediately, click the Send Log button. View devices connected to the network or edit device information You can view the devices that are connected to your Orbi network. You can also edit the information that displays on the Attached Devices page in the router web interface.
  • Page 76: Edit Device Information On The Attached Devices Page

    Orbi WiFi System Edit device information on the Attached Devices page You can change the connected device model and name that display on the Attached Devices page. To view devices connected to your network: 1. Launch a web browser from a computer or mobile device that is connected to your Orbi network.
  • Page 77: Edit Satellite Information That Displays On The Attached Devices Page

    Orbi WiFi System To view satellites connected to your network: 1. Launch a web browser from a computer or mobile device that is connected to your Orbi network. 2. Enter orbilogin.com. A login window opens. 3. Enter the router admin user name and password. The user name is admin.
  • Page 78: Monitor Internet Traffic

    Orbi WiFi System A login window opens. 3. Enter the router admin user name and password. The user name is admin. The password is the one that you specified the first time that you logged in. The user name and password are case-sensitive. The BASIC Home page displays.
  • Page 79: Manage The Router Configuration File

    Orbi WiFi System 6. To control the volume of Internet traffic, use either the traffic volume control feature or the connection time control feature: • Select the Traffic volume control by radio button and then select one of the following options: No Limit.
  • Page 80: Back Up Settings

    Orbi WiFi System Back up settings To back up the router’s configuration settings: 1. Launch a web browser from a computer or mobile device that is connected to your Orbi network. 2. Enter orbilogin.com. A login window opens. 3. Enter the admin user name and password. The user name is admin.
  • Page 81: Erase The Current Configuration Settings

    Orbi app, you must update your router’s firmware and download the latest Orbi app for your mobile device. To download the latest Orbi app for your mobile device, visit https://www.netgear.com/home/apps-services/orbi-app. Manage Your Network User Manual...
  • Page 82: Chapter 8 Customize Internet Traffic Rules For Ports

    Customize Internet Traffic Rules for Ports You can use port forwarding and port triggering to set up rules for Internet traffic. You need networking knowledge to set up these features. This chapter includes the following sections: • Manage port forwarding to a local server •...
  • Page 83: Manage Port Forwarding To A Local Server

    Orbi WiFi System Manage port forwarding to a local server If your home network includes a server, you can allow certain types of incoming traffic to reach the server. For example, you might want to make a local web server, FTP server, or game server visible and available to the Internet.
  • Page 84: Add A Custom Port Forwarding Service

    Orbi WiFi System The service displays in the table. Add a custom port forwarding service To add a custom service: 1. Find out which port number or range of numbers the application uses. You can usually find this information by contacting the publisher of the application or user groups or news groups.
  • Page 85: Edit A Port Forwarding Service

    Orbi WiFi System Your settings are saved. The service is now in the table on the Port Forwarding / Port Triggering page. Edit a port forwarding service To edit a port forwarding entry: 1. Launch a web browser from a computer or mobile device that is connected to your Orbi network.
  • Page 86: Delete A Port Forwarding Entry

    Orbi WiFi System Delete a port forwarding entry To delete a port forwarding entry: 1. Launch a web browser from a computer or mobile device that is connected to your Orbi network. 2. Enter orbilogin.com. A login window opens. 3. Enter the admin user name and password. The user name is admin.
  • Page 87: Application Example: Make A Local Web Server Public

    Orbi WiFi System 5. Your router performs Network Address Translation (NAT) on the source IP address, and sends the reply through the Internet to the computer or WiFi device that sent the web page request. Application example: Make a local web server public If you host a web server on your local network, you can use port forwarding to allow web requests from anyone on the Internet to reach your web server.
  • Page 88: Add A Port Triggering Service

    Orbi WiFi System Add a port triggering service To add a port triggering service: 1. Launch a web browser from a computer or mobile device that is connected to your Orbi network. 2. Enter orbilogin.com. A login window opens. 3. Enter the admin user name and password. The user name is admin.
  • Page 89: Disable Port Triggering Or Change The Time-Out Period

    Orbi WiFi System 13. Click the Apply button. The service is now in the Portmap Table. Disable port triggering or change the time-out period By default, port triggering is enabled and a default time-out period is defined. You can disable port triggering or change the time-out period. To disable port triggering or change the time-out period: 1.
  • Page 90 Orbi WiFi System An example is Internet Relay Chat (IRC). Your computer connects to an IRC server at destination port 6667. The IRC server not only responds to your originating source port, but also sends an “identify” message to your computer on port 113. Using port triggering, you can tell the router, “When you initiate a session with destination port 6667, you must also allow incoming traffic on port 113 to reach the originating computer.”...
  • Page 91: Chapter 9 Use Vpn To Access Your Network

    Use VPN to Access Your Network You can use OpenVPN software to remotely access your router using virtual private networking (VPN). This chapter explains how to set up and use VPN access. This chapter includes the following sections: • Set up a VPN connection •...
  • Page 92: Set Up A Vpn Connection

    To use a DDNS service, register for an account with a host name (sometimes called a domain name). You use the host name to access your network. The router supports these accounts: NETGEAR, No-IP, and Dyn. If your Internet service provider (ISP) assigned a static WAN IP address (such as 50.196.x.x or 10.x.x.x) that never changes to your Internet account, the VPN can use that IP address...
  • Page 93: Install Openvpn Software

    Orbi WiFi System 6. To change the TUN mode service type, select the UCP or TCP radio button. 7. To change the TUN mode service port, type the port number that you want to use in the field. The default port number is 12973. 8.
  • Page 94 Orbi WiFi System 5. Make sure that the Enable VPN Service check box is selected. 6. Specify any VPN service settings on the page. For more information, see Specify VPN service in the router on page 92. 7. Click the For Windows button to download the OpenVPN configuration files. 8.
  • Page 95 For a client device with Windows 64-bit system, the VPN client is installed at C:\Programfiles\OpenVPN\config\ by default. 18. For a client device with Windows, modify the VPN interface name to NETGEAR-VPN: a. On your computer, go to the Networks page. If you are using Windows 10, select Control Panel >...
  • Page 96: Install Openvpn Software On Your Mac Computer

    Orbi WiFi System c. Select the local area connection and change its name (not its device name) to NETGEAR-VPN. If you do not change the VPN interface name, the VPN tunnel connection will fail. For more information about using OpenVPN on your Windows-based computer, visit https://openvpn.net/index.php/open-source/documentation/howto.html#quick.
  • Page 97: Install Openvpn Software On An Ios Device

    Orbi WiFi System Install OpenVPN software on an iOS device You must install this software on each iOS device that you plan to use for VPN connections to your router. To install VPN client software on an iOS device: 1. Launch a web browser from a computer or mobile device that is connected to your Orbi network.
  • Page 98: Use A Vpn Tunnel On Your Windows-Based Computer

    Orbi WiFi System To install VPN client software on an Android device: 1. Launch a web browser from a computer or mobile device that is connected to your Orbi network. 2. Enter orbilogin.com. A login window opens. 3. Enter the admin user name and password. The user name is admin.
  • Page 99 Orbi WiFi System established, you cannot access your home router or your home network with the OpenVPN software. The default LAN IP address scheme for the router is 192.x.x.x.The most common IP schemes are 192.x.x.x, 172.x.x.x, and 10.x.x.x. If you experience a conflict, change the IP scheme either for your home network or for the network with the client VPN computer.
  • Page 100: Use Vpn To Access Your Internet Service At Home

    Orbi WiFi System Use VPN to access your Internet service at home When you’re away from home and you access the Internet, you usually use a local Internet service provider. For example, at a coffee shop you might be given a code that lets you use the coffee shop’s Internet service account to surf the web.
  • Page 101: Block Vpn Client Internet Access In The Router

    Orbi WiFi System Block VPN client Internet access in the router By default, the router is set up to allow VPN connections only to your home network, not to the Internet service for your home network. If you changed this setting to allow Internet access, you can change it back.
  • Page 102: Chapter 10 Troubleshooting

    This chapter provides information to help you diagnose and solve problems you might experience with your Orbi router or satellite. If you do not find the solution here, check the NETGEAR support site at support.netgear.com for product and contact information. This chapter includes the following sections: •...
  • Page 103: Troubleshoot With The Leds

    • Make sure that the power adapter is securely connected to your cable modem router and securely connected to a working power outlet. • Check that you are using the power adapter that NETGEAR supplied for this product. • If the problem persists, contact technical support for help at...
  • Page 104: Troubleshoot The Cable Internet Connection

    Orbi WiFi System Troubleshoot the Cable Internet Connection When your cable modem router cannot access the Internet and your Internet LED is on, register the cable MAC address or device MAC address of your cable modem router with your cable Internet provider. Additionally, make sure that the cable modem router is specified as the TCP/IP gateway for your computer.
  • Page 105: Changes Not Saved

    Orbi WiFi System 4. If you customized advanced home network settings such as the IP address scheme, check the following: • Make sure that the IP address of your computer is on the same subnet as the cable modem router. If you are using the recommended addressing scheme, your computer’s address is in the range of 192.168.0.2 to 192.168.0.254.
  • Page 106: Troubleshoot Your Network Using The Ping Utility

    Orbi WiFi System In this case, pressing the WiFi button does not turn the WiFi radios back on. You must log in to enable the WiFi radios. Use an Ethernet cable for a wired connection to the cable modem router. Then log in and change the settings. Someone logged in to the cable modem router and disabled its SSID broadcast.
  • Page 107: Test The Path From Your Computer To A Remote Device

    Orbi WiFi System 3. Click the OK button. You should see a message like this one: Pinging <IP address > with 32 bytes of data If the path is working, you see this message: Reply from < IP address >: bytes=32 time=NN ms TTL=xxx If the path is not working, you see this message: Request timed out If the path is not functioning correctly, you might be experiencing one of the following...
  • Page 108: The Router And Satellite Do Not Sync

    Orbi WiFi System Verify that the IP address of the cable modem router is listed as the default gateway. • Check to see that the network address of your computer (the portion of the IP address specified by the subnet mask) is different from the network address of the remote device.
  • Page 109 Orbi WiFi System 6. Move the satellite to a new location and connect the satellite to a power source. 7. At the new location, check the satellite LED and make sure it lights blue. If the satellite LED lights blue, the satellite synced successfully. If the satellite LED lights amber, move the satellite closer to the router and try again.
  • Page 110: Chapter 11 Supplemental Information

    Supplemental Information This appendix covers the following topics: • Reset to Factory Settings • Technical Specifications...
  • Page 111: Reset To Factory Settings

    Orbi WiFi System Reset to Factory Settings You can return the cable modem router and satellite to its factory settings. Use the end of a paper clip or a similar object to press and hold the Reset button on the back of the cable modem router or satellite for at least seven seconds.
  • Page 112: Factory Settings For Orbi Satellite Model Rbs750

    Orbi WiFi System Table 5. Factory default settings for the cable modem router (Continued) Feature Default Setting Firewall Inbound (communications Disabled (except traffic on port coming in from the Internet) 80, the HTTP port) Outbound (communications Enabled (all) going out to the Internet) Source MAC filtering Disabled WiFi...
  • Page 113 Orbi WiFi System Table 6. Factory default settings for the satellite (Continued) Feature Default Setting Internet WAN MAC address Use default hardware connection address WAN MTU size 1500 Port speed AutoSensing Local LAN IP 192.168.1.250 network Subnet mask 255.255.255.0 (LAN) DHCP server Enabled DHCP range...
  • Page 114: Technical Specifications

    Orbi WiFi System Table 6. Factory default settings for the satellite (Continued) Feature Default Setting WiFi WiFi communication Enabled SSID name See satellite label Security WPA2-PSK (AES) Broadcast SSID Enabled Transmission speed Auto Country/region United States in the US RF channel 2.4 GHz front and back haul: Auto 5 GHz front haul: Channel...
  • Page 115: Technical Specifications For Orbi Satellite Model Rbs750

    Orbi WiFi System Table 7. Cable modem router specifications (Continued) Feature Description Operating temperature 0° to 40°C (32º to 104ºF) Operating humidity 90% maximum relative humidity, noncondensing Electromagnetic emissions FCC Part 15 Class B VCCI Class B EN 55 022 (CISPR 22), Class B C-Tick N10947 10BASE-T or 100BASE-TX or 1000BASE-T, RJ-45 2 x 2 OFDM/OFDMA DOCSIS 3.1 32 x 8 SCQAM DOCSIS 3.0...
  • Page 116 Orbi WiFi System Table 8. Technical specifications for Orbi satellite model RBS750 Feature Description Data and routing protocols TCP/IP, DHCP, Dynamic DNS, and UPnP Power adapter North America: 120V, 60 Hz, input Dimensions 9.1 x 7.2 x 2.8 in. (231 x 183 x 71 mm) Weight 1.9 lb (862 g) Operating temperature...

This manual is also suitable for:

Orbi cbr750Orbi cbk753Orbi cbr750-100nas

Table of Contents