
Related Manuals for Mars Comfort-Aire Century A-VMH24TV-1


Summary of Contents for Mars Comfort-Aire Century A-VMH24TV-1
- Page 1 Service Manual - A-VMH18DV-1, A-VMH24TV-1, A-VMH36QV-1, A-VMH48PV-1 Service Manual VMH-SV Series Multi Zone Mini-Split Model A-VMH18DV-1, A-VMH24TV-1, A-VMH36QV-1, A-VMH48PV-1 www.marsdelivers.com...
-
Page 2: Table Of Contents
Service Manual - A-VMH18DV-1, A-VMH24TV-1, A-VMH36QV-1, A-VMH48PV-1 CONTENTS Indoor Unit Combination ........................3 Dimension Of Outdoor Unit ....................... 6 Refrigerant Cycle Diagram .......................8 Installation Details ..........................10 4.1 Wrench torque sheet for installation ....................10 4.2 Connecting the cables ........................10 4.3 Pipe length and the elevation ......................10 4.4 First-Time Installation ........................10 4.5 Adding Refrigerant after Long-Term System Operation ..............12 4.6 Procedure when servicing the indoor unit refrigeration circuit. -
Page 3: Indoor Unit Combination
Service Manual - A-VMH18DV-1, A-VMH24TV-1, A-VMH36QV-1, A-VMH48PV-1 Indoor Unit Combination Multi DC Outdoor Nominal Suggested Limit Unit capacity Combination 6+12 6+18 18DV-1 5.2kW None 9+12 12+12 Suggested Combination Multi DC Outdoor Nominal Limit Unit capacity Two units Three units 6+6+6 6+9+18 6+12 6+18... - Page 4 Service Manual - A-VMH18DV-1, A-VMH24TV-1, A-VMH36QV-1, A-VMH48PV-1 Suggested Combination Multi DC Outdoor Unit Nominal capacity Limit Two units Three units Four units 6+18 6+6+12 9+9+9 6+6+6+6 6+9+9+12 6+24 6+6+18 6+6+6+9 9+9+12 6+9+9+18 6+30 6+6+24 6+6+6+12 9+9+18 6+9+9+24 9+18 6+6+30 6+6+6+18 9+9+24 6+9+12+12 9+24...
- Page 5 Service Manual - A-VMH18DV-1, A-VMH24TV-1, A-VMH36QV-1, A-VMH48PV-1 Suggested Combination Multi DC Nominal Outdoor Limit capacity Three units Four units Five units Unit units 9+24 6+6+24 9+12+18 6+6+6+18 6+9+18+30 6+6+6+6+9 6+6+12+12+12 9+30 6+6+6+24 6+12+12+12 6+6+6+6+12 6+6+12+12+18 6+6+30 9+12+24 9+36 6+6+6+30 6+12+12+18 6+6+6+6+18 6+6+12+12+24 6+6+36...
-
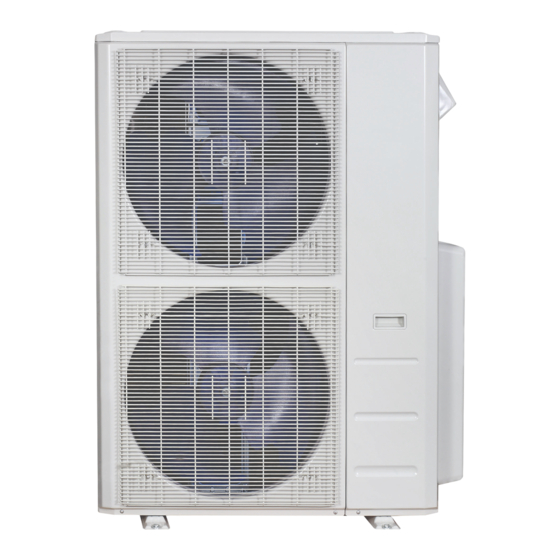
Page 6: Dimension Of Outdoor Unit
Service Manual - A-VMH18DV-1, A-VMH24TV-1, A-VMH36QV-1, A-VMH48PV-1 Dimension Of Outdoor Unit Model Unit 18DV-1 inch 35.04 13.46 26.50 38.98 26.10 13.94 1034 28TV-1 inch 37.2 16.5 31.9 40.6 26.5 15.9... - Page 7 Service Manual - A-VMH18DV-1, A-VMH24TV-1, A-VMH36QV-1, A-VMH48PV-1 Unit Model 1333 1060 36QV-1 48PV-1 inch 37.5 16.3 52.5 41.7 25.0 15.9...
-
Page 8: Refrigerant Cycle Diagram
Service Manual - A-VMH18DV-1, A-VMH24TV-1, A-VMH36QV-1, A-VMH48PV-1 Refrigerant Cycle Diagram 3.2 Refrigeration circuit drawing of 18DV-1 INDOOR OUTDOOR EXV A LIQUID VALVE A EXV B LIQUID VALVE B CAPILLARY TUBE Condenser temp. sensor HEAT EXCHANGE HEAT T1 Room T4 Ambient (EVAPORATOR) EXCHANGE temp. - Page 9 COOLING T2B-C High pressure GAS VALVE C Accumulator HEATING switch T5 Discharge Service Manual - A-VMH18DV-1, A-VMH24TV-1, A-VMH36QV-1, A-VMH48PV-1 temp. sensor Low pressure switch Compressor 3.4 Refrigeration circuit drawing of 36QV-1 INDOOR OUTDOOR EXV A LIQUID VALVE A EXV B LIQUID VALVE B EXV C LIQUID VALVE C...
-
Page 10: Installation Details
Service Manual - A-VMH18DV-1, A-VMH24TV-1, A-VMH36QV-1, A-VMH48PV-1 Caution: Installation Details ● Refrigerant pipe diameter different 4.1 Wrench torque sheet for installation according to indoor unit to be connected. When using the extension pipe, refer to the tables below. Outside diameter Torque Additional tightening torque ●... - Page 11 Service Manual - A-VMH18DV-1, A-VMH24TV-1, A-VMH36QV-1, A-VMH48PV-1 1. Air Purging Using the Vacuum Pump 2. Adding refrigerant if the pipe length exceeds chargeless pipe length Procedure: 1) Connect the charge hose to the charging cylinder and open the 2-way and 3-way valves. 1.
-
Page 12: Adding Refrigerant After Long-Term System Operation
Service Manual - A-VMH18DV-1, A-VMH24TV-1, A-VMH36QV-1, A-VMH48PV-1 4.5 Adding Refrigerant after Long-Term System Operation Procedure Procedure 1). Confirm that both the 2-way and 3-way valves are set to the opened position 1) Connect the charge hose to the 3-way service Remove the valve stem caps and confirm that the port and open the 2-way and 3-way valve. -
Page 13: Evacuation After Servicing The Outdoor Unit Refrigeration Circuit
Service Manual - A-VMH18DV-1, A-VMH24TV-1, A-VMH36QV-1, A-VMH48PV-1 valve. 4.7 Evacuation after servicing the outdoor unit refrigeration circuit 1. Evacuation of the complete refrigeration circuit, Indoor and outdoor unit. 1) Completely tighten the flare nuts of the indoor and outdoor units, confirm that both the 2-way and 3-way valves are set to the closed position. - Page 14 Service Manual - A-VMH18DV-1, A-VMH24TV-1, A-VMH36QV-1, A-VMH48PV-1 from the vacuum pump to the valve at the bottom of the cylinder. If the refrigerant is R410A, make the cylinder bottom up to ensure liquid charge. 2). Purge the air from the charge hose Open the valve at the bottom of the cylinder and press the check valve on the charge set to purge the air (be careful of the liquid refrigerant).
-
Page 15: Electronic Function
Service Manual - A-VMH18DV-1, A-VMH24TV-1, A-VMH36QV-1, A-VMH48PV-1 5.3.3 Fan Speed Malfunction 5. Electronic Function ---- If outdoor fan speed is lower than 100RPM higher than 2400RPM for 60 seconds or more, 5.1 Abbreviation the unit stops and LED displays failure code. T1: Indoor ambient temperature 5.3.4 Inverter Module Protection. - Page 16 Service Manual - A-VMH18DV-1, A-VMH24TV-1, A-VMH36QV-1, A-VMH48PV-1 and shutdown current C C o o o o l l T T 4 4 Z Z o o n n e e 5 5 I I ℃ HeatT4Zone4I T4≥15℃ Heating current limit value HeatT4Zone3I 14℃>T4≥10℃...
-
Page 17: Control And Functions
Service Manual - A-VMH18DV-1, A-VMH24TV-1, A-VMH36QV-1, A-VMH48PV-1 HeatT4Zone- When the compressor is off and T4 is lower than - -10℃>T4 Heating current limit 35℃ for 10 seconds, the unit stops and displays value “LP” or “PC0L” HeatStopI Heating stop protection current value When the compressor is on and T4 remains lower than -40℃... - Page 18 Service Manual - A-VMH18DV-1, A-VMH24TV-1, A-VMH36QV-1, A-VMH48PV-1 … COOL Frequency (Hz) L_F2 L_F1 L_F2 … _F24 Note: The final result is an integer. Amendatory … Then modify it according to a T2 average capacity … demand. (correction): Note:Average value of T2:Sum T2 value of all The maximum running frequency is adjusted indoor units)/ (indoor units number according to the outdoor ambient temperature...
- Page 19 Service Manual - A-VMH18DV-1, A-VMH24TV-1, A-VMH36QV-1, A-VMH48PV-1 4) If the compressor cumulative running time reaches 120 minutes and T3<-15℃. ℃ 5) If the air conditioner is shut down from heating Standby mode, it will enter defrost if any of the following conditions are met (this condition can be shielded Fmax=T4FREHEATMAX1 by parameters):...
- Page 20 Service Manual - A-VMH18DV-1, A-VMH24TV-1, A-VMH36QV-1, A-VMH48PV-1 When T3≥38 ℃ (100.4 ℉) or when T4≥15 ℃ (59 4-way valve defrosting Defrosting over ℉), the outdoor fan chooses a speed according compressor to T4 again. Max 10 minutes frequency Cool-F9 frequency Compressor stops TimeA 10S 30S...
- Page 21 Service Manual - A-VMH18DV-1, A-VMH24TV-1, A-VMH36QV-1, A-VMH48PV-1 run, otherwise the initial cooling opening is run, and the internal machine is not connected. deal with 7k unit). 2.3 Main EXV action: When the compressor is off, the main EXV keeps the opening degree when Breeze fan speed the compressor is turned off within the first 90 seconds.
- Page 22 Service Manual - A-VMH18DV-1, A-VMH24TV-1, A-VMH36QV-1, A-VMH48PV-1 The initial open angle of the EXV depends on the size of the indoor model. The adjustment range is 150-350p. When the unit has been running for 3 minutes, the outdoor unit receives the indoor units' indoor units' capacity demand and T2 information and then calculates their average.
-
Page 23: Wiring Diagrams
Service Manual - A-VMH18DV-1, A-VMH24TV-1, A-VMH36QV-1, A-VMH48PV-1 Wiring Diagrams 6.1 Wiring diagram of 1 drive 2 outdoor 18DV-1... - Page 24 Service Manual - A-VMH18DV-1, A-VMH24TV-1, A-VMH36QV-1, A-VMH48PV-1 6.2 Wiring diagram of 1 drive 3 outdoor 28TV-1...
- Page 25 Service Manual - A-VMH18DV-1, A-VMH24TV-1, A-VMH36QV-1, A-VMH48PV-1 6.3 Wiring diagram of 1 drive 4 outdoor 36QV-1...
- Page 26 Service Manual - A-VMH18DV-1, A-VMH24TV-1, A-VMH36QV-1, A-VMH48PV-1 6.4 Wiring diagram of 1 drive 5 outdoor 48PV-1 16022000036851 MAIN CONTRO L BOARD ELECTRONIC EX PANSIVE VALVE HEAT_D CHASSIS HE ATER HEAT_Y REVERSING VALVE COMP TOP COMP. TOP OLP TEMP. SENSOR...
- Page 27 Service Manual - A-VMH18DV-1, A-VMH24TV-1, A-VMH36QV-1, A-VMH48PV-1 IPM Board of 18DV-1, 28TV-1, 36QV-1, 48PV-1 Name Meaning connect to main board L-Out connect to main board N-Out CN_Reactor CN2/CN3 connect to reactor CN_COMP CN_COMP connect to compressor connect to main board CN21 AN_DC CN14 connect to outdoor DC fan...
- Page 28 Service Manual - A-VMH18DV-1, A-VMH24TV-1, A-VMH36QV-1, A-VMH48PV-1 PCB board of 18DV-1 & 28TV-1 Name Meaning CN11 L_in: connect to N-line (208-230V AC input) Power Supply CN12 N_in: connect to L-line (208-230V AC input) connect to Electric Expansion Valve A Electronic connect to Electric Expansion Valve B Expansion CN34...
- Page 29 Service Manual - A-VMH18DV-1, A-VMH24TV-1, A-VMH36QV-1, A-VMH48PV-1 connect to pipe temp. sensor T3, ambient temp. sensor T4, exhaust T3 T4 TP CN26 temp. sensor TP OLP TEMP. CN30 connect to compressor top temp. sensor (5VDC Pulse wave) SENSOR connect to high and low pressure swtich(pin1-pin2&pin3-pin4:5VDC H-PRO,L-RPO CN29 pulse wave)
- Page 30 Service Manual - A-VMH18DV-1, A-VMH24TV-1, A-VMH36QV-1, A-VMH48PV-1 IPM board of 48PV-1 36QV-1...
- Page 31 Service Manual - A-VMH18DV-1, A-VMH24TV-1, A-VMH36QV-1, A-VMH48PV-1 Name Meaning Connect to compressor 0V AC (standby) 10-200V AC (running) Connect to main PCB FAN1 CN11 connect to DC motor driver board FAN2 PFC-L1 connect to reactor PFC-L2 PFC-L1 connect to bridge PFC-L2...
- Page 32 Service Manual - A-VMH18DV-1, A-VMH24TV-1, A-VMH36QV-1, A-VMH48PV-1 PCB Board of 36QV-1, 48PV-1...
- Page 33 Service Manual - A-VMH18DV-1, A-VMH24TV-1, A-VMH36QV-1, A-VMH48PV-1 Name Meaning L1_in: connect to L1-line (230V AC input) Power Supply L2_in: connect to L2-line (230V AC input) Exhaust temp. sensor TP TESTPORT CN35 used for testing HEAT1 CN19/CN20 connect to chassis heater, 208-230V AC when is ON HEAT2 CN24/CN25 connect to compressor heater, 208-230V AC when is ON...
-
Page 34: Troubleshooting
Service Manual - A-VMH18DV-1, A-VMH24TV-1, A-VMH36QV-1, A-VMH48PV-1 Troubleshooting 7.1Safety Electricity is stored in capacitors, even when the power supply is shut off. Do not forget to discharge the electricity in the capacitors. The value of resistance is about 1500 ohm to 2000 ohm Electrolytic Capacitors (HIGH VOLTAGE! CAUTION!) Bulb (25-40W) -
Page 35: Indoor Unit Error Display
Service Manual - A-VMH18DV-1, A-VMH24TV-1, A-VMH36QV-1, A-VMH48PV-1 7.2 Indoor Unit Error Display For Old Console series B-VMH12FU-1; Operation Timer De-frost Failure ★ Indoor room temperature sensor (T1 ) malfunction ★ Evaporator coil temperature sensor (T2) malfunction ★ Communication malfunction between indoor and outdoor units ★... - Page 36 Service Manual - A-VMH18DV-1, A-VMH24TV-1, A-VMH36QV-1, A-VMH48PV-1 ★ ★ Indoor unit EEPROM parameter error —— ★ Inverter module (IPM) malfunction Outdoor temperature sensor(coil sensor T3 or ambient temperature ★ E0,E4 sensor T4) malfunction or Outdoor unit EEPROM parameter error ★...
- Page 37 Service Manual - A-VMH18DV-1, A-VMH24TV-1, A-VMH36QV-1, A-VMH48PV-1 Indoor PCB/Display board communication error —— ★ 9 times 0b/Eb —— ★ 8 times Water-level alarm malfunction Refrigerant leakage detection —— ★ 7 times ★ 1 time —— Current overload protection ★ 2 times Outdoor ambient temperature sensor (T4 ) malfunction ...
-
Page 38: Outdoor Unit Display
Service Manual - A-VMH18DV-1, A-VMH24TV-1, A-VMH36QV-1, A-VMH48PV-1 7.3 Outdoor Unit Display 7.3.1 Outdoor Unit Point Check Function A check switch is included on the outdoor PCB. Push SW1 to check the unit's status while running. The digital display shows the following codes each time the SW1 is pushed. - Page 39 Service Manual - A-VMH18DV-1, A-VMH24TV-1, A-VMH36QV-1, A-VMH48PV-1 Display Remark Number Presses Normal display Displays running frequency, running state, or malfunction code Quantity of indoor units with working connection Actual data Display Number of indoor unit Outdoor unit running mode code Off: 0,Fan only: 1, Cooling: 2, Heating: 3, Forced cooling: 4.
- Page 40 Service Manual - A-VMH18DV-1, A-VMH24TV-1, A-VMH36QV-1, A-VMH48PV-1 units' amendatory capacity demand The frequency after the frequency limit The frequency sending to compressor control chip Indoor unit A evaporator outlet temperature (T Indoor unit B evaporator outlet temperature (T ℃ If the temperature is lower than -9 , the digital display shows “-9.”...
- Page 41 Service Manual - A-VMH18DV-1, A-VMH24TV-1, A-VMH36QV-1, A-VMH48PV-1 F indoor unit capacity F indoor unit capacity demand code F indoor unit evaporator outlet temperature (T F indoor unit room temperature (T F indoor unit evaporator temperature (T EXV open angle for F indoor unit Reason of stop EVI valve target angle(only for A- Actual data/4.
- Page 42 Service Manual - A-VMH18DV-1, A-VMH24TV-1, A-VMH36QV-1, A-VMH48PV-1 Indoor unit A capacity demand code Indoor unit B capacity demand code Norm code*HP Indoor unit C capacity demand code (9K: 1HP,12K: 1.2HP,18K: 1.5HP,24K:2.0HP) Indoor unit D capacity demand code Indoor unit E capacity demand code Outdoor unit amendatory capacity demand code The frequency corresponding to the total indoor units' amendatory capacity demand...
- Page 43 Service Manual - A-VMH18DV-1, A-VMH24TV-1, A-VMH36QV-1, A-VMH48PV-1 Bit4 show 2A, then Reserve. Bit5=1, Bit3=1, Bit3 Frequency limit caused by IPM. and Bit1=1. This means that Bit2 Frequency limit caused by T5. a frequency limit may be caused Bit1 Frequency limit caused by T3 by current, IPM Bit0 or T3.
- Page 44 Service Manual - A-VMH18DV-1, A-VMH24TV-1, A-VMH36QV-1, A-VMH48PV-1 7.3.3 Outdoor unit error display For other models, Display LED STATUS New indoor Error Outdoor unit EEPROM parameter error Communication malfunction between indoor and outdoor units Communication malfunction between IPM board and outdoor main control ——...
- Page 45 Service Manual - A-VMH18DV-1, A-VMH24TV-1, A-VMH36QV-1, A-VMH48PV-1 18DV-1, 28TV-1, 36QV-1, 48PV-1 Display LED STATUS EC 51 Outdoor EEPROM malfunction EL 01 Indoor / outdoor units communication error PC 40 Communication malfunction between IPM board and outdoor main board PC 08 Outdoor overcurrent protection PC 10 Outdoor unit low AC voltage protection...
-
Page 46: Diagnosis And Solution
Service Manual - A-VMH18DV-1, A-VMH24TV-1, A-VMH36QV-1, A-VMH48PV-1 7.4 Diagnosis and Solution 7.4.1 Indoor unit trouble shooting 7.4.1.1 Indoor unit EEPROM parameter error diagnosis and solution. Malfunction conditions Indoor or outdoor PCB main chip does not receive feedback from EEPROM chip. Potential causes Installation mistake ●... - Page 47 Service Manual - A-VMH18DV-1, A-VMH24TV-1, A-VMH36QV-1, A-VMH48PV-1 7.4.1.2 Communication malfunction between indoor and outdoor units diagnosis and solution. If indoor unit does not receive the feedback from outdoor unit Malfunction conditions during 120 seconds. Potential causes ● Wiring mistake ● Faulty indoor or outdoor PCB Trouble shooting:...
- Page 48 Service Manual - A-VMH18DV-1, A-VMH24TV-1, A-VMH36QV-1, A-VMH48PV-1 Indoor / outdoor units communication error Start: Power off , then Power on the A/C by the Breaker. (reconnect the power wire). Is it still displaying the error code? Check wiring on the outdoor and indoor terminal follow the wiring diagram.
- Page 49 Service Manual - A-VMH18DV-1, A-VMH24TV-1, A-VMH36QV-1, A-VMH48PV-1 Pic 1: Use a multimeter to test the DC voltage between 2(old: L2) port and S port of outdoor unit. The red pin of multimeter connects with 2 (old: L2) port while the black pin is for S port.
- Page 50 Service Manual - A-VMH18DV-1, A-VMH24TV-1, A-VMH36QV-1, A-VMH48PV-1 Pic 2: IPM (for 2 zone/ 3-zone) Operating Standby els)
- Page 51 Service Manual - A-VMH18DV-1, A-VMH24TV-1, A-VMH36QV-1, A-VMH48PV-1 Pic 2: IPM (for 4 zone&5 zone) Operating Standby Power PIC3: Main board LED when power on and unit standby. els)
- Page 52 Service Manual - A-VMH18DV-1, A-VMH24TV-1, A-VMH36QV-1, A-VMH48PV-1 PIC 4: Check point button, press 1 time for check how many indoor units are connected. 7.4.1.3 Zero-crossing signal detection error diagnosis and solution. Malfunction conditions When PCB does not receive zero crossing signal feedback for 4 minutes or the zero crossing signal time interval is abnormal.
- Page 53 Service Manual - A-VMH18DV-1, A-VMH24TV-1, A-VMH36QV-1, A-VMH48PV-1 7.4.1.4 Indoor fan speed malfunction diagnosis and solution. Malfunction conditions When indoor fan speed is too low (300RPM) for a certain period of time, the unit ceases operation and the LED displays a failure code. Potential causes Wiring mistake ●...
- Page 54 Service Manual - A-VMH18DV-1, A-VMH24TV-1, A-VMH36QV-1, A-VMH48PV-1 Index 1: 1: Indoor AC fan motor Power on and set the unit running in fan mode at high fan speed. After running for 15 seconds, measure the voltage of pin1 and pin2. If the value of the voltage is less than 100V (208~240V power supply)or 50V(115V power supply), the PCB must have problems and need to be replaced.
- Page 55 Service Manual - A-VMH18DV-1, A-VMH24TV-1, A-VMH36QV-1, A-VMH48PV-1 7.4.1.5 Temperature sensor malfunction diagnosis and solution. Malfunction conditions If the sampling voltage is lower than 0.06V or higher than 4.94V, the LED displays a failure. Potential causes Wiring mistake ● Faulty sensor ●...
- Page 56 Service Manual - A-VMH18DV-1, A-VMH24TV-1, A-VMH36QV-1, A-VMH48PV-1 7.4.1.6 Inverter module (IPM) malfunction diagnosis and solution. Malfunction conditions When the voltage signal that IPM send to compressor drive chip is abnormal, the display LED will show “P6” and AC will turn off. Potential causes ●...
- Page 57 Service Manual - A-VMH18DV-1, A-VMH24TV-1, A-VMH36QV-1, A-VMH48PV-1 IPM module protection Check whether the voltage range Check whether the input Regulate it to correct, then of P-N on IPM module is normal? power supply is correct? check whether the system DC277-356V for 18-27KBtu/h; 208-230V, 1N, 60Hz can work normally? DC277-410V for 36K-48KBtu/h...
- Page 58 Service Manual - A-VMH18DV-1, A-VMH24TV-1, A-VMH36QV-1, A-VMH48PV-1 7.4.1.7 Over-voltage or under-voltage protection diagnosis and solution. Outdoor unit low AC voltage protection Outdoor unit main control board DC bus high voltage protection Outdoor unit main control board DC bus high voltage protection /341 MCE error Voltage protection Check the voltage of outdoor unit power supply,...
- Page 59 Service Manual - A-VMH18DV-1, A-VMH24TV-1, A-VMH36QV-1, A-VMH48PV-1 7.4.1.8 Compressor drive malfunction diagnosis and solution The trouble shooting is same with one of IPM module protection. Water-level alarm malfunction 7.4.1.9 diagnosis and solution Malfunction conditions If the sampling voltage is not 5V, the LED will display the failure code.
- Page 60 Service Manual - A-VMH18DV-1, A-VMH24TV-1, A-VMH36QV-1, A-VMH48PV-1 7.4.1.10 Indoor units mode conflict Error Code P5(old model) or - -(new model) Malfunction conditions The indoor units cannot work cooling mode and heating at same time. Heating mode has a priority. Potential causes ●...
- Page 61 Service Manual - A-VMH18DV-1, A-VMH24TV-1, A-VMH36QV-1, A-VMH48PV-1 7.4.1.11 High temperature protection of IPM board diagnosis and solution High temperature protection of IPM High temperature protection of IPM board board Check whether the radiator is Check whether the radiator is Fix the radiator well Fix the radiator well fixed well ? fixed well ?
- Page 62 Service Manual - A-VMH18DV-1, A-VMH24TV-1, A-VMH36QV-1, A-VMH48PV-1 Communication error between the indoor PCB and display board 7.4.1.12 Power off, then restart the unit after 2 minutes. Does a problem remain? The unit is operating normally Check the wirings and connections Are all the Ensure proper connections connections good?
- Page 63 Service Manual - A-VMH18DV-1, A-VMH24TV-1, A-VMH36QV-1, A-VMH48PV-1 7.4.1.13 Refrigerant Leakage Detection Power off, then restart the unit 2 minutes later. Does a problem remain? Put your hands in front of the indoor air outlet. Is there cool air blowing out from Check the T2 sensor.
- Page 64 Service Manual - A-VMH18DV-1, A-VMH24TV-1, A-VMH36QV-1, A-VMH48PV-1 7.4.1.14 Communication malfunction between indoor two chips Shut off the power supply and turn it on 2 minutes later. Is it still displaying The unit is operating normally. the error code? Replace the indoor main PCB.
- Page 65 Service Manual - A-VMH18DV-1, A-VMH24TV-1, A-VMH36QV-1, A-VMH48PV-1 7.4.2 Outdoor unit trouble shooting 7.4.2.1 E0/ EC 51 (Outdoor unit EEPROM parameter error) diagnosis and solution Error Code E0/ EC 51 Malfunction PCB main chip does not receive feedback from EEPROM chip conditions Potential causes ●...
- Page 66 Service Manual - A-VMH18DV-1, A-VMH24TV-1, A-VMH36QV-1, A-VMH48PV-1 7.4.2.2 E2/ EL 01 (Communication malfunction between indoor and outdoor units) diagnosis and solution. Error Code E2/ EL 01 Malfunction Indoor unit does not receive the feedback from outdoor unit during 120 seconds or outdoor unit does not receive the conditions feedback from any one indoor unit during 180 seconds.
- Page 67 Service Manual - A-VMH18DV-1, A-VMH24TV-1, A-VMH36QV-1, A-VMH48PV-1 Communication malfunction between indoor and outdoor units Start: Power off , then Power on the A/C by the Breaker. (reconnect the power wire). Is it still displaying the error code? Check wiring on the outdoor and indoor terminal follow the wiring diagram.
- Page 68 Service Manual - A-VMH18DV-1, A-VMH24TV-1, A-VMH36QV-1, A-VMH48PV-1 Pic 1: Use a multimeter to test the DC voltage between 2(old: L2) port and 3 port of outdoor unit. The red pin of multimeter connects with 2 (old: L2) port while the black pin is for 3 port.
- Page 69 Service Manual - A-VMH18DV-1, A-VMH24TV-1, A-VMH36QV-1, A-VMH48PV-1 Pic 2: IPM board (for 2 zone/ 3-zone) Operating Standby els)
- Page 70 Service Manual - A-VMH18DV-1, A-VMH24TV-1, A-VMH36QV-1, A-VMH48PV-1 Pic 2: IPM (for 4 zone & 5 zone) Operating Standby Power PIC3: Main board LED when power on and unit standby. els)
- Page 71 Service Manual - A-VMH18DV-1, A-VMH24TV-1, A-VMH36QV-1, A-VMH48PV-1 PIC 4: Check point button, press 1 time for check how many indoor units are connected.
- Page 72 Service Manual - A-VMH18DV-1, A-VMH24TV-1, A-VMH36QV-1, A-VMH48PV-1 7.4.2.3 E3/ PC 40 (Communication malfunction between IPM board and outdoor main control board) diagnosis Error Code E3/ PC 40 Malfunction PCB main chip does not receive feedback from IPM module during 60 seconds. conditions Potential causes ●...
- Page 73 Service Manual - A-VMH18DV-1, A-VMH24TV-1, A-VMH36QV-1, A-VMH48PV-1 Remark: Use a multimeter to test the DC voltage between black pin and white pin of signal wire The normal value should be around 5V. Use a multimeter to test the DC voltage between black pin and red pin of signal wire.
- Page 74 Service Manual - A-VMH18DV-1, A-VMH24TV-1, A-VMH36QV-1, A-VMH48PV-1 7.4.2.4 E4/EC 50 (Outdoor temperature sensor (coil sensor T3,ambient sensor T4, Compressor discharge sensor T5、 、 indoor coil outlet pipe sensor T2B) malfunction) diagnosis and solution F1/F2/F3/F4/F5 (No.A,B,C,D,E Indoor unit coil outlet temp. sensor malfunction) diagnosis and solution.
- Page 75 Service Manual - A-VMH18DV-1, A-VMH24TV-1, A-VMH36QV-1, A-VMH48PV-1 7.4.2.5 E5/ PC 10/PC 11/PC 12 (Over-voltage or under-voltage protection) diagnosis and solution. Error Code E5/ PC 10/PC 11/PC 12 Malfunction conditions An abnormal voltage rise or drop is detected by checking the specified voltage detection circuit.
- Page 76 Service Manual - A-VMH18DV-1, A-VMH24TV-1, A-VMH36QV-1, A-VMH48PV-1 IPM board (for 2-zone /3-zone) Bridge rectifier (for 2-zone/3-zone) Remark: Measure the DC voltage between + and - port. The normal value should be 190V~250V. P(or E1/E2/E3)-N(GND) (for 2-zone/3-zone) Bridge rectifier (for 2-zone/3-zone) IPM Module (for 2-zone/3-zone)
- Page 77 Service Manual - A-VMH18DV-1, A-VMH24TV-1, A-VMH36QV-1, A-VMH48PV-1 IPM board (for 4-zone)
- Page 78 Service Manual - A-VMH18DV-1, A-VMH24TV-1, A-VMH36QV-1, A-VMH48PV-1 Bridge rectifier (for 5-zone) Remark: Measure the DC voltage between + and - port. The normal value should be 190V~250V. IPM board (for 5-zone) IPM Module (for 5-zone)
- Page 79 Service Manual - A-VMH18DV-1, A-VMH24TV-1, A-VMH36QV-1, A-VMH48PV-1 7.4.2.6 E6/ PC 0F (PFC module protection) error diagnosis and solution. Error Code E6/ PC 0F Malfunction When the voltage signal that PFC sends to main control board is abnormal, the display LED will show “E6” and AC will turn conditions off.
- Page 80 Service Manual - A-VMH18DV-1, A-VMH24TV-1, A-VMH36QV-1, A-VMH48PV-1 PFC module protection Check whether the connecting line between Connect it tightly, check main board and the PFC normal or not module(IPM module) is connected tightly Check whether the voltage range of P-N on IPM Replace the outdoor main board module is normal? DC277- 356V for 18-27KBtu/h;...
- Page 81 Service Manual - A-VMH18DV-1, A-VMH24TV-1, A-VMH36QV-1, A-VMH48PV-1 Inductance Two ports of the inductance...
- Page 82 Service Manual - A-VMH18DV-1, A-VMH24TV-1, A-VMH36QV-1, A-VMH48PV-1 7.4.2.7 E8/ EC 07 (Outdoor fan speed malfunction)/ EC 71(Over current failure of outdoor DC fan motor) diagnosis and solution Error Code E8/ EC 07/ EC 71 Malfunction conditions When outdoor fan speed keeps too low (300RPM) or too high(2400RPM) for certain time, the unit will stop and the LED will display the failure.
- Page 83 Service Manual - A-VMH18DV-1, A-VMH24TV-1, A-VMH36QV-1, A-VMH48PV-1 Index 1: 1. DC fan motor(control chip is inside fan motor) Power on and when the unit is in standby, measure the voltage of pin1-pin3, pin4-pin3 in fan motor connector. If the value of the voltage is not in the range showing in below table, the PCB must have problems and need to be replaced.
- Page 84 Service Manual - A-VMH18DV-1, A-VMH24TV-1, A-VMH36QV-1, A-VMH48PV-1...
- Page 85 Service Manual - A-VMH18DV-1, A-VMH24TV-1, A-VMH36QV-1, A-VMH48PV-1 2. DC Fan Motor (control chip is in PCB) Release the UVW connector. Measure the resistance of U-V, U-W, and V-W. If the resistances are not equal to each other, the fan motor may be experiencing problems and need to be replaced.
- Page 86 Service Manual - A-VMH18DV-1, A-VMH24TV-1, A-VMH36QV-1, A-VMH48PV-1 7.4.2.8 P1/PC 30 (High pressure protection) diagnosis and solution. Error Code P1/PC 30 Malfunction conditions If the sampling voltage is not 5V, the LED will display the failure. Potential causes ● Wiring mistake ●...
- Page 87 Service Manual - A-VMH18DV-1, A-VMH24TV-1, A-VMH36QV-1, A-VMH48PV-1 High pressure protection High pressure protection Whether the wiring Whether the wiring between the high pressure between the high pressure switch and main control switch and main control Connect it well Connect it well board is connected well or board is connected well or correctly...
- Page 88 Service Manual - A-VMH18DV-1, A-VMH24TV-1, A-VMH36QV-1, A-VMH48PV-1...
- Page 89 Service Manual - A-VMH18DV-1, A-VMH24TV-1, A-VMH36QV-1, A-VMH48PV-1 7.4.2.9 P2/PC 31 (Low pressure protection) diagnosis and solution. Error Code P2/PC 31 Malfunction conditions If the sampling voltage is not 5V, the LED will display the failure. Potential causes ● Wiring mistake ●...
- Page 90 Service Manual - A-VMH18DV-1, A-VMH24TV-1, A-VMH36QV-1, A-VMH48PV-1 Low pressure protection Low pressure protection Whether the wiring Whether the wiring between the low pressure between the low pressure protector and main control protector and main control Connect it well Connect it well board is connected well or board is connected well or correctly...
- Page 91 Service Manual - A-VMH18DV-1, A-VMH24TV-1, A-VMH36QV-1, A-VMH48PV-1...
- Page 92 Service Manual - A-VMH18DV-1, A-VMH24TV-1, A-VMH36QV-1, A-VMH48PV-1 7.4.2.10 P3/PC 08 (Current overload protection)/ PC 44(Outdoor unit zero speed protection)/PC 46(Compressor speed has been out of control)/PC 49(Compressor overcurrent failure) diagnosis and solution. Error Code P3/PC 08/PC 44/PC 46/PC 49 Malfunction conditions If the outdoor current exceeds the current limit value, the LED will display the failure.
- Page 93 Service Manual - A-VMH18DV-1, A-VMH24TV-1, A-VMH36QV-1, A-VMH48PV-1 Current protection of compressor Judge 1: Check whether the input current of the power supply wire is more than 15A(18K) (For 27K&hyper heat 18K, it is Replace outdoor main board 18.5A.For 36K&hyper heat 27K, it is 22.5A.For 48K&hyper heat 36K, it is 28A) Check whether the...
- Page 94 Service Manual - A-VMH18DV-1, A-VMH24TV-1, A-VMH36QV-1, A-VMH48PV-1...
- Page 95 Service Manual - A-VMH18DV-1, A-VMH24TV-1, A-VMH36QV-1, A-VMH48PV-1 7.4.2.11 P4/PC 06 (Temperature protection of compressor discharge) diagnosis and solution. Error Code P4/PC 06 Malfunction conditions When the compressor discharge temperature(T5) is more than 115℃ for 10 seconds, the compressor will stop restart till T5 is less than 90℃.
- Page 96 Service Manual - A-VMH18DV-1, A-VMH24TV-1, A-VMH36QV-1, A-VMH48PV-1 Temperature protection of Temperature protection of compressor discharge compressor discharge Check whether the Check whether the Check whether the Check whether the compressor discharge temp. is compressor discharge temp. is Stop leaking and add refrigerant Stop leaking and add refrigerant refrigerant is leak refrigerant is leak...
- Page 97 Service Manual - A-VMH18DV-1, A-VMH24TV-1, A-VMH36QV-1, A-VMH48PV-1 High temperature protection of High temperature protection of condenser Check the connection condenser Check the connection between temperature Correct the connection between temperature Correct the connection sensor and PCB. sensor and PCB. Check whether the Check whether the condenser temperature is condenser temperature is...
- Page 98 Service Manual - A-VMH18DV-1, A-VMH24TV-1, A-VMH36QV-1, A-VMH48PV-1 ● Faulty outdoor PCB Trouble shooting:...
- Page 99 Service Manual - A-VMH18DV-1, A-VMH24TV-1, A-VMH36QV-1, A-VMH48PV-1 IPM module protection Check whether the voltage range Check whether the input Regulate it to correct, then of P-N on IPM module is normal? power supply is correct? check whether the system DC277-356V for 18-27KBtu/h; 208-230V, 1N, 60Hz can work normally? DC277-410V for 36-48KBtu/h...
- Page 100 Service Manual - A-VMH18DV-1, A-VMH24TV-1, A-VMH36QV-1, A-VMH48PV-1 7.4. 2.14 . High temperature protection of compressor top(IDU P2/ODU P0/PC 02) Malfunction decision If the sampling voltage is not 5V, the LED will display the failure. conditions Supposed causes Faulty overload protector ●...
- Page 101 Service Manual - A-VMH18DV-1, A-VMH24TV-1, A-VMH36QV-1, A-VMH48PV-1 7.4. 2.15 Lack phase failure of outdoor DC fan motor(EC 72) Power off,then restart the unit The unit operates 2 minutes later.Is it still normally displaying the error code Check the wiring of fan motor.Are all the connections Correct the connections good?
- Page 102 Service Manual - A-VMH18DV-1, A-VMH24TV-1, A-VMH36QV-1, A-VMH48PV-1 7.4. 2.16 Outdoor compressor lack phase protection(PC43) Power off,then restart the unit The unit operates 2 minutes later.Is it still normally displaying the error code Check both ends of compressor connecting Correct the connections line .Are all the connections good? Check whether the three-...
- Page 103 Service Manual - A-VMH18DV-1, A-VMH24TV-1, A-VMH36QV-1, A-VMH48PV-1 7.4. 2.18 The cooling operation or heating operation does not operate. Potential causes ● Faulty 4-way valve Check of 4-way, please refer to part 5 in 9.5 Trouble Criterion Of Main Parts. 7.4.2.19 When cooling, heat exchanger of non-operating indoor unit frosts. When heating, non-operating indoor unit get warm.
- Page 104 Service Manual - A-VMH18DV-1, A-VMH24TV-1, A-VMH36QV-1, A-VMH48PV-1 7.4.2.17 Communication malfunction between adapter board and outdoor main control board(ODU Ed) Malfunction decision If outdoor PCB does not receive feedback from adapter board. conditions Supposed causes Wiring mistake ● Faulty PCB ● Power off, then restart the unit after 3 minutes.
-
Page 105: Trouble Criterion Of Main Parts
Service Manual - A-VMH18DV-1, A-VMH24TV-1, A-VMH36QV-1, A-VMH48PV-1 7.5 Trouble Criterion of Main Parts. 1.Temperature sensor checking Disconnect the temperature sensor from PCB, measure the resistance value with a tester. Temperature Sensors. Room temp.(T1) sensor, Indoor coil temp.(T2) sensor, Outdoor coil temp.(T3) sensor, Outdoor ambient temp.(T4) sensor, Compressor discharge temp.(T5) sensor. - Page 106 Service Manual - A-VMH18DV-1, A-VMH24TV-1, A-VMH36QV-1, A-VMH48PV-1 Appendix 1 Temperature Sensor Resistance Value Table (℃--K) K Ohm K Ohm K Ohm K Ohm ℃ ℃ ℃ ℃ 115.266 12.6431 2.35774 0.62973 108.146 12.0561 2.27249 0.61148 101.517 11.5000 2.19073 0.59386 96.3423 10.9731 2.11241 0.57683...
- Page 107 Service Manual - A-VMH18DV-1, A-VMH24TV-1, A-VMH36QV-1, A-VMH48PV-1 Appendix 2 Unit: ℃---K Discharge temp. sensor table 542.7 68.66 13.59 3.702 511.9 65.62 13.11 3.595 62.73 12.65 3.492 455.9 59.98 12.21 3.392 430.5 57.37 11.79 3.296 406.7 54.89 11.38 3.203 384.3 52.53 10.99 3.113 363.3...
- Page 108 Service Manual - A-VMH18DV-1, A-VMH24TV-1, A-VMH36QV-1, A-VMH48PV-1 Appendix 3: 10 11 12 13 14 15 16 17 18 19 20 21 22 ℃ 48 50 52 54 56 58 60 62 64 66 68 70 72 ℉ 23 24 25 26 27 28 29 30 31 32 33 34 35 ℃...
- Page 109 Service Manual - A-VMH18DV-1, A-VMH24TV-1, A-VMH36QV-1, A-VMH48PV-1 3. IPM continuity check Turn off the power, let the large capacity electrolytic capacitors discharge completely, and dismount the IPM. Use a digital tester to measure the resistance between P and UVWN; UVW and N. Normal Normal resistance Digital tester...
- Page 110 Service Manual - A-VMH18DV-1, A-VMH24TV-1, A-VMH36QV-1, A-VMH48PV-1 Position Resistance Value YDK53- YDK70-6FB YDK180-8GB YSK27-4G YSK68-4B YDK45-6B YSK25-6L 6FB(B) 56Ω±8% 24.5Ω±8% 317Ω±8% 145Ω±8% 345Ω±8% 627Ω±8% 88.5Ω±8% Black - (20℃) (20℃) (20℃) (20℃) (20℃) (20℃) (20℃) 76Ω±8% 19Ω±8% 252Ω±8% 88Ω±8% 150Ω±8% 374.3Ω±8% 138Ω±...
- Page 111 Service Manual - A-VMH18DV-1, A-VMH24TV-1, A-VMH36QV-1, A-VMH48PV-1 2 Turn off the power, use a digital tester to measure the resistance. The value should be 1.8~2.5 KΩ. 6.EXV check Disconnect the connectors.
- Page 112 Service Manual - A-VMH18DV-1, A-VMH24TV-1, A-VMH36QV-1, A-VMH48PV-1 Red Brown Blue Orange Yellow White Resistance to EXV coil Color of lead wire Normal Value Red- Blue Red - Yellow About 50Ω Brown-Orange Brown-White...
- Page 113 Service Manual - A-VMH18DV-1, A-VMH24TV-1, A-VMH36QV-1, A-VMH48PV-1 Red- Blue Brown-Orange Red - Yellow...
- Page 114 Service Manual - A-VMH18DV-1, A-VMH24TV-1, A-VMH36QV-1, A-VMH48PV-1 Brown-White...
-
Page 115: Disassembly Instructions
Service Manual - A-VMH18DV-1, A-VMH24TV-1, A-VMH36QV-1, A-VMH48PV-1 Disassembly Instructions Note: This part is for reference, the photos may have slight difference with your machine. 18DV-1, 28TV-1 (WD30 metal plate) No. Part name Procedures Remarks How to remove the panel Screws of Screws of top cover big handle... - Page 116 Service Manual - A-VMH18DV-1, A-VMH24TV-1, A-VMH36QV-1, A-VMH48PV-1 Screws of front panel 12) Remove two screws of terminal board, screws of water collector and fifteen screws of right-rear panel, and remove the right-rear Screws of front panel panel. Screws of front panel Screws of right-rear panel...
- Page 117 Service Manual - A-VMH18DV-1, A-VMH24TV-1, A-VMH36QV-1, A-VMH48PV-1 Screws of terminal board How to remove the fan assembly. assembly 5) Remove the top cover, right front side panel and ② ② front panel from item 1.step 6) Remove the hex nut fixing the fan.
- Page 118 Service Manual - A-VMH18DV-1, A-VMH24TV-1, A-VMH36QV-1, A-VMH48PV-1 8) Remove the cover of electrical control box cover. 9) Disconnect the fan motor ⑤ ⑤ connector CN14(5p,white) from the IPM board. Remove the fan motor after unfastening four fixing screws. How to remove the electrical ③...
- Page 119 Service Manual - A-VMH18DV-1, A-VMH24TV-1, A-VMH36QV-1, A-VMH48PV-1 pieces of connection wires and connectors between IPM and ④ PCB. CN1(5p,white) CN14(3p,white) CN3(red or brown) CN5(blue) ⑥ Remove the IPM board. Disconnect the connectors and wires connected from PCB and other CN17 CN15 CN7 CN18/CN19/CN22 parts.
- Page 120 Service Manual - A-VMH18DV-1, A-VMH24TV-1, A-VMH36QV-1, A-VMH48PV-1 expansion valve A,B,C (6p/6p/6p,red/red/red) CN25/CN23/CN20: S-A,S-B,S-C (3p/3p/3p,white/white/white) Wires: CN20 CN1/CN2: 4-way valve (blue-blue) CN23 CN25 CN5/CN6: Crankcase heating cable (red-red) CN3:L1-IN (red) CN4:L2-IN (black) Disconnect the grounding wire (yellow-green) after removing the big handle CN1/CN2 CN5/CN6 and the right-rear panel.
- Page 121 Service Manual - A-VMH18DV-1, A-VMH24TV-1, A-VMH36QV-1, A-VMH48PV-1 How to remove the compressor. Compressor 9) Perform work of item 1,2,3. 10) Remove the electrical control box and partition plate. ⑥ 11) Extract refrigerant gas. 12) Remove the sound insulation material and crankcase heating cable.
- Page 122 Service Manual - A-VMH18DV-1, A-VMH24TV-1, A-VMH36QV-1, A-VMH48PV-1 Reactor How to remove the reactor 1) Perform work of item 1,2 2) Unfasten the connector between IPM and reactor. 3) Remove two screws of cover of inductance, and remove the cover of Screws of cover of inductance...
- Page 123 Service Manual - A-VMH18DV-1, A-VMH24TV-1, A-VMH36QV-1, A-VMH48PV-1 How to remove the expansion expansion valve valve 5) Perform work of item 1,2. 6) Remove the electrical parts Expansion valves from item 3. 7) Remove the coils. 8) Detach the welded parts of expansion valves and pipes.
-
Page 124: 36Qv-1, 48Pv-1 (We30 Metal Plate)
Service Manual - A-VMH18DV-1, A-VMH24TV-1, A-VMH36QV-1, A-VMH48PV-1 36QV-1, 48PV-1 (WE30 metal plate) Part name Procedures Remarks How to remove the fan assembly assembly. Turn off the air ② ② conditioner. Turn off the power breaker. 2) Remove the screws of air outlet grille(8 screws) 3) Remove the hex nut fixing the fan. - Page 125 Service Manual - A-VMH18DV-1, A-VMH24TV-1, A-VMH36QV-1, A-VMH48PV-1 Screws of top cover 5) Remove the screws of top cover, and remove the top cover. (4 screws) 6) Remove the screws of front side panel, and remove the front side panel (1 screw) ⑥...
- Page 126 Service Manual - A-VMH18DV-1, A-VMH24TV-1, A-VMH36QV-1, A-VMH48PV-1 Panel plate How to remove the panel plate. 4) Remove big handle.(2 Screws screws) and water of big handle collector(2 screws) 5) Remove 2 screws of Screws of Water collector terminal board and 15 screws of right-rear panel, and remove the right-rear Screws of...
- Page 127 Service Manual - A-VMH18DV-1, A-VMH24TV-1, A-VMH36QV-1, A-VMH48PV-1 2) Disconnect the fan motor Connector(5p,white) from the IPM board. Disconnect following 8 pieces of connection wires and connectors between IPM and other parts. CN2(yellow) CN1(red) CN6(black) CN3(yellow) U、V、W(black) CN9(10p,white) 4) Remove the fixing screws then remove the IPM board.
- Page 128 Service Manual - A-VMH18DV-1, A-VMH24TV-1, A-VMH36QV-1, A-VMH48PV-1 CN8: Discharge temperature sensor (2p,white) CN12:Heatsink temperature sensor(2p,red) CN13 CN16 CN9:T3/T4 temperature sensor CN21 (2p/2p,white) CN29 CN37 CN11:T2B-A,B,C,D,E temperature CN8 CN12 CN9 CN11 sensor (2p/2p/2p/2p/2p,white) CN15/CN23/CN26/CN30/CN33: Electronic expansion valve (6p/6p/6p/6p/6p,red) CN37/CN29/CN21/CN16/CN13: S- A,S-B,S-C,S-D,S-E (3p/3p/3p/3p/3p,white) CN10: High and low pressure switch (2p/2p, white)
- Page 129 Service Manual - A-VMH18DV-1, A-VMH24TV-1, A-VMH36QV-1, A-VMH48PV-1 Compressor How to remove the compressor. 1) Perform work of item 1 step 5~6 and item 2.. ⑤ ⑤ 2) Extract refrigerant gas. 3) Remove the sound insulation material and crankcase heating cable. 4) Remove terminal cover of compressor, and disconnect wires of...
- Page 130 Service Manual - A-VMH18DV-1, A-VMH24TV-1, A-VMH36QV-1, A-VMH48PV-1 The 4-way How to remove the 4-way valve valve 6) Perform work of item 1 step 5~6 and item 2.. Coil 7) Extract refrigerant gas. Welded parts 8) Remove the electrical parts from item 3. 9) Remove fixing screw of the coil, and remove the coil.
- Page 131 Service Manual - A-VMH18DV-1, A-VMH24TV-1, A-VMH36QV-1, A-VMH48PV-1 PAGE INTENTIONALLY LEFT BLANK...
- Page 132 Service Manual - A-VMH18DV-1, A-VMH24TV-1, A-VMH36QV-1, A-VMH48PV-1 1900 Wellworth Ave., Jackson, MI 49203 • Ph. 517-787-2100 • www.marsdelivers.com 5/2022...
Need help?
Do you have a question about the Comfort-Aire Century A-VMH24TV-1 and is the answer not in the manual?
Questions and answers