Table of Contents
Advertisement
Available languages
Available languages
Quick Links
Advertisement
Chapters
Table of Contents

Subscribe to Our Youtube Channel
Related Manuals for Fox Spirit FQ320V2


Summary of Contents for Fox Spirit FQ320V2
- Page 1 FQ320V2 GUIDE D’UTILISATION Écran 32” WQHD FAST IPS 165 Hz...
- Page 2 Préface Tout a été mis en œuvre pour que les informations contenues dans ce manuel soient exactes. Néanmoins, le fabricant de cet appareil et le distributeur ne sauraient être tenus responsables de toute erreur ou omission dans ce manuel, ou de l’utilisation des informations contenues dans celui-ci.
- Page 3 DÉCLARATION DE CONFORMITÉ AU MARQUAGE CE Produit conforme à la réglementation en vigueur sur le territoire Européen, aux spécifications des directives EMC 2014/30/EU et directives LVD 2014/35/EU sur les basses tensions. Ce produit est conforme aux régulations de la directive RoHS (Restriction of Hazardous Substances).
-
Page 4: Table Of Contents
TABLE DES MATIÈRES INFORMATIONS DE SÉCURITÉ PRÉCAUTIONS ENTRETIEN ET NETTOYAGE REMARQUES SUR LES ÉCRANS LCD CONTENU DE L’EMBALLAGE VUE D’ENSEMBLE BOUTONS DU MONITEUR PORTS DU MONITEUR INSTALLATION DU PIED MONTAGE MURAL CONNECTIVITE ET OPTIONS ALIMENTATION SORTIE AUDIO SORTIE VIDÉO MISE SOUS TENSION ADAPTATIVE SYNC MENU OSD PRÉSENTATION... -
Page 5: Informations De Sécurité
INFORMATIONS DE SÉCURITÉ PRÉCAUTIONS • Avant d’installer le moniteur, lisez attentivement toute la documentation. • Pour réduire le risque d’incendie ou de choc électrique, n’exposez jamais le moniteur à la pluie ou à l’humidité. • N’essayez jamais d’ouvrir le boîtier du moniteur. Les hautes tensions dangereuses à l’intérieur du moniteur peuvent entraîner de graves blessures corporelles. -
Page 6: Entretien Et Nettoyage
ENTRETIEN ET NETTOYAGE • Pour des raisons de sécurité, éteindre et débrancher le moniteur avant de le nettoyer. • Nettoyez la surface du moniteur à l’aide d’un chiffon non pelucheux et non abrasif. Les tâches coriaces peuvent être éliminées à l’aide d’un chiffon humidifié et d’un produit de nettoyage spécifique doux. -
Page 7: Remarques Sur Les Écrans Lcd
REMARQUES SUR LES ÉCRANS LCD Les symptômes suivants sont normaux pour les moniteurs LCD et n’indiquent pas de problème. De par la nature de la lumière fluorescente, l’écran peut scintiller lors de la première ⚫ utilisation. Éteignez l’interrupteur d’alimentation et rallumez-le pour vous assurer que le scintillement ait disparu. -
Page 8: Contenu De L'emballage
CONTENU DE L’EMBALLAGE Image Description Quantité Moniteur Colonne du pied Base du pied Adaptateur d’alimentation (1,2 m) DC 24V, 5A Câble d’alimentation (1,2 m) AC 100-240V, 50/60 Hz, 2.5A Câble DP 1.2 (1,5 m) Tournevis M4*10... -
Page 9: Vue D'ensemble
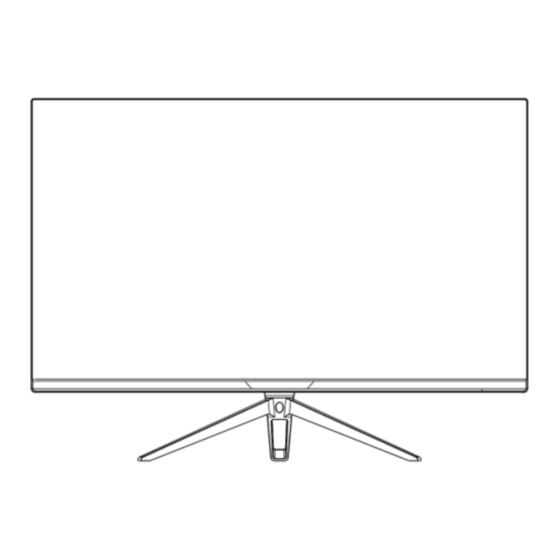
VUE D’ENSEMBLE BOUTONS DU MONITEUR Bouton de contrôle de l’éclairage arrière Boutons de commande OSD Bouton d’alimentation Sélection de la couleur du logo projeté et de l’éclairage arrière (indissociables) Sélection de la source d’entrée / Quitter le menu OSD Parcourir le Menu OSD Principal vers le haut / Augmenter la valeur de la fonction sélectionnée Parcourir le Menu OSD Principal vers le bas / Diminuer la valeur de la fonction sélectionnée... -
Page 10: Ports Du Moniteur
PORTS DU MONITEUR Connectez le câble d’alimentation pour alimenter votre Port d’alimentation moniteur. DC12V Alimentation 12V, 5A Insérez un connecteur HDMI dans le port de votre ordinateur et HDMI1 le second connecteur dans le port HDMI de votre moniteur. HDMI2 Adaptative , MPRT (Seulement à... -
Page 11: Installation Du Pied
INSTALLATION DU PIED 1. Sortez le moniteur en gardant son polystyrène de protection, placez-le doucement sur une table ou sur une surface plane. 2. Insérez la plaque de fixation du pied à l’arrière du moniteur. La plaquette émettra un clic une fois en place. Assurez-vous que le pied soit correctement fixé à l’arrière du moniteur avant de le manipuler. - Page 12 1. Insérez la partie supérieure, puis appuyez vers le bas 2. Un clic confirmera le bon verrouillage de la plaque de fixation à la colonne du pied. 3. Fixez la colonne du pied à la base à l’aide de la vis M4*10mm fournie, en tournant dans le sens des aiguilles d’une montre.
- Page 13 Bouton de verrouillage / déverrouillage rapide 4. Saisissez le pied et positionnez avec attention l’écran monté sur une table ou sur une surface plane.
-
Page 14: Montage Mural
MONTAGE MURAL Ce moniteur est fourni sans support de montage mural, sans vis ou autres accessoires de montage, qui doiventt être achetés séparément. La norme VESA est 100*100mm, la visserie nécessaire : 4x vis M4x10mm. 1. Sortez le moniteur en gardant son polystyrène de protection, placez-le doucement sur une table. -
Page 15: Sortie Audio
Adaptateur d’alimentation (1,5m) x1 Câble d’alimentation (1,2m x1) SORTIE AUDIO Branchez votre casque ou vos enceintes à l’aide de la prise jack 3,5 mm directement sur votre moniteur. Si des enceintes ou casques sont déjà branchés directement sur votre PC en même temps, les appareils audios ne produiront aucun son. -
Page 16: Sortie Vidéo
SORTIE VIDÉO HDMI Afin que le moniteur reçoive un signal HDMI, connectez le câble HDMI inclus sur la sortie du moniteur correspondante et reliez-le au port correspondant de votre machine. Câble HDMI non inclus Sortie HDMI... - Page 17 Afin que le moniteur reçoive un signal DP, connectez le câble DP inclus sur une sortie du moniteur correspondante et reliez-le au port correspondant de votre machine. Câble DP 1.4 1,5m (inclus) Sortie DP...
-
Page 18: Mise Sous Tension
MISE SOUS TENSION 1. Connecter les câbles aux ports correspondants de votre moniteur et de votre PC. Les sources seront détectées automatiquement. 2. Appuyez sur le bouton Power afin d’allumer le moniteur. L’indicateur LED s’affichera en bleu. 3. Pour changer la source d’entrée, appuyez sur le bouton pour entrer dans le menu Entrée. -
Page 19: Menu Osd
MENU OSD Présentation Le menu OSD peut être utilisé pour ajuster les réglages de votre appareil et apparait sur votre écran après l’avoir allumé et en pressant le bouton Le Menu Principal donne accès aux sous-menus suivants : ENTRÉE / Luminosité/Contraste/ COULEUR / IMAGE / AFFICHAGE / AUDIO / OSD / Appuyez sur le bouton pour entrer dans le menu OSD. -
Page 20: Fonctions Du Menu Osd
FONCTIONS DU MENU OSD ENTRÉE Sous-menu Options Description Aucune Passe en signal d’entrée DP2 Aucune Passe en signal d’entrée DP1 HDMI2 Aucune Passe en signal d’entrée HDMI2 HDMI1 Aucune Passe en signal d’entrée HDMI1 Luminosité/Contraste... - Page 21 Sous-menu Options Description Luminosité 0-100 Ajuste le niveau de luminosité Contraste 0-100 Ajuste le contraste de l’écran On/Off Active/Désactive la fonction COULEUR...
- Page 22 Sous-menu Options Description Gamma Définit une correction Gamma Standard, Format de Photo, Film Définit un mode d’affichage suivant l’activité l’image Jeux, FPS, RTS Normale, Définit la température des couleurs Chaude, Froide, Utilisateur : Température de Rouge Personnalise les composantes RVB pour la température de couleur Vert couleur personnalisée...
- Page 23 Super Off, Haut, Ajuste la résolution Resolution Moyen, Bas Dynamic Contrôle dynamique de la luminosité. Compense l’échelle Luminous On/Off de gris affichée et renforce son expression. Active ou Control désactive la fonction. AFFICHAGE Sous-menu Options Description Ration Écran large, 4:3 , Sélectionne les proportions d’affichage d’affichage 1:1, Auto...
- Page 24 Sous-menu Options Description Muet On, off Allume/éteint le mode muet Volume 0-100 Ajuste le volume audio...
- Page 25 Sous-menu Options Description Français, English, Chinese, Language Définit la langue de l’OSD SPANISH, PORTUGUESE, Italian ,Turkish OSDH-Position 0-100 Ajuste la position horizontale du menu OSDV-Position 0-100 Ajuste la position verticale du menu Transparence 0-100 Ajuste la transparence du menu du menu OSD Défini le temps d’affichage de l’OSD à...
-
Page 26: Boutons D'acces Rapide
Sous-menu Options Description Adaptative Sync On/Off Active ou désactive la fonction On/Off Permet d’activer / de désactiver l’option MPRT On/Off Permet d’activer / de désactiver l’option Flicker Free On/Off Permet d’activer / de désactiver l’option Permet d’activer / de désactiver l’éclairage arrière et la Light effect On/Off projection du logo (indissociable... - Page 27 Bouton accès rapide Réglage Auto Select. Accès rapide à la sélection de la source d’entrée Sélectionnez la source d’entrée avec les boutons flèches haut et bas. Accès rapide à la sélection du mode Appuyez sur le bouton flèche haut pour changer de mode. Ces modes d'affichage incluent Standard, Photo, Film, Jeux, FPS, RTS et peuvent être activés pour optimiser les réglages en fonction de votre utilisation.
-
Page 28: Spécifications Techniques
SPÉCIFICATIONS TECHNIQUES Fox SPIRIT FQ320 V2 Taille de la dalle 32’’ / 81 cm Diagonal Type de dalle Fast IPS Courbure Rétroéclairage Luminosité 400 cd/m² Contraste Ratio (Max.) 1000 :1 Taille des pixels 0.273(H)*0.273(H)mm Résolution WQHD 2560*1440@165Hz (DP), 144Hz (HDMI) - Page 29 Accessoires Câble d’alimentation 1x 1,2m 1x M4*10 Pour tout incident rencontré avec ce matériel, nous vous invitons à prendre contact avec le SAV FOX SPIRIT : support@fox-spirit.com Prise en charge des pixels défectueux selon la norme ISO 9241-307 Classe 1...
- Page 30 FQ320 V2 USER’S GUIDE 32” Monitor WQHD FAST IPS 165 Hz...
- Page 31 Preface Every effort has been made to ensure that the information in this document is accurate. However, the manufacturer and the distributor of this product assume no responsibility for any error, omission. Please preserve this manual for the life of the equipment. Congratulations on your purchase!
- Page 32 DECLARATION OF CE CONFORMITY MARKING Product in accordance with the applicable regulations on the European territory, with the requirements EMC 2014/30/EU and LVD 2014/35/EU. This product is RoHS (Restriction of Hazardous Substances) compliant. INFORMATION ABOUT RECYCLING This product bears the selective sorting symbol for waste electrical and electronic equipment (WEEE).
- Page 33 TABLE OF CONTENT SAFETY NOTICE PRECAUTIONS MAINTENANCE AND CLEANING SPECIAL NOTES ON LCD MONITORS PACKAGE CONTENT PRODUCT OVERVIEW MONITOR BUTTONS MONITOR PORTS STAND INSTALLATION WALL MOUNTING CONNECTIVITY OPTIONS POWER SUPPLY AUDIO OUTPUT VIDEO OUTPUT POWER UP ADAPTATIVE SYNC OSD MENU PRESENTATION OSD MENU FUNCTIONS SHORTCUTS...
-
Page 34: Safety Notice
SAFETY NOTICE PRECAUTIONS • Please read all the instructions carefully before using this product. • To reduce any fire or electrical risk, do not spill any liquids into the cabinet or use your monitor near water. • Do not remove monitor back cover. There are no user serviceable parts inside and opening or removing covers may expose you to dangerous shock hazards or other risks. -
Page 35: Maintenance And Cleaning
MAINTENANCE AND CLEANING • For safety reasons, turn off and unplug the display before cleaning. • Clean the panel surface with a lint-free, non-abrasive cloth. Treat stubborn stains with a wet cloth and a gentle specific solution. • Avoid using cleaning products containing alcohol or acetone. Use a cleaning solution specifically made for cleaning LCD screens. -
Page 36: Special Notes On Lcd Monitors
SPECIAL NOTES ON LCD MONITORS The following symptoms are normal with LCD monitor and do not indicate a problem. Due to the nature of the fluorescent light, the screen may flicker during initial use. Turn ⚫ off the Power Switch and then turn it on again to make sure the flicker disappears. You may find slightly uneven brightness on the screen depending on the desktop pattern ⚫... -
Page 37: Package Content
PACKAGE CONTENT Illustration Description Quantity Monitor Stand column Stand base Power Adapter (1,5 m) DC 12V, 5A Power cable (1,2 m) AC 100-240V DP 1.2 Cable (1,5 m) Screwdriver M4*10... -
Page 38: Product Overview
PRODUCT OVERVIEW MONITOR BUTTONS Light Control Button OSD Control Buttons Power Button Select the rear light and logo color Select signal source / Exit OSD. Go Up the Main OSD Menu / Increase the value of a selected item Go Down the Main OSD Menu / Decrease the value of a selected item Open the Main OSD Menu / Select sub-menus Turn the monitor On or Off... -
Page 39: Monitor Ports
MONITOR PORTS Insert the power cable to supply power to the monitor. Power Port DC 12V Power 12V, 5A lnsert one end of the HDMI cable into the HDMI output device HDMI1 connect the other end to the monitor's HDMI port. Support QHD 144Hz, HDR, Adaptative Sync, MPRT (Only HDMI2 workable at more than 75Hz) -
Page 40: Stand Installation
STAND INSTALLATION 5. Take out the monitor keeping the protective foam under, gently place it on a table or on a flat surface. 6. Insert the stand’s mounting plate at the rear of monitor. There will be a ‘’click’’ sound once the mounting plate is properly locked. - Page 41 2. Insert the upper part first, and press down 2. A ‘’click’’ sound confirms that the column stand’s mounting plate is properly locked to the back of monitor. 7. Lock the stand column to the stand base using the screwdriver and 1x M4*10 screw by turning it clockwise...
- Page 42 Note: The stand can easily be detached from the monitor by pushing the fast locking / unlocking button located on the back cover. Make sure that the monitor is lying on a flat surface before removing it. Fast locking / unlocking button 8.
-
Page 43: Wall Mounting
WALL MOUNTING The monitor comes without wall bracket, mounting screws or other accessories, that are to be purchased separately. The VESA norm is 100*100mm, the necessary screws: 4x screws M4x16-6mm. 3. Take out the monitor keeping it gently place it on a table. 4. -
Page 44: Connectivity Options
CONNECTIVITY AND OPTIONS POWER SUPPLY Connect the appropriate end the supplied power cable to the port of the power adapter, connect the other end of the power cable to the dedicated port of the monitor. And then, plug the power adapter’s plug into a wall outlet to power your monitor. Power Adaptor (1,5m) x1 Power Cable (1,2m x1) AUDIO OUTPUT... -
Page 45: Video Output
Headphones (not included) VIDEO OUTPUT HDMI In order for the monitor to receive the HDMI signal, connect one end of the included HDMI cable to the corresponding port of the monitor, and connect the other end to the corresponding port of the computer. HDMI Cable not included HDMI Out... - Page 46 In order for the monitor to receive the DP signal, connect one end of the included HDMI cable to the corresponding port of the monitor, and connect the other end to the corresponding port of the computer. DP Cable 1.2 1,5m included DP Output...
-
Page 47: Power Up
POWER UP 4. Connect the cables to the corresponding ports of your monitor and of your PC. The sources will be automatically detected. 5. Press on the Power button to turn the monitor on. 6. To change the Input source, press to enter the ‘’Input’’... -
Page 48: Osd Menu
OSD MENU Presentation OSD Menu may be used to adjust your monitor’s settings and appears on screen after turning on the monitor and pressing the button The Main Menu gives access to the following sub-menus: INPUT SOURCE, BRIGHTNESS/CONTRAST, COLOR SETTINGS, PICTURE QUALITY SETTINGS, DISPLAY, AUDIO, OSD, OTHER Press to enter the OSD Menu. -
Page 49: Osd Menu Functions
OSD MENU FUNCTIONS INPUT SOURCE Sub-menu Options Description None Switch to DP2 signal input None Switch to DP1 signal input HDMI2 None Switch to HDMI2 signal input HDMI1 None Switch to HDMI1 signal input... - Page 50 BRIGHTNESS/CONTRAST Sub-menu Options Description Brightness 0-100 Adjust display brightness Contrast 0-100 Adjust display contrast Activate/Desactivate the Dynamic Contrast Ratio On/Off Feature COLOR SETTINGS...
- Page 51 Sub-menu Options Description Gamma 2.0 Gamma Gamma 2.2 Change the display Gamma Value Gamma 2.4 Standard, Photo, Picture Mode Movie Game, FPS, Change the pre-set mode Normal,Warm, Cool, Change the color temperature Color User : 0~100 Temperature / Green Customizes the RGB components User Blue 0-100...
- Page 52 Sous-menu Options Description Sharpness 0-100 Change the display Sharpness value Response Time On/Off Turn the feature On or Off Low, Middle, High, Noise Reduction Select the Noise Reduction Value Super Low, Middle, High, Select the Super Reduction Value Resolution Dynamic Luminous On/Off Turn the feature On or Off...
- Page 53 Sub-menu Options Description Wide Aspect Ratio Change the image aspect ratio Screen,4:3,1:1,Auto AUDIO...
- Page 54 Sub-menu Options Description Mute On, off Turn on or off Mute. Volume 0-100 Change the audio volume. Sous-menu Options Description French, ENGLISH, , Language Change the OSD Menu display language SPANISH,...
- Page 55 PORTUGUESE, Italian , German, Polish, Dutch OSD H-Position 0-100 Adjust the horizontal position of the OSD Menu. OSD V-Position 0-100 Adjust the vertical position of the OSD Menu. 0-100 Change the OSD Transparency value Transparency OSD Timer Out 5-100 Normal, 90°, 180°, OSD Rotation 270°...
-
Page 56: Shortcuts
SHORTCUTS SHORTCUT Setting Auto Select Quick Access to the Input Source selection Press Up button to switch ECO modes. These modes include Standard,Photo, Movie, Game, FPS, RTS and can be used to optimize settings according to your activity. Standard mode is suitable for most activities Press Down button to switch Gameplus modes. -
Page 57: Technical Specifications
TECHNICAL SPECIFICATIONS Fox SPIRIT FQ320 V2 Screen size 32’’ / 81cm Diagonal Screen type Fast IPS Curvature Backlight Brightness 400 cd/m² Contrast Ratio (Max.) 1000 :1 Pixel Pitch 0.273(H)*0.273(H)mm Resolution WQHD 2560*1440@165Hz (DP), 144Hz (HDMI) Refresh rate Screen 165 Hz... - Page 58 Power Adaptor Cable 1x 1,5 m Power cable 1x 1,2m Screw 1x M4*10 Should there be a problem with this device, please contact FOX SPIRIT’s After-Sales department: support@fox-spirit.com Processing of the defective pixels according to ISO 9241-307 Classe 1 norm.
Need help?
Do you have a question about the FQ320V2 and is the answer not in the manual?
Questions and answers