Table of Contents
Advertisement
Quick Links
Advertisement
Table of Contents

Subscribe to Our Youtube Channel
Related Manuals for Fox Spirit PGN340


Summary of Contents for Fox Spirit PGN340
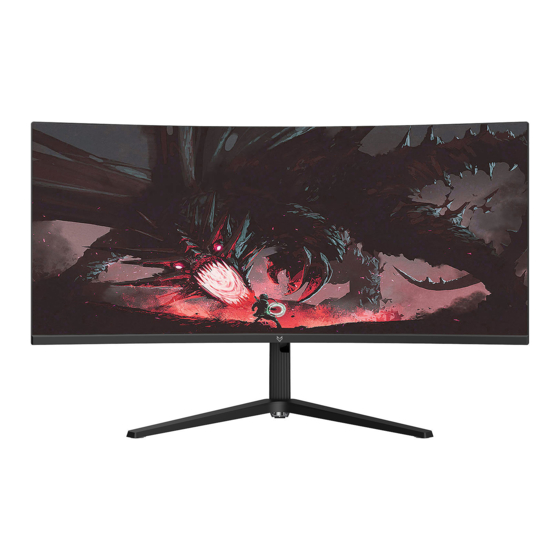
- Page 1 PGN340 USER’S GUIDE Curved Monitor UWQHD 34”...
- Page 2 Preface Every effort has been made to ensure that the information in this document is accurate. However, the manufacturer and the distributor of this product assume no responsibility for any error, omission. Please preserve this manual for the life of the equipment. Congratulations on your purchase!
- Page 3 DECLARATION OF CE CONFORMITY MARKING Product in accordance with the applicable regulations on the European territory, with the requirements EMC 2014/30/EU and LVD 2014/35/EU. This product is RoHS (Restriction of Hazardous Substances) compliant. INFORMATION ABOUT RECYCLING This product bears the selective sorting symbol for waste electrical and electronic equipment (WEEE).
-
Page 4: Table Of Contents
TABLE OF CONTENT SAFETY NOTICE PRECAUTIONS MAINTENANCE AND CLEANING SPECIAL NOTES ON LCD MONITORS PACKAGE CONTENT PRODUCT OVERVIEW MONITOR BUTTONS LED INDICATOR MONITOR PORTS STAND INSTALLATION CABLE MANAGEMENT WALL MOUNTING CONNECTIVITY OPTIONS VIDEO OUTPUT AUDIO OUTPUT POWER-UP ADAPTATIVE SYNC OSD MENU PRESENTATION OSD MENU FUNCTIONS SWITCH TO GAMEPLUS AND ECO MODE... -
Page 5: Safety Notice
SAFETY NOTICE PRECAUTIONS • Please read all the instructions carefully before using this product. • To reduce any fire or electrical risk, do not spill any liquids into the cabinet or use your monitor near water. • Do not remove monitor back cover. There are no user serviceable parts inside and opening or removing covers may expose you to dangerous shock hazards or other risks. -
Page 6: Maintenance And Cleaning
MAINTENANCE AND CLEANING • For safety reasons, turn off and unplug the display before cleaning. • Clean the panel surface with a lint-free, non-abrasive cloth. Treat stubborn stains with a wet cloth and a gentle specific solution. • Avoid using cleaning products containing alcohol or acetone. Use a cleaning solution specifically made for cleaning LCD screens. -
Page 7: Special Notes On Lcd Monitors
SPECIAL NOTES ON LCD MONITORS The following symptoms are normal with LCD monitor and do not indicate a problem. Due to the nature of the fluorescent light, the screen may flicker during initial use. Turn ⚫ off the Power Switch and then turn it on again to make sure the flicker disappears. You may find slightly uneven brightness on the screen depending on the desktop pattern ⚫... -
Page 8: Package Content
PACKAGE CONTENT (100-240~, 50/60Hz, 2.0A - 1.8m x1) -
Page 9: Product Overview
PRODUCT OVERVIEW MONITOR BUTTONS Menu button: Press to enter sub-menus/ quickly enter the main menu Down button: Press to move down in the menu/quickly enter the gameplus mode Up button: Press to move up in the menu/quickly enter the Eco mode Exit/hot key: Press to return to the previous menu/quickly switch the color format Power button: Press to turn on/off the monitor LED INDICATOR... -
Page 10: Monitor Ports
MONITOR PORTS Audio Out : Insert an audio jack connector into this port to receive the audio signal from your monitor. DP (x2): Insert one end of the DP cable into the DP output device connect the other end to the monitor's DP port. HDMI (x2): lnsert one end of the HDMI cable into the HDMI output device connect the other end to the monitor's HDMI port. - Page 11 3. Put the assembled stand and base assembly into the slot on the rear case, press the stand lightly to clip the shaft assembly into place, the locking button will click to ensure a tighten assembling. Hold the middle of the stand with hand and gently lift the monitor twice to make sure the monitor does not come loose.
-
Page 12: Cable Management
4. After assembly, simply hold the stand with hand to stand the monitor upright. Note: During standing of the whole monitor, do not press the liquid crystal screen with hand to avoid damage to the screen. CABLE MANAGEMENT 1. After the installation is complete, the monitor needs to be connected with the cables. As shown below, push up in the direction of the arrow, and then take out the bracket back cover. - Page 13 3. The back cover of the bracket is put back on the machine according to the reverse operation of step 1, and the cables are inserted into the corresponding machine ports.
- Page 14 ADJUSTING THE MONITOR Note: Maintain the stand base when adjusting the rotation angle / tilt angle or the height. Do not touch the screen while adjusting, cracks or damages could occur.
-
Page 15: Wall Mounting
WALL MOUNTING This monitor includes only the mounting screws for attaching to a wall mount. No wall brackets or related accessories are provided. 1. Open the carton package, take out the foam and put it flat on the table top. 2. - Page 16 4. Follow the instructions received with your wall mount, stand or accessory and install your monitor on the wall or wall mount as desired. Hang the assembled product on a hard wall. Do not pinch the screen with your hands during the hanging processe to avoid damaging the screen.
-
Page 17: Connectivity Options
CONNECTIVITY AND OPTIONS VIDEO OUTPUT Connect one end of the included HDMI/DP cable to the corresponding port of the monitor and connect the other end to the corresponding port of the computer. Audio output Connect your headphones or speakers using the 3,5 mm jack directly to your monitor. -
Page 18: Adaptative Sync
ADAPTATIVE SYNC To use this feature, you will need : 1. A computer equipped with the Adaptative Sync technology; 2. An HDMI / DP cable ; 3. Updated graphic drivers. Connect your computer and monitor with a DP/HDMI cable. After connecting, you may receive a prompt to enable the feature on your computer. -
Page 19: Osd Menu
OSD MENU PRESENTATION OSD Menu may be used to adjust your monitor’s settings and appears on screen after turning on the monitor and pressing the button. When using the monitor for the first time, settings will automatically adjust to optimal settings according to your computer’s configuration and parts. 1. - Page 20 3. Press to scroll through the functions. • Select the desired function, and press to enter the sub-menu. • Press to scroll through the sub-menus. And press to select and confirm the desired function. • Press to select one option, and press to confirm settings and exit from the current menu.
- Page 21 OSD MENU FUNCTIONS Maine Menu Sub-menu Options Description None Swap to DP signal None Swap to DP signal INPUT SOURCES HDMI1 None Swap to HDMI signal HDMI2 None Swap to HDMI signal Brightness 0~100 Adjust display brightness Contrast 0~100 Adjust display contrast BRIGHTNESS / Blacklevel 0~100...
- Page 22 LedMode Normal, off, flicker Choose a type of lighting for the rear LEDs Mute On, off Turn On/ Off the mute mode Volume 0-100 Adjust the audio volume AUDIO DP 1 / DP 2 Audio source Select the audio source HDMI 1 / HDMI 2 Multi-Window Off, PIP Mode, PBP...
- Page 23 MODES GAMEPLUS ET ECO 1. Press any of the buttons to activate the navigation window. 2. Press to switch to Gameplus. Depending on your needs in-game, chose the corresponding game icon. These game icons are primarily designed to optimize your aim during shooting games, though they can be used for other scenarios.
-
Page 24: Troubleshooting
TROUBLESHOOTING 48-165Hz. - Page 26 TECHNICAL SPECIFICATIONS Fox SPIRIT PGN340 DISPLAY Panel Size 34" / 86.36 cm Panel Type Curvature R1500 Backlight ELED Rear Led Yes, red Brightness 350 cd/m2 Typ. 320 cd/m2 min Contrast 3000 :1 Dynamic contrast 1000000 :1 ratio Pixel Pitch 0.2318(H)*0.2318(V) mm...
- Page 27 HDR 400 Ready ACCESSORIES 1x Câble HDMI 2.0 1,5m 1x Câble DP 1.4 1,5m Should there be a problem with this device, please contact FOX SPIRIT's After-Sales department : support@fox-spirit.com Handling of defective pixels according to ISO 9241-307 Class 1...
Need help?
Do you have a question about the PGN340 and is the answer not in the manual?
Questions and answers