Table of Contents
Advertisement
Quick Links
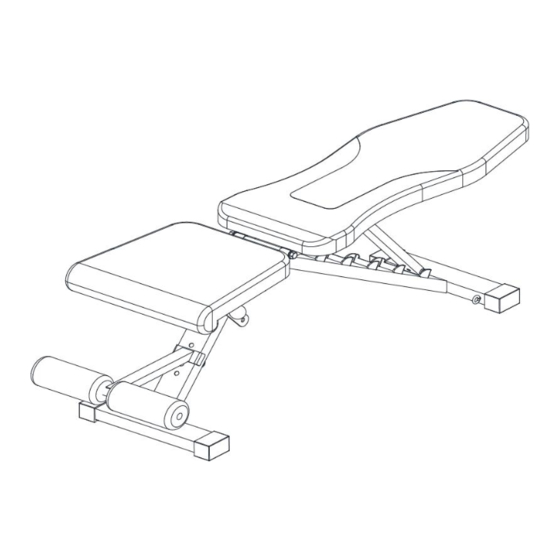
Multifunctional Training Bench
Assembly & User Instructions -
–
Important
Please read these instructions fully before assembly or use
These instructions contain important information which will help you get the best from your
equipment and ensure safe and correct assembly, use and maintenance.
If you need help or have damaged or missing parts, Contact the after-sale service: Block this email
as required by Amazon policy
Please keep for future reference
SCM-878
Issue 1 -15/10/15
Advertisement
Table of Contents

Related Manuals for SincMill SCM-878


Summary of Contents for SincMill SCM-878
- Page 1 Multifunctional Training Bench Assembly & User Instructions - SCM-878 Please keep for future reference – Important Please read these instructions fully before assembly or use These instructions contain important information which will help you get the best from your equipment and ensure safe and correct assembly, use and maintenance.
-
Page 2: Table Of Contents
Contents Safety Information Components - Parts Components - Fixings Assembly Instructions Fold Instruction Free area and training area Exercising Information Before you start Muscle chart Warming up and Cooling down Exercises Calf / Achilles stretch Exploded Parts Diagram Parts List Exercises Guarantee... -
Page 3: Safety Information
Safety Information Important – Please read fully before assembly or use To reduce the risk of serious injury, read the entire manual before you assemble or operate this Bench. In particular, note the following safety precautions. Assembly Do not use in any commercial, rental, or institutional setting. -
Page 4: Components - Parts
MUST read all instructions before using any fitness equipment. Argos assumes no responsibility for Components - Parts personal injury or property damage sustained by or through the use of this product. Please check you have all parts listed below Note: Some of the smaller components may be pre-fitted to larger components. -
Page 5: Components - Fixings
Components - Fixings Please check you have all fittings listed below Note: Some of the smaller components may be pre-fitted to the larger components. Please prepare an adjustable spanner by yourself when you are intend to assemble this machine. M10×165 Hex bolt x 2 M10×160 Hex bolt x 1 M8×42 Hex bolt x 8 M10×85 Hex bolt x 1... -
Page 6: Assembly Instructions
Assembly instructions Note: Tighten all bolts only 80%. Tighten all bolts 100% after all parts are assembled. Because some of the holes are oval, not tightening the bolt can adjust the part gap to avoid the bolt and hole from not aligning. It also prevents the backrest support rod from not fitting inside the adjustment recess. - Page 7 Assembly instructions The #5 has the silver metal liners facing outward, please note their orientation. Step 2 A.Attach the 2pcs backrest pad support(5#) as the diagram shows,Carefully align the holes and secure them with 1pcs M10*165 Hex bolt (17#),2pcsφ10 washer (22#)and 1 pc M10 Aircraft nut (21#).
- Page 8 Assembly instructions The #3 has the silver metal liners facing outward, please note their orientation. Step 3 Attach the seat pad incline support (4#)between the seat pad support(3#) and then insert the two holes of the seat pad support(3#). Attach the seat pad support(3#) as the diagram shows and secure them with 1pc M10*165 Allen bolt (17#),2pcs φ10 washer(22#) and 1 pc M10 Aircraft nut(21#).
- Page 9 Assembly instructions Step 4 Attach the seat pad (8#) onto the seat pad support(3#), Secure it with 4pcs M8×42 Hex bolt(20#) and 4pcsφ8 washer (23#).
- Page 10 Assembly instructions Step 5 Attach the backrest pad (10#) onto the backrest pad support, Secure them together with 4pcs M8 ×42 Hex bolt(20#) and 4pcsφ8 washer (23#).
- Page 11 Assembly instructions Step 6 Attach the Form Roll tube (7#) to the front support frame(1#) and secure it with the lock knob(16#). Push 2X Foam Roll(14#) from both ends separately. Select the desired seat pad incline with the lock pin(9#) when using.
-
Page 12: Fold Instruction
Fold Instruction To Fold & Store Your Bench Easy to keep and move after folding. -
Page 13: Free Area And Training Area
Free area and training area The free area should be no less than 0.6m greater than the training area in the directions from which the equipment is accessed. The free area must also include the area for emergency dismount. Where equipment is positioned adjacent to each other the value of the free area may be shared. -
Page 14: Exercising Information
Exercising Information Before starting to exercise Before you start How you begin your exercise program depends on your physical condition. If you have been inactive for several years, or are overweight, you must start slowly and increase your time on the equipment; increase a few repetitions per workout. -
Page 15: Muscle Chart
Exercising Information Muscle chart Aerobic Exercise Aerobic exercise improves the fitness of your lungs and heart - your body’s most important muscle. Aerobic exercise fitness is promoted by any activity that uses your large muscles (arms, legs, or buttock, for example). Your heart beats quickly and you breathe deeply. -
Page 16: Warming Up And Cooling Down Exercises
Exercising Information Warming up and Cooling down Exercises Each workout should include the following three parts: 1. A warm up, consisting of 5 to 10 minutes of stretching and light exercise. A proper warm up increases your body temperature, heart rate and circulation in preparation for exercise. 2. -
Page 17: Calf / Achilles Stretch
Exercising Information Calf / Achilles stretch With one leg in front of the other, reach forward and place your hands against a wall. Keep your back leg straight and your back foot flat on the floor. Bend your front leg, lean forward and move your hips toward the wall. -
Page 18: Exploded Parts Diagram
Exploded Parts Diagram... -
Page 19: Parts List
Exploded Parts List Part Description Qty. Part Description Qty. Ф19 End Cap Front Support Frame Rear Support Frame Foam Roll Seat pad support Bushing Seat pad incline support Lock knob Backrest pad support M10×165 Hex Bolt Backrest pad incline support M10×160 Hex Bolt Form Roll tube M10×85 Hex Bolt... -
Page 20: Guarantee
Guarantee Product Guarantee This product is guaranteed against manufacturing defects from a period of Year This product is guaranteed for twelve months from the date of original purchase. Any defect that arises due to faulty materials or workmanship will either be replaced, refunded or repaired free of charge where possible during this period by the dealer from whom you purchased the unit.
Need help?
Do you have a question about the SCM-878 and is the answer not in the manual?
Questions and answers