
Related Manuals for Candy MICG20GDFB


Summary of Contents for Candy MICG20GDFB
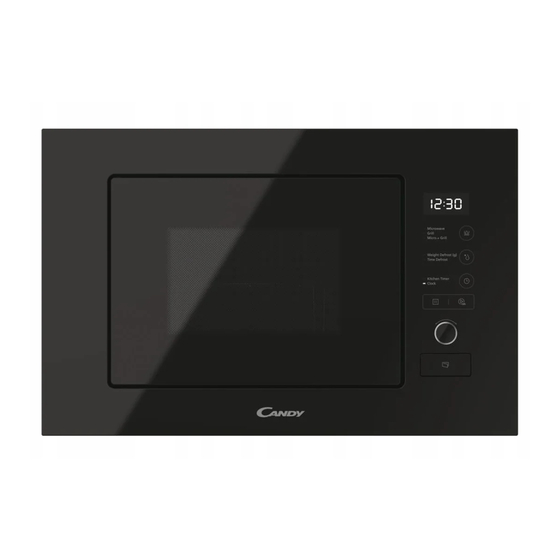
- Page 1 MICG20GDFB MICROWAVE OVENS USER INSTRUCTIONS HORNOS DE MICROONDAS INSTRUCCIONES DE USO...
-
Page 2: Precautions To Avoid Possible Exposure To Excessive Microwave Energy
If the apparatus is not maintained in a good state of cleanliness, its surface could be degraded and affect the lifespan of the apparatus and lead to a dangerous situation. Sp ec i f i c at i o n s Model: MICG20GDFB Rated Voltage: 230V~50Hz 1250W Rated Input Power(Microwave):... -
Page 3: Important Safety Instructions Warning
IMPORTANT SAFETY INSTRUCTIONS WARNING To reduce the risk of fire, electric shock, injury to persons or exposure to excessive microwave oven energy when using your appliance, follow basic precautions, including the following: 1. Read and follow the specific:"PRECAUTIONS TO AVOID POSSIBLE EXPOSURE TO EXCESSIVE MICROWAVE ENERGY". - Page 4 6. WARNING: It is hazardous for anyone other than a competent person to carry out any service or repair operation that involves the removal of a cover which gives protection against exposure to microwave energy. 7. WARNING: Liquids and other foods must not be heated in sealed containers since they are liable to explode.
- Page 5 16.Only use the temperature probe recommended for this oven.(for ovens provided with a facility to use a temperature-sensing probe.) 17.The microwave oven must be operated with the decorative door open. (for ovens with a decorative door.) 18.This appliance is intended to be used in household and similar applications such as: -staff kitchen areas in shops, offices and other working environments;...
-
Page 6: Read Carefully And Keep For Future Reference
23. The microwave oven is intended to be used built-in. 24. Steam cleaner is not to be used. 25. Surface of a storage drawer can get hot. 26. WARNING: The appliance and its accessible parts become hot during use. Care should be taken to avoid touching heating elements. -
Page 7: To Reduce The Risk Of Injury To Persons
To Reduce the Risk of Injury to Persons Grounding Installation DANGER Consult a qualified electrician or serviceman Electric Shock Hazard if the grounding instructions Touching some of the are not completely internal components can understood or if doubt exists cause serious personal as to whether the appliance injury or death. -
Page 8: Utensils Caution
CLEANING Be sure to unplug the appliance from the power supply. 1. Clean the cavity of the oven after using with a slightly damp cloth. 2. Clean the accessories in the usual way in soapy water. 3. The door frame and seal and neighbouring parts must be cleaned carefully with a damp cloth when they are dirty. -
Page 9: Materials You Can Use In Microwave Oven
Microwave-safe only. Use to cover food during cooking to retain moisture. Do not allow plastic wrap to touch food. Thermometers Microwave-safe only (meat and candy thermometers). Wax paper Use as a cover to prevent splattering and retain moisture. Materials to be avoided in microwave oven... -
Page 10: Turntable Installation
SETTING UP YOUR OVEN Names of Oven Parts and Accessories Remove the oven and all materials from the carton and oven cavity. Your oven comes with the following accessories: Glass tray Turntable ring assembly Instruction Manual A) Control panel B) Turntable shaft C) Turntable ring assembly D) Glass tray E) Observation window... -
Page 11: Installation And Connection
Installation and connection 1.This appliance is only intended for domestic use. 2.This oven is intended for built-in use only. It is not intended for counter-top use or for use inside a cupboard. 3. Please observe the special installation instructions. 4.The appliance can be installed in a 60cm wide wall- mounted cupboard. -
Page 12: Installation Instructions
Installation Instructions Please Read the Manual Carefully Before Installation ADJUST SCREW A SCREW B TRIM-KIT PLASTIC COVER Please Note Electrical connection The oven is fitted with a plug and must be only connected to a properly installed earthed socket. In accordance with the appropriate regulations, the socket must only be installed and the connecting cable must only be replaced by a qualified electrician. - Page 13 A. Built-in furniture The built-in cabinet shall not have a rear wall behind the appliance. Minimum installation height is 85cm. Do not cover ventilation slots and air intake points. (45) (45)
- Page 14 B. Inst all the Oven ADJUST SCREW A UPPER AIR TUNNEL ADJUST HEIGHT ADJUST SCREW A TRIM KIT TRIM-KIT 1. Fix ADJSUTSCREW A on the UPPER AIR TUNNEL of the oven, and then install the oven into the cabinet. Adjust the height of ADJUST SCREW A to keep 1mm gap between the ADJUST SCREW A and the top plane of cabinet.
-
Page 15: Control Panel
Control panel Stop/ Clear Start/ + 30Sec/ Confirm... - Page 16 Operation Instructions 1. Clock Setting When the microwave oven is electrified, the screen will display "0:00", buzzer will ring once. 1) Press " " twice , the hour figures will flash. 2) Turn " " to adjust the hour figures, the input time should be within 0--23. 3) Press "...
-
Page 17: Grill Cooking
3. Grill cooking Press " " twice, the screen will display " 0:30 ". Turn " " to set cooking time from 0:05 to 95:00. " " again to start cooking. Press Note : When the grill time is halfway completed, the oven will sound twice. In order to have better grilling results, you should flip the food over, close the door, and then press "... - Page 18 5. Kitchen Timer (1) Press " " once , the screen will display :00, clock indicator will be lighted. (2) Turn " " to enter the timer time. (The maximum cooking time is 95 minutes). (3) Press " " to confirm setting. (4) When the kitchen time is reached, clock indicator will go out.
- Page 19 3) Press " " to start defrosting. The defrost power is P30. It cannot be changed. Auto Menu 1) In waiting state, turn right " " to choose the menu, an d "A1" to "A8" will displa y. 2) Press " "...
- Page 20 Example: If you want to use auto menu to cook fish for 250g. 1) In waiting state, turn right " " to choose the menu, till "A " displays. 2) Press " " to confirm. 3) Turn " " to select the weight of fish till "250" displays. 4) Press "...
-
Page 21: Troubleshooting
Trouble shooting It is forbidden to run the unit without any food inside. It is very dangerous. According to Waste of Electrical and Electronic Equipment (WEEE) directive, WEEE should be separately collected and treated. If at any time in future you need to dispose of this product please do NOT dispose of this product with household waste. - Page 22 Si el aparato no se mantiene en buen estado de limpieza, su superficie podría degradarse y afectar a la vida útil del aparato y provocar una situación peligrosa. Especificaciones Modelo: MICG20GDFB Tensión nominal: 230 V~50 Hz Potencia nominal de entrada (microondas): 1250 W...
- Page 23 ADVERTENCIA DE SEGURIDAD IMPORTANTE Para reducir el riesgo de incendio, de descarga eléctrica, de lesiones personales o de exposición a un exceso de energía del horno microondas mientras utiliza el aparato, siga las precauciones básicas, incluyendo las siguientes: 1. Lea y siga las siguientes indicaciones: "PRECAUCIONES PARA EVITAR UNA POSIBLE EXPOSICIÓN A UN EXCESO DE ENERGÍA DE MICROONDAS".
- Page 24 6. ADVERTENCIA: Es peligroso que alguien que no sea una persona competente lleve a cabo cualquier tarea de mantenimiento o reparación que implique la retirada de una cubierta que proteja de la exposición a la energía de microondas. 7. ADVERTENCIA: No se deben calentar líquidos ni otros alimentos en recipientes cerrados, ya que pueden explotar.
- Page 25 16. Utilice únicamente la sonda de temperatura recomendada para este horno. (Para hornos provistos de una instalación para el uso de una sonda de detección de temperatura). 17. El horno microondas debe ser manejado con la puerta decorativa abierta. (Para hornos con puerta decorativa). 18.
- Page 26 25. La superficie de un cajón de almacenamiento se puede calentar. 26. ADVERTENCIA: El electrodoméstico y sus partes accesibles se calientan durante el uso. Debe prestarse atención para no tocar los elementos calientes. Los niños menores de 8 años deben mantenerse lejos del aparato o estar continuamente supervisados.
- Page 27 Instalación de la toma de tierra para reducir el riesgo de lesiones a las personas Consulte a un electricista PELIGRO o técnico cualificado si las Peligro de descarga eléctrica instrucciones de conexión Tocar algunos de los a tierra no se entienden componentes internos puede completamente o si existen causar graves lesiones...
- Page 28 LIMPIEZA Asegúrese de desenchufar el aparato de la red eléctrica. 1. Tras el uso, limpie la cavidad de cocinado del horno con un paño ligeramente húmedo. 2. Limpie los accesorios de la forma habitual con agua y jabón. 3. El marco y la junta de la puerta, así como las piezas adyacentes, deben limpiarse bien con un paño húmedo si están sucios.
- Page 29 Materiales que se pueden utilizar en el horno microondas Utensilios Observaciones Siga las instrucciones del fabricante. El fondo del plato para dorar debe Plato para dorar quedar de al menos 3/16 pulgadas (5 mm) por encima del plato giratorio. El uso incorrecto puede causar que el plato giratorio se rompa. Vajilla Solo apto para microondas.
-
Page 30: Instalación Del Plato Giratorio
CONFIGURACIÓN DEL HORNO Nombres de las piezas y accesorios del horno Saque el horno y todos los materiales de la caja y de la cavidad de cocción del horno. Su horno incluye los siguientes accesorios: Bandeja de cristal Aro de montaje del plato giratorio 1 Manual de instrucciones A) Panel de control B) Eje del plato giratorio... -
Page 31: Instalación Y Conexión
Instalación y conexión 1. Este aparato está destinado exclusivamente al uso en el ámbito doméstico. 2. Este horno está diseñado únicamente para ser encastrado. No ha sido diseñado para utilizarse en la encimera ni en el interior de un armario. 3. -
Page 32: Instrucciones De Instalación
Instrucciones de instalación Lea detenidamente el manual antes de efectuar la instalación TORNILLO DE AJUSTE A TORNILLO B TAPÓN DE PLÁSTICO DEL KIT DE MOLDURA A tener en cuenta Conexión eléctrica Este horno está equipado con una clavija y solo debe conectarse a un enchufe con toma de tierra debidamente instalado. - Page 33 A. Muebles empotrados El armario empotrado no deberá tener una pared trasera detrás del electrodoméstico. La altura mínima de instalación es de 85 cm. No cubra las ranuras de ventilación ni los puntos de entrada de aire.
- Page 34 B. Instalación del horno TORNILLO DE AJUSTE A TÚNEL DE AIRE SUPERIOR AJUSTAR ALTURA TORNILLO DE AJUSTE A KIT DE MOLDURA KIT DE MOLDURA 1. Fije el TORNILLO DE AJUSTE A en el TÚNEL DE AIRE SUPERIOR del horno y, a continuación, instale el horno en el mueble. ●...
-
Page 35: Panel De Control
Panel de control Microondas Grill Micro + Grill Descongelación por peso (g) Descongelación por tiempo Temporizador de cocina Reloj Parar/Borrar Inicio/ +30Seg/ Confirmar... -
Page 36: Instrucciones De Funcionamiento
Instrucciones de funcionamiento 1. Ajuste del reloj Cuando el horno microondas está conectado a la red eléctrica, la pantalla mostrará "0:00" y el zumbador sonará una vez. " hasta que parpadeen los dígitos correspondientes a las horas. 1) Pulse dos veces " 2) Gire "... - Page 37 3. Cocción con grill 1) Pulse " " dos veces; en la pantalla se muestra " 0:30 ". " para ajustar el tiempo de cocción de 0:05 a 95:00. 2) Gire " " para iniciar la cocción. 3) Vuelva a pulsar " Nota: Cuando haya transcurrido la mitad del tiempo de gratinado, el horno emitirá...
- Page 38 5. Temporizador de cocina " una vez, la pantalla mostrará 00:00, el indicador del reloj se iluminará. (1) Pulse " " para introducir la hora del temporizador. (El tiempo máximo de cocción es (2) Gire " de 95 minutos). (3) Pulse " "...
- Page 39 La potencia de descongelación es P30. No se puede cambiar. 9. Menú Auto " para elegir el menú, y se mostrarán "A1" 1) En estado de espera, gire a la derecha " a "A8". 2) Pulse " " para confirmar. "...
- Page 40 Ejemplo: Si desea utilizar el menú auto para cocinar el pescado para un peso de 250 g. " para elegir el menú, hasta que aparezca "A6". 1) En estado de espera, gire a la derecha " 2) Pulse " " para confirmar. 3) Gire "...
-
Page 41: Resolución De Problemas
Resolución de problemas Normal La recepción de radio y televisión puede verse afectada cuando el horno microondas está en funcionamiento. Se trata de una interferencia similar a la que causan los El horno microondas interfiere pequeños electrodomésticos, como la batidora, la en la recepción de la televisión aspiradora y el ventilador eléctrico.
Need help?
Do you have a question about the MICG20GDFB and is the answer not in the manual?
Questions and answers