Table of Contents
Advertisement
ORIGINAL INSTRUCTION MANUAL
PETROL LAWNMOWERS
LK 41 B&S
LK 46 SP 139 cc OHV
LK 41 99 cc OHV
LK 46 B&S – LK 46 SP B&S
LK 51 SP HW SM B&S
LK51SPHWSM 173 cc OHV
LK41 99 cc OHV
LK41SP 99 cc OHV
LK46SP 139 cc OHV
LK56SPHWSM 173 cc OHV
(mod.:
TZ41PB-BS450E / TZ46SB-139 / TZ46PB-BS450E / TZ46SB-BS450E / TZ51SF-BS625EX /
TZ51SF-173 / TZ41PB-99 / TZ41SB-99 / TZ46SB-139 / TZ56SF-173)
READ THIS MANUAL CAREFULLY BEFORE OPERATING THE MACHINE
KEEP THIS MANUAL FOR FUTURE REFERENCE
WARNING THIS SYMBOL INDICATES IMPORTANT SAFETY FEATURES
Serial number :
Advertisement
Table of Contents

Related Manuals for Lawn-King LK 41 B&S


Summary of Contents for Lawn-King LK 41 B&S
- Page 1 ORIGINAL INSTRUCTION MANUAL PETROL LAWNMOWERS LK 41 B&S LK 46 SP 139 cc OHV LK 41 99 cc OHV LK 46 B&S – LK 46 SP B&S LK 51 SP HW SM B&S LK51SPHWSM 173 cc OHV LK41 99 cc OHV LK41SP 99 cc OHV LK46SP 139 cc OHV LK56SPHWSM 173 cc OHV...
-
Page 3: Table Of Contents
CONTENT Introduction ..................................Safety instructions ................................Training Preparation Operation Maintenance and storage Product specifications ............................... Definition of symbols ..............................Description of components ............................Unpacking and set up instructions ........................... Removal from the carton Disconnect the spark plug Items required for assembly Assembly of the handle Cutting height adjustment Operating ..................................... -
Page 4: Introduction
INTRODUCTION Dear Customer, thank you for purchasing our petrol lawnmower . This manual explains how to use the machine correctly. Before using it, please read this operator’s manual carefully, to ensure correct and safe operation. Due to ongoing changes of specification, all the details of your machine may not agree with this manual. Your lawnmower is designed solely for grass cutting and collecting It should not be used for any other purpose and extreme caution should be exercised at all times. -
Page 5: Safety Instructions
SAFETY INSTRUCTIONS TRAINING Read the instructions carefully in its entirety before assembling this machine. Read, understand and follow all instructions on the machine and in the manual before the first operation. Be completely familiar with the controls and the proper use of the equipment. ... -
Page 6: Operation
Petrol is highly flammable !! Store fuel only in containers specifically designed and approved for this purpose ; Refuel outdoors only with the engine stopped and do not smoke while refueling ; Add fuel before starting the engine. Never remove the cap of the fuel tank or add petrol while the engine is running or when the engine is hot ;... -
Page 7: Maintenance And Storage
grass, and when transporting the lawn mower to and from the area to be mowed; Never operate the lawn mower with defective guards, or without safety devices, for example deflectors and/or grass catchers, in place; Disengage all blade and drive clutches before starting the engine; ... -
Page 8: Product Specifications
PRODUCT SPECIFICATIONS Model LK 41 B&S LK 46 SP 139 cc OHV LK 46 B&S LK46 SP B&S Factory model TZ41PB-BS450E TZ46SB-139 TZ46PB-BS450E TZ46SB-BS450E GARDIF model TOT911415 TOT911414 TOT911416 TOT911417 Drive Hand propelled Self-propelled Hand propelled Self-propelled Engine B&S 450E Series TZ1P65F Rally B&S 450E Series B&S 450E Series... - Page 9 LK51SPHWSM Model LK 51 SP HW SM B&S LK 41 99 cc OHV LK 41 SP 99 cc OHV 173 cc OHV Factory model TZ51SF-BS625EX TZ51SF-173 TZ41PB-99 TZ41SB-99 TOT911314 / GARDIF model TOT911418 TOT911413 TOT911469 TOT911497 Self Self Drive Hand propelled Self propelled Propelled propelled...
- Page 10 LK56SPHWSM Model LK41 99 cc OHV LK41SP 99 cc OHV LK46SP 139 cc OHV 173 cc OHV Factory model TZ41PB-99 TZ41SB-99 TZ46SB-139 TZ56SF-173 GARDIF model TOT911494 TOT911495 TOT911496 TOT911498 Drive Hand propelled Self propelled Self propelled Self propelled Engine TZ1P56F - Rally TZ1P56F - Rally TZ1P65F Rally TZ1P70F Rally...
-
Page 11: Definition Of Symbols
DEFINITION OF SYMBOLS DANGER ! WARNING ! ATTENTION 2 : Read the operating and service instruction manual carefully. Be thoroughly familiar with the controls and the proper use of the lawnmower. 3 : Projection hazard. Beware of thrown objects. 4 : Never mow while people, especially children or pets, are nearby. 5 &6 : When cleaning, repairing or inspecting, make certain the blade and all mowing parts have stopped. - Page 12 To start the mower, push the OPC brake control lever against the handle, then pull the engine starter cord. To stop the mower, release the OPC brake control lever. To start self propelling function, if the mower has this function (optional, depending on models), push the traction lever against the handle and keep it in this position.
-
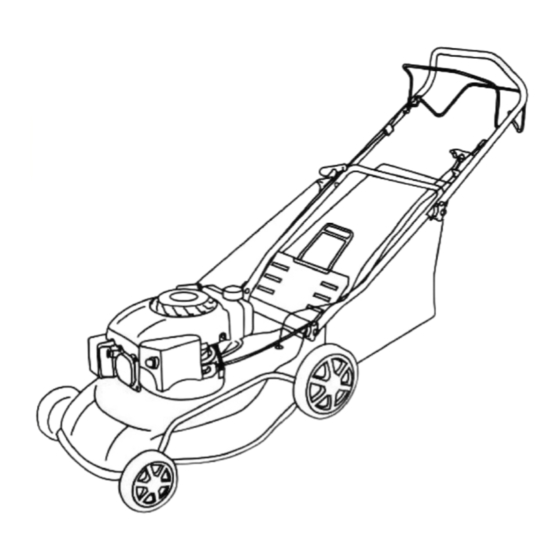
Page 13: Description Of Components
DESCRIPTION OF COMPONENTS 1 : Fly brake lever or Operators Presence Control (OPC) 2 : Upper handle 3 : Traction lever (not valid for LK41 / LK46) 4 : Throttle control (not valid for LK41 / LK41SP 99 cc OHV) 5 : Accelerator (speed) cable (not valid for LK41 99 cc OHV / LK41SP 99 cc OHV) 6 : Bolts... -
Page 14: Unpacking And Set Up Instructions
UNPACKING & SET UP INSTRUCTIONS Use of safety gloves is imperative while performing adjustment or repair of the machine A- Removal from the carton – WARNING Unpacking and completing the assembly should be done a flat, stable surface with enough space for machine handling and its packaging. -
Page 15: Assembly Of The Handle
– IMPORTANT This lawnmower is shipped without fuel and oil. Ensure machine is oiled and fuelled as detailed in this manual before starting the engine. – NOTE Reference to right hand or left hand side of the mower is observed from the rear of the machine (operating position) D- Assembly of the handle ... - Page 16 Assembly of the dashboard on handle (only valid for model LK56SPHWSM) Remove the plastic dashboard from the packaging carefully. Place the dashboard on upper handle, matching the corresponding holes (points 1, 2, 3 - picture 5) Clip now the dashboard on the handle and check it is secure. E- Cutting height adjustement The cutting height adjustment lever is situated above the right rear wheel.
-
Page 17: Operating
OPERATING KEEP HANDS AND FEET AWAY FROM THE REAR DISCHARGE ON THE CUTTING DECK A- Grass box assembly Put the metal frame inside the grass collector. Fix the bag onto the frame securely. Lift the rear flap / deflector and attach the grass collector in place, on rear of the mower. -
Page 18: Operating Without A Grass Collecting Box
D- Operating without a grass collecting box You can operate the lawnmower without grass collecting box nor mulching plug. You must nevertheless always ensure that the rear flap / deflector is always folded against the deck. Side discharge (only for model LK51SPHWSM / LK56SPHWSM) Lift the side discharge shutter on the cutting deck Attach the side discharge shutter in place, in the hooks provided for this purpose. -
Page 19: Starting And Stopping
STARTING AND STOPPING WARNING ! This lawnmower is sold without fuel and oil. Ensure machine is oiled and fuelled before starting the engine Do not overfill Never fill a fuel tank in a confined area, indoors or when the engine is running. Allow to cool for at least two minutes before refuelling A- Starting a cold engine 1. -
Page 20: Stop Engine And Blade
C- Stop engine and blade Move the throttle control onto « STOP » position (NOT valid for LK41 99 cc OHV / LK41SP 99 çç OHV). Release the Operators Presence Control (OPC) handle to stop the engine and blade. WARNING !!! ATTENTION : the blade continues to rotate after the engine is switched off. -
Page 21: Maintenance
MAINTENANCE Stop the engine and disconnect and earth the spark plug before any repairing or maintenance operations. Use of safety gloves is imperative while performing adjustment or repair of the machine Only use original spare parts (see Trenchex Power Products Ltd. webside). Complicated operations –not listed here below- must be carried out by a specialized technical assistance centre. -
Page 22: Deck Housing
E- Deck housing Remove all grass debris from the underside of the cutting deck immediately after each use. If allowed to accumula te, it will cause rust and corrosion and may prevent proper collection. Fertilisers and top dressings are extremely corrosive. Thoroughly clean the cutting deck immediately after use on treated grass and store them well away from corrosive materials. -
Page 23: Ec Declaration Of Conformity
EC DECLARATION OF CONFORMITY Serial number : pls see front page We Company, GARDIF SAS ZA de l’Europe 60, Avenue de Bruxelles 77310 St FARGEAU PONTHIERRY FRANCE The undersigner, Bruno VAN ELSLANDE, Managing Director the person authorized to compile the technical file : Yuxi WANG, quality engineer LAWN KING Declare that petrol mowers branded: models... - Page 24 Evaluated conformity as per Directive 2000/14/EC, Annex VI and Directive 2005/88/EC. Notified body: 0036 TUV SUD Industrie Service Gmbh Westendstrasse 199 • 80686 München • Deutschland For models LK 41 B&S (TZ41PB-BS450E) Measured noise power level m : 93.1 dB(A) Guaranteed noise power level g : 96 dB(A) For models LK 46 SP 139 cc / LK46SP 139 cc (TZ46SB-139)
Need help?
Do you have a question about the LK 41 B&S and is the answer not in the manual?
Questions and answers
Got belt to fit this one