Advertisement
Quick Links
FE N I E X .
2 019
INSTR U CTION M A NUA L
W E B. w w w.fe niex.com
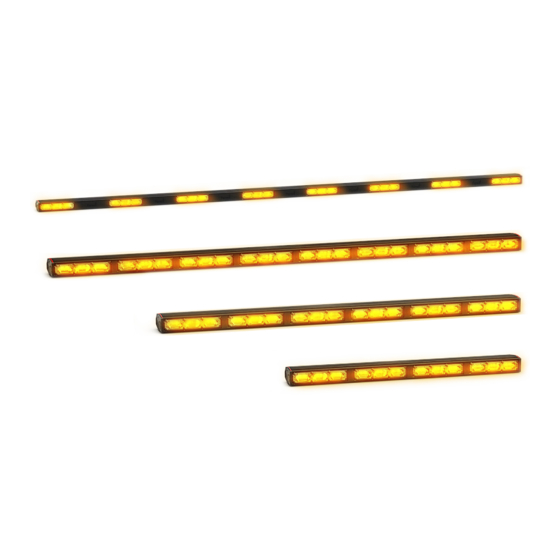
GEOSERIES
LIGHT STICKS
G-1418, G-1618, G-1818, G-1918
INSTRUCTION MANUAL
Feniex Product Copyrights This price List and the mentioned Feniex products include or describe copyrighted Feniex material. Laws in the
United States and other countries preserve for Feniex Industries and its licensors certain exclusive rights for copyrighted material, including the
exclusive right to copy, reproduce in any form, distribute and make derivative works of the copyrighted material. Accordingly, any copyrighted
material of Feniex and its licensors contained herein or in the Feniex products described in this Price List may not be copied, reproduced,
distributed, merged or modified,transmitted, transcribed, stored in retrieval system or translated into any language or computer language, in any
form or by any means, without prior written permission of Feniex Industries, Inc.. Feniex and the stylized Feniex logo are registered in the U.S.
Patent & Trademark Office.
Advertisement

Related Manuals for Feniex GEO G-1418


Summary of Contents for Feniex GEO G-1418
- Page 1 Feniex Industries, Inc.. Feniex and the stylized Feniex logo are registered in the U.S.
-
Page 2: Table Of Contents
TABLE OF CONTENTS V3.0 Safety Regulations Warranty Service after Expiration Copyright Feniex Product Copyright Equipment Dimensions Wiring Diagram Flash Patterns Mounting Instructions F E NIE X . 2019 I NST RU CTI ON MA NUA L WE B. w w w.feni ex .co m... -
Page 3: Safety Regulations Warranty
Feniex Product Copyrights product. The products described in this document are the property of Feniex Industries, Inc. It is Warranty furnished by express license agreement only Feniex Industries, Inc. warrants to the original... -
Page 4: Equipment Dimensions
EQUIPMENT DIMENSIONS V3.0 GEO 400 1.25in. 2.25in. GEO 600 1.25in. 2.25in. GEO 800 1.25in. 2.25in. GEO ROCKER PANEL 2.25in. F E NIE X . 2019 I NST RU CTI ON MA NUA L 1.25in. WE B. w w w.feni ex .co m... -
Page 5: Wiring Diagram
400, 600, 800 & ROCKER PANEL V3.0 WIRING DIAGRAM GEO 400, 600 & 800 and Rocker Panel GEO 400, 600, 800 and Rocker Panel Wiring Diagram Wire Color: Single Color: Black 12V ( - ) 12V ( + ) White Takedown* Pattern Change 12V Yellow... - Page 6 GEO 400, 600, 800 & ROCKER PANEL V3.0 WIRING INSTRUCTIONS Step 1: In order to power the unit, extend Step 5: For right arrow function, connect the red, 12V(+) wire to the 12V(+) post of the gray wire to a 12V(+) post (switch). the vehicle’s battery.
-
Page 7: Flash Patterns
FLASH PATTERNS V3.0 The flash patterns are listed in consecutive order of appearance. To select a certain flash pattern, start with a recognizable pattern and use the blue wire to cycle through patterns. Flash Patterns Single Color: GEO 400, 600, 800 & Rocker Panel Cluster Attack Night Ride... -
Page 8: Mounting Instructions
MOUNTING V3.0 Step 1: To mount to bracketry, remove the Figure 5.0 flat endcap and slide in provided bolts in the back of the frame. Screw the flat endcap back into the aluminum extrusion with the original screws and attach bolts and nuts with the brackets.