Advertisement
Quick Links
ASSEMBLY MANUAL
BRUKSANVISNING
NOTE: 50% TIGHTEN BEFORE FIXING ALL BOLTS
VIKTIGT – LÄS MONTERINGSANVISNINGARNA NOGA INNAN DU BÖRJAR
Please don't remove the batch code sticker at back side of this product!
Any feedback please take picture of this batch code for traceablity purpose
Ta inte bort ettiketten med batchnummer som finns på möbeln. Om du behöver hjälp med service eller reklamation av din möbel –
ange möblensbatchnummer till återförsäljaren, så att du kan få rätt reservdelar till just din möbel.
XX-YYWW
SKU: 166-1-54
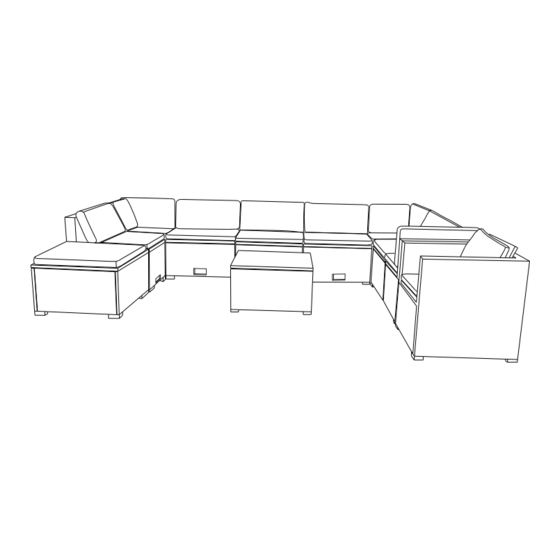
MODEL NAME: Steninge
MODELLNAMN:
Steninge
Konsumentkontakt
Arc E-commerce AB
Box 3124
13603 Haninge
Advertisement

Related Manuals for Lyfco Steninge 166-1-54


Summary of Contents for Lyfco Steninge 166-1-54
- Page 1 ASSEMBLY MANUAL BRUKSANVISNING NOTE: 50% TIGHTEN BEFORE FIXING ALL BOLTS VIKTIGT – LÄS MONTERINGSANVISNINGARNA NOGA INNAN DU BÖRJAR Please don’t remove the batch code sticker at back side of this product! Any feedback please take picture of this batch code for traceablity purpose Ta inte bort ettiketten med batchnummer som finns på...
- Page 2 Attention! Please note that at first all screws should be inserted slightly by hand! Turn 2-3 times so that the screw grips on its own and connects all elements loosely. The screws must only be driven in tightly when all elements are connected with each other in this way. Otherwise the setup won´t be possible.
- Page 3 Component Hardware 1 pc 38 pcs Back Frame Bolt M6x55mm 9 pcs 27 pcs Panel Frame B Bolt M6x40mm 5 pcs 51 pcs Bolt M6x30mm Panel Frame C 1 pc 88 pcs Seat Frame D Bolt M6x25mm 3 pcs Right Back Frame E 38 pcs Nut M6 3 pcs...
- Page 4 Component Hardware 5 pcs Back Pillow 3 pcs Seat Frame H 3 pcs Big Corner Pillow 1 pc Table Top Frame Small Corner Pillow 3 pcs 1 pc Stool Top Frame 1 pc Table Glass 44 pcs Sofa Leg Right Frame 1 pc 8 pcs Sofa Connector...
- Page 5 Component Component Front Frame 1 pc Back Frame 4 pcs 4 pcs Panel Frame 4 pcs Panel Frame Panel Frame 4 pcs Seat Frame 4 pcs 4 pcs Bottom Frame Fold Frame 1 pc Rain Cover 4 pcs...
- Page 6 STEP 1 STEP 2 Connect Back Frame (A1) & Seat Frame (D1) with Connect part from STEP 1, Panel Frame (P) & Bolt (1) & Nut M6 (5) Panel Frame (C2) with Bolt (3) STEP 3 STEP 4 Connect part from STEP 3 & Rain Cover (R), Connect part from STEP 2 &...
- Page 7 STEP 5 STEP 6 Connect part from STEP 5 & Sofa Leg (12) Connect part from STEP 4 & Bottom Frame (N1) with Bolt (4) with Bolt (2) Put on Seat Cushion (6) & Back Pillow (8) to complete.
- Page 8 STEP 7 STEP 8 Connect Right Frame E (E) & Left Frame (F) Connect Panel Frame B (B) & Panel Frame G (G) with Bolt (1) & Nut M6 (5) with Bolt (3) STEP 10 STEP 9 Connect part from STEPS 7 & 8 with Bolt (2) & (3) Connect part from STEP 9 &...
- Page 9 STEP 11 STEP 12 Connect part from STEP 10 & Sofa Leg (12) Put on Seat Corner Cushion (7), Big Corner with Bolt (4) Pillow (9), Small Corner Pillow (10) to complete STEP 14 STEP 13 Connect Table Top Frame (I), Panel Frame C (C) & Connect part from STEP 13 &...
- Page 10 STEP 16 STEP 15 Connect part from STEP 15 & Sofa Leg (12) Connect part from STEP 14 & Panel Frame C (C) with Bolt (4) with Bolt (3) STEP 17 Put on Table Glass (11) to complete table.
- Page 11 STEP 19 STEP 18 Connect Table Top Frame (I), Panel Frame C (C) & Connect part from STEP 18 & Panel Frame B (B) Panel Frame B (B) with Bolt (3) with Bolt (3) STEP 21 STEP 20 Connect part from STEP 20 & Sofa Leg (12) Connect part from STEP 19 &...
- Page 12 STEP 22 STEP 23 Put on Stool Cushion (16) to complete table. Connect 2pcs Panel Frame B(B) & Back Frame(A) with Bolt (3) . STEP 25 STEP 24 Connect part from STEP 23 & Panel Frame C (C) Connect part from STEP 24 & Seat Frame (D) with Bolt (3).
- Page 13 STEP 26 STEP 27 Overturn part from STEP 25, connect part from Put on Seat Cushion (6) & Back Cushion(8) STEP 25 & Sofa Leg (12) with Bolt (4) to complete the chair. STEP 29 STEP 28 Connect Back Frame (M) & Seat Frame (N) with Connect part from STEP 28 &...
- Page 14 STEP 30 STEP 31 Connect part from STEP 29 & Fold Frame (Q) Connect part from STEP 30 & Left Frame (L) with Bolt (1) & Nut (5) STEP 33 STEP 32 Connect part from STEP 31 & Front Frame (O) Connect part from STEP 32 &...
- Page 15 STEP 34 Put on Seat Cushion (17) & Back Cushion (18) to compelet armchair FINISH...
Need help?
Do you have a question about the Steninge 166-1-54 and is the answer not in the manual?
Questions and answers