Table of Contents
Advertisement
Quick Links
Advertisement
Table of Contents

Related Manuals for Akw M17


Summary of Contents for Akw M17
- Page 1 AKW M17 DIGIPUMP Installation and User Care Instructions Read ALL instructions carefully BEFORE installation and leave with the end user for future reference Read ALL instructions carefully BEFORE installation and leave with the end user for future reference...
-
Page 2: Table Of Contents
Declaration of Conformity Declaration of Conformity We declare that the AKW M17 DigiPump shower waste water pump conforms to the requirements of the EMC Directive 2014/30/EU, LVD Directive 2014/35/EU and the following harmonised European and national standards in the confirming assessment. -
Page 3: Box Contents -Plumbing Specification
Before you start... Before you start... 100mm MIN Confirm you have all the correct parts and tool required. Box contents 22mm 22mm Plumbing Specification Plumbing Specification This product is rated at IP45 and suitable to be installed in Zone 1, 2 or Zone 3 of a shower room only if these instructions are fully complied with. -
Page 4: Important Safety And Electrical Information
5 amp fuse. AD INSTRUCTIONS FORE INSTALLING The IP45 rating of the AKW pump product refers to the inner casing containing the electrical THIS PRODUCT control gear. The pump motor which operates at SELV is located within the outer cover. -
Page 5: Fixing Pump To Surface
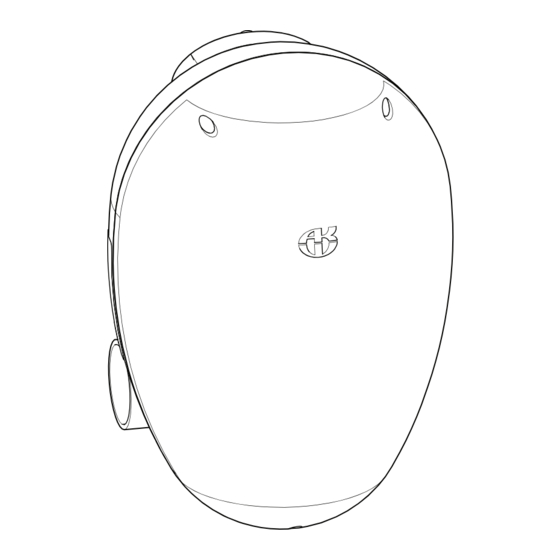
The pump unit must be located on a vertical surface with the inlet/outlet connections at the bottom of the unit in horizontal alignment, with the AKW case logo at the top. Pipe connections must be easily accessible and a clearance of 100mm... - Page 6 Fixing pump to surface Fixing pump to surface Remove front cover with a screwdriver. Disconnect pump motor cable. Remove pump assembly from the back plate to access the fixing holes. Fit to a finished surface. Using the back plate as a template mark the fixing holes.
- Page 7 The pipework to this high performance pump must be clamped down effectively, AKW advise and recommend you clamp pipework either side of joints, junctions or connections and at a maximum of 500mm between other supports.
-
Page 8: Plumbing Connections
Plumbing Connections Plumbing Connections For best performance locate within 1m (39in) of shower and minimise the number of lifts, bends and the length of all pipes connecting the pump to the waste outlet pipe. Note: Increased Head/Lift conditions will affect the pump’s performance. See product specifications. -
Page 9: Fitting Flow Sensor(S)
Fitting Flow Sensor(s) Fitting Flow Sensor(s) Depending on the installation install 1 or 2 filters and sensors to the shower water feed. Install the filter (Y-Pattern filter) in the correct flow orientation to the shower water supply line and then fit the flow sensor between the filter and the shower. -
Page 10: Electrical Installation
It must be wired into a fused, unswitched, fixed wiring connector fitted with a 5 amp fuse. The IP45 rating of the AKW pump product refers to the inner casing containing the electrical control gear. The pump motor which operates at SELV 32 DC (maximum) is located within the outer cover. - Page 11 Connecting the Flow Sensor(s) to the Digipump Connecting the Flow Sensor(s) to the Digipump Ensure sensor and filter are in an easily accessible location. Ensure all cables and plumbing are behind water resistant surfaces. The pump has two flow sensor cables, for mixer showers with two water feeds, both must be connected to the separate flow sensors.
-
Page 12: Pump Set Up
Bottom Button = DELAY (Sets shower start delay to run) Calibration The AKW DigiPump allows for precise pump control of the shower waste water by calculating the amount of water the shower is producing. It may be necessary to calibrate the pump once installation is complete (the pump may be over or under pumping). - Page 13 START DELAY (range 01 to 99) default 05 seconds briefly indicate the model and software version of From standby … the pump (00-M11 : 01:M17 : 02:M20) DELAY button The pump will then enter standby mode. Short press : value single increment Long press : value repeating increment In Standby Mode …...
-
Page 14: Commissioning
Commissioning Checks Commissioning Checks As a general precaution and check before installation, always ensure the supply pipework to the shower has been fully purged with at least 20 litres (2 buckets) of water through it before the flow sensor is installed. Any building debris in the water supply will adversely affect the sensor function and may also damage the shower heater/mixer. -
Page 15: Care And Maintenance
Care and Maintenance Care and Maintenance The integrity of the case and the RCD device operation should be checked quarterly as part of a routine safety and maintenance activity on the installation. If the case shows any mechanical damage the unit must be isolated electrically and the entire unit replaced. -
Page 16: Problem Solving
Problem Solving Problem Solving PUMP WILL START BUT DOES NOT PUMP WATER Check Non-Return Valves are Confirm plastic pipe inserts correctly fitted and oriented in the are NOT used. (see page 9 installation) inlet and outlet pipe connectors. Ensure all push-fit pipe connections are fully sealed and O-rings are not damaged or displaced. -
Page 17: Warranty
To be free of charge work must only be undertaken by AKW or our approved agents in the UK or the Republic of Ireland and with prior agreement. Any action taken under this warranty does not extend the stated 5-year expiry date. - Page 18 Notes Notes...
- Page 19 Notes Notes...
- Page 20 This information is provided on the condition that the person receiving it shall make his/her own tests to determine the suitability for the particular purpose. Failure to install this AKW product in accordance with supplied instructions or the making of unauthorised modifications will invalidate any warranty and may affect product safety.
Need help?
Do you have a question about the M17 and is the answer not in the manual?
Questions and answers