Advertisement
Available languages
Available languages
NOTICE D'INSTALLATION, D'INSTRUCTION & D'ENTRETIEN
CLIMATISEUR / POMPE A CHALEUR AIR/AIR
AIR CONDITIONER AIR/AIR HEAT PUMP INSTALLATION,
MANUAL DE INSTALACIÓN, INSTRUCCIONES Y MANTENIMIENTO
AIRE ACONDICIONADO/BOMBA DE CALOR/AIRE
MANUALE DI INSTALLAZIONE, ISTRUZIONE E MANUTENZIONE
CONDIZIONATORE D'ARIA / POMPA DI CALORE ARIA/ARIA
INSTALLATIONS-, BEDIENUNGS-& WARTUNGSANLEITUNG
INSTALLATIE-, INSTRUCTIE- EN ONDERHOUDSHANDLEIDING
AIRCONDITIONER/WARMTE- EN LUCHTPOMP
Réf. 409730
Réf. 409731
Réf. 409732
Réf. 409913
Réf. 409733
Réf. 409894
A
IRTON
INSTRUCTION & MAINTENANCE MANUAL
KLIMAGERAT / WARMEPUMPE LÜFTUNG
Type : SMVH09B-2A2A3NH
Type : SMVH12B-2A2A3NH
Type : SMVH18B-4A2A3NG
Type : SUV2-H18/3CFA-N + SMVH09B-2A2A3NG + SMVH09B-2A2A3NG
Type : SUV2-H18/3CFA-N + SMVH09B-2A2A3NG + SMVH12B-3A2A3NG
Type : SUV3-H24/3CGA-N + 2 x SMVH09B-2A2A3NG + SMVH12B-3A2A3NG
STARLIGHT - 255 bd de la Madeleine FR-06000 NICE
airton.fr
R32
V5 06-2022
Advertisement
Chapters

Subscribe to Our Youtube Channel
Related Manuals for Airton SMVH12B-3A2A3NG


Summary of Contents for Airton SMVH12B-3A2A3NG
- Page 1 Réf. 409913 Type : SUV2-H18/3CFA-N + SMVH09B-2A2A3NG + SMVH09B-2A2A3NG Réf. 409733 Type : SUV2-H18/3CFA-N + SMVH09B-2A2A3NG + SMVH12B-3A2A3NG Réf. 409894 Type : SUV3-H24/3CGA-N + 2 x SMVH09B-2A2A3NG + SMVH12B-3A2A3NG STARLIGHT - 255 bd de la Madeleine FR-06000 NICE V5 06-2022...
-
Page 3: Table Of Contents
SUMMARY ( FRANÇAIS ) NOTICE D’INSTALLATION, D’INSTRUCTION & D’ENTRETIEN CLIMATISEUR / POMPE A CHALEUR AIR/AIR ( ENGLISH ) AIR CONDITIONER / AIR/AIR HEAT PUMP INSTALLATION, INSTRUCTION & MAINTENANCE MANUAL p.28 ( ESPAÑOL ) MANUAL DE INSTALACIÓN, INSTRUCCIONES Y MANTENIMIENTO AIRE ACONDICIONADO/BOMBA DE CALOR/AIRE p.54 ( ITALIANO ) MANUALE DI INSTALLAZIONE, ISTRUZIONE E MANUTENZIONE... -
Page 4: Notice D'installation, D'instruction & D'entretien Climatiseur / Pompe A Chaleur Air/Air
Type : SUV2-H18/3CFA-N + SMVH09B-2A2A3NG + SMVH09B-2A2A3NG Réf. 409733 Type : SUV2-H18/3CFA-N + SMVH09B-2A2A3NG + SMVH12B-3A2A3NG Réf. 409894 Type : SUV3-H24/3CGA-N + 2 x SMVH09B-2A2A3NG + SMVH12B-3A2A3NG Nouveau gaz réfrigérant + PERFORMANT - DE POLLUTION Nous vous remercions d’avoir choisi notre climatiseur Pour assurer son bon fonctionnement et une utilisation de longue durée,... - Page 6 TABLE DES MATIERES TABLE DES MATIERES CONSIGNES INTRODUCTION & AVERTISSEMENTS CONCERNANT LE GAZ R32 REGLES DE SÉCURITÉ ET RECOMMANDATIONS POUR L’INSTALLATION REGLES DE SÉCURITÉ ET INTERDICTIONS p.10 OUTILS NECESSAIRES A L’INSTALLATION / LISTE DES COMPOSANTS p.11 AFFICHAGE UNITÉ INTERIEURE MURALE p.12 CHOIX DE L’EMPLACEMENT / INSTRUCTION D’INSTALLATION p.13...
- Page 7 CONSIGNES CONSIGNES • Prenez le temps de bien lire toutes les recommandations décrites dans cette notice et vous assurez de leur compréhension avant de procéder à l'installation de votre climatiseur. Conservez votre notice précieusement. • Notice sujette à des modifications et mise à jour selon l'évolution technologique de nos produits et selon la législation/ réglementation.
- Page 8 INTRODUCTION & AVERTISSEMENTS CONCERNANT LE GAZ R32 (1) Lisez le manuel d'utilisation (ISO 7000 – 0790) (2) Manuel d'utilisation; instructions de l'utilisateur (ISO 7000 – 1641) (3) Indicateur d'entretien; lisez le manuel technique (ISO 7000 – 1659) Le réfrigérant utilisé dans ces climatiseurs est un hydrocarbure R32. Le R32 est un gaz dit ”Ecologique”...
- Page 9 REGLES DE SECURITE ET RECOMMANDATIONS POUR L’INSTALLATION • Lire ce guide avant d'installer et utiliser l'appareil. • Ne pas installer l'appareil à une distance de moins de 50 cm de substances inflammables • Durant l'installation des unités intérieures et (alcool, etc.) ou de contenants sous pression extérieure l'espace de travail devrait être interdit (canettes d'aérosol).
- Page 10 REGLES DE SECURITE ET RECOMMANDATIONS POUR L’INSTALLATEUR • Ne pas entreprendre l'installation vous-même; • Ne jamais demeurer directement dans le courant toujours faire appel à du personnel technique d'air frais durant une période prolongée. Une qualifié. exposition directe et prolongée pourrait nuire à votre santé.
- Page 11 REGLES DE SECURITE ET INTERDICTIONS • Ne pas plier, tirer ou écraser le cordon d'alimenta- • Ne pas grimper sur l’appareil, ni placer des objets tion car cela pourrait l'endommager. lourds ou chauds sur le dessus. Les décharges électriques et les incendies sont habituellement causés par un cordon endommagé...
- Page 12 OUTILS NECESSAIRES A L’INSTALLATION Niveau à bulle Clé à molette Perforateur + tête de forage Tournevis Perceuse à percussion LISTE DES COMPOSANTS UNITÉ MURALE Unité murale Description Panneau avant Filtre à air Filtre optionnel (si installé) Affichage LED Capteur de signal Couvercle bloc d'alimentation Générateur ionisant (si installé) Déflecteurs...
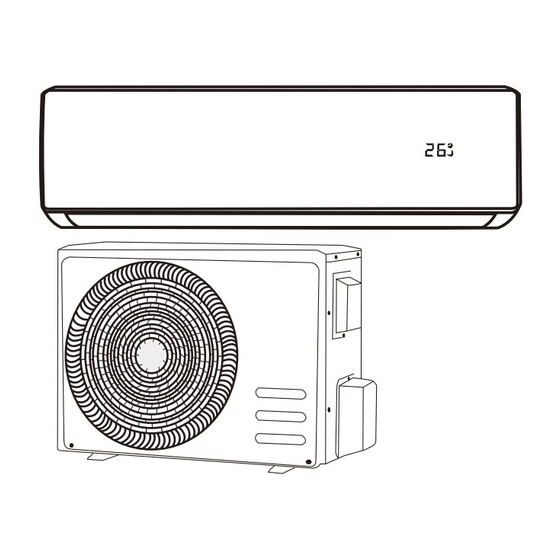
- Page 13 AFFICHAGE UNITE INTERIEURE MURALE Unité intérieure Panneau Entrée d’air Grille horizontale Filtre Sortie d’air Bouton aux. A chage Télécommande Pour certains modèles: Indicateur de température Indicateur Wi-Fi Pour certains modèles: Indicateur de température Indicateur Wi-Fi REMARQUE : Le produit réel peut être di érent des graphiques ci-dessus, veuillez vous référer au produit réel.
- Page 14 CHOIX DE L’EMPLACEMENT/ INSTRUCTION D’INSTALLATION N'installez pas l'unité dans les lieux suivants au risque de provoquer des dysfonctionnements. - Ne pas installer l'unité extérieure près d'une source de Plaque de fixation chaleur, de vapeur ou de gaz inflammable. - Un lieu contenant des appareils haute fréquence (machine à...
- Page 15 2. Percer les trous de fixation des vis sur le mur à l'aide Unités intérieures Bi split - ref 409733 (SMVH09B-2A2A3NG d'une perceuse à percussion (la mèche de la perceuse + SMVH12B-3A2A3NG) doit correspondre à la cheville à expansion en plastique), Unités intérieures Tri split - ref 409894 (2 x SMVH09B-2A2A3NG puis insérer les chevilles dans les trous.
- Page 16 INSTRUCTIONS D’INSTALLATION DE L’UNITE MURALE PREPARATIONS AU RACCORDEMENT DES LIAISONS FRIGORIFIQUES Les raccords peuvent être dirigés dans les 3 directions illustrées ci-contre. Lorsque les raccords sont dirigés dans la direction 1 ou 3, faites une entaille le long de la rainure de l'unité...
- Page 17 INSTRUCTIONS D’INSTALLATION DE L’UNITE EXTERIEURE ATTENTION : La procédure suivante doit être suivie avant de raccorder les tuyaux et le câblage électrique INSTALLATION DE L’UNITE EXTERIEURE Choisir l'emplacement de l'installation en fonction de la structure de la maison. Déterminer la meilleure position au mur ou au sol et allouer amplement d'espace pour l'entretien futur.
- Page 18 RACCORDEMENT FRIGORIFIQUE DES UNITES ATTENTION : Manipuler précautionneusement les raccordements. N’excercez pas de pliage trop souvent. Dérouler délicatement les raccordements. OPTION READYCLIM Aucun tirage au vide, ni équipement spécifique Se reporter à la notice d’installation dans le carton des raccordements READYCLIM 100% ÉCROUS MINUTES...
- Page 19 Tableau des correspondances des raccordements frigorifiques entre unités intérieures et extérieures Pour climatiseur Bi split ref 409733 - Type : SUV2-H18/3CFA-N Puissance Type Unité SMVH12B-3A2A3NG 3500 W - 12 K SMVH09B-2A2A3NG 2500 W - 9 K Pour climatiseur Tri split ref 409894 - Type : SUV3-H24/3CGA-N Puissance Modèle...
- Page 20 CONDITIONS POUR LE RACCORDEMENT ELECTRIQUE Précautions de sécurité Il est nécessaire de respecter les normes de sécurité électrique lors de l'installation des unités. En conformité avec les dispositions de sécurité locales, utiliser un circuit d'alimentation et un disjoncteur de courant aux normes.
- Page 21 RACCORDEMENT ELECTRIQUE DE(S) UNITE(S) INTERIEURE(S) A L’UNITE EXTERIEURE Veiller à couper l'alimentation électrique avant de procéder à toute intervention relative au circuit électrique ou à la sécurité. 1. Retirer le couvercle. 2. Raccorder le câblage au bornier électrique et s’assurer de la correspondance avec l’unité murale 3.
- Page 22 ETAPES FINALES Une fois terminé, attacher les tuyaux, le câblage et le tuyau de condensat à l'aide d’une bande isolante. 1. Bien placer les tuyaux, le câblage et le tuyau de condensat. 2. Bien isoler les raccords des liaisons frigorifiques à l’aide des manchons d’isolation et de la bande isolante. Colliers Liaison manchons...
- Page 23 ENTRETIEN ET NETTOYAGE Un entretien périodique est essentiel pour maintenir votre climatiseur efficace. ATTENTION : • Avant de procéder au nettoyage, veillez à arrêter le fonction- nement et à désactiver le disjoncteur. • Ne touchez pas aux ailettes en aluminium de l'unité intérieure.
- Page 24 FONCTIONS D'AUTO-REDÉMARRAGE & DE MISE EN MARCHE MANUELLE FONCTION D'AUTO-REDÉMARRAGE Le climatiseur enregistre automatiquement les derniers paramètres sélectionnés après une panne ou une chute de courant, et redémarre automatiquement avec ces paramètres lorsque le courant est rétabli. Cette fonction ne peut pas être désactivée. FONCTION DE MISE EN MARCHE MANUELLE La fonction de mise en marche manuelle permet la mise en route du climatiseur en cas de perte, d'indisponibilité...
- Page 25 PROTECTION Le dispositif de protection peut se déclencher et arrêter le climatiseur dans les conditions énumérées ci-dessous. Pour les modèles de conditions climatiques T1 MODÈLE Température air extérieur plus de 24ºC Chauffage Température air extérieur moins de -7°C Température de la pièce plus de 27ºC Température air extérieur plus de 43ºC Climatisation Température de la pièce moins de 21ºC...
- Page 26 GUIDE DE DEPANNAGE DÉFAILLANCE CAUSES POSSIBLES Panne de courant / prise non branchée Moteur de ventilateur interne ou externe endommagé Disjoncteur thermomagnétique du compresseur en problème L'appareil ne Protection thermique ou fusible défectueux fonctionne pas Connexions mal branchées ou prise débranchée L'opération s'arrête afin de protéger l'appareil La tension plus élevée ou plus basse que l'échelle de tension Fonction MINUTERIE -EN MARCHE activée...
- Page 27 QUESTIONS FREQUENTES ENTRETIEN : • Est ce que je peux faire une recharge de gaz moi-même ? Vous ne pouvez pas procéder à des recharges de gaz vous mêmes. Seuls les frigoristes et opérateurs qualifiés détenant l’attestation de capacité à manipuler des gaz sont autorisés à le faire •...
- Page 28 CES CAS NE SONT PAS DES PROBLEMES Les cas suivants ne sont pas des problèmes. Vous pouvez continuer à utiliser le climatiseur UNITE INTERIEURE Les volets ne se mettent pas à osciller immédiatement : • Le climatiseur règle la position des volets. Les volets devraient se mettre en mouvement sous peu. Le climatiseur cesse de générer un flux d'air lors du fonctionnement : •...
- Page 29 CONSIGNES POUR LA MISE AU REBUT Tout consommateur doit se responsabiliser concernant les changements rapides qui interviennent sur l'environnement et la couche d'ozone. Deux principales directives européennes ont été transposées dans le Droit Français pour réagir face aux importantes modifications intervenues sur notre environnement. La première de ces directives a pour but de valoriser et d'éliminer les piles et les accumulateurs usagés contenant des matières dangereuses.
-
Page 30: Air Conditioner / Air/Air Heat Pump Installation, Instruction & Maintenance Manual
Type : SUV2-H18/3CFA-N + SMVH09B-2A2A3NG + SMVH12B-3A2A3NG ref.409913 Type : SUV2-H18/3CFA-N + SMVH09B-2A2A3NG + SMVH09B-2A2A3NG ref.409894 Type : SUV3-H24/3CGA-N + 2 x SMVH09B-2A2A3NG + SMVH12B-3A2A3NG New refrigerant gas + HIGH PERFORMANCE - LOW POLLUTION Thank you for choosing our air conditioner... - Page 32 TABLE OF CONTENTS p.31 INSTRUCTIONS p.32 INTRODUCTION & WARNINGS REGARDING R32 GAS SAFETY RULES AND RECOMMENDATIONS FOR INSTALLATION p.33 SAFETY RULES AND PROHIBITIONS p.35 TOOLS REQUIRED FOR INSTALLATION / LIST OF COMPONENTS p.36 DISPLAY WALL UNIT p.37 CHOICE OF LOCATION / INSTALLATION INSTRUCTIONS p.38 p.39 WALL UNIT INSTALLATION INSTRUCTIONS...
-
Page 33: Instructions
INSTRUCTIONS • Please take the time to read and understand all the recommendations in this manual before installing your air conditioner. Keep your instructions in a safe place. • This leaflet is subject to change and update according to the technological evolution of our products and according to legislation/regulations. -
Page 34: Introduction & Warnings Regarding R32 Gas
INTRODUCTION & WARNINGS REGARDING R32 GAS (1) Read the user manual (ISO 7000 – 0790) (2) User manual; user instructions (ISO 7000 – 1641) (3) Maintenance indicator; read the technical manual (ISO 7000 – 1659) ATTENTION : fire hazard The refrigerant used in these air conditioners is a hydrocarbon R32. R32 is a so-called “environmentally friendly” gas because it is chlorine-free and ozone-friendly. -
Page 35: Safety Rules And Recommendations For Installation
SAFETY RULES AND RECOMMENDATIONS FOR INSTALLATION • Read this guide before installing and using the • Do not install the appliance within 50 cm of appliance. flammable substances (alcohol, etc.) or pressu- rised containers (aerosol cans). • While the indoor and outdoor units are being installed, the working area should be kept free of •... - Page 36 SAFETY RULES AND RECOMMENDATIONS FOR THE INSTALLER • Do not undertake to installation the appliance • Never stand directly in the cool air stream for a yourself; always use qualified technical personnel. prolonged period. Direct and prolonged exposure could damage your health. Special care should be •...
-
Page 37: Safety Rules And Prohibitions
SAFETY RULES AND PROHIBITIONS • Do not bend, pull or crush the power cord as this • Do not climb on the appliance or place heavy or may damage it. Electrical shocks and fires are hot objects on top. usually caused by a damaged cord. Only a qualified technician should replace a damaged power cord. -
Page 38: Tools Required For Installation / List Of Components
TOOLS REQUIRED FOR INSTALLATION Spirit level Adjustable spanner Drill + drill head Screwdriver Hammer drill LIST OF COMPONENTS WALL UNIT Wall unit Description Front panel Air filter Optional filter (if fitted) LED display Signal sensor Power supply cover Ionising generator (if installed) Deflectors Emergency button Wall unit information label... -
Page 39: Display Wall Unit
DISPLAY WALL UNIT Indoor unit Panel Air inlet Horizontal grid Filter Air outlet Aux. button Display Remote control For some models: Temperature indicator Wi-Fi indicator For some models: Temperature indicator Wi-Fi indicator NOTE: The actual product may di er from the above graphics, please refer to the actual product. -
Page 40: Choice Of Location/Installation Instructions
CHOICE OF LOCATION/INSTALLATION INSTRUCTIONS Do not install the unit in the following locations as this may cause malfunction. - Do not install the outdoor unit near a source of heat, Mounting plate steam or flammable gas. - A place containing high-frequency appliances (e.g. -
Page 41: Wall Unit Installation Instructions
Bi-split indoor units - ref 409733 (SMVH09B-2A2A3NG the plugs into the holes. + SMVH12B-3A2A3NG) 3. Fix the plate to the wall using the self-tapping screws Tri-split indoor units - ref 409894 (2 x SMVH09B-2A2A3NG... - Page 42 WALL UNIT INSTALLATION INSTRUCTIONS PREPARATIONS FOR THE CONNECTION OF REFRIGERATION LINES Fittings can be directed in the 3 directions shown opposite. When the fittings are pointing in direction 1 or 3, make a cut along the groove of the wall unit with a knife. Point the fitting towards the hole in the wall and join the connections with the insulating tape, condensate pipe and wiring.
-
Page 43: Outdoor Unit Installation Instructions
OUTDOOR UNIT INSTALLATION INSTRUCTIONS ATTENTION: The following procedure should be followed before connecting the pipes and electrical wiring. INSTALLATION OF THE OUTDOOR UNIT Choose the location of the installation according to the struc- ture of the dwelling. Determine the best position on the wall or floor and allow ample space for future maintenance. - Page 44 REFRIGERATION CONNECTION FOR UNITS ATTENTION: Handle connections carefully. Do not fold too often. Carefully unwind the connections. READYCLIM OPTION No vacuuming or special equipment Refer to the installation instructions in the READYCLIM connection box 100% NUTS MINUTES SECURE EASY FAST SECURE COMMISSIONING COMMISSIONING...
- Page 45 Table of refrigerant connections between indoor and outdoor units For Bi split air conditioner ref 409733 - Type: SUV2-H18/3CFA-N Power Type Unit SMVH12B-3A2A3NG 3500 W - 12 K SMVH09B-2A2A3NG 2500 W - 9 K For Tri split air conditioner ref 409894 - Type: SUV3-H24/3CGA-N...
-
Page 46: Conditions For Electrical Connection / Electrical Connection For Inside Unit(S)
CONDITIONS FOR ELECTRICAL CONNECTION Safety precautions Electrical safety standards must be complied with when installing the units. In accordance with local safety regulations, use a standard power supply and circuit breaker. Ensure that the power supply meets the requirements of the air conditioner. Unstable power supply or incorrect wiring may cause malfunctions. - Page 47 ELECTRICAL CONNECTION OF THE INDOOR UNIT(S) TO THE OUTDOOR UNIT Be sure to turn off the power supply before performing any work on the electrical system or safety. 1. Remove the cover. 2. Connect the wiring to the electrical terminal block and make sure it matches the wall unit. 3.
-
Page 48: Final Stages / Functional Test
FINAL STAGES Once completed, secure the pipes, wiring and condensate pipe with insulation tape. 1. Place the pipes, wiring and condensate pipe properly. 2. Insulate the refrigerant line fittings well with the insulation sleeves and insulation tape. Pipe Refrigeration insulation clamp line sleeves... -
Page 49: Maintenance
MAINTENANCE AND CLEANING Periodic maintenance is essential to keep your air conditioner efficient. ATTENTION: • Before cleaning, be sure to stop the operation and turn off the circuit breaker. • Do not touch the aluminium fins of the indoor unit. Touching these parts can cause injury WALL UNIT - DUST FILTER Clean once a month... -
Page 50: Auto-Restart & Manual Start Functions
AUTO-RESTART & MANUAL START FUNCTIONS AUTO-RESTART FUNCTION The air conditioner automatically saves the last selected settings after a power failure or drop, and automatically restarts with these settings when power is restored. This function cannot be disabled. MANUAL START FUNCTION The manual start function allows the air conditioner to be started if the remote control is lost, unavailable or malfunctions. -
Page 51: Protection
PROTECTION The protective device may trip and stop the air conditioner under the conditions listed below. For T1 weather models MODEL Outdoor air temperature over 24ºC Heating Outdoor air temperature under -7°C Room temperature over 27ºC Outdoor air temperature over 43ºC Air conditioning Room temperature below 21ºC Room temperature below 18ºC... -
Page 52: Troubleshooting Guide
TROUBLESHOOTING GUIDE FAULT POSSIBLE CAUSES Power failure/unplugged socket Internal or external fan motor damaged Problems with the thermomagnetic circuit breaker in the compressor The appliance Faulty thermal protection or fuse does not work Poorly connected or unplugged connections Operations have stopped in order to protect the appliance Voltage higher or lower than the voltage scale TIMER ON function activated Damaged printed circuit board... - Page 53 FREQUENTLY ASKED QUESTIONS MAINTENANCE: • Can I refill the gas myself? You cannot refill the gas yourself. Only refrigeration technicians and qualified operators holding a certificate of compe- tence to handle gases are authorised to do so. • After how long do I have to refill the gas? We advise you to take out a maintenance contract to check your air conditioner annually.
-
Page 54: After-Sales Service
THESE CASES ARE NOT PROBLEMS The following cases are not problems. You can continue to use the air conditioner. INDOOR UNIT The flaps do not start swinging immediately: • The air conditioner adjusts the position of the flaps. The shutters should start moving shortly. The air conditioner stops generating air flow during operation: •... -
Page 55: Instructions For Disposal
INSTRUCTIONS FOR DISPOSAL Every consumer must take responsibility for the rapid changes taking place in the environment and the ozone layer. Two main European directives have been transposed into French law to respond to major changes in our environment. The first of these directives aims to recover and dispose of spent batteries and accumulators containing hazardous materials. -
Page 56: Manual De Instalación, Instrucciones Y Mantenimiento Aire Acondicionado/Bomba De Calor/Aire
Tipo : SUV2-H18/3CFA-N + SMVH09B-2A2A3NG + SMVH12B-3A2A3NG ref.409913 Tipo : SUV2-H18/3CFA-N + SMVH09B-2A2A3NG + SMVH09B-2A2A3NG ref.409894 Tipo : SUV3-H24/3CGA-N + 2 x SMVH09B-2A2A3NG + SMVH12B-3A2A3NG Nuevo gas refrigerante + EFICIENTE - CONTAMINANTE Gracias por elegir nuestro aire acondicionado Para garantizar un buen funcionamiento y una larga vida útil, lea atentamente este manual antes de su uso y asegúrese de que solamente utiliza... - Page 58 ÍNDICE DE CONTENIDOS INSTRUCCIONES p.57 INTRODUCCIÓN Y ADVERTENCIAS SOBRE EL GAS R32 p.58 NORMAS DE SEGURIDAD Y RECOMENDACIONES DE INSTALACIÓN p.59 NORMAS DE SEGURIDAD Y PROHIBICIONES p.61 HERRAMIENTAS NECESARIAS PARA LA INSTALACIÓN / LISTA DE COMPONENTES p.62 PANTALLA UNIDAD INTERIOR DE PARED p.63 SELECCIÓN DE LA UBICACIÓN/ INSTRUCCIONES DE INSTALACIÓN p.64...
-
Page 59: Instrucciones
INSTRUCCIONES • Por favor, tómese el tiempo necesario para leer y comprender todas las recomendaciones de este manual antes de instalar el aire acondicionado. Guarde sus instrucciones en un lugar seguro. • Este folleto está sujeto a cambios y actualizaciones en función de la evolución tecnológica de nuestros productos y de la legislación/reglamentación. -
Page 60: Introducción Y Advertencias Sobre El Gas R32
INTRODUCCIÓN Y ADVERTENCIAS SOBRE EL GAS R32 (1) Lea el manual del usuario (ISO 7000 - 0790) (2) Manual de usuario; instrucciones de uso (ISO 7000 - 1641) (3) Indicador de mantenimiento; lea el manual técnico (ISO 7000 - 1659) ATENCIÓN: peligro de incendio El refrigerante utilizado en estos aires acondicionados es un hidrocarburo R32. -
Page 61: Normas De Seguridad Y Recomendaciones De Instalación
NORMAS DE SEGURIDAD Y RECOMENDACIONES DE INSTALACIÓN • Lea esta guía antes de instalar y utilizar el aparato. • No instale el aparato a menos de 50 cm de sustancias inflamables (alcohol, etc.) o recipientes • Durante la instalación de las unidades interiores a presión (latas de aerosol). - Page 62 NORMAS DE SEGURIDAD Y RECOMENDACIONES PARA EL INSTALADOR • No realice la instalación usted mismo; recurra • No permanezca nunca directamente en la siempre a personal técnico cualificado. corriente de aire frío durante un período prolongado. Una exposición directa y prolongada •...
-
Page 63: Normas De Seguridad Y Prohibiciones
NORMAS DE SEGURIDAD Y PROHIBICIONES • No doble, tire o aplaste el cable de alimentación, • No se suba al aparato ni coloque objetos pesados ya que podría dañarlo. o calientes encima. Las descargas eléctricas y los incendios suelen estar causados por un cable dañado. Solo un •... -
Page 64: Herramientas Necesarias Para La Instalación / Lista De Componentes
HERRAMIENTAS NECESARIAS PARA LA INSTALACIÓN Nivel de burbuja Llave inglesa Perforador + cabezal de perforación Destornillador Taladro de percusión LISTA DE COMPONENTES UNIDAD DE PARED Unidad de pared N.º Descripción Panel frontal Filtro de aire Filtro opcional (si está instalado) Pantalla LED Sensor de señales Cubierta de la fuente de alimentación... -
Page 65: Pantalla Unidad Interior De Pared
PANTALLA DE LA UNIDAD INTERIOR DE PARED Unidad interior Panel Entrada de aire Rejilla horizontal Filtro Salida de aire Botón auxiliar Pantalla Mando a distancia Para algunos modelos: Indicador de temperatura Indicador Wi-Fi Para algunos modelos: Indicador de temperatura Indicador Wi-Fi NOTA: El producto real puede diferir de los grá... -
Page 66: Selección De La Ubicación/ Instrucciones De Instalación
ELECCIÓN DE LA UBICACIÓN/INSTRUCCIONES DE INSTALACIÓN No instale la unidad en los siguientes lugares, ya que puede causar un mal funcionamiento. - No instale la unidad exterior cerca de una fuente de calor, Placa de montaje vapor o gas inflamable. - Un lugar que contenga equipos de alta frecuencia (por ejemplo, una máquina de soldar o un equipo médico). -
Page 67: Instrucciones De Instalación De La Unidad De Pared
2. Perfore los agujeros de los tornillos en la pared con un Unidades interiores bi split - ref 409733 (SMVH09B-2A2A3NG taladro de percusión (la broca debe coincidir con el taco + SMVH12B-3A2A3NG) de expansión de plástico) e introduzca los tacos en los Unidades interiores tri-split - ref 409894 (2 x SMVH09B-2A2A3NG agujeros. - Page 68 INSTRUCCIONES DE INSTALACIÓN DE LA UNIDAD DE PARED PREPARATIVOS PARA LA CONEXIÓN DE LAS LÍNEAS DE REFRIGERACIÓN Las conexiones pueden dirigirse en las 3 direcciones que se muestran al lado. Cuando las conexiones apunten en la dirección 1 o 3, haga un corte a lo largo de la ranura de la unidad de pared con un cuchillo.
-
Page 69: Instrucciones De Instalación De La Unidad Exterior
INSTRUCCIONES DE INSTALACIÓN DE LA UNIDAD EXTERIOR ATENCIÓN: El procedimiento siguiente debe realizarse antes de conectar las tuberías y el cableado eléctrico INSTALACIÓN DE LA UNIDAD EXTERIOR Elija la ubicación de la instalación en función de la estructura de la casa. Determine la mejor posición en la pared o en el suelo y deje un espacio amplio para el mantenimiento. -
Page 70: Conexión De Refrigeración De Las Unidades
CONEXIÓN DE REFRIGERACIÓN DE LAS UNIDADES ATENCIÓN: Manipule las conexiones con cuidado. No realice dobleces en demasiadas ocasiones. Desenrolle con cuidado las conexiones. OPCIÓN READYCLIM No hay que hacer el vacío ni tener un equipo especial Consulte las instrucciones de instalación de la caja de conexiones del READYCLIM 100% TUERCAS MINUTOS... -
Page 71: Conexión De Refrigeración De Las Unidades Para Multi-Split
Para el aire acondicionado Tri split ref 409894 - Tipo: SUV2-H18/3CFA-N Potencia Tipo Unidad SMVH12B-3A2A3NG 3500 W - 12 K SMVH09B-2A2A3NG 2500 W - 9 K Pour climatiseur Tri split ref 409894 - Type : SUV3-H24/3CGA-N Potencia... -
Page 72: Condiciones Para La Conexión Eléctrica
CONDICIONES PARA LA CONEXIÓN ELÉCTRICA Precauciones de seguridad Es necesario cumplir con las normas de seguridad eléctrica al instalar las unidades. De acuerdo con las normas de seguridad locales, utilice una fuente de alimentación estándar y un disyuntor. Asegúrese de que la fuente de alimentación cumple con los requisitos del aire acondicionado. Una fuente de alimentación inestable o un cableado incorrecto pueden provocar un mal funcionamiento. - Page 73 CONEXIÓN ELÉCTRICA DE LA/S UNIDAD/ES INTERIOR/ES A LA UNIDAD EXTERIOR Asegúrese de desconectar la alimentación eléctrica antes de realizar cualquier intervención en el sistema eléctrico o de seguridad. 1. Retire la cubierta. 2. Conecte el cableado al bloque de terminales eléctricos y asegúrese de que coincide con la unidad de pared. 3.
-
Page 74: Fases Finales / Prueba De Funcionamiento
FASES FINALES Una vez completado, asegure las tuberías, el cableado y el tubo de condensado con cinta aislante. 1. Coloque las tuberías, el cableado y la tubería de condensado correctamente. 2. Aísle bien las líneas de refrigeración con los manguitos y la cinta aislante. Collarín Línea de manguitos... -
Page 75: Mantenimiento
MANTENIMIENTO Y LIMPIEZA Realizar un mantenimiento periódico es esencial para garanti- zar la eficiencia de su aire acondicionado. ATENCIÓN: • Antes de la limpieza, asegúrese de detener el funcionamien- to y desconectar el disyuntor. • No toque las lamas de aluminio de la unidad interior. Tocar estas partes puede causar lesiones. -
Page 76: Funciones De Reinicio Automático Y Puesta En Marcha Manual
FUNCIONES DE REINICIO AUTOMÁTICO Y PUESTA EN MARCHA MANUAL FUNCIÓN DE REINICIO AUTOMÁTICO El aire acondicionado guarda automáticamente los últimos ajustes seleccionados después de un fallo o una caída de tensión, y se reinicia automáticamente con estos ajustes cuando se restablece la corriente eléctrica. -
Page 77: Protección
PROTECCIÓN El dispositivo de protección puede dispararse y detener el aire acondicionado en las condiciones indicadas a continuación. Para los modelos de condiciones climáticas T1 N.º MODELO Temperatura del aire exterior superior a 24ºC Calefacción Temperatura del aire exterior inferior a -7°C Temperatura ambiente superior a 27ºC Temperatura del aire exterior superior a 43ºC Climatización... - Page 78 GUÍA PARA LA RESOLUCIÓN DE PROBLEMAS FALLOS POSIBLES CAUSAS Fallo de alimentación/toma no enchufada Motor del ventilador interno o externo dañado Fallos en el disyuntor termomagnético del compresor El dispositivo no Protección térmica o fusible defectuoso funciona Conexiones mal conectadas o desenchufadas La operación se detiene para proteger el dispositivo Tensión superior o inferior a la escala de tensión Función TEMPORIZADOR ENCENDIDO activada...
-
Page 79: Preguntas Frecuentes
PREGUNTAS FRECUENTES MANTENIMIENTO: • ¿Puedo recargar el gas yo mismo? No, no puede recargar el gas usted mismo. Solo están autorizados a hacerlo los técnicos frigoristas y los operarios cualificados que dispongan de un certificado de competencia para la manipulación de gases. •... -
Page 80: Servicio Posventa
ESTOS CASOS NO SON AVERÍAS Los siguientes casos no son averías. Puede seguir utilizando el aire acondicionado. UNIDAD INTERIOR Las lamas no comienzan a oscilar inmediatamente: • El aire acondicionado ajusta la posición de las lamas. Las lamas deberían empezar a moverse en breve. El aire acondicionado deja de generar flujo de aire durante su funcionamiento: •... -
Page 81: Instrucciones Para La Eliminación
INSTRUCCIONES PARA LA ELIMINACIÓN Todos los consumidores deben responsabilizarse de los rápidos cambios que se están produciendo en el medio ambien- te y en la capa de ozono. Se han incorporado dos grandes directivas europeas a la legislación francesa para responder a los grandes cambios de nuestro entorno. -
Page 82: Manuale Di Installazione, Istruzione E Manutenzione Condizionatore D'aria / Pompa Di Calore Aria/Aria
Tipo : SUV2-H18/3CFA-N + SMVH09B-2A2A3NG + SMVH12B-3A2A3NG rif.409913 Tipo : SUV2-H18/3CFA-N + SMVH09B-2A2A3NG + SMVH09B-2A2A3NG rif.409894 Tipo : SUV3-H24/3CGA-N + 2 x SMVH09B-2A2A3NG + SMVH12B-3A2A3NG Nuovo gas refrigerante + PERFORMANTE - INQUINAMENTO Grazie per aver scelto il nostro condizionatore d'aria... - Page 84 INDICE DEI CONTENUTI ISTRUZIONI p.83 INTRODUZIONE E AVVERTENZE SUL GAS R32 p.84 NORME DI SICUREZZA E RACCOMANDAZIONI PER L'INSTALLAZIONE p.85 NORME DI SICUREZZA E DIVIETI p.87 STRUMENTI NECESSARI PER L'INSTALLAZIONE / LISTA DEI COMPONENTI p.88 VISTA DELL’UNITÀ A PARETE INTERNA p.89 SCELTA DEL LUOGO/ISTRUZIONI PER L'INSTALLAZIONE p.90...
-
Page 85: Istruzioni
ISTRUZIONI • Prendetevi il tempo necessario per leggere e capire tutte le raccomandazioni di questo manuale prima di installare il vostro condizionatore d'aria. Conservare le istruzioni in un luogo sicuro. • Questo opuscolo è soggetto a modifiche e aggiornamenti in base all'evoluzione tecnologica dei nostri prodotti e secondo la legislazione/regolamenti. -
Page 86: Introduzione E Avvertenze Sul Gas R32
INTRODUZIONE E AVVERTENZE SUL GAS R32 (1) Leggere il manuale d’uso (ISO 7000 - 0790) (2) Manuale d'uso; istruzioni per l'uso (ISO 7000 - 1641) (3) Indicatore di manutenzione; leggere il manuale tecnico (ISO 7000 - 1659) ATTENZIONE: pericolo di incendio Indicatore di manutenzione;... - Page 87 REGOLE DI SICUREZZA E RACCOMANDAZIONI PER L'INSTALLAZIONE • Leggere questa guida prima di installare e • Non installare l'apparecchio a meno di 50 cm da utilizzare l'apparecchio. sostanze infiammabili (alcol, ecc.) o da contenitori sotto pressione (bombolette spray). • Durante l'installazione delle unità interne ed esterna, deve essere impedito l’accesso all'area di •...
- Page 88 REGOLE DI SICUREZZA E RACCOMANDAZIONI PER L'INSTALLATORE • Non effettuare l'installazione da soli; ricorrere • Non rimanere mai direttamente esposti al flusso sempre a personale tecnico qualificato. d'aria fredda per un periodo prolungato. L'esposizione diretta e prolungata potrebbe causare • La pulizia e la manutenzione devono essere danni alla salute.
- Page 89 REGOLE DI SICUREZZA E DIVIETI • Non piegare, tirare o schiacciare il cavo di • Non salire sull'apparecchio e non appoggiarvi alimentazione per non danneggiarlo. Le scosse sopra oggetti pesanti o caldi. elettriche e gli incendi sono di solito causati da un cavo danneggiato.
-
Page 90: Strumenti Necessari Per L'installazione / Lista Dei Componenti
STRUMENTI NECESSARI PER L'INSTALLAZIONE Livella a bolla Chiave inglese Perforatore + punta perforante Cacciavite Trapano a percussione ELENCO DEI COMPONENTI UNITÀ A PARETE Unità a parete Descrizione Pannello frontale Filtro dell’aria Filtro opzionale (se montato) Display a LED Sensore di segnale Coperchio del blocco di alimentazione Generatore ionizzante (se montato) Deflettori... - Page 91 DISPLAY DELL’UNITÀ A PARETE INTERNA Unità interna Pannello Ingresso aria Griglia orizzontale Filtro Uscita dell'aria Pulsante Aux Display Telecomando Per alcuni modelli: Indicatore di temperatura Indicatore Wi-Fi Per alcuni modelli: Indicatore di temperatura Indicatore Wi-Fi NOTA: Il prodotto reale può di erire dalla gra ca di cui sopra, fare riferimento al prodotto reale.
-
Page 92: Scelta Del Luogo/Istruzioni Per L'installazione
SCELTA DEL LUOGO/ISTRUZIONI PER L'INSTALLAZIONE Non installare l'unità nei seguenti luoghi, poiché questo potrebbe causare malfunzionamenti. - Non installare l'unità esterna vicino a una fonte di calore, Piastra di montaggio vapore o gas infiammabile. - Un luogo che contiene attrezzature ad alta frequenza (ad esempio, saldatrice, attrezzature mediche). -
Page 93: Istruzioni Per L'installazione Dell'unità A Parete
(la punta del trapano deve corrispondere al Unità interne a due split - rif 409733 (SMVH09B-2A2A3NG tassello a espansione in plastica) e inserire i tasselli nei + SMVH12B-3A2A3NG) fori. Unità interne a tre split - rif 409894 (2 x SMVH09B-2A2A3NG 3. - Page 94 ISTRUZIONI PER L'INSTALLAZIONE DELL'UNITÀ A PARETE PREPARAZIONE PER IL RACCORDO DEI COLLEGAMENTI DELLE LINEE DI REFRIGERAZIONE I raccordi possono essere orientati nelle 3 direzioni indicate qui a fianco. Quando i raccordi sono rivolti nella direzione 1 o 3, fare un taglio lungo la scanalatura dell’unità a parete con una taglierina.
-
Page 95: Istruzioni Per L'installazione Dell'unità Esterna
ISTRUZIONI PER L'INSTALLAZIONE DELL'UNITÀ ESTERNA ATTENZIONE: La seguente procedura deve essere seguita prima di collegare i tubi e il cablaggio elettrico. INSTALLAZIONE DELL'UNITÀ ESTERNA Scegliere la posizione dell'installazione secondo la struttura della casa. Determinare la posizione migliore sul muro o sul pavimento e lasciare un ampio spazio per la manutenzione futura. - Page 96 RACCORDO DI REFRIGERAZIONE DELLE UNITÀ ATTENZIONE: Maneggiare i raccordi con cura. Non piegare troppo spesso. Svolgere con cura i raccordi. OPZIONE READYCLIM Nessuno aspirazione a vuoto o attrezzatura speciale Fare riferimento alle istruzioni di installazione nella scatola dei raccordi di READYCLIM 100% DADI MINUTI...
- Page 97 Tabella delle corrispondenze dei collegamenti del refrigerante tra le unità interne ed esterne Per condizionatore a due split rif 409733 - Tipo: SUV2-H18/3CFA-N Potenza Tipo Unità SMVH12B-3A2A3NG 3500 W - 12 K SMVH09B-2A2A3NG 2500 W - 9 K Per condizionatore a tre split rif 409894 - Tipo: SUV3-H24/3CGA-N Potenza Modello Unità...
-
Page 98: Condizioni Per Il Collegamento Elettrico
CONDIZIONI PER IL COLLEGAMENTO ELETTRICO Norme di sicurezza È necessario rispettare le norme di sicurezza elettrica durante l'installazione delle unità. In conformità con le norme di sicurezza locali, utilizzare un circuito di alimentazione e un interruttore di corrente a norma. Assicurarsi che l'alimentazione corrisponda ai requisiti del condizionatore d'aria. -
Page 99: Collegamento Elettrico Della/E Unità Interna/E All'unità Esterna
COLLEGAMENTO ELETTRICO DELLA/E UNITÀ INTERNA/E ALL'UNITÀ ESTERNA Assicurarsi di scollegare l'alimentazione elettrica prima di eseguire qualsiasi lavoro sull'impianto elettrico o sulla sicurezza. 1. Rimuovere il coperchio. 2. Collegare il cablaggio alla morsettiera elettrica e assicurarsi che corrisponda all'unità a parete. 3. -
Page 100: Fasi Finali / Test Di Funzionamento
FASI FINALI Una volta completato, fissate i tubi, il cablaggio e il tubo della condensa con del nastro isolante. 1. Posizionare correttamente i tubi, il cablaggio e il tubo della condensa. 2. Isolare bene i raccordi di collegamento del refrigerante con i manicotti isolanti e il nastro isolante. Collari di Collegamento manicotti di... -
Page 101: Manutenzione
MANUTENZIONE E PULIZIA La manutenzione periodica è essenziale per mantenere efficiente il vostro condizionatore d'aria. ATTENZIONE: • Prima della pulizia, assicurarsi di interrompere il funzionamento e di disattivare l'interruttore. • Non toccare le alette di alluminio dell'unità interna. C'è il rischio che il contatto con queste parti provochi delle lesioni. -
Page 102: Funzioni Di Riavvio Automatico E Avvio Manuale
FUNZIONI DI RIAVVIO AUTOMATICO E AVVIO MANUALE FUNZIONE DI RIAVVIO AUTOMATICO Il condizionatore d'aria salva automaticamente le ultime impostazioni selezionate dopo un'interruzione o un calo di corrente, e riparte automaticamente con queste impostazioni quando viene ripristinata la corrente. Questa funzione non può essere disabilitata. FUNZIONE DI AVVIO MANUALE La funzione di avvio manuale permette di avviare il condizionatore d'aria se il telecomando viene perso, non è... -
Page 103: Protezione
PROTEZIONE Il dispositivo di protezione può scattare e fermare il condizionatore d'aria nelle condizioni elencate di seguito. Per i modelli per condizioni climatiche T1 MODELLO Temperatura dell'aria esterna superiore a 24ºC Sistema di Temperatura dell'aria esterna inferiore a -7°C riscaldamento Temperatura ambiente superiore a 27ºC Temperatura dell'aria esterna superiore a 43ºC Aria... -
Page 104: Guida Alla Risoluzione Dei Problemi
GUIDA ALLA RISOLUZIONE DEI PROBLEMI GUASTO POSSIBILI CAUSE Mancanza di corrente/presa scollegata Motore del ventilatore interno o esterno danneggiato Interruttore magnetotermico del compressore con dei problemi Il dispositivo Protezione termica o fusibile difettoso non funziona Connessioni mal collegate o spina staccata Si interrompe il funzionamento per proteggere il dispositivo La tensione è... -
Page 105: Domande Frequenti
DOMANDE FREQUENTI MANUTENZIONE: • Posso ricaricare il gas da solo? Non si può ricaricare il gas da soli. Solo i tecnici della refrigerazione e gli operatori qualificati in possesso di un certificato di competenza per la manipolazione dei gas sono autorizzati a farlo. •... -
Page 106: Servizio Post-Vendita
QUESTI CASI NON SONO PROBLEMI I seguenti casi non costituiscono dei problemi. Potete continuare a usare il condizionatore d'aria. UNITÀ INTERNA Le alette non iniziano a oscillare immediatamente: • Il condizionatore d'aria regola la posizione delle alette. Le alette dovrebbero iniziare a muoversi dopo poco. Il condizionatore smette di generare un flusso d'aria durante il funzionamento:: •... -
Page 107: Istruzioni Per Lo Smaltimento
ISTRUZIONI PER LO SMALTIMENTO Ogni consumatore deve essere consapevole dei rapidi cambiamenti che avvengono nell'ambiente e nello strato di ozono. Due principali direttive europee sono state recepite nel diritto francese per rispondere ai grandi cambiamenti avvenuti nel nostro ambiente. La prima di queste direttive ha lo scopo di recuperare e smaltire le batterie e gli accumulatori usati, contenenti materiali pericolosi. -
Page 108: Installations-, Bedienungs- & Wartungsanleitung Klimagerät / Wärmepumpe Lüftung
Typ : SUV2-H18/3CFA-N + SMVH09B-2A2A3NG + SMVH12B-3A2A3NG ref.409913 Typ : SUV2-H18/3CFA-N + SMVH09B-2A2A3NG + SMVH09B-2A2A3NG ref.409894 Typ : SUV3-H24/3CGA-N + 2 x SMVH09B-2A2A3NG + SMVH12B-3A2A3NG Neues Kältemittel LEISTUNGSFÄHIGER - WENIGER UMWELTSCHÄDLICH Wir danken Ihnen, dass Sie sich für unsere Klimaanlage entschieden haben Um einen reibungslosen Betrieb und eine lange Lebensdauer zu gewährleis-... - Page 110 INHALTSVERZEICHNIS HINWEISE s.109 EINLEITUNG & WARNHINWEISE ZU DIFLUORMETHAN (R32) s.110 SICHERHEITSREGELN UND EMPFEHLUNGEN FÜR DIE INSTALLATION s.111 SICHERHEITSREGELN UND VERBOTE s.113 FÜR DIE INSTALLATION BENÖTIGTE WERKZEUGE / LISTE DER KOMPONENTEN s.114 ANZEIGE WANDEINHEIT INNEN s.115 STANDORTWAHL/INSTALLATIONSANWEISUNG s.116 INSTALLATIONSANWEISUNGEN FÜR DIE WANDEINHEIT s.117 INSTALLATIONSANLEITUNG FÜR DIE AUSSENEINHEIT s.119...
-
Page 111: Hinweise
HINWEISE • Nehmen Sie sich die Zeit, alle in dieser Anleitung beschriebenen Empfehlungen zu lesen und stellen Sie sicher, dass Sie sie verstehen, bevor Sie mit der Installation Ihrer Klimaanlage beginnen. Bewahren Sie Ihre Gebrauchsinformation gut auf. • Änderungen und Aktualisierungen aufgrund der technologischen Weiterentwicklung unserer Produkte und aufgrund von Gesetzen/Verordnungen bleiben vorbehalten. -
Page 112: Einleitung & Warnhinweise Zu Difluormethan (R32
EINLEITUNG & WARNHINWEISE ZU DIFLUORMETHAN (R32) (1) Lesen Sie das Benutzerhandbuch (ISO 7000 - 0790) (2) Benutzerhandbuch; Anweisungen für den Benutzer (ISO 7000 - 1641) (3) Wartungsanzeige; lesen Sie das technische Handbuch (ISO 7000 - 1659) ACHTUNG: Brandgefahr Das in diesen Klimaanlagen verwendete Kältemittel ist ein R32-Kohlenwasserstoff. R32 ist ein sogenanntes klimafreundliches Gas, da es chlorfrei ist und die Ozonschicht schont. -
Page 113: Sicherheitsregeln Und Empfehlungen Für Die Installation
SICHERHEITSREGELN UND EMPFEHLUNGEN FÜR DIE INSTALLATION • Lesen Sie diese Anleitung, bevor Sie das Gerät • Stellen Sie das Gerät nicht in einem Abstand von aufstellen und benutzen. weniger als 50 cm zu brennbaren Substanzen (Alkohol usw.) oder Druckbehältern (Aerosoldo- •... - Page 114 SICHERHEITSREGELN UND EMPFEHLUNGEN FÜR DIE INSTALLATION • Nehmen Sie die Installation nicht selbst vor, • Halten Sie sich nie über einen längeren Zeitraum sondern lassen Sie sie immer von qualifizierten direkt im kühlen Luftstrom auf. Eine direkte und technischem Personal durchführen. längere Exposition könnte Ihrer Gesundheit scha- den.
-
Page 115: Sicherheitsregeln Und Verbote
SICHERHEITSREGELN UND VERBOTE • Knicken, ziehen oder quetschen Sie das Netzka- • Klettern Sie nicht auf das Gerät und stellen Sie bel nicht, da es dadurch beschädigt werden könnte. keine schweren oder heißen Gegenstände darauf. Elektrische Entladungen und Brände werden normalerweise durch ein beschädigtes Kabel •... -
Page 116: Für Die Installation Benötigte Werkzeuge / Liste Der Komponenten
FÜR DIE INSTALLATION BENÖTIGTE WERKZEUGE Wasserwaage Schraubenschlüssel Bohrmaschine + Drillkopf Schraubenzieher Schlagbohrmaschine LISTE DES COMPOSANTS WANDEINHEIT Wandeinheit Beschreibung Frontplatte Luftfilter Optionaler Filter (falls installiert) LED-Anzeige Signalsensor Abdeckung Netzteil Ionisationsgenerator (falls installiert) Deflektoren Notfalltaste Typenschild Wandeinheit (Option Stabposition) Luftleitklappen Fernbedienung AUSSENEINHEIT Beschreibung Luftauslassgitter Typenschild Außeneinheit... -
Page 117: Anzeige Wandeinheit Innen
ANZEIGE WANDEINHEIT INNEN Innengerät Schild Lufteinlass Horizontales Gitter Filter Luftauslass Hilfstaste Anzeige Fernbedienung Für bestimmte Modelle: Temperaturanzeige Wi-Fi-Anzeige Für bestimmte Modelle: Temperaturanzeige Wi-Fi-Anzeige HINWEIS: Das eigentliche Produkt kann von den obigen Darstellungen abweichen, orientieren Sie sich am eigentlichen Produkt. -
Page 118: Standortwahl/Installationsanweisung
STANDORTWAHL/INSTALLATIONSANWEISUNG Installieren Sie das Gerät nicht an den folgenden Orten, da dies zu Fehlfunktionen führen kann. - Stellen Sie das Außengerät nicht in der Nähe von Befestigungsplatte Wärmequellen, Dampf oder entflammbaren Gasen auf. - in der Nähe von Hochfrequenzgeräten (z. B. Schweißgerät, medizinische Geräte). - In Küstennähe. -
Page 119: Installationsanweisungen Für Die Wandeinheit
Schrauben an der Wand an. Inneneinheit Bi Split - Ref 409733 (SMVH09B-2A2A3NG 2. Bohren Sie mit einer Schlagbohrmaschine die Löcher + SMVH12B-3A2A3NG) für die Schrauben an der Wand (der Bohrer der Bohrma- Inneneinheit Tri split - Ref 409894 (2 x SMVH09B-2A2A3NG schine muss mit dem Spreizdübel aus Kunststoff überein-... - Page 120 INSTALLATIONSANWEISUNGEN FÜR DIE WANDEINHEIT VORBEREITUNGEN FÜR DEN ANSCHLUSS DER KÄLTELEITUNGEN Die Anschlüsse können in die drei nebenstehend abgebildeten Richtungen gehen. Wenn die Anschlüsse in Richtung 1 oder 3 zeigen, schneiden Sie mit einem Messer entlang der Nut der Wandeinheit eine Kerbe. Verlegen Sie das Verbindungsstück in Richtung des Lochs in der Wand und verbinden Sie mithilfe des Isolierbands die Anschlüsse, den Kondenswasserschlauch und die Verkabe-...
-
Page 121: Installationsanleitung Für Die Ausseneinheit
INSTALLATIONSANLEITUNG FÜR DIE AUSSENEINHEIT ACHTUNG: Die folgenden Schritte müssen vor dem Anschließen von Schläuchen und elektrischer Verkabelung durchgeführt werden INSTALLATION DER AUSSENEINHEIT Wählen Sie den Installationsort entsprechend den Gebäudeei- genschaften. Bestimmen Sie die beste Position an der Wand oder auf dem Boden und lassen Sie genügend Platz für zukünftige Wartungsarbeiten. -
Page 122: Kältetechnischer Anschluss Der Einheiten
KÄLTETECHNISCHER ANSCHLUSS DER EINHEITEN ACHTUNG: Gehen Sie mit den Anschlüssen sorgfältig um. Nicht zu oft zusammenlegen. NEIN Sorgfältig abrollen. OPTION READYCLIM Kein Vakuumeinsatz, keine spezielle Geräteausstattung Beachten Sie die Installationsanleitung in der Verpackung der READYCLIM-Anschlüsse 100% MUTTERN MINUTEN GESICHERT EINFACHE SCHNELLE GESICHERTE INBETRIEBNAHNME... -
Page 123: Kältetechnische Verbindung Der Einheiten Für Multi-Split
Tabelle der Zuordnung der kältetechnischen Anschlüsse zwischen Innen- und Außeneinheit Für Bi split-Klimaanlage ref 409733 - Typ: SUV2-H18/3CFA-N Leistung Einheit SMVH12B-3A2A3NG 3500 W - 12 K SMVH09B-2A2A3NG 2500 W - 9 K Für Tri Split-Klimaanlage ref 409894 - Typ: SUV3-H24/3CGA-N... -
Page 124: Bedingungen Für Den Elektrischen Anschluss
BEDINGUNGEN FÜR DEN ELEKTRISCHEN ANSCHLUSS Sicherheitsvorkehrungen Bei der Installation der Einheiten müssen die Normen für elektrische Sicherheit beachtet werden. Verwenden Sie in Übereinstimmung mit den Sicherheitsvorschriften Ihres Landes einen normgerechten Stromkreis und einen normgerechten Stromunterbrecher. Stellen Sie sicher, dass die Stromversorgung den Anforderungen des Klimageräts entspricht. Eine instabile Stromversorgung oder eine falsche Verkabelung können zu Fehlfunktionen führen. - Page 125 ELEKTRO-ANSCHLUSS VON INNENEINHEIT(EN) MIT AUSSENEINHEIT(EN) Stellen Sie sicher, dass die Stromversorgung unterbrochen ist, bevor Sie Arbeiten am Stromkreis oder an der Sicherung durchführen. 1. Nehmen Sie den Deckel ab. 2. Schließen Sie die Verdrahtung an die elektrische Klemmleiste an und stellen Sie sicher, dass sie mit der Wandeinheit übereinstimmt 3.
-
Page 126: Abschliessende Schritte / Funktionstest
ABSCHLIESSENDE SCHRITTE Sobald dies geschehen ist, befestigen Sie die Schläuche, die Verkabelung und den Kondensatschlauch mit Isolierband. 1. Richten Sie die Schläuche, die Verkabelung und den Kondensatschlauch richtig aus. 2. Isolieren Sie die Anschlüsse der Kältemittelverbindungen gut mit Hilfe der Isolierhülsen und des Isolierbandes. Klemm- schellen Kühlverbindung... - Page 127 WARTUNG UND REINIGUNG Eine regelmäßige Wartung ist wichtig, um Ihre Klimaanlage effizient zu betreiben. ACHTUNG: • Vor einer Reinigung stellen Sie das Gerät ab und schalten den Überspannungsschutzschalter aus. • Berühren Sie die Aluminiumlamellen des Innengeräts nicht. Wenn Sie sie berühren, könnten Sie sich verletzen WANDEINHEIT - STAUBFILTER 1 Mal pro Monat zu reinigen 1.
- Page 128 FONCTIONS D'AUTO-REDÉMARRAGE & DE MISE EN MARCHE MANUELLE AUTOSTARTFUNKTION Die Klimaanlage speichert nach einem Stromausfall oder einem Spannungsverlust automatisch die zuletzt gewählten Einstellungen und startet mit diesen Einstel- lungen automatisch neu, sobald die Stromversorgung wiederhergestellt ist. Diese Funktion kann nicht deaktiviert werden.
-
Page 129: Schutz
SCHUTZ Die Sicherheitsabschaltung kann unter den unten aufgeführten Bedingungen ausgelöst werden und die Klimaanlage ausschalten. Für die Klimamodelle T1 MODELL Außenlufttemperatur über 24ºC Heizung Außenlufttemperatur unter -7°C Raumtemperatur über 27ºC Außenlufttemperatur über 43ºC Klimaanlage Raumtemperatur weniger als 21ºC Trocken Raumtemperatur weniger als 18ºC Für die Klimamodelle T3 MODELL Außenlufttemperatur über 24ºC... -
Page 130: Leitfaden Fehlerbehebung
LEITFADEN FEHLERBEHEBUNG PANNEN MÖGLICHE URSACHEN Stromausfall / Stecker nicht eingesteckt Beschädigter interner oder externer Ventilatormotor Thermomagnetischer Schutzschalter des Kompressors hat ein Problem Das Gerät Thermischer Schutz oder Sicherung defekt funktioniert nicht Schlecht angeschlossene Anschlüsse oder Stecker ausgesteckt Der Betrieb wird angehalten, um das Gerät zu schützen Die Spannung höher oder niedriger als die in der Skala angegeben TIMER-Funktion - EIN aktiviert Beschädigte Platine... -
Page 131: Häufige Fragen
HÄUFIGE FRAGEN WARTUNG: • Kann ich das Gas selber nachfüllen? Sie dürfen das Gas nicht selbst nachfüllen. Nur Kältetechniker und qualifizierte Fachleute mit einer Bescheinigung über die Fähigkeit, mit Gasen umzugehen, dürfen dies tun. • Nach wie viel Zeit muss ich Gas nachfüllen? Wir empfehlen Ihnen, einen Wartungsvertrag abzuschließen, um eine jährliche Kontrolle Ihres Klimageräts durchzuführen. - Page 132 DIESE FÄLLE STELLEN KEIN PROBLEM DAR Diese Fälle sind unproblematisch. Sie können die Klimaanlage weiter benutzen INNENEINHEIT Die Klappen beginnen nicht sofort zu oszillieren: • Die Klimaanlage stellt die Klappenposition ein. Die Klappen sollten sich in Kürze in Bewegung setzen. Die Klimaanlage erzeugt während des Betriebs keinen Luftstrom mehr: •...
-
Page 133: Entsorgungshinweise
ENTSORGUNGSHINWEISE Jeder Verbraucher muss Verantwortung für die raschen Umweltveränderungen und den Schutz der Ozonschicht über- nehmen. Zwei wichtige europäische Richtlinien wurden in französisches Recht umgesetzt, um auf die erheblichen Veränderungen in unserer Umwelt zu reagieren. Die erste dieser Richtlinien zielt auf die Verwertung und Beseitigung von Altbatterien und Altakkumulatoren ab, die gefährliche Stoffe enthalten. -
Page 134: Installatie-, Instructie- En Onderhoudshandleiding Airconditioner/Warmte- En Luchtpomp
Type : SUV2-H18/3CFA-N + SMVH09B-2A2A3NG + SMVH09B-2A2A3NG Réf. 409733 Type : SUV2-H18/3CFA-N + SMVH09B-2A2A3NG + SMVH12B-3A2A3NG Réf. 409894 Type : SUV3-H24/3CGA-N + 2 x SMVH09B-2A2A3NG + SMVH12B-3A2A3NG Nieuw koelgas + EFFICIËNTIE - VERONTREINIGING Hartelijk dank voor het kiezen van onze airconditioner Om een goede werking en een lange levensduur te waarborgen, dient u deze handleiding vóór gebruik aandachtig door te lezen en de... - Page 136 INHOUDSOPGAVE INSTRUCTIES p.135 INLEIDING EN WAARSCHUWINGEN MET BETREKKING TOT R32-GAS p.136 VEILIGHEIDSVOORSCHRIFTEN EN AANBEVELINGEN VOOR INSTALLATIE p.137 VEILIGHEIDSVOORSCHRIFTEN EN VERBODSBEPALINGEN p.139 BENODIGD GEREEDSCHAP VOOR INSTALLATIE / LIJST VAN ONDERDELEN p.140 DISPLAY BINNENWANDUNIT p.141 KEUZE VAN LOCATIE/INSTALLATIE-INSTRUCTIES p.142 INSTALLATIE-INSTRUCTIES VOOR DE WANDUNIT p.143 INSTALLATIE-INSTRUCTIES VOOR DE BUITENUNIT p.145...
-
Page 137: Instructies
INSTRUCTIES • Neem de tijd om alle aanbevelingen in deze handleiding te lezen en zorg ervoor dat u ze goed begrijpt voordat u de airconditioner installeert. Bewaar uw instructies op een veilige plaats. • Deze handleiding kan worden gewijzigd en bijgewerkt naargelang de technologische evolutie van onze producten en volgens de wetgeving/reglementering. -
Page 138: Inleiding En Waarschuwingen Met Betrekking Tot R32-Gas
INLEIDING EN WAARSCHUWINGEN MET BETREKKING TOT R32-GAS (1) Lees de gebruikershandleiding (ISO 7000 - 0790) (2) Gebruikershandleiding; gebruikersinstructies (ISO 7000 – 1641) (3) Onderhoudsboekje; lees de technische handleiding (ISO 7000 – 1659) OPGELET: brandgevaar Het koelmiddel dat in deze airconditioners wordt gebruikt, is een R32 koolwaterstof. R32 is een zogenaamd “ecologisch”... -
Page 139: Veiligheidsvoorschriften En Aanbevelingen Voor Installatie
VEILIGHEIDSVOORSCHRIFTEN EN AANBEVELINGEN VOOR INSTALLATIE • Lees deze handleiding voordat u de unit • Installeer de unit niet binnen 50 cm van installeert en gebruikt. ontvlambare stoffen (alcohol, enz.) of houders onder druk (spuitbussen). • Tijdens de installatie van de binnen- en buitenunits mogen kinderen de werkruimte niet •... - Page 140 VEILIGHEIDSVOORSCHRIFTEN EN AANBEVELINGEN VOOR DE INSTALLATEUR • Voer de installatie niet zelf uit, maar schakel altijd • Ga nooit voor langere tijd direct in de koele gekwalificeerd technisch personeel in. luchtstroom staan. Directe en langdurige blootstelling kan uw gezondheid schaden. Speciale •...
-
Page 141: Veiligheidsvoorschriften En Verbodsbepalingen
VEILIGHEIDSVOORSCHRIFTEN EN VERBODSBEPALINGEN • Buig, trek of plet het netsnoer niet, want dat kan • Klim niet op de unit en plaats er geen zware of het beschadigen. Elektrische schokken en brand hete voorwerpen op. worden meestal veroorzaakt door een beschadigd snoer. -
Page 142: Benodigd Gereedschap Voor Installatie / Lijst Van Onderdelen
BENODIGD GEREEDSCHAP VOOR INSTALLATIE Waterpas Moersleutel Perforator + boorkop Schroevendraaier Percussieboor LIJST VAN ONDERDELEN WANDUNIT Wandunit Beschrijving Voorpaneel Luchtfilter Optioneel filter (indien gemonteerd) LED-scherm Signaalsensor Deksel stroomvoorziening Ionisator (indien geïnstalleerd) Deflectoren Noodknop Typeplaatje wandunit (optionele plakpositie) Luchtrichtkleppen Afstandsbediening BUITENUNIT Beschrijving Luchtuitlaatrooster Typeplaatje buitenunit Deksel... -
Page 143: Display Binnenwandunit
DISPLAY BINNENWANDUNIT Binnenunit Paneel Luchtinlaat Horizontaal rooster Filter Luchtuitlaat Aux. toets Display Afstandsbediening Voor sommige modellen: Temperatuurindicator Wi-Fi-indicator Voor sommige modellen: Temperatuurindicator Wi-Fi-indicator OPMERKING: Het werkelijke product kan afwijken van de bovenstaande afbeeldingen, raadpleeg hiervoor het werkelijke product. -
Page 144: Keuze Van Locatie/Installatie-Instructies
KEUZE VAN LOCATIE/INSTALLATIE-INSTRUCTIES Installeer de unit niet op de volgende plaatsen, aangezien dit storingen kan veroorzaken. - Installeer de buitenunit niet in de buurt van een warmtebron, Montageplaat stoom of ontvlambaar gas. - Een plaats met hoogfrequente apparatuur (bijv. lasapparaat, medische apparatuur). - Een plaats bij een kustgebied. -
Page 145: Installatie-Instructies Voor De Wandunit
(de boor moet overeenkomen met de plastic Bi-split binnenunits - ref 409733 (SMVH09B-2A2A3NG expansieplug) en steek de pluggen in de gaten. + SMVH12B-3A2A3NG) 3. Bevestig de plaat aan de muur met de bijgeleverde Tri-split binnenunits - ref 409894 (2 x SMVH09B-2A2A3NG... - Page 146 INSTALLATIE-INSTRUCTIES VOOR DE WANDUNIT VOORBEREIDINGEN VOOR DE AANSLUITING VAN KOELLEIDINGEN Fittingen kunnen worden gericht in de 3 richtingen die hiernaast zijn aangegeven. Wanneer de hulpstukken in richting 1 of 3 wijzen, maakt u met een mes een snede langs de groef van het hangelement. Richt de aansluiting naar het gat in de muur en verbind de aansluitingen met de isolatietape, condensaatleiding en bedrading.
-
Page 147: Installatie-Instructies Voor De Buitenunit
INSTALLATIE-INSTRUCTIES VOOR DE BUITENUNIT LET OP: Voor het aansluiten van de leidingen en de elektrische bedrading moet de volgende procedure worden gevolgd. INSTALLATIE VAN DE BUITENUNIT Kies de plaats van de installatie in overeenstemming met de structuur van het huis. Bepaal de beste plaats op de muur of vloer en zorg voor voldoende ruimte voor toekomstig onderhoud. -
Page 148: Aansluiting Van Koelinstallaties
AANSLUITING VAN KOELINSTALLATIES LET OP: Ga voorzichtig om met de verbindingen. Plooi ze niet te vaak om. Wikkel de verbindingen voorzichtig los. READYCLIM OPTIE Vereist geen vacuüm trekken of speciale apparatuur Raadpleeg de installatie-instructies in de READYCLIM aansluitdoos 100% SCHROEVEN MINUTEN VEILIG MAKKELIJKE... -
Page 149: Aansluiting Van Multi-Split Koelinstallaties
Tabel van koelmiddelverbindingen tussen binnen- en buitenunits Voor Bi split airconditioner ref 409733 - Type: SUV2-H18/3CFA-N Vermogen Type Unit SMVH12B-3A2A3NG 3500 W - 12 K SMVH09B-2A2A3NG 2500 W - 9 K Voor Tri split airconditioner ref 409894 - Type: SUV3-H24/3CGA-N... -
Page 150: Voorwaarden Voor Elektrische Aansluiting
VOORWAARDEN VOOR DE ELEKTRISCHE AANSLUITING Voorzorgsmaatregelen Bij de installatie van de toestellen moeten de elektrische veiligheidsnormen in acht worden genomen. Gebruik, in overeenstemming met de plaatselijke veiligheidsvoorschriften, een standaard stroomvoorziening en stroomonderbreker. Zorg ervoor dat de stroomvoorziening voldoet aan de eisen van de airconditioner. Een onstabiele stroomvoorziening of onjuiste bedrading kan storingen veroorzaken. - Page 151 ELEKTRISCHE AANSLUITING VAN DE BINNENUNIT(S) OP DE BUITENUNIT Zorg ervoor dat u de stroomtoevoer onderbreekt voordat u werkzaamheden aan het elektrische systeem of de veiligheid uitvoert. 1. Verwijder het deksel. 2. Sluit de bedrading aan op het elektrische aansluitblok en controleer of deze overeenkomt met de wandkast. 3.
-
Page 152: Laatste Fasen / Functionele Test
LAATSTE FASEN Zet na afloop de leidingen, bedrading en condensaatbuis vast met isolatietape. 1. Plaats de leidingen, bedrading en condensaatleiding op de juiste manier. 2. Isoleer de koelmiddelaansluitingen goed met de isolatiehulzen en isolatietape. Slang Koppeling manchons klemmen koeling d’isolation condensatorhuls elektriciteitskabel Koppeling... -
Page 153: Onderhoud
ONDERHOUD EN REINIGING Periodiek onderhoud is essentieel om de werking van uw airconditioner efficiënt te houden. LET OP: • Alvorens te reinigen, moet u de bediening stoppen en de stroomonderbreker uitschakelen. • Raak de aluminium wieken van de binnenunit niet aan. Het aanraken van deze onderdelen kan letsel veroorzaken. -
Page 154: Zelfstart- & Manuele Startfuncties
ZELFSTART- & MANUELE STARTFUNCTIES AUTO-HERSTART FUNCTIE De airconditioner slaat automatisch de laatst geselecteerde instellingen op na een stroomonderbreking of -uitval, en start automatisch opnieuw met deze instellingen wanneer de stroomtoevoer hersteld is. Deze functie kan niet worden uitgeschakeld HANDMATIGE STARTFUNCTIE Met de functie handmatige start kan de airconditioner worden gestart als de afstandsbediening zoek is, niet beschikbaar is of defect is. -
Page 155: Bescherming
BESCHERMING Onder de hieronder genoemde omstandigheden kan de beveiligingsinrichting geactiveerd worden en de airconditioner stoppen. Voor T1 airconditioners MODEL Buitenluchttemperatuur boven 24ºC Verwarming Buitenluchttemperatuur lager dan -7°C Kamertemperatuur boven 27ºC Buitenluchttemperatuur boven 43ºC Airconditioning Kamertemperatuur lager dan 21ºC Droog Kamertemperatuur lager dan 18ºC Voor T3 airconditioners MODEL Buitenluchttemperatuur boven 24ºC... -
Page 156: Gids Voor Probleemoplossing
GIDS VOOR PROBLEEMOPLOSSING DEFECT MOGELIJKE OORZAKEN Stroomuitval/stopcontact Interne of externe ventilatormotor is beschadigd Storing compressor thermomagnetische stroomonderbreker De unit werkt niet Defecte thermische beveiliging of zekering Slecht aangesloten of losgekoppelde verbindingen De bediening wordt gestopt om de unit te beschermen Spanning hoger of lager dan de spanningsschaal TIMER AAN functie geactiveerd L o r e m i p s u m... -
Page 157: Vaak Gestelde Vragen
VAAK GESTELDE VRAGEN ONDERHOUD: • Kan ik zelf gas bijvullen? U kunt het gas niet zelf bijvullen. Alleen koeltechnici en gekwalificeerde operators met een certificaat van bekwaamheid voor het omgaan met gassen zijn daartoe bevoegd. • Hoe lang duurt het om het gas bij te vullen? Wij raden u aan een onderhoudscontract af te sluiten om uw airconditioner jaarlijks te laten controleren. -
Page 158: Klantendienst
DEZE GEVALLEN ZIJN GEEN PROBLEMEN De volgende gevallen zijn geen problemen. U kunt de airconditioner blijven gebruiken. BINNENUNIT De flappen beginnen niet onmiddellijk te oscilleren: • De airconditioner past de stand van de kleppen aan. De flappen zullen weldra in beweging komen. De airconditioner stopt met het produceren van luchtstroom tijdens de werking: •... -
Page 159: Instructies Voor Verwijdering
INSTRUCTIES VOOR VERWIJDERING Elke consument moet zijn verantwoordelijkheid nemen voor de snelle veranderingen die zich voltrekken in het milieu en de ozonlaag. Twee belangrijke Europese richtlijnen zijn omgezet in Franse wetgeving om te reageren op de belangrijke veranderingen die zich in onze omgeving hebben voorgedaan. De eerste van deze richtlijnen is gericht op het terugwinnen en verwijderen van gebruikte batterijen en accu's die gevaarlijke stoffen bevatten.
Need help?
Do you have a question about the SMVH12B-3A2A3NG and is the answer not in the manual?
Questions and answers