
Subscribe to Our Youtube Channel
Related Manuals for inventum VFI6042ZWA


Summary of Contents for inventum VFI6042ZWA
- Page 1 INDUCTION COOKER inductie fornuis VFI6042ZWA • gebruiksaanwijzing • instruction manual...
- Page 2 •...
-
Page 3: Table Of Contents
Nederlands veiligheidsvoorschriften pagina 4 bediening van de multifunctionele oven pagina 20 productomschrijving pagina 9 baktips en baktabel pagina 21 voor het eerste gebruik pagina 11 10. reiniging en onderhoud pagina 24 installatie pagina 11 storingen en oplossingen pagina 26 gebruik van de oven pagina 14 12. -
Page 4: Veiligheidsvoorschriften
Nederlands veiligheidsvoorschriften • Lees eerst de gebruiksaanwijzing aandachtig en geheel door voordat u het apparaat gaat gebruiken en bewaar deze zorgvuldig voor latere raadpleging. • Gebruik dit apparaat uitsluitend voor de in de gebruiksaanwijzing beschreven doeleinden. Gebruik geen agressieve reinigingsmiddelen in dit apparaat. Het fornuis is alleen geschikt voor het bereiden van voedsel. - Page 5 • De buitenzijde van het fornuis kan warm worden nadat het fornuis langdurig is gebruikt. Dit geldt ook voor de ovendeur. Bij langdurig gebruik op de maximale temperatuur wordt de ruit van de ovendeur heet. Let op als er kinderen in de buurt zijn. •...
- Page 6 WAARSCHUWING : indien de glasplaat van het • kookgedeelte is gebroken: - schakel onmiddellijk alle kookzones en elektrische verwarmingselementen uit en verbreek de stroomtoevoer naar het apparaat. - raak het oppervlak van het apparaat niet aan. - gebruik het apparaat niet. •...
- Page 7 • Het apparaat moet altijd geaard zijn. • De wanden en het werkblad rondom het apparaat moeten minimaal tot 100°C hittebestendig zijn. Ook al wordt het apparaat zelf niet warm, door de warmte van een hete pan kan de wand verkleuren of vervormen. •...
- Page 8 • Door verkeerde installatie, aansluiting of montage vervalt de garantie. • Attentie: elke wijziging in het apparaat, inclusief het vervangen van de voedingskabel, moet worden uitgevoerd door personeel van de technische dienst met een specifieke opleiding. • Dompel het snoer of de stekker nooit onder in water. •...
-
Page 9: Productomschrijving
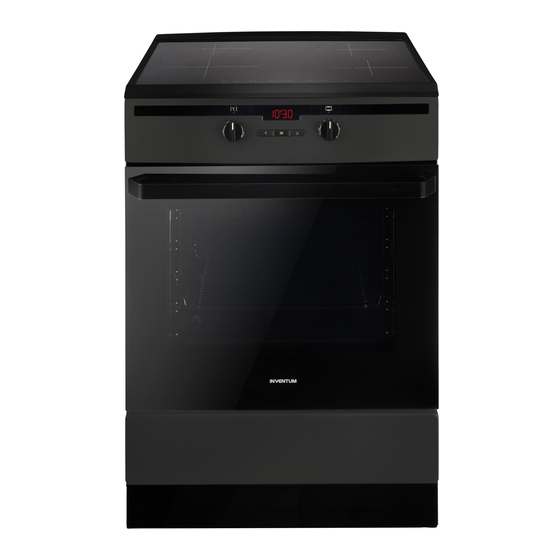
productomschrijving Kookgedeelte Thermostaatlampje van de oven Controlelampje van de oven Temperatuurknop Aan/ uit en ovenfunctieknop Ovendeur Schuiflade Ovenlampje Niveau’s in oven 10. Bakplaat Rooster Nederlands •... - Page 10 Kookgedeelte 1. Kookzone - linksvoor (Ø 210 mm) 2. Kookzone - linksachter (Ø 160 mm) 3. Kookzone - rechtsachter (Ø 160 mm) 4. Kookzone - rechtsvoor (Ø 160 mm) 5. Bedieningspaneel Bedieningspaneel Toets voor toetsenblokkering Kookzonetoets Vermogenstoetsen + en - Timertoets 10.
-
Page 11: Voor Het Eerste Gebruik
voor het eerste gebruik Voordat u het apparaat voor de eerste maal in gebruik neemt, dient u als volgt te werk te gaan: pak het fornuis voorzichtig uit en verwijder al het verpakkingsmateriaal en eventuele promotionele stickers. De verpakking (plastic zakken, piepschuim en karton) buiten het bereik van kinderen houden. - Page 12 MONTAGE VAN DE OMVALBEVEILIGING De omvalbeveiliging wordt gemonteerd om te voorkomen dat het fornuis kantelt. Dankzij de omvalbeveiliging tegen het kantelen van het fornuis voorkomt u dat een kind dat op de openstaande ovendeur klimt het fornuis laat kantelen. Fornuis, hoogte 850 mm A = 60 mm B = 103 mm Fornuis, hoogte 900 mm...
- Page 13 POWER MANAGEMENT Met deze functie kunt u het totale maximale vermogen van het kookgedeelte in stellen. Dit kan nodig zijn in verband met de beschikbare elektrische aansluiting. Het kookgedeelte is standaard ingesteld op 3,7kW. Het kookgedeelte kan ingesteld worden op een van de volgende waarden: Aansluitschema Maximaal vermogen 2,8 kW...
-
Page 14: Gebruik Van De Oven
gebruik van de oven Opgelet! Bij fornuizen die uitgerust zijn met een elektronische klok verschijnt na het aansluiten op het stroomnet [0.00] op het display. Stel de huidige tijd in op de klok. De oven zal niet werken als het uur niet ingesteld is. ELEKTRONISCHE KLOK OK - keuzetoets >... - Page 15 AUTOMATISCHE IN - EN UITSCHAKELING INSTELLEN Gebruik deze functie als de oven op een bepaalde tijd aan moet gaan gedurende een bepaalde bereidingstijd. Stel de bereidingstijd en de eindtijd in. Voorbeeld: Het is 11:00 uur. De bereidingstijd is 1 uur. Het gerecht moet om 14:00 uur klaar zijn.
-
Page 16: Bediening Van Het Kookgedeelte
bediening van het kookgedeelte Gebruik alleen pannen die geschikt zijn voor een inductie kookplaat. Het kookgedeelte functioneert door elektronische sensoren die worden bediend door de corresponderende tiptoets aan te raken. Bij elke aanraking van een tiptoets klinkt er een geluidssignaal. HET KOOKGEDEELTE INSCHAKELEN Schakel het kookgedeelte in door gedurende enkele seconden op de AAN/UIT toets te drukken. - Page 17 TIMER FUNCTIE INSTELLEN De timer functie kan op twee manieren gebruikt worden: kooktimer en kookwekker. Kooktimer De kooktimer is gekoppeld aan een kookzone en kan voor elke kookzone apart ingesteld worden. In tegenstelling tot de kookwekker schakelt de kooktimer de kookzone uit als de ingestelde tijd voorbij is. •...
- Page 18 WARMHOUDFUNCTIE - De warmhoudfunctie houdt reeds bereide gerechten warm op de kookzone. De geselecteerde kookzone is aan op een laag vermogen. Het vermogen van de kookzone wordt door de warmhoudfunctie zo geregeld dat het gerecht in de pan rond de 65°C blijft. Het warme voedsel dat klaar is om op te eten, veranderd hierdoor niet van smaak en kleeft niet vast aan de bodem van de pan.
-
Page 19: Pannen Voor Inductie
pannen voor inductie • Gebruik pannen met een dikke, vlakke bodem die dezelfde diameter hebben als de betreffende kookzone. Dit vermindert de kooktijd. • Een pan moet in het midden van de kookzone geplaatst worden. • Wanneer u op het glazen kookgedeelte in een pan met een sterk weerkaatsende (licht metalen oppervlak) of dikke bodem kookt, kan het aan de kook brengen van het gerecht langer duren (tot 10 minuten extra). -
Page 20: Bediening Van De Multifunctionele Oven
bediening van de multifunctionele oven De multifunctionele oven kan verwarmd worden met behulp van een verwarmingselement bovenaan en onderaan, een grillelement en een verwarmingselement voor heteluchtcirculatie. INSCHAKELEN De oven kan bediend worden met behulp van de draaiknop voor de functie van de oven - draai de draaiknop naar de gewenste functie om de oven in te stellen –... -
Page 21: Baktips En Baktabel
Ovenfunctie Omschrijving Op de stand hetelucht wordt de verwarming van de oven op gecontroleerde wijze ondersteund met behulp van een heteluchtventilator die op een centrale plaats in de achterwand van de Hetelucht ovenruimte gemonteerd is. In vergelijking met een conventionele oven wordt een lagere baktemperatuur gebruikt. - Page 22 VLEES BRADEN • In de oven kunnen porties vlees van meer dan 1 kg bereid worden. Kleinere stukken kunnen beter gebakken worden op de gasbranders van het fornuis. • Gebruik bij het braden van vlees vuurvaste schotels. Ook de handgrepen van deze schotels moeten bestand zijn tegen hoge temperaturen.
- Page 23 Gerecht Ovenfuncties Temperatuur - °C Tijd in minuten Niveau 230 - 250 14 - 18 225 - 250 120 - 150 160 - 180 120 - 160 160 - 230 90 - 120 160 - 190 90 - 120 2 - 3 70 - 90 160 - 180 45 - 60...
-
Page 24: Reiniging En Onderhoud
reiniging en onderhoud Het reinigen en onderhouden van het fornuis heeft een belangrijke invloed op de levensduur en probleemloze werking. Het fornuis mag niet gereinigd worden met een stoomreiniger of hogedruk reiniger. Voor de reiniging moet het fornuis uitgeschakeld worden. Let er hierbij op dat alle draaiknoppen in de uit-stand [ ... - Page 25 OVENDEUR DEMONTEREN EN MONTEREN De ovendeur kan gedemonteerd worden om het schoonmaken van de binnenzijde van de oven en de ovendeur te vergemakkelijken. • Open de ovendeur en de klap beveiliging op het scharnier naar boven(fig. A). Doe de deur een kleine beetje dicht en til de deur naar boven en naar buiten op om deze te verwijderen.
-
Page 26: Storingen En Oplossingen
De glasplaat van het Gevaar! Schakel de stroomtoevoer uit en verwijder de stekker van het apparaat. kookgedeelte is gebarsten. Neem contact op met de servicedienst van Inventum. Het kookgedeelte maakt een Dat is een normaal geluid. De koelventilator van de elektrische onderdelen werkt. -
Page 27: Productkaart
Fabrikant INVENTUM Typenummer VFI6042ZWA Type apparaat inductiefornuis Aantal kookzones Verwarmingstechnologie - kookgedeelte inductie Diameter per kookzone [cm] (linksvoor) Ø 21 Diameter per kookzone [cm] (linksachter) Ø 16 Diameter per kookzone [cm] (rechtsachter) Ø 16 Diameter per kookzone [cm] (rechtsvoor) Ø... -
Page 28: English
English safety instructions • Carefully and fully read the instruction manual prior to using the appliance and carefully store the manual for future reference. • Only use this appliance for the purposes described in the instruction manual. Do not use aggressive cleaning agents in this appliance. - Page 29 • WARNING: fire hazard: do not leave anything standing on the cooker. WARNING : cooking with fat or oil on an unattended cooker • can be dangerous and could result in fire. NEVER try to extinguish the fire with water. Instead, you should turn off the appliance and then cover the flames with a lid or an extinguishing blanket, for example.
- Page 30 • In case of smoke, switch off the cooker and remove the plug from the socket. Keep the oven door closed to smother the flames. • Check that the appliance is switched off before replacing the lamp, to prevent the risk of an electric shock. •...
- Page 31 • The cooker cannot be used with a timer or separate remote control. • Only connect the appliance to alternate current, to an earthed wall socket, with a mains voltage that corresponds with the information provided on the information plate of the appliance. •...
- Page 32 • If you decide not to use the appliance any more due to a defect, we recommend cutting off the cord after removing the plug from the wall socket. Household appliances may not be added to normal household waste. Take the appliance to a special centre for separated waste collection of your municipality to have it recycled in a responsible manner and in accordance with government regulations.
-
Page 33: Product Description
product description Cooking section Thermostat light of the oven Indicator led of the oven Temperature knob On/off and oven mode knob Oven door Sliding drawer Oven light Levels in oven 10. Baking tray Grille English •... - Page 34 Cooking section 1. Cooking zone - front left (Ø 210 mm) 2. Cooking zone - rear left (Ø 160 mm) 3. Cooking zone - rear right (Ø 160 mm) 4. Cooking zone - front right (Ø 160 mm) 5. Operating panel Operating panel Key for key lock Cooking zone key...
-
Page 35: Prior To First Use
prior to first use Before using the appliance for the first time, you should proceed as follows: carefully unpack the cooker and remove all packaging material and any promotional stickers. Keep the packaging (plastic bags, polystyrene and cardboard) out of the reach of children. - Page 36 ASSEMBLY OF THE TILTING SAFEGUARD The tilting safeguard is mounted to prevent the cooker from tilting. Thanks to the tilting safeguard, children are prevented from climbing on the open oven door and tilting the cooker. Cooker, 850 mm high A = 60 mm B = 103 mm Cooker, 900 mm high A = 104 mm...
- Page 37 POWER MANAGEMENT This function allows you to set the total maximum power of the cooking section. This may be necessary in connection with the available electrical connection. By default, the cooking section is set to 3.7kW. The cooking section can be set to one of the following values: Wiring diagram Maximum power 2.8 kW...
-
Page 38: Use Of The Oven
use of the oven Important! In cookers equipped with the electronic timer, the time [0.00] will start flashing in the display field upon connection to the power supply. Set the timer with the current time. If the current time is not set, operation of the oven is impossible. - Page 39 AUTOMATIC OPERATION Use this function if the oven is to be switched on for a specified period of time and switched off at a fixed hour. Set the preparation time and the end time. Example: the current time is 11:00. The cooking time is 1 hour. The dish has to be done by 14:00. The oven starts cooking at 13:00 (14:00 minus 1 hour) on the preset temperature and oven function and will finish at 14:00.
-
Page 40: Operating The Cooking Section
operating the cooking section Only use pans that are suitable for an induction hob. The cooking section works by means of electronic sensors that are operated by touching the corresponding touch control. At each touch of a touch control, you can hear a sound signal. SWITCHING ON THE COOKING SECTION Switch on the cooking section by pressing the ON/OFF key for a few seconds. - Page 41 SETTING THE TIMER FUNCTION The timer function can be used in two way: cooking timer and egg timer. Cooking timer The cooking timer is coupled to a cooking zone and can be set separately for each cooking zone. Contrary to the egg timer, the cooking timer switches off the cooking zone when the set time has passed.
- Page 42 HEAT MODE - The heat mode keeps prepared dishes warm on the cooking zone. The selected cooking zone is on at a low power. The power of the cooking zone is controlled in such a way by the heat mode, that the dish in the pan remains around 65°C. The hot food that is ready to be eaten does not change in flavour and does not get stuck to the bottom of the pan.
-
Page 43: Pans For Induction
pans for induction • Use pans with a thick, flat bottom with the same diameter as the cooking zone concerned. This reduces cooking time. • A pan should always be placed in the centre of the cooking zone. correct false false •... -
Page 44: Operating The Multifunctional Oven
operating the multifunctional oven The multifunctional oven can be heated by means of a top and bottom heating element, a grill element and a heating element for hot air circulation. SWITCHING ON The oven can be operated by means of the rotary button for the oven function - turn the rotary button to the required mode to switch on the oven, and –... -
Page 45: Baking Tips And Baking Tables
Oven mode Description On the position hot air , heating the oven is supported in a controlled manner by means of a hot air fan that is mounted on a central position in the rear wall of the oven chamber. Compared to a conventional oven, Hot air a lower baking temperature is used. - Page 46 ROASTING MEAT • In the oven, it is possible to prepare portions of meat of more than 1 kg. It is better to prepare smaller pieces on the gas burners of the cooker. • Use ovenproof dishes when roasting meat. The handles of these oven dishes should also be able to resist high temperatures.
- Page 47 Dish Oven modes Temperature - °C Time in minutes Level 230 - 250 14 - 18 225 - 250 120 - 150 160 - 180 120 - 160 160 - 230 90 - 120 160 - 190 90 - 120 2 - 3 70 - 90 160 - 180...
-
Page 48: Cleaning And Maintenance
cleaning and maintenance Cleaning and maintenance of the cooker has a major effect on life span and trouble-free operation. The cooker should not be cleaned with a steam cleaner or high pressure cleaner. Switch off the cooker prior to cleaning. Make sure that all rotary buttons are in the off position [ / 0 ]. The oven should only be cleaned once it is cooled down. - Page 49 DISASSEMBLING AND MOUNTING THE OVEN DOOR The oven door can be disassembled to make it easier to clean the interior of the oven and the oven door. • Open the oven door and fold the safeguard on the hinge upwards (fig. A). Close the door a little and lift the door upwards and to the outside to remove it.
-
Page 50: Breakdowns And Solutions
The glass plate of the cooking Hazard! Switch off the power supply and remove the plug of the appliance. Contact the section is cracked. Inventum service department. The cooking section makes This is a normal noise. The cooling fan of the electrical parts is working. -
Page 51: Product Fiche
fiche Manufacturer INVENTUM Model number VFI6042ZWA Appliance type Induction cooker Number of cooking zones Heating technology - cooking section induction Diameter per cooking zone [cm] (front left) Ø 21 Diameter per cooking zone [cm] (rear left) Ø 16 Diameter per cooking zone [cm] (rear right) Ø... -
Page 52: Algemene Service- En Garantievoorwaarden
De actuele omruilkosten kun je terugvinden op www.inventum.eu/omruilkosten. 3. Om aanspraak te maken op de 5 jaar Inventum garantie kun je teruggaan naar de winkel waar je het product hebt gekocht of contact opnemen met de consumentenservice van Inventum via het formulier op www.inventum.eu/service-aanvraag. - Page 53 7. De garantieperiode begint te lopen op de datum van aankoop van het product. 8. Voor het recht op garantie dien je een kopie van het originele aankoopbewijs en het Inventum 5 jaar garantiecertificaat te kunnen overleggen.
-
Page 54: General Terms And Conditions Of Service And Warranty
The current costs of exchange are listed at www.inventum.eu/omruilkosten. 3. In order to claim under the 5-year Inventum warranty, you can either return the product to the shop you bought it from or contact the Inventum costumer service department via the form at www.inventum.eu/service-aanvraag. - Page 55 7. The warranty period starts from the date the product is bought. 8. In order to claim under the warranty, you must produce a copy of the original receipt and the Inventum 5-year warranty certificate. 9. The warranty applies only to normal domestic use of Inventum products within the Netherlands.
- Page 56 Inventum Huishoudelijke Apparaten B.V. Meander 901 6825 MH Arnhem Tel: 0800-4583688 info@inventum.eu www.inventum.eu facebook.com/inventum1908 youtube.com/inventum1908 VFI6042ZWA/0.0520V Wijzigingen en drukfouten voorbehouden/ Modifications and printing errors reserved...
Need help?
Do you have a question about the VFI6042ZWA and is the answer not in the manual?
Questions and answers