
Related Manuals for Dunster House H3-GS4X35HEX

Summary of Contents for Dunster House H3-GS4X35HEX
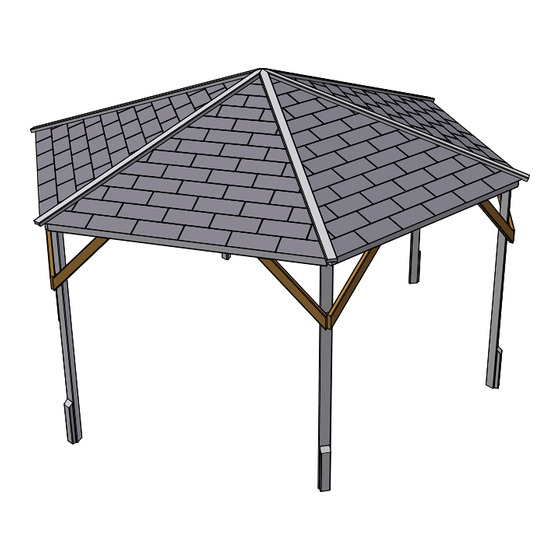
- Page 1 INSTALLATION MANUAL Hexagonal Utopia Garden Shelter H3-GS4X35HEX Unique product reference number ................. http://www.dunsterhouse.co.uk Dunster House Ltd.
- Page 2 In the unlikely event that you need to contact us, please do so in writing to: Email: cs@dunsterhouse.co.uk Post: FAO Customer Services, Dunster House Ltd - Factory 1, Caxton Road, Bedford, MK41 0LF Our Customer Services department is open 9:00 - 17:00, Monday to Friday. Please include your Sales Order number starting with SO or your postcode so we can locate your order.
- Page 3 Installation Manual for Utopia Garden Shelter Dear customer! The assembly of your new Hexagonal Utopia Garden Shelter requires no technical knowledge. However, it is important that the assembly instructions are strictly followed. The assembly instruction is a combination of text and illustrations.
- Page 4 Component details for Utopia Garden Shelter 70x35x1961.A Roof support 1961 70x35x350.C Post trim 70x35x650.C Post trim 70x35x1948.P Purlin 1948 70x35x2360 Temporary support trim 2360 70x35x2170.D 6x Roof Trim 2096 2170 86x65x1810.A 1810 Wall post Page 3 All dimensions are approximate and subject to the limitations of the material used and the methods of manufacture...
- Page 5 Component details for Utopia Garden Shelter HU - Roof panel top 58.5 Roof panel 1183.2 HU - Roof panel bottom Roof panel 58.5 2009.7 45x20x1750.A Roof panel support 1750 21x76x70(Triangle Support) SMB051 Triangle support Spider Bracket 21.9 TABLE Description 50mm Screws 60mm Screws 70mm Screws 90mm Screws...
- Page 6 Installation Manual for Utopia Garden Shelter Step 1 - Assembling shelter frame To avoid splitting timber, please pre-drill all holes before screwing throughout the installation. Start by assembling the main frame for the Utopia Garden Shelter. At the notched end of Wall posts (86x65x1810.A) fix Triangle support 76x70 and Roof supports (70x35x1961.A) in the positions shown using 2x 70mm screws per end.
- Page 7 Step 3 - Assembling Purlins 70x35x1948.P 60mm Screws 70x35x1948.P SMB051 70x35x1948.P Using diagram above, assemble Purlins (6x 70x35x1948.P) and Spider metal bracket (SMB051) roof structure. To fix purlins to spider metal bracket use 2x 60mm screws per purlin and screw from underneath, as shown above. Once the roof frame has been assembled, you will need to position it on the top of the wall posts and fix it to them using 2x 90mm screws per purlin.
- Page 8 Step 6 - Fixing roof panels Roof panel top Roof panel top 50mm Screws Slide in (6x HU - Roof panel top) between purlins as much as possible so the panel sit tight between purlins. Secure panels from underneath using 6x 50mm screws per panel, screwing though the panel subframe.
- Page 9 Step 6 - Fixing Roof supports and Post trims Position Roof panel support (45x20x1750.A) underneath the roof panel as shown below. Fix them by screwing from the outside with 8x 50mm and 2x 70mm screws. Repeat this process for all 6 roof sections. 50mm Screws 45x20x1750.A 70mm Screws...
- Page 10 Important: • If your shingles have a peelable plastic backing remove this before installing them to the roof. • Felt lap Adhesive is an optional extra. Membrane: • Place membrane over top of roof leaving a 15-20mm overhang on each side. If membrane does not overlap whole area of roof face overlap a second piece with at least a 20mm overlap.
- Page 11 Diagram represents shingle tiles building up across the roof boards. Important: Adhesive layer (Bitumen) on the back of the shingles will adhese the shingles together in warm sunlight. Dunster House Shingles installation video - https://www.youtube.com/watch?v=IFMFYYSUEUI page 2...
- Page 12 Important: • If your shingles have a peelable plastic backing remove this before installing them to the roof. • Felt lap Adhesive is an optional extra. Membrane: • Place membrane over top of roof leaving a 15-20mm overhang on each side. If membrane does not overlap whole area of roof face overlap a second piece with at least a 20mm overlap.
- Page 13 Diagram represents shingle tiles building up across the roof boards. Important: Adhesive layer (Bitumen) on the back of the shingles will adhese the shingles together in warm sunlight. Dunster House Shingles installation video - https://www.youtube.com/watch?v=IFMFYYSUEUI page 2...
- Page 14 Felt Plastic Waterproof Membrane: Place membrane over top of roof leaving a 15-20mm overhang on each side. If membrane does not overlap whole area of • roof face overlap a second piece with at least a 20mm overlap. Secure membrane to roof boards using a staple gun. Felt: •...
- Page 15 INSTALLATION MANUAL ADDITIONAL PANEL PACK H3-GS4X35HEX Unique product reference number ................. http://www.dunsterhouse.co.uk Dunster House Ltd.
- Page 16 Components Required for Utopia GS Hexagonal Gazebo Infill Panel 2m - Solid 1860 Infill Panel 2m - Glass 1860...
- Page 17 Utopia Garden Shelter 3m x 4m Half Height Wall Panel Assembly Important: Panel diagrams shown are one • 2m Solid Wall Panel section of Hexagonal Gazebo. Please apply • 70mm Screws instructions to all section of you installation. • Position the solid wall panels between Posts as shown in the diagram bellow. •...
Need help?
Do you have a question about the H3-GS4X35HEX and is the answer not in the manual?
Questions and answers