
Related Manuals for OPTO-EDU A59.4972


Summary of Contents for OPTO-EDU A59.4972
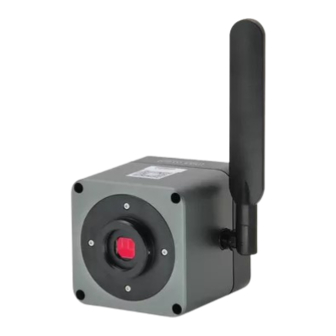
- Page 1 A59.4972 5G WIFI+4K HDMI+USB+LAN Digital Camera, 12.0M, C-Mount, USB/WIFI Measuring Capture Pro Software Instruction Manual...
-
Page 2: Table Of Contents
2.5 Measuring tools .........................- 9 - 2.5.1 Calibration ......................- 9-10 - 2.5.2 Select measurement tool for measurement ............- 10 - 2.6 Drawing tools ........................- 11 - 2.7 Thumbnail toolbar ......................- 11 - 2.8 Software setup ........................- 12 - www.optoedu.comhttps://www.optoedu.com/A59.4972 l... -
Page 3: Chapter 1: Software Installation
Microsoft Outlook 2003 or later version (for sending pictures via email function) �.� Installation steps Step1.Run the file “A59.4972 Capture Pro Install ”. When window pops up,please select the installation guide language. Note: The installation guide language is independent of the software interface language. -
Page 4: Software Connection To The Camera Method
�.�.� Wireless connection method (only valid for cameras with WiFi capability) Step 1: Confirm that the computer supports the 5G WiFi IEE 802.11ac protocol; Step 2: WiFi embedded camera or WiFi camera, power on and switch to WiFi gear. As shown in the figure below: www.optoedu.comhttps://www.optoedu.com/A59.4972 l - 2 -... - Page 5 Step 3: After the WiFi camera is started, search for the camera's WiFi name WiFiCamera_5G_xxxxxx or WiFi5Camera_xxxxxx in the network connection, the default connection password is 12345678, the display shows "Connected" that is successfully connect- ed to the camera WiFi, as shown below. www.optoedu.comhttps://www.optoedu.com/A59.4972 l - 3 -...
-
Page 6: Chapter 2: Software Instructions
Support single selection or select them by drawing a big box around them. Drag Use the mouse to drag the still image. Undo Undoing the last operation on an "object". Redo Redoing the last operation on an "object". www.optoedu.comhttps://www.optoedu.com/A59.4972 l - 4 -... -
Page 7: Depth-Of-Field Fusion Function
�.�.� Depth of field fusion function Depth of field fusion only works with USB connection. Provide two depth of field fusion software algorithms, Phase mode and Characteristic mode, and choose the appropriate algorithm for fusion according to the actual application. www.optoedu.comhttps://www.optoedu.com/A59.4972 l - 5 -... -
Page 8: Image Stitching Function
Live image taking Preview window setting: double window to display original image and combined channel image separately, single window to display combined channel image only Image Zoom Image reduction Adapts to screen size Import images www.optoedu.comhttps://www.optoedu.com/A59.4972 l - 6 -... -
Page 9: Combined Color Images
The advantage of H264 format is that the image quality is more transparent, but it Preview format requires a higher computer configuration. The advantage of MJPG format is that it requires a lower computer configuration, but the picture quality is not as good as H264. www.optoedu.comhttps://www.optoedu.com/A59.4972 l - 7 -... -
Page 10: Camera Property Control
Export image Exporting image properties to local disk. properties Import image Import image properties from local disk. properties Restore Restore all image property parameters to their default values. Default values www.optoedu.comhttps://www.optoedu.com/A59.4972 l - 8 -... -
Page 11: Measuring Tools
1000, "unit" select “μm”. Then click "Add" to add this Aditional remark calibration value to the calibration table to be used. Add the calibration value for other objectives of different magnifications in this way. Edit Delete www.optoedu.comhttps://www.optoedu.com/A59.4972 l - 9 -... -
Page 12: Select Measurement Tool For Measurement
Three-point vertical line measurement Four-point angle measurement Set the measurement tool line width Ellipse measurement Set the transparency of the measurement tool Drawing a circle with radius Set the measurement tool color Three point drawing circle measurement www.optoedu.comhttps://www.optoedu.com/A59.4972 l - 10 -... -
Page 13: Drawing Tools
The exported documents are as follows: �.� Drawing tools pencil straight line highlighter single arrow straght line rectangle oval concentric circle isosceies triangle set font insert text line type set line width set transparency color www.optoedu.comhttps://www.optoedu.com/A59.4972 l - 11 -... -
Page 14: Thumbnail Toolbar
Support for modifying software interface language. Support modifying the default maximum single recording time. Support for modifying the image resolution of an external HDMI display. (This function is only valid for cameras with HDMI output). www.optoedu.comhttps://www.optoedu.com/A59.4972 l - 12 -...
Need help?
Do you have a question about the A59.4972 and is the answer not in the manual?
Questions and answers