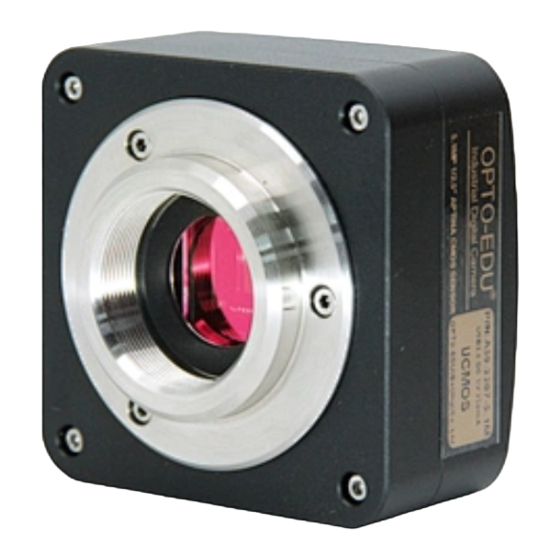
Summary of Contents for OPTO-EDU A59.2207
- Page 1 A59.2207, A59.2208 Digital Camera Instruction Manual Copyright 2013 Opto‐Edu (Beijing) Co., Ltd. ...
- Page 2 ...
- Page 3 User Manual WARNING! TO AVO ID TH E RISK OF FIRE OR ELECT RICAL SHOCK. N EVER EXPOSE THIS PRO DUC T TO WATER OR OPER ATE IN A H IGH HU MID IT Y EN VIRONME NT. Keep camera away from the following: High temperatures and excessive humidity Direct sunlight or other heat sources Dust...
-
Page 4: Trademark And Copyright Information
User Manual Trademark and Copyright information © COPYRIGHT 2012, TOUPTEK PHOTONICS All rights are reserved. No part of this document may be photocopied, reproduced, or translated to another language without the prior written consent of TOUPTEK PHOTONICS. The information contained in this document is subject to change without notice. -
Page 5: Warnings And Precautions
User Manual Warnings and Precautions Precautions when using your Pro-MicroScan Keep camera away from the following: · High temperatures and excessive humidity · Direct sunlight or other heat sources · Dust · Extreme vibration If the imaging sensor lens becomes dirty, first try blowing dust particles from it. Next use a lint free cloth or proper lens cleaning cloth to wipe the lens gently. -
Page 6: System Requirements
User Manual System Requirements PC running either Windows ® (32-bit & 64-bit) XP , Vista , 2008 and 7 ; Mac OSX and Linux Performance is not guaranteed if the following specification cannot be reached. ♦ DirectX 9.0 or later installed ♦... -
Page 7: Package Contents
User Manual Package Contents If you find any contents missing or damaged, contact the place of purchase. Camera Software CD USB Cable Manual Calibration slide* Fixed Focusable Lens adaptor for Cable* CS-Mount Ring* lens adaptor* Lens adaptor* eyepiece tube* (90˚ connector) “*”... - Page 8 User Manual 2. Select “Install Camera Driver”. 3. Select “Next”. 4. Select “I Agree”.
- Page 9 User Manual 5. Select the driver consistent with model of your products, and then click “Next”. 6. Select the installation path. If the installation path in the default one, just click the “Install”. The progress of installation……...
- Page 10 User Manual 7. Click “Finish”, the end of the installation. (If using Vista, please plug the digital eyepiece into the USB slot before installing camera driver and skip step 3) 8. Click to select the “Install Image Software” (the installation image software-ToupView for example) 9.
- Page 11 User Manual 10. Click the “I Agree” 11. Select the installation path. If the installation path in the default one, just click the “Install”. The progress of installation……...
- Page 12 User Manual 12. Click the “Finish”, end of the installation (after the success of installation, the shortcut icon “ ” ToupView will appear on the desktop) Connect the camera to a Microscope The left hand holds the camera and makes the dust cover down, the right hand rotate the dust cover clockwise.
-
Page 13: Using The Camera
User Manual Using the camera 1. Double click on the desktop icon “ ”, and start ToupView. 2. If the camera is connected with the computer correctly, click the device on the camera list of left sidebar, and then preview window will be open. Camera Initialization Settings On the first use of camera for video preview, the following settings are available for adjustment to make the camera work in the preset condition. - Page 14 User Manual Snap: Capture single image Record: Capture video stream Resolution settings: Choose suitable resolutions will get both smooth video and high resolution still images. 1, Advanced users unselected automatic exposure button, enter the manual exposure mode. 2,Tune the microscope light source to a bright state, and then pull exposure time block left and right until the brightness of the image is in the best visual effects.
- Page 15 User Manual Different frame rates are available. You can select proper frame rate according to your computer performance. Select the fastest frame rate if your computer is good enough. If you need to observe color image, select “Color” If you need to observe black and white image, select “Gray” If the image on the screen appears in different direction from what is viewed under the microscope, check the “level”...
- Page 16 User Manual Before definition: After definition: 3. Calibrate the gray values of image This function can make image brightness stable and uniform results with a lot of shooting or in differe nt time shooting, achieve the requirement of the continuity of the shooting. Method of use: use the “Image Select”...
- Page 17 User Manual 2. Video Marker (Setup --> Video Overlay --> Marker) 3. Video / Image Measurement Capture and save ToupView provides a variety of image or video recording mode and can easily achieve a single picture, sequence images, video capture and preservation. 1、Taking single picture and video During the video showing, you can always use the “Snap”...
-
Page 18: Troubleshooting
User Manual 2、Capture a sequence of pictures (Time-Lapse) This function can capture a sequence of pictures with the same interval of time after setting time interval; you can precisely set the time interval (2 to 3600 seconds) and the total number of shots. Open path: the menu bar “Capture”... - Page 19 User Manual Fault reason: Solution: The light source of the microscope is closed Open light source and adjust the brightness The position of the splitter lever of the microscope is in the Switch the splitter lever to open to photography channel wrong position to make the photography channel closed The preset exposure time is too short Reset the exposure time...


Need help?
Do you have a question about the A59.2207 and is the answer not in the manual?
Questions and answers