
Related Manuals for PURPLE LEAF ZY04GHTG1014


Summary of Contents for PURPLE LEAF ZY04GHTG1014
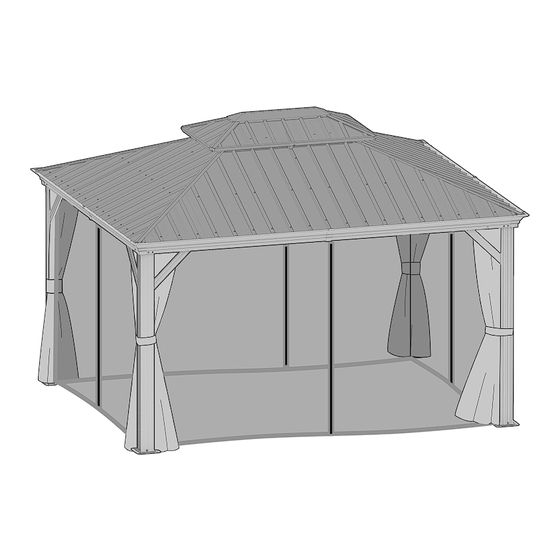
- Page 1 PURPLE LEAF 1 0 ' × 1 4 ' SKU: ZY04GHTG1014 HARDTOP GAZEBO WITH DOUBLE ROOF Assembly Manual ©Copyright 2016-2022 Purple Leaf Inc. All Rights Reserved...
- Page 2 PURPLE LEAF’s Gazebo Read and follow this assembly and operation guide. To reduce personal injury and damage to your gazebo Please close your gazebo curtain when it is incoming over 30 mph wind. We recommend a two-person team for assembly and disassembly.
- Page 3 Warnings and Cautions Please retain this instruction for future usage and read carefully before assembly. Make sure you have all the parts & hardware as item list shows. 2 adults or more are recommended to install your gazebo. Do not discard any of the packaging until you have checked that you have all the parts and pack of fittings. Check all bolts for tightness before use, and periodically check and tighten bolts ensure your gazebo works properly.
- Page 5 MOUNTING MOUNTING BLUEPRINT BLUEPRINT Gazebo 10×14 6.77 in. 160.27 in. 6.77 in. 111.77 in.
- Page 6 ×12 If the deck is hard wood and the depth of it is over 3 inch , you can use 5/16 in. ×4 in. Structural Wood Screw to mount the gazebo.
- Page 7 4 inches 1/4 inch ×12 If the ground is concreted and the depth of it is over 3 inch , you can use 1/4 inch expansion bolts to mount the gazebo O r y o u c a n m a k e a c o n c r e t e f o o t i n g f o r g a z e b o ,...
- Page 8 CHECK LIST ×2 ×4 ×2 ×2 ×2 ×2 ×2 ×2 ×2 ×2 ×2 ×2 ×4 ×2...
- Page 9 ×4 ×1 ×1 ×4 ×4 ×4 ×4 ×1 ×4 ×4 ×4 ×2...
- Page 10 ×2 ×2 ×2 ×4 ×4 ×2 ×4 ×2 ×4 ×8 ×4 ×116 ×2 ×4...
- Page 11 ×2 ×2 ×2 ×4 ×2 ×2 ×2 ×2 ×2 ×2 ×2...
- Page 12 ×2 ×2 ×2 ×2...
- Page 13 ×2 ×2 ×2 ×2...
- Page 14 ×56 ×112 ×4 (M6×25) ×6 ×72 ×12 ×6 (M6×28) (M6×10) ×2 ×8 ×1 (M6×45) ×2 ×1 ×32 ×1 ×215 (M6×50) (M6×16) ×1 ×16 ×4 (M6×20) (M5×16) ×16 ×24 (ST4.8×13)
- Page 15 STEP 1...
- Page 16 ×12 ×12 ×4 ×4 STEP 1...
- Page 17 ×2 ×2 ×2 ×8 STEP 1...
- Page 18 STEP 1...
- Page 19 ×20 ×2 ×2 ×10 STEP 1...
- Page 20 ×2 ×2 ×8 ×2 STEP 1...
- Page 21 STEP 1...
- Page 22 ×28 ×2 ×2 ×14 STEP 1...
- Page 23 ×16 ×16 STEP 1...
- Page 24 ×32 ×4 ×4 11## STEP 1...
- Page 25 ×4 ×16 STEP 1...
- Page 26 STEP 2...
- Page 27 ×1 ×1 ×3 Don't fully tighten the screw , It might cause problem on roofs installation. STEP 2...
- Page 28 ×1 ×1 ×3 STEP 2...
- Page 29 ×3 STEP 2...
- Page 30 ×3 ×9 STEP 2...
- Page 31 ×1 ×3 STEP 2...
- Page 32 Check the the frame as pictures below shows. Frames in Parallelogram shape Frames in rectangular shape STEP 2...
- Page 33 ×2 ×6 STEP 2...
- Page 34 ×2 ×4 ×8 ×2 STEP 2...
- Page 35 P1×2 ×2 ×2 ×4 ×8 STEP 2...
- Page 36 Don't forgot to stick the velcro between the bug netting STEP 2...
- Page 37 ×4 ×2 ×8 ×2 STEP 2...
- Page 38 STEP 3...
- Page 39 ×2 ×2 ×4 ×2 ×12 ×2 ×2 ×2 STEP 3...
- Page 40 If you can't install v3 or v5 , push the part K up and try to insert them again. STEP 3...
- Page 41 Fully fasten the #1 bolts in K & K1 . STEP3...
- Page 42 ×4 ×4 ×4 ×24 ×4 STEP 3...
- Page 43 ×2 ×2 ×2 ×24 ×2 ×2 ×2 ×2 ×2 STEP3...
- Page 44 ×20 ×2 ×2 ×2 ×2 ×4 ×4 ×2 ×2 ×2 ×2 STEP 3...
- Page 45 Install the middle panels ( X4 , X5 or W3 , X4 X5 W4 ) then the small panels on the edge. Ensure the panels stay in the rails as pictures below indicate. STEP3...
- Page 46 ×72 ×4 ×76 ×7 ×4 ×4 ×7 ×72 ×11 ×11 STEP 3...
- Page 47 ×8 ×32 ×40 ×3 ×8 ×3 ×32 ×5 ×2 ×5 STEP3...
- Page 48 STEP 4...
- Page 49 ×2 ×16 ×2 1#×8 STEP 4...
- Page 50 ×2 ×24 ×2 1#×12 STEP 4...
- Page 51 ×48 ×6 ×6 ×6 ×6 STEP 4 Here are two rails for curtians and netting .
- Page 52 ×64 ×8 ×8 ×8 ×8 STEP 4 Here are two rails for curtians and netting.
- Page 53 ×4 ×4 ×8 ×4 STEP 4...
- Page 54 ×1 STEP 4...
- Page 55 ×4 ×4 STEP 4...
- Page 56 ×6 ×8 Pictures below indicate the number of holes on the curtains/netting, each hole is match to one hook. ×6 ×8 ×6 ×8 ×8 ×6 STEP 4...
- Page 57 ×6 ×8 Pictures below indicate the number of ×6 holes on the curtains/netting, each hole ×8 is match to one hook. ×8 ×6 ×8 ×6 STEP 4...
- Page 58 ×8 ×6 Ensure the suture line close to the pole. ×8 ×6 STEP 4...
- Page 59 ×8 ×6 Ensure the suture line close to the pole. ×8 ×6 STEP 4...
- Page 60 STEP 4...
- Page 61 STEP 4...
- Page 62 Care and Cleaning Wash frame parts and fabric with mild soap and water, rinse thoroughly. Dry frame completely and allow the fabric to drip dry. Do not use bleach, acid, or other solvents on the fabric or frame parts. Please inspect and tighten all bolts or fasteners on a regular basis to ensure proper performance and safety of your gazebo.
- Page 63 Warranty Limitation This warranty is for the original purchase order only. (Order number required). This warranty is non-transferable. Purple Leaf is responsible for the free replacement part including shipping charges for the 1 year warranty. Warranty Exclusion This warranty does not cover products subject to negligence, abuse usage, inappropriate installation, extreme weather condition.
- Page 64 Purple Leaf Inc. 1820 E Locust St, Ontario CA, 91761, US gazebo3@purpleleafgarden.com © Copyright 2016-2022 Purple Leaf Inc. All Rights Reserved...
Need help?
Do you have a question about the ZY04GHTG1014 and is the answer not in the manual?
Questions and answers
Is this a gazebo in light grey in color. Will be ordering one once the snow melts. Live in Edmonton. Have to get my permit first.
The document only mentions the color as "Grey" and does not specify "light grey." Therefore, it cannot be determined if the PURPLE LEAF ZY04GHTG1014 gazebo is available in light grey color.
This answer is automatically generated