
Related Manuals for PURPLE LEAF ZY04BY1216-GY


Summary of Contents for PURPLE LEAF ZY04BY1216-GY
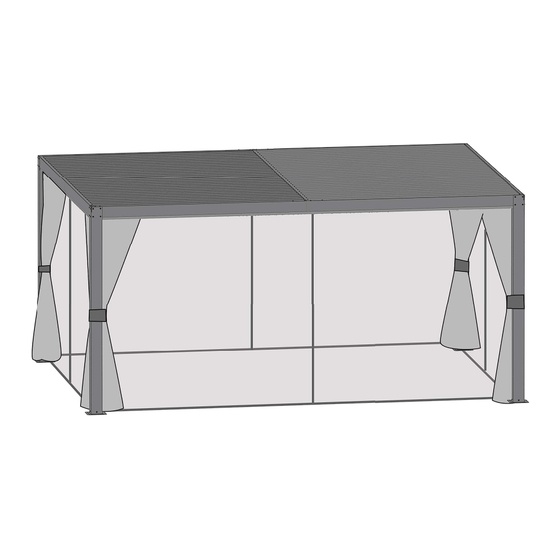
- Page 1 PURPLE LEAF 1 2 ' × 1 6 ' SKU: ZY04BY1216-GY PURPLE LEAF LOUVERED PERGOLA Assembly Manual ©Copyright 2016-2022 Purple Leaf Inc. All Rights Reserved...
-
Page 2: Warnings And Cautions
Warnings and Cautions Please retain this instruction for future usage and read carefully before assembly. Make sure you have all the parts & hardware as item list shows. 2 adults or more are recommended to install your gazebo. Do not discard any of the packaging until you have checked that you have all the parts and pack of fi ttings. Check all bolts for tightness before use, and periodically check and tighten bolts ensure your gazebo works properly. - Page 4 MOUNTING BLUEPRINT Pergola 12×16 192.93in. 7.27 in. 7.27 in. 145.53 in.
- Page 5 ×16 If the deck is hard wood and the depth of it is over 3 inch you can use 5/16 in. ×4 in. Structural Wood Screw to mount the pergola.
- Page 6 4 inches 1/4 inch ×16 If the ground is concreted and the depth of it is over 3 inch you can use 1/4 inch expansion bolts to mount the pergola O r y o u c an m a k e a c o nc r e te f o o t i n g f o r p e r g o l a 1 5 ×...
- Page 7 CHECK LIST ×2 ×4 (M6) (M8) ×2 ×4 ×2 ×8 ×2 ×2 ×1 ×2 ×2 ×2 ×2 ×1...
- Page 8 ×64 ×4 (M8×36) ×140 ×2 (ST4.2×16) ×4 ×2 (M6×30) ×40 ×2 (M5×30) ×128 ×4 ×2 ×4 (M6×16) ×2 ×4 ×1 (S6) ×1 ×2 ×2 (S4) ×1 ×52 ×32 (S10) (M6×16) (M6×20) ×2 ×2 ×16 (S13) (M6×132) (M8) ×1...
- Page 9 STEP 1...
- Page 10 ×16 ×4 ×4 STEP 1...
- Page 11 ×2 ×2 ×4 ×4 STEP 1...
- Page 12 ×2 STEP 1...
- Page 13 ×8 ×2 ×2 ×2 Be aware that this hole is reserved for the rails of curtains & netting. STEP 1...
- Page 14 ×8 ×2 Be aware that this hole is reserved for the rails of curtains & netting. STEP 1...
- Page 15 ×8 ×2 STEP 1...
- Page 16 ×8 ×32 ×16 ×4 ×2 ×8 STEP 1...
- Page 17 ×1 ×2 ×4 ×8 ×4 STEP 1...
- Page 18 ×2 ×20 STEP 1 ×10...
- Page 19 ×4 ×2 ×2 8#×20 ×5 ×2 ×5 STEP 1...
- Page 20 The inner rail. ×56 ×7 ×7 The outer rail. ×7 ×7 STEP 1 Here are two rails for curtians and netting.
- Page 21 The inner rail. ×72 ×9 ×9 The outer rail. ×9 ×9 STEP 1 Here are two rails for curtians and netting.
- Page 22 ×8 ×4 STEP 1...
- Page 23 STEP 2...
- Page 24 ×64 ×128 ×64 STEP 2...
- Page 25 ×32 ×32 ×32 STEP 2...
- Page 26 ×2 ×2 STEP 2...
- Page 27 ×4 STEP 2...
- Page 28 ×1 STEP 2...
- Page 29 STEP 2...
- Page 30 STEP 3...
- Page 31 ×2 ×4 ×2 ×2 ×2 & & H1 H2 inside of pergola outside of pergola STEP 3...
- Page 32 ×7 ×9 Pictures below indicate the number of holes on the curtains/netting, each hole ×9 ×7 is match to one hook. ×7 ×9 ×9 ×7 STEP 3...
- Page 33 ×7 ×9 Pictures below indicate the number of holes on the curtains/netting, each hole ×9 is match to one hook. ×7 ×7 ×9 ×9 ×7 STEP 3...
- Page 34 ×9 ×7 Ensure the suture line close to the pole ×7 ×9 STEP 3...
- Page 35 ×7 ×9 Ensure the suture line close to the pole ×7 ×9 STEP 3...
- Page 36 STEP 3...
- Page 37 STEP 3...
-
Page 38: Warranty Limitation
Warranty Limitation This warranty is for the original purchase order only. (Order number required). This warranty is non-transferable. Purple Leaf is responsible for the free replacement part including shipping charges for the 1 year warranty. Warranty Exclusion This warranty does not cover products subject to negligence, abuse usage, inappropriate installation. Purple leaf reserves the right to explain warranty exclusions. - Page 39 PURPLE LEAF’s Pergola Read and follow this assembly and operation guide. To reduce personal injury and damage to your pergola Please close your pergola curtain when it is incoming over 30 mph wind. two-person team We recommend a for assembly and disassembly.
- Page 40 Purple Leaf Inc. 1820 E Locust St, Ontario CA, 91761, US pergola2@purpleleafgarden.com © Copyright 2016-2022 Purple Leaf Inc. All Rights Reserved...
Need help?
Do you have a question about the ZY04BY1216-GY and is the answer not in the manual?
Questions and answers
assembly instructions for 94as pergola
The assembly instructions for the PURPLE LEAF ZY04BY1216-GY pergola include the following steps:
1. Preparation:
- Ensure you have all the parts and hardware listed in the item list.
- Do not discard packaging until all parts are confirmed.
- Assemble with at least two adults.
- Place the pergola on level ground, at least 6 feet away from obstructions.
2. Safety Precautions:
- Check all bolts for tightness before use and periodically after assembly.
- Some parts have sharp edges; handle with care.
- Small parts may pose a choking hazard, so keep them away from children under 3 years old and pets.
3. Step-by-Step Assembly:
- Attach the necessary base components and support structures.
- Connect the rails for curtains and netting as indicated.
- Secure the inner and outer rails with the specified bolts.
- Continue assembling by following the labeled steps for each part, ensuring all bolts and fasteners are properly tightened.
These instructions ensure a safe and stable installation of the pergola.
This answer is automatically generated
the L1 TAPE 6long 2short where do the short ones go ?