
Related Manuals for DSE DM-C2


Summary of Contents for DSE DM-C2
- Page 1 INSTALLATION MANUAL DM-C2 videophones Page:1 DM-C2 Smart Home video intercoms Installation manual How to install Smart-Home video door phones DSE SRL – ITALY – WWW.DSE.EU...
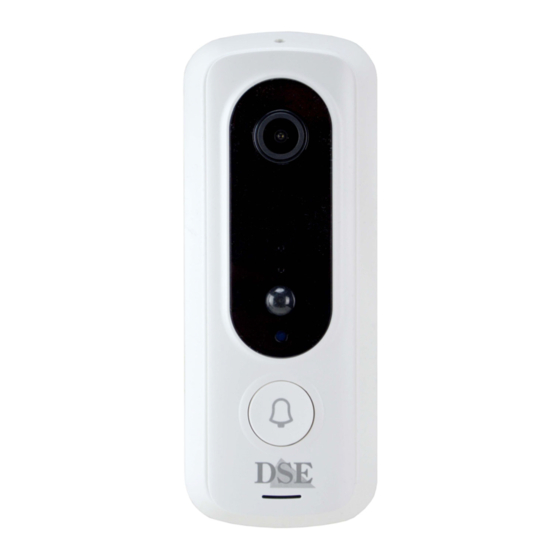
- Page 2 INDICATOR–Status LEDs Flashing blue = Device is awaiting configuration Steady red = Connection to the wifi network failed Solid Blue = Connection to wifi network established Solid Blue and Red = No wifi network connected DSE SRL – ITALY – WWW.DSE.EU...
- Page 3 Insert a microSD card, max 32GB to record (not included). The direction of insertion is indicated with a small drawing. BATTERIES–2 3.7V 1800mAh rechargeable batteries SECURITY SCREW–Fixing screw Insert the included locking screw here to lock the doorphone into its base DSE SRL – ITALY – WWW.DSE.EU...
-
Page 4: Assembly And Operation
The video door phone is equipped with a fixing base which is screwed to the wall with plugs. The intercom clips into the base and is secured with a small security screw. This way you can easily remove the intercom to recharge it. DSE SRL – ITALY – WWW.DSE.EU... - Page 5 Inside the door you will also find the slot for inserting the microSD card, the USB socket for recharging and the RESET button. DSE SRL – ITALY – WWW.DSE.EU...
- Page 6 A voice message informs you of the reset in progress. You must perform this reset if you want to connect your camera to a new access point, even within your own LAN network. DSE SRL – ITALY – WWW.DSE.EU...
- Page 7 Once the account has been created, you have your own space in the cloud where you can upload all your cameras and also many different devices, such as our WiFi remote controls or our WiFi cameras of this DM Series. DSE SRL – ITALY – WWW.DSE.EU...
- Page 8 1 – Press the + button and then ADD DEVICE 2 – Choose the type of SECURITY CAMERA device that you find in the CAMERA or VIDEO SURVEILLANCE section DSE SRL – ITALY – WWW.DSE.EU...
- Page 9 INSTALLATION MANUAL DM-C2 videophones Page:9 3 – Now check that the front blue LED flashes, insert the confirmation tick and press NEXT DSE SRL – ITALY – WWW.DSE.EU...
- Page 10 2.4 GHz WiFi networks. Select the network and enter the password to access your WiFi network. Warning: your mobile phone must be connected to the wifi network you want to connect the device to. DSE SRL – ITALY – WWW.DSE.EU...
- Page 11 BEEP button to continue. The camera registration process takes about 30 seconds, during which the camera is connected to your WiFi network and is added to your personal area on the Cloud server. DSE SRL – ITALY – WWW.DSE.EU...
- Page 12 Page:12 FINISHED! Now the video intercom is configured and ready to be used. If you mess something up and the procedure doesn't go through, you can press the internal reset button and start over. DSE SRL – ITALY – WWW.DSE.EU...
- Page 13 FHD images are not received smoothly. - Enable digital zoom in the image. The magnified area can then be moved by dragging it. It is also possible to activate the digital zoom with the two-finger zoom gesture. DSE SRL – ITALY – WWW.DSE.EU...
- Page 14 DEVICE VOLUME–It is possible to reduce the playback volume of the loudspeaker PIR–It is possible to adjust the sensitivity of the front presence detector. Presence detector allows the camera to record images and send a notification if a human presence is detected in front of the device. DSE SRL – ITALY – WWW.DSE.EU...
- Page 15 If the app is running on your phone, instead of receiving a simple notification you can answer it directly like a phone call DSE SRL – ITALY – WWW.DSE.EU...
- Page 16 INSTALLATION MANUAL DM-C2 videophones Page:16 DSE SRL – ITALY – WWW.DSE.EU...
- Page 17 Assistant. In this section you will find instructions on how to associate your camera. Further on in the manual you will find indications for these integrations. BASIC FEATURE SET –This section contains the basic settings of the DSE SRL – ITALY – WWW.DSE.EU...
- Page 18 You also have a time programmer available to record only in certain periods. OFFLINE NOTIFICATION–Receive a notification if the camera is offline (not connected to the server) for 30 minutes. For battery cameras this limit is 8 hours. DSE SRL – ITALY – WWW.DSE.EU...
-
Page 19: Device Management
You can add all of our DM Series devices: our Smart Home cameras, our remote controls and our intercoms and manage them all from the same app. All your devices are in the app DSE SRL – ITALY – WWW.DSE.EU... - Page 20 Through the Smart Life skill you can control all our DM Series devices with Alexa voice commands. To manage cameras with Alexa, you need to purchase a device with a monitor, such as the Echo Show. You can ask Alexa to show the cameras you want at any time. DSE SRL – ITALY – WWW.DSE.EU...
- Page 21 Smart Life integrates seamlessly with Google Home You need to download Google Home and connect Smart Life by entering your account credentials. To view the cameras you then need a device suitable for viewing for Google Home, such as Chromecast. DSE SRL – ITALY – WWW.DSE.EU...
- Page 22 INSTALLATION MANUAL DM-C2 videophones Page:22 DSE SRL – ITALY – WWW.DSE.EU...
-
Page 23: Computer Connection
To log into the site you do not need credentials, you just need your mobile phone. Open the Smartlife app, touch add device and press the scan button on the top right. Scan the QR code that appears on the site and you will have direct access to all your devices DSE SRL – ITALY – WWW.DSE.EU... - Page 24 INSTALLATION MANUAL DM-C2 videophones Page:24 DSE SRL – ITALY – WWW.DSE.EU...
Need help?
Do you have a question about the DM-C2 and is the answer not in the manual?
Questions and answers