
Subscribe to Our Youtube Channel
Related Manuals for Sony PIX1L


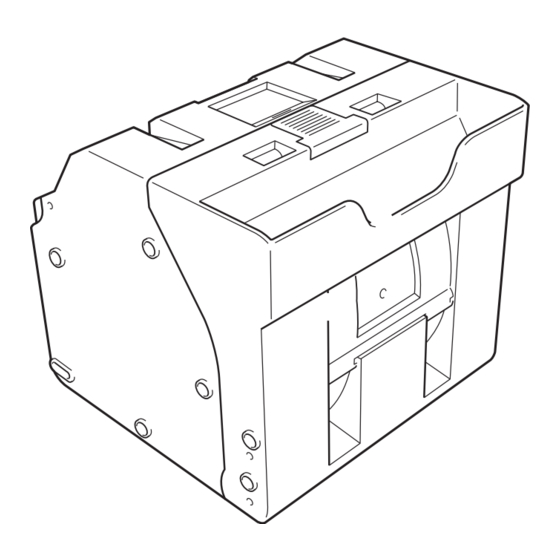
Summary of Contents for Sony PIX1L
- Page 1 3-198-616-11 (1) Digital Photo Printer Operating Instructions Before operating the unit, please read this manual thoroughly and retain it for future reference. PIX1L © 2007 Press Labo Service S.A.
- Page 2 English Owner’s Record The model and serial numbers are located at the rear. Record these number in the space provided below. Refer to these numbers whenever you call upon your dealer regarding this product. Model No. ____________________ Serial No. ____________________ WARNING To reduce the risk of fire or electric shock, do not expose this apparatus to rain or moisture.
-
Page 3: Table Of Contents
Table of Contents Chapter 1 Outline What This Product Can Do ............. 5 Supplied Documentation ..............6 Chapter 2 Preparations Supplied Accessories ..............7 Controls and Functions ..............8 Front ...................... 8 Rear ....................... 9 Installation..................10 Connecting the Power Cord ..............10 Adjusting the Display Angle ............... - Page 4 Setting Memory Cards..............30 Using a “Memory Stick” ..............30 Using a CompactFlash Card..............30 Using a SmartMedia Card ..............31 Using a SD Card/MultiMediaCard............31 Using a xD-Picture Card ..............32 Using Bluetooth communication............32 Selecting Images for Printing ............32 Verifying Order Contents and Entering a Password ......
-
Page 5: Chapter 1 Outline
1) A commercially available CompactFlash card or Microdrive is required. Using a newly developed print engine that features a 2) The Sony DPPA-BT1 Bluetooth USB adaptor is dyesublimation thermal transfer technology, it is possible supported. The adaptor may not be commercially to print images of lasting beauty at high speed. -
Page 6: Supplied Documentation
The following words are trademarks of their respective owners. • “Memory Stick”, “MagicGate Memory Stick”, “Memory Stick Duo”, “Memory Stick PRO”, and “Memory Stick PRO Duo” are trademarks of Sony Corporation. • CompactFlash is a trademark of SanDisk Corporation, registered in the United States and other countries. -
Page 7: Supplied Accessories
Preparations Chapter Supplied Accessories Make certain you have received the following accessories: Paper Tray (1) Power Cord (1) Paper Holder These accessories are stored in the paper holder. Paper Core (1) Adaptor (left,1) Adaptor (right,1) Cleaning Cartridge (1) Operating Instructions (1) Ferrite Core (1) Memory Card Caution Label (1) CD-ROM (1) -
Page 8: Controls And Functions
Controls and Functions Front a Display Note Shows the operation screen. Because the display is a touch To avoid loss of image data or damage to the main unit, screen, the user simply touches the field for the desired never attempt to insert a “Memory Stick”, SmartMedia operation. -
Page 9: Rear
Front door open Rear a USB port (host) Allows connection of a USB device. A Paper holder (page 11) You can connect a commercially available card reader or The paper roll is inserted here. USB flash memory device to this port and use it to read The white areas between printouts are cut off and data. -
Page 10: Installation
Loading Paper Roll and Ribbon Installation Cartridge Handling the paper roll and ribbon Connecting the Power Cord cartridge Connect the supplied power cord to the ~ AC IN connector Notes on the back of the unit, and then connect the plug to a power outlet. - Page 11 • An IC board is incorporated in the ribbon cartridge. Do Press the latch on top of the paper holder and open the not touch the terminal of the IC board with anything, holder. including your fingers or metallic objects. Also, do not strike, bend, or drop the IC board.
- Page 12 When using 5-inch wide print packs Notes Remove the adaptors from the paper holder. • If the edges of the paper roll are uneven, make sure to even them out before installing the paper roll. Otherwise a malfunction may occur. •...
- Page 13 Press the latch on top of the paper holder and open the Close the paper holder. holder. Note Insert the paper roll into the paper holder. When closing the paper holder, take care that the leading edge of the paper roll does not stick out of the The arrow on the label in the center of the paper roll paper feed opening.
- Page 14 Close the front door. Notes • If it is difficult to insert the ribbon cartridge, remove it and try inserting it again. Reduce the ribbon slack by turning the cartridge spool in the direction of the arrow only if the ribbon cartridge cannot be inserted due to slack in the ribbon.
- Page 15 Remove any paper remnants from the paper holder. Notes • There is extra paper on the paper roll. When the ribbon Press the latch on top of the paper holder and open the cartridge is finished, remove the remainder of the paper holder.
-
Page 16: Attaching The Paper Tray
Removing the ribbon cartridge Close the side door. Open the side door. Attaching the Paper Tray Pull back the latch on the ribbon cartridge to release the lock, and then grasp the ribbon cartridge and Attach the supplied paper tray. remove it. -
Page 17: Preparing An Expansion Compactflash Card
CompactFlash card with the unit. Insert the CompactFlash card into the computer. Copy the promotional images. Create the folder “\Sony\UPCR\” in the root folder of the CompactFlash card, and copy the entire folder “\Sony\UPCR\Promotion” into it from the supplied CD-ROM. -
Page 18: Startup And Shutdown
Inserting the expansion CompactFlash card Startup and Shutdown Open the side door. Startup Verify that no memory card is inserted in any of the front-side memory card slots of the unit. Then press the on/standby button. Insert the expansion CompactFlash card that you have created into the expansion CompactFlash card slot. -
Page 19: Shutdown
Shutdown Checking the Ribbon Cartridge Remainder Complete any pending operations, and then bring up the following screen. You can check the remainder of the ribbon cartridge. At the Start Guide display, touch the top right corner of the screen twice in succession. Verify that no memory card is inserted in any of the front-side memory card slots of the unit. -
Page 20: Chapter 3 Setup
Setup Chapter Touch the [OK] button. Setup Procedure The administration screen appears. Before the unit can be used, you must first make various settings. This includes selecting the language and currency, selecting the service mode, and setting up passwords. These settings are made from the administration screen. -
Page 21: Setting Items
(Administration) tab Setting Items Lets you limit the number of prints per order and make password settings. The print logs and system logs can also by displayed from this tab. System Tab When the setting is complete, touch the button. Beep Determines whether a beep sound is heard when performing an operation step or when an error has... -
Page 22: Screens Tab
• Image size: 640 (W) × 480 (H) pixels • File format: 24-bit Windows BMP • File name: Image 1 = promo1.bmp, Image 2 = promo2.bmp • File storage location: \Sony\UPCR\Promotion • (Import promotional image) This button lets you import a promotional image from memory card inserted front-side memory card slot. -
Page 23: Template Tab
Start Guide • (Delete All) Deletes all template data stored on the expansion Selects the time period for which the Start Guide is CompactFlash card. displayed. When the time has elapsed, the unit automatically switches to the promotional image. When Note [OFF] is selected, the Start Guide is not shown. -
Page 24: Print Tab
[Position] tab Print position adjustment Lets you specify where in the image the text should be If the print is not properly centered on the paper, you can placed. adjust the position in the X and Y direction. The adjustment range is ±2 mm in each direction. [Color] tab Lets you specify the text color. -
Page 25: Pricing Tab
Sharpness On-screen Currency abbreviation Adjusts the outline sharpness of the image. Russian Ruble Swedish Krona Pricing Tab Singapore Dollar Thai Baht Turkish Lira US Dollar Hong Kong Dollar South Korean Won Mexican Peso Brazilian Real Colombian Peso Venezuelan Bolivar East Carribbean Dollar Argentinian Peso Chilean Peso Peruvian Nuevo Sol... -
Page 26: Administration Tab
Password Administration Tab Allows you to set whether a password must be entered before printing starts. When set to [ON], a password is required in Full mode and Quick Print mode before printing can begin. Budget code Determines whether a budget code must be input when printing. - Page 27 Print Logs The system log information can be exported to the expansion CompactFlash card. Displays the print history of the unit, with one entry for To do this, touch the button. The system log data are each order. exported in CSV format. To reset the print counter, touch the button.
-
Page 28: Chapter 4 Operation
Operation Chapter Operation Outline Print Types The unit can print photos taken with a digital camera in several different ways, as listed below. Print Select desired images from the contents of the memory card, specify the number of copies, and print. This function is available in all operation modes. -
Page 29: Operation Flow
Operation Flow Full mode/Event mode Quick Print mode Touch the screen Touch the screen Select language Select language Select input method Select input method Insert memory card or send images Insert memory card or send images Select print type Select print type Print Border Print Split Image... -
Page 30: Setting Memory Cards
Removing the “Memory Stick” Setting Memory Cards When you see a message that prompts you to remove the “Memory Stick”, first push the “Memory Stick” until you hear a click 1, then pull it out 2. A variety of memory cards, listed below, can be set in the drives and slots on the user interface panel to read image data stored on these memory cards. -
Page 31: Using A Smartmedia Card
Removing the CompactFlash card Using a SD Card/MultiMediaCard When you see a message that prompts you to remove the CompactFlash card, pull the it straight out. Inserting the SD Card or MultiMediaCard With the notch on the SD Card or MultiMediaCard away Note from you and to the right, completely insert the card into the slot. -
Page 32: Using A Xd-Picture Card
Using a xD-Picture Card Selecting Images for Inserting the xD-Picture Card Printing With the v mark on the xD-Picture Card facing up and forward, completely insert the xD-Picture Card into the slot. The procedure for selecting images from the inserted memory card is described below. - Page 33 Memo Memo The following buttons are available in the screens that Touching the [Add Date] button on this screen will follow. Touch the buttons when required. cause the shooting date to be printed on each photo. • [Start Over]: Returns to the start screen in step 1. For details, see the section “Adding the Date”...
- Page 34 Memo If the digital camera with which the photos were taken supports DPOF, the images to print and the quantity for each image can already be specified at the camera. For details, see the section “Printing From DPOF Settings” on page 47. If you wish to print without editing the images, proceed to step 9.
-
Page 35: Verifying Order Contents And Entering A Password
Verifying Order Contents and Note Entering a Password Do not remove the memory card before this message is shown. Otherwise data on the memory card may be erased or corrupted. Removing and inserting an Verify that the print quantity, pricing, and other items expansion CompactFlash card during printing may are correct. -
Page 36: Using Index Print
Touch the language you want to use. Using Index Print This function prints out all images on a memory card in reduced size to provide an index of the contents. The maximum number of images printed on a single sheet is as follows. -
Page 37: Using Split Image Print
Insert the memory card into the respective slot on the Using Split Image Print front side of the unit. When the memory card is recognized, the Main Menu appears. This function lets you print several images on a single sheet. Splitting into prescribed-size images such as Touch [Split Image]. - Page 38 Touch the frame you want to assign the image to. Specify the number of copies (quantity) to print. Use the [+] and [-] buttons to specify the quantity. A list of images stored on the memory card is shown. If you wish to print without editing the images, Select the image by touching it, and then touch the proceed to step 10.
-
Page 39: Using Border Print
Touch the [Print] button. Using Border Print When printing images stored on the memory card, you can select from a variety of border designs to be printed around the image, and you can also enter text to be printed. This function is available in Full mode and Event mode. To use this function, the expansion CompactFlash card must be inserted. - Page 40 Touch the language you want to use. Select the desired border by touching it, and then touch the [OK] button. Precautions about using the unit are shown. Read these carefully and then touch the [OK] button. If you wish to enlarge the selected border, touch the When a Bluetooth USB adaptor is inserted and button.
- Page 41 Specify the number of copies (quantity) to print. To edit an image, touch the [Edit] button. Use the [+] and [–] buttons to specify the quantity. The edit menu appears. This menu gives access to the Crop & Rotate, Color Adjustment, Red Eye If the [Select All] button has been selected, the Reduction, and Sepia/Black&White functions.
-
Page 42: Printing All Images On A Memory Card
Memo Printing All Images on a In Event mode, the order contents are not shown and Memory Card printing starts directly. Verify the order contents and enter the password. This function lets you print all images stored on a memory For details on this operation, see “Verifying Order card in one operation, producing one print per image. -
Page 43: Image Editing
Insert the memory card into the respective slot on the Image Editing front side of the unit. When the memory card is recognized, the Main Menu appears. The Edit Menu gives access to the following functions: • Crop & Rotate (page 44) Touch [Print All Images]. -
Page 44: Specifying The Layout (Crop & Rotate)
To rotate the image Specifying the Layout (Crop & You can rotate the image in steps of 90 degrees. Rotate) On the Edit Menu, touch [Crop & Rotate]. This function allows you to trim the image or rotate it, thereby changing the composition of the image. The following screen appears. -
Page 45: Adjusting The Image Quality
Adjusting the Image Quality Printing in Sepia or Black and White The following items can be adjusted. You can set the image color to sepia or black and white for • Brightness printing. • Tint • Saturation On the Edit Menu, touch [Sepia/B&W]. •... -
Page 46: Compensating For The Red Eye Effect
Touch the button. Compensating for the Red Eye The compensation function is carried out. Effect The result is shown in the small image at the bottom of the screen. On photos taken with a flash, the so-called red eye effect To cancel the compensation function, touch the can sometimes be a problem. -
Page 47: Adding The Date
Adding the Date Printing From DPOF Settings You can add the date when an image was shot to the printout. If a digital camera that supports DPOF was used, the This function is available when [Print] or [Border Print] images to print and the quantity for each image can also be was selected from the Main Menu. -
Page 48: Printing With Bluetooth® Communication
Depending on the available space on the expansion sending images via Bluetooth communication. CompactFlash card, the number of images that can be received may differ. 1) The Sony DPPA-BT1 Bluetooth USB adaptor is supported. Printing from Bluetooth-compatible devices Preparing for Bluetooth... - Page 49 32. device. When selecting a printer on your Bluetooth- compatible device, select “PLS PIX1L ##.” The alpha numeric characters comprising the right side of the Bluetooth address displayed on the printer’s screen appear in place of “##.” “CF” appears in place of “##”...
-
Page 50: Entering Passwords Using Memory Cards (Remote Password Input)
[password] Entering Passwords pass=∗∗∗∗ Using Memory Cards 1) “∗∗∗∗” is the password you set. (Remote Password Input) Remove the expansion CompactFlash card, and copy the password file into the root folder of the memory card you intend to use. You can enter a password without using the on-screen The password file cannot be used to enter passwords numeric keypad by simply inserting a memory card. -
Page 51: Printing From A Computer
Connection to a Computer Printing From a Computer To control the unit from a computer, you must connect the unit to the computer using a commercially available USB When a commercially available USB cable is used to cable. Plug the USB cable into the USB port (device) on connect the unit to a computer, data sent from the the rear of the unit. -
Page 52: Appendix
Appendix • Do not install the unit in any location that is subject to: Precautions – instability – excessive dust – extremely high or low temperatures – vibration Safety – high humidity • Operate the printer using the power source specified in –... -
Page 53: Supported Memory Cards And File Formats
material recorded with this unit is not protected by Supported Memory Cards MagicGate. In addition, you can also use “Memory Stick Duo” or and File Formats “Memory Stick PRO” with your unit. Write-protecting “Memory Stick” data Supported memory cards In order to protect important data from accidental erasure, This unit supports the following types of memory cards. - Page 54 • Do not get the “Memory Stick” wet. • Avoid storing or using the “Memory Stick” under the Write-protect sticker following conditions: – In a hot location, such as inside a car or outside on a very hot day. – In direct sunlight. Write-protect area –...
- Page 55 To do so, slide the write-protect switch as shown in the Notes on using memory cards figure. Note The following apply to all memory cards except “Memory Write-protect switch Stick”. Not write- Write- For details about ““Memory Stick” types” on page 53. protected protected •...
-
Page 56: Cleaning
The cleaning cartridge can be used repeatedly. corners do not peel up and the center is not raised. If the corners of the cleaning sheet peel up, cleaning may Bring up the administration screen on the PIX1L, and not be performed properly. select the System tab. - Page 57 The adhesive surface of the cleaning sheet is exposed When the cabinet becomes dirty now, so check again to make sure that none of the If the cabinet is extremely dirty, soak a clean cloth in corners have peeled up and the center has not been water, or a solution of water and a neutral detergent, wring raised.
-
Page 58: Troubleshooting
When the printer roller becomes dirty Troubleshooting When the printer roller becomes dirty, use a soft cloth moistened with cleaning alcohol to gently wipe the roller while turning it. Before sending the unit out for servicing, check the items listed below. If you still cannot solve the problem, contact Note your dealer. -
Page 59: Ribbon Cartridge And Paper
Symptom Cause/Remedy Ribbon Cartridge and Image data cannot be A mounted memory card does not read. contain any data. Paper tInsert a memory card that contains image data. Data has been recorded on a memory card in a format that the A printing pack contains two sets of the ribbon cartridge unit does not recognize. -
Page 60: Specifications
Compatible image file formats Specifications JPEG: JFIF 4:4:4, 4:2:2, 4:2:0 (baseline JPEG) Exif 2.2.1 compatible DCF 2.0 compatible Power requirements TIFF: Exif 2.2.1 compatible (TIFF-RGB 100 to 240 V AC, 50/60 Hz non compressed) Input current 3.0 to 1.3 A max. BMP: 24 bit Windows format Operating temperature range (Some versions of the file formats may... - Page 61 Press Labo Service S.A.
Need help?
Do you have a question about the PIX1L and is the answer not in the manual?
Questions and answers