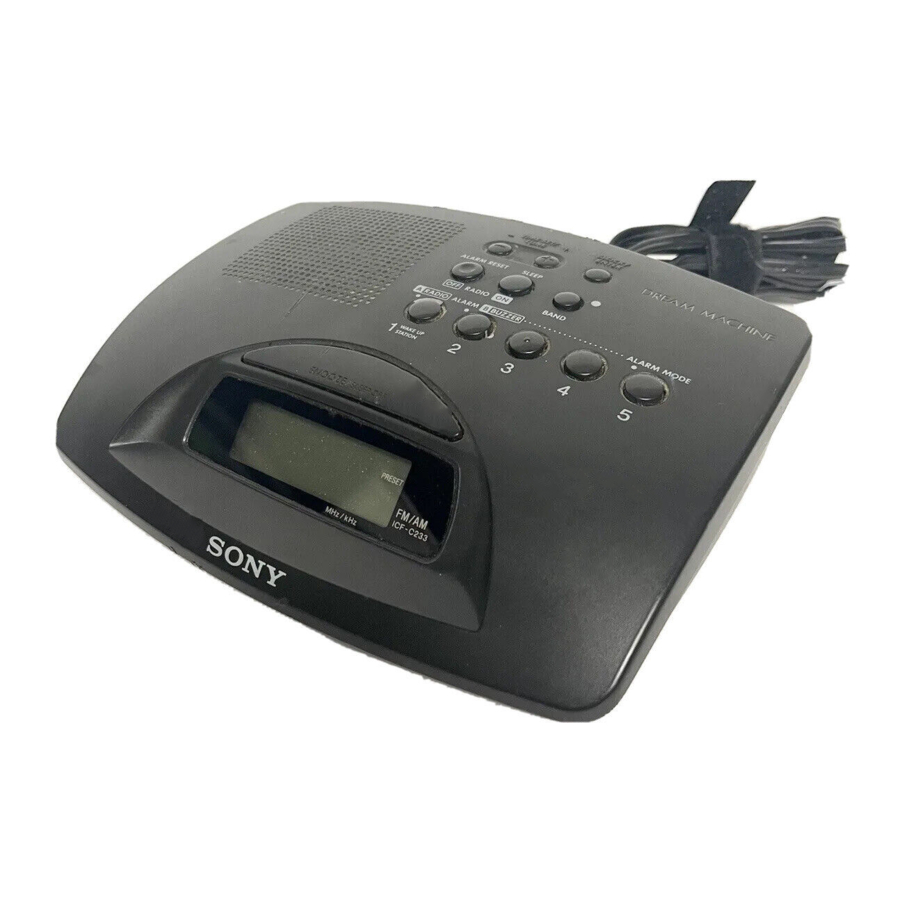
Sony DREAM MACHINE ICF-C233, ICF-C233L Manual
- Operating instructions (2 pages) ,
- Operating instructions (2 pages) ,
- Operating instructions (2 pages)
Advertisement
Overview

Before You Begin
This clock radio will give you many hours of reliable service and listening pleasure. Before operating the Dream Machine, please read these instructions thoroughly and retain them for future reference.
These instructions cover these models: ICF-C233 and ICF-C233L.
Their differences are shown below.
| Model Number | ICF-C233 | ICF-C233L |
| Band | FM/AM | FM/MW/LW |
Features
- Dual alarm FM/AM (ICF-C233) or FM/MW/LW (ICF-C233L) PLL (phase locked loop) synthesized clock radio
- 5 random memory presets
- Radio and buzzer alarms with the snooze function
- LCD display with backlight
Setting the Clock
- Plug in the unit. The display will flash "AM 12:00" or "0:00".
- While holding down CLOCK/ENTER, press TIME SET/TUNE + or –. Use the + button to advance the hour and minute digits and the – button to reverse them. Hold down the + or – button to advance or reverse the time setting at high speed.
- Release CLOCK/ENTER. The time is set and clock operation begins.
- The clock system varies depending on the model you own.
12-hour system: "AM 12:00" = midnight
24-hour system: "0:00" = midnight - For zero second adjustment, release CLOCK/ ENTER at the sound of a time tone.
- The colon (":") in the time indication is flashing when the radio is off and steadily displayed when it is on.
Operating the Radio
Manual Tuning
- Press SLEEP/RADIO ON to turn on the radio. The band and frequency and the preset number displayed before the radio was last turned off appear on the display for 10 seconds, after which the current time indication returns to the display.
- Turn the VOL (volume) control to make sure the sound is audible.
- Press BAND to select the band. The most recently tuned FM, AM (MW) or LW frequencies alternate on the display with each press of the button.
- Use TIME SET/TUNE + or – to tune in the desired station. The FM channel step is set to 0.1 MHz and the AM channel step is set to l0 kHz for the model for the North America. The FM channel step is set to 0.05 MHz and the AM(MW) channel step is set to 9 kHz for the model for other countries. (The FM frequency indication changes every 0.1 MHz.) The LW channel step is set to 9 kHz. A beep sounds and the tuning stops when the upper or lower extremity of the band range is reached.
- Set the desired volume with the VOL control.
- To turn off the radio, press ALARM RESET/ RADIO OFF.
- To improve reception
FM: Extend the FM wire antenna fully to increase FM reception sensitivity.
AM(MW)/LW: Rotate the unit horizontally to the position in which reception is clearest. - To check the current station, press the + button lightly. The band and frequency are displayed for 10 seconds, after which the current time indication returns to the display.
- Each time the radio is turned on or the frequency changed, the band and frequency replace the current time indication for 10 seconds.
- If the radio alarm
![]() comes on while the radio is playing, the station switches to the frequency set under preset number 1 (the wakeup frequency).
comes on while the radio is playing, the station switches to the frequency set under preset number 1 (the wakeup frequency).
 comes on while the radio is playing, the station switches to the frequency set under preset number 1 (the wakeup frequency).
Preset Tuning
You can preset up to five stations for one-touch tuning, one under each of preset buttons 1 to 5.
Presetting a station
Example: To set AM 1260 kHz in preset button 2.
- Tune in the station you want to preset. (See "Manual Tuning")
- Press CLOCK/ENTER.
"P" flashes in the display for about 10 seconds.
![]()

- Press the preset button under which you wish to store the station before the "P" indication stops flashing. Two beeps sound to indicate successful presetting.
![]()

- The current time indication replaces the band and frequency indication on the display 10 seconds after a station is preset, but the preset number remains in the display.
- When using the radio alarm, preset the station you wish to serve as the alarm (the wake-up frequency) under preset button 1.
To change a preset station
Press the preset number again after tuning manually to a different station. The previous station is replaced by the new one.
Tuning in a preset station
- Press SLEEP/RADIO ON to turn on the radio.
- Press the preset button under which the desired station is stored. The band, frequency and preset number replace the current time indication in the display for about 10 seconds.
- To check the current station, press the preset number button. The band and frequency are displayed for 10 seconds.
Setting the Alarm
You can set the radio and buzzer alarms at the preset time. Before setting the alarm, be sure to set the clock (See "Setting the Clock").
- Turn off the radio.
- While holding down
![]() ALARM or
ALARM or ![]() ALARM, press either TIME SET/ TUNE + or – until the desired time appears in the display.
ALARM, press either TIME SET/ TUNE + or – until the desired time appears in the display.
At this time, the![]() or
or ![]() indication appears in the display.
indication appears in the display. - Release
![]() ALARM or
ALARM or ![]() ALARM.
ALARM. - Press ALARM MODE until the alarm you want appears in the display. Each time you press ALARM MODE, the alarm indication changes as follows.
![]()

When the alarm time is reached, the radio or buzzer sounds for 60 minutes or until turned off.
To stop the alarm
Press ALARM RESET/RADIO OFF while the alarm is activated. The alarm will function at the same time the next day.
To cancel the alarm
Press ALARM MODE until neither the  nor
nor  indication is displayed.
Notes
- The alarm does not function, unless you set the clock,
![]() and
and ![]() function.
function. - If both the radio and buzzer alarm are set for the same time, the radio alarm takes precedence.
- You can check the alarm time setting by pressing
![]() ALARM or
ALARM or ![]() ALARM.
ALARM.
To doze for a few more minutes
- Press SNOOZE/SLEEP OFF while the alarm is sounding. The alarm will be silenced for about 8 minutes, after which it will sound again. You can use the snooze alarm repeatedly in this manner for about one hour.
- The alarm indication continues to flash in the display while the snooze alarm function is operational.
Setting the Sleep Timer
You can enjoy falling asleep to the radio using the built-in sleep timer that turns off the radio automatically after a preset duration. You can set the sleep timer for 90, 60, 30, or 15 minutes.
- Press RADIO ON/SLEEP repeatedly. The radio turns on. Each time you press RADIO ON/SLEEP, the duration changes as follows.
![]()
The radio will turn off automatically after the selected preset duration has elapsed.

- To cancel the sleep timer function and turn off the radio, press SNOOZE/SLEEP OFF.
To Use Both Sleep Timer and Alarm
You can fall asleep to the radio sound and you will be awakened by the radio or buzzer alarm at the preset time.
- Set the alarm. (See "Setting the Alarm".)
- Set the sleep timer.(See "Setting the Sleep Timer".)
Troubleshooting
Should any problem occur with the unit, make the following simple checks to determine whether or not servicing is required. If the problem persists, consult the nearest Sony dealer.
The clock does not show the correct time
- Has an electrical power outage lasting more than 5 minutes occurred?
The radio or buzzer alarm does not sound at the preset alarm time.
- Has the desired radio and/or buzzer alarm mode been activated with the ALARM MODE button (
![]() and/or
and/or ![]() indication shown in the display)?
indication shown in the display)?
Precautions
- Operate the unit on the power sources specified in "Specifications".
- The nameplate indicating voltage, etc. is located on the bottom exterior.
- Disconnect the cord by grasping the plug. Never pull it by the cord.
- Do not leave the unit in a location near a heat source such as a radiator or airduct, or in a place subject to direct sunlight, excessive dust, mechanical vibration, or shock.
- Allow adequate air circulation to prevent internal heat build-up. Do not place the unit on a surface (a rug, a blanket, etc.) or near materials (a curtain) which might block the ventilation holes.
- Should any liquid or solid object fall into the unit, unplug the unit and have it checked by a qualified personnel before operating it further.
- When the casing becomes soiled, clean it with a soft cloth dampened with a mild detergent solution. Never use abrasive cleaners or chemical solvents, as they may mar the casing.
- The unit is not disconnected from the AC power source (mains) as long as it is connected to the wall outlet, even if the unit itself has been turned off.
If you have any question, please consult your nearest Sony dealer.
Specifications
Time display
| United Kingdom and North America | 12 hour |
| Other countries | 24 hour |
Frequency range
Model for North America
| Band | ICF-C233 | Channel step |
| FM | 87.5-108.0 MHz | 0.1 MHz |
| AM | 530-1,710 kHz | 10 kHz |
Model for other countries
| Band | ICF-C233 | ICF-C233L | Channel step |
| FM | 87.5-108.0 MHz | 87.5-108.0 MHz | 0.05 MHz* |
| AM(MW) | 531-1,602 kHz | 531-1,602 kHz | 9 kHz |
| LW | — | 153 - 279 kHz | 9 kHz |
* The frequency display is raised or lowered by steps of 0.1 MHz.
(Example: Frequency 88.05 MHz is displayed as "88.0 MHz".)
Speaker
Approx. 6.6 cm (2 5 / 8 in) dia.
Power output
120 mW (at 10% harmonic distortion)
Power requirements
North American model: 120 V AC, 60 Hz
Other models: 220–230 V AC, 50 Hz
Dimensions
Approx. 196 x 56 x 149.5 mm (w x h x d) (7 3 / 4 x 2 1 / 4 x 6 in) incl. projecting parts and controls
Mass
ICF-C233: Approx. 530 g (1 lb 2.7 oz)
ICF-C233L: Approx. 600 g (1 lb 5 oz)
Design and specifications are subject to change without notice.

Documents / ResourcesDownload manual
Here you can download full pdf version of manual, it may contain additional safety instructions, warranty information, FCC rules, etc.
Advertisement


Need help?
Do you have a question about the DREAM MACHINE ICF-C233 and is the answer not in the manual?
Questions and answers