
Related Manuals for CDA FW224


Summary of Contents for CDA FW224
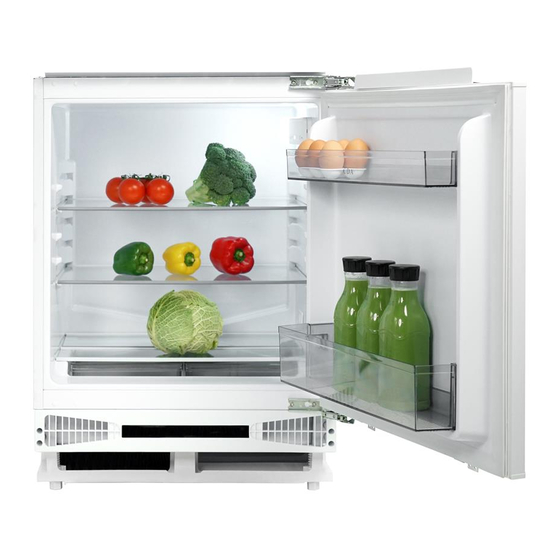
- Page 1 FW224 Integrated under counter larder fridge Use and maintenance 1 | Instruction Manual...
- Page 2 Appliance information: Please enter the details on the appliance rating plate below for reference, to assist CDA Customer Care in the event of a fault with your appliance and to register your appliance for guarantee purposes.
- Page 3 IMPORTANT INFORMATION FOR CORRECT DISPOSAL OF THE PRODUCT IN ACCORDANCE WITH EU DIRECTIVE 2012/19/EU. At the end of its working life, the product must not be disposed of as urban waste. The refrigeration system contains insulating gases and refrigerants, which require specialised waste disposal. The valuable materials contained in this appliance can be recycled.
- Page 4 Important Never store inflammable or explosive items and strong corrosive acids or alkalis in the appliance. This is a household appliance, which is produced in accordance with the national standard. It is intended for food storage only, not for storage of blood, medicine and biological products. To prevent risk of fire, keep the appliance away from petrol or any other inflammables.
-
Page 5: Before First Use
Before first use You must allow the fridge to settle for at least twenty four hours prior to switching the power on. It is recommended that you clean the interior of the appliance prior to first use, using a solution of bicarbonate of soda and warm water and then thoroughly drying the interior. - Page 6 Fridge • Never put liquids in the refrigerator uncovered • Never put hot foods in the refrigerator. Warm food should be allowed to cool to room temperature before being put into the refrigerator • Nothing should rest against the rear wall of the refrigerator, as this will cause frost and possible condensation problems which will be difficult to remove •...
-
Page 7: Storage And Use
Storage and use The fridge is for short term food storage. Although the temperature can be maintained between 0-10˚C, extended periods of food storage is not recommended. As the cold air circulates within the fridge, the temperature can vary between the different sections. As such, foods should be stored in different sections according to type. - Page 8 Controls Power Adjust Fig. 2 Temperature control The temperature controls for this fridge are simple and easy to use. To change the temperature simply press the adjust button on the right hand side of the unit to cycle through settings 1 to 5. The warmest setting being 1 and the coldest being 5.
-
Page 9: Care And Cleaning
Care and cleaning Cleaning Rod Always disconnect the appliance from the power supply before any cleaning or maintenance. Water Outlet The fridge and crisper sections should be cleaned using a solution of bicarbonate of soda and lukewarm water. Do not use abrasive products or detergents. -
Page 10: Defrosting The Fridge
Defrosting the fridge The fridge is self-defrosting. Any water created will run out of the fridge through the channel at the back of the fridge. It is important to keep the channel clear at all times using the cleaning tool supplied. The defrosted water is collected in the evaporating tray at the back of the appliance and dissipated by evaporation. -
Page 11: Troubleshooting
Troubleshooting If you have any problems with your appliance, you should check the troubleshooting prior to calling CDA Customer Care to prevent unnecessary service calls and potential cost. Contact details are on the back cover of this manual If the appliance is not working, check the following: •... - Page 12 • Check the door seal for any kinks, debris or damage. If you notice any, and are unable to resolve the issue yourself, contact CDA Customer Care so that the seal can be replaced If ice has formed on the back wall of the fridge: •...
-
Page 13: Installation And Ventilation
Installation and ventilation This appliance must never be installed close to heat sources, e.g. heating elements, cookers or in damp places. • To ensure the appliance is level, you should use the height adjustable feet at the front of the appliance •... -
Page 14: Mounting The Fascia Doors
Mounting the fascia doors Fig. 6 - Fitting the decor door bracket Remove the white decorative cover (Fig. 5) by lifting it upwards. Obtain the below measurements: Dimension B = Measure from the underside surface of kitchen unit to the bottom of fixing bracket. - Page 15 Locate the washers and screw the nuts onto the adjustment bolts. Fig. 9 - Aligning the decor door Close the door and check the alignment with the other unit doors. Adjust the decor door by screwing or unscrewing the adjustment bolts for vertical adjustment and by the help Fig.
- Page 16 Reversing the fridge door We recommend you seek the help of another individual to support the doors whilst performing this operation. 1. Open the door 2. Carefully prise off the white cover caps for the side that you wish to switch the hinges to 3.
- Page 17 Ensuring the door seals correctly: It is normal for the seal to be compressed after the door has been reversed. With the door closed, use a hair dryer to expand the seal and fill the gap between the door and the body of the appliance. Take care not to use the hair dryer too close to the appliance, which could damage the seal.
-
Page 18: Electrical Information
Electrical information Warning! This appliance must be earthed. Green and yellow to earth Brown to live 13A Fuse Cord Clamp Blue to Neutral Fig. 11 The mains lead of this appliance has been fitted with a BS 1363A 13A fused plug. To change a fuse in this type of plug, follow the steps below: 1. - Page 19 N.B. Ensure that the plug socket is situated in an easily accessible place after installation. E & O E. All instructions, dimensions and illustrations are provided for guidance only. CDA reserve the right to change specifications without prior notice. Instruction Manual | 19...
-
Page 20: Changing The Light Bulb
Changing the light bulb If the LED lighting fails in any way, it should only be replaced by CDA authorised service agents. In the event of light failure within your fridge please contact CDA Customer Care to arrange a service visit. Contact details are on the rear cover of this manual. -
Page 21: Practical Tips
Practical tips Due to the natural circulation of the air in the appliance, there are different temperature zones in the refrigerator chamber. The coldest area is directly above the vegetable drawers. Use this area for all delicate and highly perishable food such as: Fish, meat, poultry •... -
Page 22: Warranty And Service
Warranty and service The manufacturer shall not be held liable for any damage caused by improper use of the product. • Repairs carried out by unqualified persons may seriously endanger the appliance user • Pursuant to Commission Regulation (EU) 2019/2019, The mini- mum availability period for spare parts necessary to repair the appliance is 7 or 10 years depending on the type and purpose of the spare part... - Page 23 Notes Instruction Manual | 23...
- Page 24 The CDA Group Harby Road Langar Nottinghamshire NG13 9HY Sales Department Phone: 01949 862010 Email: sales@cda.eu CDA Customer Care Phone: 01949 862012 Email: customer.care@cda.eu ©2020 CDA Group Ltd...
Need help?
Do you have a question about the FW224 and is the answer not in the manual?
Questions and answers
How do i change the light bulb in my fw224 fridge
The light bulb in the CDA FW224 fridge should only be replaced by CDA authorised service agents. If the LED lighting fails, contact CDA Customer Care to arrange a service visit.
This answer is automatically generated
When you open the fridge door the light starts flashing continuously.
If the light is flashing continuously when opening the fridge door on a CDA FW224, it likely indicates the door has been left open and the Door Open Alarm is active. The appliance beeps in short bursts every thirty seconds if a door is open for more than a minute.
This answer is automatically generated