Table of Contents

Related Manuals for Fujitsu BS2000 SE320


Summary of Contents for Fujitsu BS2000 SE320
- Page 1 English Fujitsu Server BS2000 SE Series Basic Operating Manual Valid for: SE700(B) / SE500(B) / SE300(B) (basic software V6.2A and higher) SE710 / SE310 (basic software V6.3A and higher) SE320 (basic software V6.4A) Edition July 2021...
- Page 2 9001:2015 Copyright and Trademarks Copyright © 2021 Fujitsu Technology Solutions GmbH. All rights reserved. Delivery subject to availability; right of technical modifications reserved. All hardware and software names used are trademarks of their respective manufacturers. The Xen® mark is a trademark of Citrix Systems, Inc., which manages the mark on behalf of the Xen open source community.
-
Page 3: Table Of Contents
Table of Contents Basic Operating Manual ..........5 1 Introduction . - Page 4 8.1 Switching the SE x86 on and off ........76 8.1.1 Switching off in an emergency .
-
Page 5: Basic Operating Manual
Basic Operating Manual... -
Page 6: Introduction
1 Introduction The FUJITSU Server BS2000 SE series is the continuation and integration of technologies from the previous Fujitsu mainframe lines of the S and SQ series as regards hardware architecture and software functions. Designed as hybrid systems, the SE servers bring a high quality of openness and integration ability from various server and peripheral systems together with comprehensive, cross-system manageability. - Page 7 Figure 1: SE Server SE700 and SE700B...
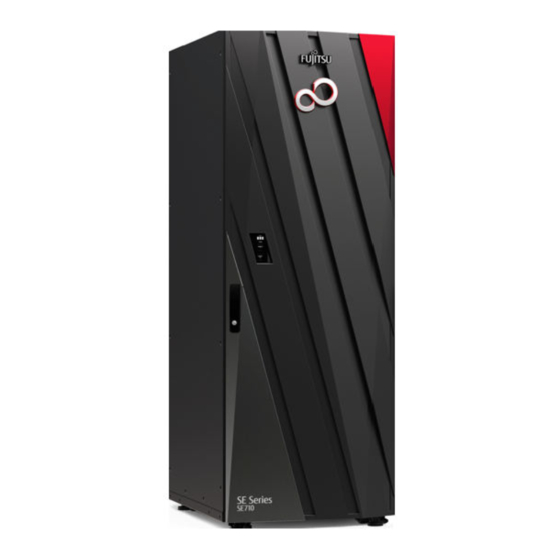
- Page 8 Figure 2: SE Server SE710...
-
Page 9: Models, Names, Abbreviations
The above server models are combined into two server lines: SE /390 for FUJITSU Server BS2000 SE700 / SE700B / SE710 / SE500, i.e. for SE servers with an SU /390 SE x86 for FUJITSU Server BS2000 SE300 / SE300B / SE310 / SE320, i.e. for SE servers with SU x86 only resp. - Page 10 AU for the Application Unit (with x86-based hardware) The AU is an optional component of the SE Server, which enables the operation of customer applications under Linux, Windows, VMware or other hypervisors. Depending on the hardware base, AUs are differentiated as follows: AU PY denominates all PRIMERGY-based AUs (e.g.
-
Page 11: Documentation For The Se Servers
Further literature is listed in Related publications Detailed information on the various hardware components and interfaces of the SE servers is provided in the data sheet "FUJITSU Server BS2000 SE Series". See the product site for the relevant server at https://www.fujitsu.com/emeia/products/computing/servers/mainframe /bs2000/ >... -
Page 12: Objective And Target Groups Of This Manual
The Operating Manual for the servers of the SE Series consists of a number of modules and describes the features and hardware components of the FUJITSU Servers BS2000 of the SE Series. Users should read this manual carefully in order to obtain optimal performance from the SE server. -
Page 13: Summary Of Contents
1.4 Summary of contents This operating manual deals with the hardware-related display and operating functions of the FUJITSU BS2000 servers of the SE Series. The chapter "Important notes" contains important information on the installation and safe operation of the SE server and the components. -
Page 14: Changes To The Predecessor Manual
1.5 Changes to the predecessor manual This release describes optional hardware components that are supported by the basic software M2000/X2000/HNC V6.3A or higher: New hardware generation SE310 and SE710 Instead of MU M1/M2, with SE310 and SE710 a new variant MU M3 of the hardware base is used. Instead of HNC M1/M2, with SE710 a new variant HNC M3 of the hardware base is used. -
Page 15: Notational Conventions
1.6 Notational conventions The following notational conventions are used in this manual: could result in serious personal injury This indicates a hazardous situation which if the WARNING! user does not perform the procedure correctly. This indicates a hazardous situation which could result in minor or moderate personal CAUTION! injury , if the user does not perform the procedure correctly. -
Page 16: Important Notes
2 Important notes In this chapter the following subjects are discussed: Notes from the manufacturer Notes on safety Installation and operation precautions... -
Page 17: Notes From The Manufacturer
Use the product according to this manual. About this product The FUJITSU Server BS2000 of the SE Series is designed and manufactured for use in standard applications such as computing center work, office work, and general industrial applications. This product is not intended for use in... -
Page 18: Notes On Safety
2.2 Notes on safety Note regarding radio interference suppression WARNING! This is a product which meets Class A of EN55022. In a domestic environment this product may cause radio interference in which case the user may be required to take adequate measures. Important alert messages CAUTION! This alert signal indicates a hazardous situation that could result in minor or moderate personal injury if... - Page 19 Maintenance WARNING! All maintenance measures which are described in this manual may only be performed by the Customer Support. Incorrect performance of these tasks may cause electric shock, injury, or fire. Installation and reinstallation of all components, and initial settings Removal of front, rear, or side covers Mounting/de-mounting of optional internal devices Plugging or unplugging of external interface cables...
-
Page 20: Installation And Operation Precautions
2.3 Installation and operation precautions CAUTION! Equipment damage Be sure to follow the precautions below when installing or operating the equipment. Otherwise, the SE server may be damaged. Installation precautions WARNING! The SE server is installed on the vendor’s premises. Modifications may only be carried out by Customer Support. - Page 21 Operating precautions WARNING! Danger of electric shock and fire Do not damage, break or modify the cables. Cable breaks can cause electric shocks and fires. CAUTION! Equipment damage Do not cover or block ventilation openings. Install the SE server in a location away from direct sunlight and sources of heat. Install the Server Unit in an environment free of dust, corrosive gases, and salt air.
-
Page 22: System Overview
3 System overview The description is divided into the following sections: Features Rack of the SE server Expanded maintenance and operational functions... -
Page 23: Features
CPUs in the Server Unit. All models have at least one CPU for the BS2000 operating system BS2000 OS DX. A FUJITSU Server BS2000 of the SE Series (SE server for short) consists of the following components: Management Unit (MU) with SE Manager An autonomous server known as the "Management Unit"... - Page 24 (see the "Operation and Administration" manual [ ]). Detailed information on the installation data, in particular on the dimensions and weights, is provided in the data sheet "FUJITSU Server BS2000 SE Series". See the product site for the relevant server at https://www.fujitsu.com/emeia/products/computing/servers/mainframe...
-
Page 25: Rack Of The Se Server
3.1.1 Rack of the SE server SE300 / SE310 The following two figures show how the basic rack of the SE300 resp. the SE310 is equipped with the components of the basic configuration and with optional components. Figure 3: System components SE300 and SE300B The following differences arise with the SE310: The rack height is 42 instead of 37 height units. - Page 26 Figure 4: System components SE310 (basic configuration on the left, with optional components on the right) SE700 / SE710 and SE500 The following two figures show how the basic rack of the SE700 resp. the SE710 is equipped with the components of the basic configuration and with optional components.
- Page 27 Figure 5: System components SE700 and SE700B The following difference arises with the SE710: The rack height is 42 instead of 37 height units.
- Page 28 Figure 6: System components SE710 (basic configuration on the left, with optional components on the right)
-
Page 29: Expanded Maintenance And Operational Functions
3.1.2 Expanded maintenance and operational functions The equipment maintenance feature of the SE server is designed to prevent fault events occurring. The Management Unit monitors the hardware status of the Management Unit, Server Unit(s) and Application Unit(s). Detected faults are displayed in the SE Manager and reported to the vendor's Support Center via remote service. At every Management Unit, the SE Manager shows the hardware status of all Management Units, Server Units and Application Units of the respective SE server configuration. -
Page 30: Racks
4 Racks The description is divided into the following sections: Basic rack Extension rack Power supply... -
Page 31: Basic Rack
4.1 Basic rack The components of the SE server are integrated into the basic rack, a 19-inch standard rack. In the case of the SE700/SE710 and SE500 the control panel is located on the front (see section "Control panel (on the SE /390)" ). - Page 32 Figure 8: Basic rack (SE710 / SE310)
-
Page 33: Extension Rack
4.2 Extension rack The extension rack is a 19-inch standard rack which accommodates additional components for which there is no more space in the basic rack. Figure 9: SE server with an extension rack (e.g. SE700 and SE700B) - Page 34 Figure 10: SE710 with two extension racks In all an SE server can comprise at most four extension racks.
-
Page 35: Power Supply
4.3 Power supply The devices in the racks are supplied with power over power distribution units (PDUs). SE /390 By default a basic rack contains four PDUs, each with 8 or 11 x C13 outlets. Each PDU is connected to the in-house power grid with CEE connectors 32A resp. 16A (SE710) blue. For redundancy reasons, two phases are required. - Page 36 The power cables must be connected in such a manner that the power consumption of the rack components does not exceed the maximum rated current of the circuit’s fuse and the maximum permissible current of the fuses in the power distribution unit in the rack. Free sockets in the power distribution unit may not be used to connect other devices.
-
Page 37: Controls
5 Controls The description is divided into the following sections: Rack console Console switch Control panel (on the SE /390) Function of the displays Function of the keys and switches... -
Page 38: Rack Console
5.1 Rack console The rack console contains the following in a compact 19'' slide-in housing (1 HU): A fold-out 17'' TFT color LCD monitor with a control panel and screen menu A keyboard with US/international assignment with an integrated number pad A touchpad with a scroll bar Left and right mouse buttons Monitor, keyboard and touchpad are protected in the slide-in module. - Page 39 Opening the rack console > Use the handle to push the cover of the rack console up until the monitor is open at an angle of 110 degrees. Monitor operating panel The operating panel is at the bottom right of the monitor. 1 Power button Press this button to turn on the power to the monitor, or, if the power is already on, to turn off the power to the monitor.
- Page 40 5 DOWN button Press this button to select the left-hand item or to increase the value. 6 AUTO/EXIT button Press this button to close the menu, to cancel the selection of an item to be adjusted, to cancel an adjusted setting, or to perform automatic adjustment.
- Page 41 HOT-KEY and RESET key The following indicators and buttons are located on the right above the keyboard. HOT-KEY Pressing the HOT-KEY (outputs the code of the CTRL key twice) causes the menu of the connected console switch to be called. RESET Resets the keyboard and pointing device on this device.
- Page 42 Scrolling Slide your finger up or down along the right edge of the touchpad surface to scroll up or down the screen. Notes on the pointing device The pointing device does not work correctly if you operate it in the following ways: Operating the pointing device with a gloved finger Operating the pointing device with a pen, ballpoint pen, or pencil Operating the pointing device with two or more fingers...
- Page 43 Closing the monitor > Make sure that the front USB connector (1) is empty before closing the monitor. It is not envisaged for use with the SE server. > Use the handle (2) to push the cover of the rack console carefully down until it clicks into place. Sliding the rack console into the rack >...
- Page 44 Troubleshooting No image is displayed on the monitor: Symptom Cause Action The power LED is out. The power is not turned on. Press the power button. The monitor does not Notify Customer Support. function correctly after being turned The power LED is orange. Or, The server is in standby when the MENU/SELECT button is mode.
- Page 45 Monitor cannot be adjusted: Symptom Cause Action Automatic adjustment using the Automatic adjustment was Make the monitor image as bright as AUTO/EXIT button does performed with an possible, and then press not work and the following message extremely dark monitor the AUTO/EXIT button to redo automatic is not displayed: background/image.
-
Page 46: Console Switch
5.2 Console switch The monitor, keyboard and mouse port of the integrated rack console are connected to the corresponding ports on the integrated units (Management Unit, Server Unit x86, HNC, and Application Unit) and thus attached to one of them. By default, the rack console is attached to the first Management Unit. -
Page 47: Control Panel (On The Se /390)
5.3 Control panel (on the SE /390) At the front of the basic rack on the SE /390, a control panel is located on the outside. The control panel is connected to the service processor (SVP) of the SU700/SU710 resp. SU500 of the SE server. Further information on the SU700/SU710 and SU500 is provided in the "Server Unit /390"... - Page 48 Figure 13: Control panel on the rack of the SE710 The control panel contains the following controls and displays (please refer to the numbers in the figure): UNIT EMERGENCY switch (not on SE710) The UNIT EMERGENCY switch switches the SU /390 off. POWER ON button with lamp Switches the Server Unit on.
-
Page 49: Function Of The Displays
5.3.1 Function of the displays POWER ON Lights up green after the system power controller has completed the power-up sequence without error. In the standby status the indicator flashes. SYSTEM Lights up green when the CPU(s) is/are in operation. CHECK Lights up red when the SVP has detected a hardware malfunction or a fault in the power supply of the SU /390. - Page 50 POWER ON STATUS Hardware status indicator Does not light Does not Power failure light up Does not light b00 through Power supply units are being initialized. Flashing Does not Standby mode light up (in maintenance mode CE0) Lights up Power-on sequence is active. 001 through Lights up System is being initialized.
-
Page 51: Function Of The Keys And Switches
5.3.2 Function of the keys and switches UNIT EMERGENCY switch (SE700 / SE500 only) The UNIT EMERGENCY switch switches the system off as quickly as possible when an emergency or disaster occurs. The Server Unit is switched off immediately when the switch is pressed. This switch should only be used in the utmost emergency. - Page 52 The system is ready when POWER ON lights up and the status indicator displays 000. If the status indicator displays an error code, an error occurred while powering up. In this case notify Customer Service of this error code. STAND-BY key This key is used to switch off the power supply of the entire /390 system.
-
Page 53: Management Unit
Detailed information on operating the Management Unit is provided in the "Operation and Administration" manual Detailed information on the various hardware components and interfaces of the Management Unit is provided in the data sheet "FUJITSU Server BS2000 SE Series". See the product site for the relevant server at https://www.fujitsu.com/emeia/products/computing/servers/mainframe... -
Page 54: Front Of The Mu
6.1 Front of the MU Figure 14: Management Unit (MU) - front of an MU M1 Figure 15: Management Unit (MU) - front of an MU M2 Indicators on the front panel of MU M1 Figure 16: MU M1 (front panel) HDD fault indicator Power supply fault indicator Temperature fault indicator... - Page 55 HDD activity indicator Status indicator On/Off button NMI button (for Customer Support only) Reset button (for Customer Support only) ID button Open/close optical drive Optical drive activity indicator ID card (green) Indicators on the front panel of MU M2 Figure 17: MU M2 (front panel) Reset button (for Customer Support only) NMI button (for Customer Support only) ID button / ID indicator...
- Page 56 Optical drive activity indicator Open/close optical drive ID card (green); further left, above HDD module The DVD-RW drive is used by Customer Support to install and update the M2000 software. Use of the USB interfaces is reserved for Customer Support. You can pull the ID card out and push it in again as far as it will go.
- Page 57 flashing slowly Status Server switched off and connected to power grid (stand-by mode) green on / off indicator / Server switched off and not connected to power grid or switched (power on and normal operation cable connected)
-
Page 58: Controls
6.1.1 Controls Identification (ID) button Lights up (blue) on the front and on the rear of the MU when the ID button is pressed. The two ID indicators are synchronized. On/Off button When the MU is switched off, it is switched on again by pressing the On/Off button once. When the MU is in operation, it is switched off by pressing the On/Off button once. - Page 59 Indicators on the operating panel Power-on indicator (three colors) Lights up orange when the MU is switched off but line voltage is present. After the power cables have been connected, it takes about 60 seconds until the MU is in standby mode. Lights up yellow during power up delay.
- Page 60 Hard disk drive control indicators Figure 19: Front - Detailed view: Indicators on a hard disk module HDD BUSY (green) Lights up: HDD in active phase Does not light up: HDD inactive HDD FAULT (orange) (in conjunction with a RAID controller) Does not light up: no HDD error Lights up: HDD Faulty or Rebuild Stopped (drive defective, needs replacing, a rebuild process was stopped or the HDD module is not correctly inserted)
-
Page 61: Rear Of The Mu
6.2 Rear of the MU Figure 20: Management Unit (MU) - rear of an MU M1 Figure 21: Management Unit (MU) - rear of an MU M2 Figure 22: Management Unit (MU) - rear of an MU M3 Figures 20, 21 and 22 show the rear of an MU M1, MU M2 and MU M3 with PCIe slots which are not equipped. - Page 62 ID/CSS/Global error indicator Figure 23: ID/CSS/Global error indicator (MU M1) Figure 24: ID/CSS/Global error indicator (MU M2) Figure 25: ID/CSS/Global error indicator (MU M3) ID/CSS/Global error indicator ID indicator (blue) Lights up blue when the MU has been selected by pressing the ID button. To deactivate, press the button again.
- Page 63 Generally, the states of these indicators have the following meanings: Do not light up when the MU is OK. If the event is still acute after a power failure, the indicator is activated after the restart. Light up when a prefailure event was detected. The indicator also lights up in standby mode. Flash when an error was detected.
- Page 64 Figure 28: LAN indicators (MU M3) LAN speed Lights up green for a LAN transfer rate of 1 Gbps. Lights up green for a LAN transfer rate of 100 Mbps. Does not light up for a LAN transfer rate of 10 Mbps. LAN connection/transfer Lights up green if a LAN connection exists.
- Page 65 1) The following events are detected as predictable errors: The temperature is very high. The power consumption is very high. The strength of current is very high. The fan speed is very low. In each of these cases please notify Customer Support. Assignment of the PCIe slots The assignment of the PCIe slots differs between MU M1, MU M2 and MU M3.
- Page 66 PCIe slot assignment on the MU M2 Figure 31: Principle of PCIe slot assignment at the rear of the device (MU M2) The figure shows the PCIe slots of the MU M2 on an SE700B. On the various model series of the SE server, the PCIe slots of an MU M2 are assigned as follows: PCIe slot SE700B SE500B...
-
Page 67: Net Unit
7 Net Unit The Net Unit implements the connection of the units to the networks of the SE server and to private customer networks. The Net Unit can be designed with redundancy in the interest of protection against failure. The Net Unit contains the following components: Switches A redundant Net Unit has redundant switches (by default in the case of SE /390). -
Page 68: Switches
7.1 Switches One switch is used in the basic configuration of the SE server SE300. By default the SE servers SE700 and SE500 have two redundant switches. Brocade ICX 6450 models are employed. ICX 6450-24 with 24 copper ports (10/100/1000 Mbps) 4 optical ports (SFP+;... -
Page 69: Front
7.1.1 Front Figure 33: Net Unit (ICX 6450-24) - front Figure 34: Net Unit (ICX 6450-48) - front Figure 35: Net Unit (ICX 7450-48) - front System LEDs Media/Stacking module LEDs Stack unit ID display Management port (RJ-45) USB port (for flash drive) Mini-USB console port Reset button 10/100/1000Base-T RJ-45 ports 1/1/1 - 1/1/48... -
Page 70: Network And Management Interfaces
7.1.2 Network and management interfaces Each Brocade ICX 6450 model has a reset button and the following management interfaces on the front: Console management interface (serial RJ-45 port, by default connected to the USB port of the MU) Out-of-band management interface (RJ-45 port, by default not used) On 24-port models the management interfaces are arranged at the center on the front, and on 48-port models on the left-hand side at the front (see the figures below). -
Page 71: Led Indicators For Ports, System And Power Status
7.1.3 LED indicators for ports, system and power status On Brocade ICX 6450 models LEDs indicate the status of the ports, of the system, and the power status of the device. Port status LED indicator Figure 38: Port status LED indicator (ICX 6450-24) Figure 39: Port status LED indicator (ICX 6450-48) (1) or (1) and (2) display the ports with status LEDs. - Page 72 System status LED indicator Figure 40: System status LED indicator The information displayed by the system status LEDs is only relevant for the service technician. Information on the status of the Net Unit which is relevant for the customer is displayed by the SE Manager in the main menu Hardware ->...
- Page 73 Lights up yellow when the internal power supply has failed and power is being supplied from an external power supply (EPS). Table 6: Meaning of the power status LED indicator...
-
Page 74: Extension Of The Net Unit
On the SE servers SE300 (not on SE310 and SE320) the port extension is possible if the Net Unit is redundant in design. Please inquire about the current possibilities of a port extension at the Fujitsu Technology Solutions Sales department. -
Page 75: Switching The Server On And Off
8 Switching the server on and off The description is divided into the following sections: Switching the SE x86 on and off Switching off in an emergency Switching the SE server on Switching the SE server off Switching the SE /390 on and off Switching off in an emergency Switching the SE server on Switching the SE server off... -
Page 76: Switching The Se X86 On And Off
8.1 Switching the SE x86 on and off Normally the Management Unit, Server Unit and Application Units are switched on and off via remote administration PCs, see the information in the “Quick Guide” [ ]. This chapter describes the actions for switching these units on/off which can be performed directly on the SE server SE x86 as an alternative to switching it on/off remotely. -
Page 77: Switching Off In An Emergency
8.1.1 Switching off in an emergency The SE servers SE x86 comply with the relevant safety regulations for IT equipment, including electrical office equipment. In an emergency all the hardware components must immediately be disconnected by cutting off the power distribution units from the power source (e.g. -
Page 78: Switching The Se Server On
8.1.2 Switching the SE server on The following hardware components must be switched on in this order: 1. Switch on the optional hardware components > Switch on the ETERNUS LT140 resp. ETERNUS LT40 S2 tape library as well as the ETERNUS DX100 S4 disk storage system using the On/Off switch at the front (see the "Additive Components"... - Page 79 4. Switch on the optional Application Units Before an Application Unit is switched on, the status indicator lights up orange (POWER STAND-BY). > Switch on the Application Unit by pressing the On/Off switch. The power-on indicator lights up green. The Application Unit switches on, conducts a system test and starts the operating system.
-
Page 80: Switching The Se Server Off
8.1.3 Switching the SE server off The following hardware components must be switched off in the specified order. CAUTION! This does not disconnect the hardware components completely from the power source (POWER STAND- BY). To cut the entire system off from the power source, you must must disconnect the power distribution units from the power source. - Page 81 3. Switch off the MU > Switch off the MU using the SE Manager (menu Hardware -> Units Units tab, Power off symbol), see the “Operation and Administration” manual [ ]. Before the MU is switched off, the power-on indicator lights up green, and after it has been switched off, it lights up orange (item 11 resp.
-
Page 82: Switching The Se /390 On And Off
8.2 Switching the SE /390 on and off Normally the Management Unit, Server Unit and Application Units are switched on and off via remote administration PCs, see the information in the “Quick Guide” [ ]. This chapter describes the actions for switching these units on/off which can be performed directly on the SE server SE /390 as an alternative to switching it on/off remotely. -
Page 83: Switching Off In An Emergency
8.2.1 Switching off in an emergency The SE servers SE /390 comply with the relevant safety regulations for IT equipment, including electrical office equipment. In an emergency the devices must immediately be switched off (e.g. when the housing or power cable is damaged or liquid or foreign material gets into the equipment). -
Page 84: Switching The Se Server On
8.2.2 Switching the SE server on The figure below shows the hardware involved in switching the Server Unit /390 on/off. Figure 44: Hardware involved in switching the Server Unit /390 on/off Detailed information on switching the hardware on/off using the SE Manager is provided in the "Operation and Administration"... - Page 85 > Call the SE Manager, e.g. after logging in on the local console via the browser of the Linux desktop (in the “Computer” menu in the task bar) or via an administration PC (default), see the “Operation and Administration” manual [ ]. Redundant MUs are switched on in the same way.
- Page 86 5. Switch on the optional Application Units Before an Application Unit is switched on, the status indicator lights up orange (POWER STAND-BY). > As the administrator or AU administrator, switch on the Application Unit using the SE Manager (menu Hardware -> Units Units Switch on tab, symbol), see the “Operation and Administration”...
-
Page 87: Switching The Se Server Off
8.2.3 Switching the SE server off Figure 44 shows the hardware involved in switching the Server Unit /390 on/off. The following hardware components must be switched off in the specified order. CAUTION! This does not disconnect the hardware components completely from the power source (POWER STAND- BY). - Page 88 The control panel and SVP frames of the Server Unit are described in the "Server Unit /390" Operating Manual [ ]. 3. Switch off the optional Server Units x86 (SE700/SE500 only) > As the administrator, BS2000 administrator or a privileged operator, switch off the Server Unit using the SE Manager (menu Hardware ->...
-
Page 89: Environmental Protection And Service
9 Environmental protection and service The FUJITSU servers have a long life expectancy, not only because of the excellent expansion options they offer, but also because of the quality of the products. As technology continues to develop, however, ever greater volumes of data will need to be processed. More and more demands are being placed on storage capacity, speed and computer system design. - Page 90 +49 (0) 3634 / 330 - 1758 Fax: +49 (0) 3634 / 330 - 1814 If you have questions on operation or if problems occur, please contact your local FUJITSU Customer Support, in Germany under: Tel.: +49 (0) 89 3564 80 000 You can find all service numbers on the FUJITSU support pages: https://support.ts.fujitsu.com/IndexContact.asp?OpenTab=servicedesk...
-
Page 91: Abbreviations
10 Abbreviations APCS Automatic Power Control System AROMA-P Automatic and Remote Operation Manager Application Unit Compact Disk Digital Versatile Disk DVD-RW Digital Versatile Disk - Read and Write Error Correcting Code Error Detection Code Electrostatically Sensitive Device Fibre Channel Host Bus Adapter Hard Disk Drive High-speed Net Connect Height Unit... -
Page 92: Related Publications
You can find the following BS2000 manuals on the manual server with the BS2000 documentation at https://bs2manuals.ts.fujitsu.com Other manuals, for example descriptions of the FUJITSU PRIMERGY and PRIMEQUEST servers, can be found on the general FUJITSU support pages at https://support.ts.fujitsu.com/...
Need help?
Do you have a question about the BS2000 SE320 and is the answer not in the manual?
Questions and answers