
Related Manuals for Olympus OM SYSTEM MOTOR DRIVE 2


Summary of Contents for Olympus OM SYSTEM MOTOR DRIVE 2
- Page 3 Symbols used in this manual Correct Incorrect Operation Operation order Two-step operation Automatic Attention Lamp on operation Order...
- Page 4 PREPARATION As the power unit, the M. 15V Ni-Cd Control Pack 1 is illustrated.
- Page 5 Inserting the Batteries "36" turns on. LR44/SR44...
- Page 6 Connecting the Power Unit Attaching to the Camera 1 . Remove the motor drive socket cap.
- Page 7 2 . Store the removed cap. 3 . Turn the fastening screw clockwise. * The cap of OM-1 or OM-2 cannot be stored. * If there is clearance, shake the motor drive slightly and fit it tightly.
- Page 8 Detaching the Motor Drive 4. Set the mode selector to SINGLE or SEQUENCE. 1 . Set the mode selector to OFF.
- Page 9 * The motor cover should always be attached if you are not shooting with the motor drive.
- Page 10 Operating the Motor Drive 2 with the OIM-4...
- Page 11 Loading the Film...
- Page 12 4 . Press the shutter release. The film will automatically advance two frames without taking pictures. The film advance release wilt automatically stop.
- Page 13 Rewinding the Film Turn the lever until it stops. 1 . Push R button. When rewinding is completed, the motor will auto- matically stop.
- Page 14 4 . Remove the film.
- Page 15 Operating the Motor Drive 2 with the OM-20 (OM-G) or OM-30 (OM-F)
- Page 16 Loading the Film...
- Page 17 4. Press the shutter release. The film wil I automatically advance two frames without taking pictures. The film advance release will automatically stop.
- Page 18 Rewinding the Film Rewind until the tension is released.
- Page 20 Operating the Motor Drive 2 with the OM-2N (OM-1N)
- Page 21 Loading the Film...
- Page 22 4 . Make two blind shots.
- Page 23 Set the exposure counter to "36" Press the shutter release. 5 . Push the reset button. The film advance release will automatically stop.
- Page 24 Rewinding the Film Rewind until the tension is released.
- Page 25 4 . Push the reset button.
- Page 27 How to prevent automatic stop Using films that are not a 36-exposure roll.
- Page 28 Attaching the Remote Controller How to illuminate the exposure counter M. Quartz Remote Controller 1...
- Page 29 Attaching the strap Attaching the 250 Film Back 1...
- Page 30 Care and Storage Questions and Answers Q: I have pressed the camera's shutter release. A: If you then press the shutter release button of the Motor Drive in the single mode, only the film advance will be activated. If you press it in the sequence mode, continuous shooting in- cluding film advance is possible.
-
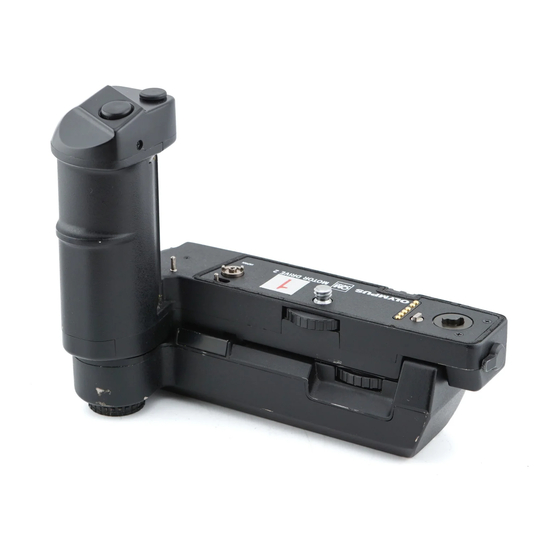
Page 31: Description Of Controls
Description of Controls 1 Shutter Release Button 10 Setting Button 2 Remote Control Jack 11 Reset Button 12 Illumination Button 3 Shutter Release Coupling Pin 4 Film Advance Claw 5 Rewind Claw 6 Camera Coupling Terminal 13 Rewind Lever 14 250 Film Back Coupling Terminal 7 Guide Pin 15 LCD Display Window... - Page 32 Specifications Compatible cameras: OM-4, OM-2, OM-1, OM-30 (OM-F), OM-20 (OM-G). Film advance: 5 frames per second maximum con- tinuous filming without mirror lock-up as well as single frame advance. Shutter speed: All available speeds (1/2-1/1000 sec. only in sequence mode with OM-1). Power supply: M.18V Control Grip 1, 2 (12 A A , batteries), M.
- Page 33 OLYMPUS OPTICAL CO.,LTD. San-Ei Building, 22-2, Nishi Shinjuku 1-chome, Shinjuku-ku, Tokyo, Japan Tel 03-340-2211 OLYMPUS CORPORATION Crossways Park, Woodbury, New York 11797, U.S.A. Tel. 516-364-3000 OLYMPUS OPTICALCO.(EUROPA)GMBH Postfach 104908, Wendenstrasse 14-16, 2 Hamburg 1. West Germany Tel: 040-23773-0 OLYMPUS OPTICALCO.(U.K.) LTD.
Need help?
Do you have a question about the OM SYSTEM MOTOR DRIVE 2 and is the answer not in the manual?
Questions and answers