Table of Contents
Advertisement
Available languages
Available languages
Model#
SKU#
67737-0001
1001813686
67737-0008D2
1001813690
INSTALLATION AND CARE GUIDE
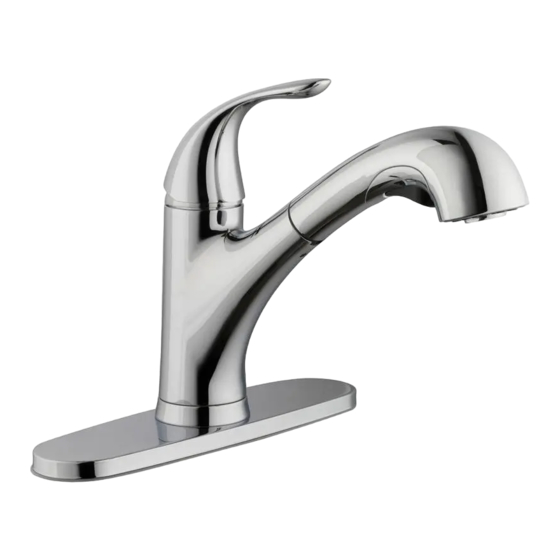
PULL-OUT KITCHEN FAUCET
Questions, problems, missing parts?
Before returning to the store, call Glacier Bay Customer Service
8 a.m. - 7 p.m., EST, Monday - Friday
9 a.m. - 6 p.m., EST, Saturday
1-855-HD-GLACIER (1-855-434-5224)
HOMEDEPOT.COM/GLACIERBAY
THANK YOU
We appreciate the trust and con dence you have placed in Glacier Bay through the purchase of this kitchen
faucet. We strive to continually create quality products designed to enhance your home. Visit us online to see
our full line of products available for your home improvement needs. Thank you for choosing Glacier Bay!
THD
4/2017 REV.02
Advertisement
Chapters
Table of Contents

Related Manuals for Glacier bay 67737-0001


Summary of Contents for Glacier bay 67737-0001
- Page 1 HOMEDEPOT.COM/GLACIERBAY THANK YOU We appreciate the trust and con dence you have placed in Glacier Bay through the purchase of this kitchen faucet. We strive to continually create quality products designed to enhance your home. Visit us online to see our full line of products available for your home improvement needs.
-
Page 2: Table Of Contents
Glacier Bay products are manufactured with superior quality standards and workmanship and are backed by our limited lifetime warranty. Glacier Bay products are warranted to the original consumer purchaser to be free of defects in materials or workmanship. We will replace FREE OF CHARGE any product or parts that prove defective. -
Page 3: Package Contents
Pre-Installation (continued) PACKAGE CONTENTS Part Description Quantity Faucet assembly FastMount™ Quick connector Escutcheon Gasket Weight Weight clip HOMEDEPOT.COM/GLACIERBAY Please contact 1-855-HD-GLACIER for further assistance. -
Page 4: Installation
Installation Installing the faucet assembly Installing the faucet assembly CAUTION: Always shut off the water supply before NOTE: This step is for escutcheon installation (optional). removing an existing faucet or replacing any part of a If the escutcheon will not be used, install the faucet faucet. - Page 5 Installation (continued) Attaching the quick connector Securing the faucet assembly to the receiving block □ Push the quick connector (C) rmly upward and NOTE: Make sure the spout and handle is centered and attach it to the receiving block (1). Pull down facing forward prior to secure the faucet assembly.
- Page 6 Installation (continued) Making the water supply Installing the weight connections □ Install the weight clip (G) at the point of the NOTE: The hot side inlet tube is indicated by a label. Avoid hose marking “weight here”. twisting wires together or placing the wires close to each other and damaging.
-
Page 7: Operation
Operation Flushing and checking for leaks IMPORTANT: After installation is completed, turn on the hot and cold water supplies. Check for leaks. Do not lose the gasket (1) in the hose. □ Pull the hose assembly out of the spout and remove the spray head by unscrewing it from the hose in a counterclockwise direction. -
Page 8: Care And Cleaning
Care and Cleaning □ To clean, wipe down with a damp cloth and dry with a towel. □ Do not use abrasive cleaners, steel wool, or harsh chemicals when cleaning this faucet, or the warranty will be voided. Troubleshooting NOTE: Refer to the service parts section in this manual for a detailed drawing showing the location of the parts listed below. -
Page 9: Service Parts
Service Parts Faucet ID tags can be found on the hot water inlet Part Description Part Number Part Description Part Number Spray head and Hose RP38297* FastMount™ RP56096 Handle RP13461* Block RP70421 RP80543* O-ring RP60002 Bonnet nut RP70336 Quick connect RP70558 assembly Screw... - Page 10 Questions, problems, missing parts? Before returning to the store, call Glacier Bay Customer Service 8 a.m. - 7 p.m., EST, Monday - Friday 9 a.m. - 6 p.m., EST, Saturday 1-855-HD-GLACIER (1-855-434-5224) HOMEDEPOT.COM/GLACIERBAY Retain this manual for future use.
- Page 11 HOMEDEPOT.COM/GLACIERBAY GRACIAS Agradecemos la con anza que has depositado en Glacier Bay al comprar este grifo para cocina. Nos esforzamos por crear continuamente productos de calidad diseñados para mejorar su hogar. Visítanos en Internet para ver nuestra línea completa de productos disponibles para las necesidades de mejoras de tu hogar. ¡Gracias por...
-
Page 12: Información Importante
GARANTÍA LIMITADA DE POR VIDA Los productos de Glacier Bay están fabricados con normas y mano de obra de calidad superior y están respaldados por nuestra garantía de por vida limitada. Glacier Bay garantiza al comprador consumidor original que sus productos no presentan defectos materiales o de fabricación. -
Page 13: Contenido Del Paquete
Pre-instalación (continuación) CONTENIDO DEL PAQUETE Pieza Descripción Cantidad Ensamblaje del grifo FastMount™ Conector rápido Placa protectora Junta Peso Sujetador con peso HOMEDEPOT.COM/GLACIERBAY Para obtener asistencia, llama al 1-855-HD-GLACIER. -
Page 14: Instalación
Instalación Cómo instalar el ensamblaje Cómo instalar el ensamblaje del grifo del grifo PRECAUCIÓN: Cierra siempre el suministro de agua NOTA: Este paso es para la instalación de la placa antes de retirar un grifo existente o reemplazar alguna protectora (opcional). Si no usarás la placa protectora, parte del mismo. - Page 15 Instalación (continuación) Cómo fijar el ensamblaje del Cómo montar el conector grifo rápido al bloque receptor □ Presiona rmemente el conector rápido (C) NOTA: Garantiza que el caño y la manija queden hacia arriba y fíjalo en el bloque receptor (1). centrados y mirando hacia adelante antes de asegurar Hala hacia abajo ligeramente para asegurar el ensamblaje del grifo.
- Page 16 Instalación (continuación) Cómo hacer las conexiones Instalar la peso del suministro de agua □ Instala el sujetador de la peso (G) en la punta NOTA: El tubo de entrada del agua caliente se identi ca de la manguera marcada “weight here” con una etiqueta.
-
Page 17: Funcionamiento
Funcionamiento Cómo purgar las tuberías y comprobar que no haya fugas IMPORTANTE: Luego de terminar la instalación, abre los suministros de agua caliente y fría. Revisa si hay ltraciones. No a ojes la junta (1) en la manguera. □ Retira del caño el ensamblaje de la manguera y retira el cabezal del rociador desenroscándolo de la manguera en el sentido contrario a las manecillas del reloj. -
Page 18: Cuidado Y Limpieza
Cuidado y limpieza □ Para limpiar, usa un paño húmedo y seca con una toalla. □ No uses limpiadores abrasivos, esponjas de alambre o productos químicos fuertes para limpiar esta mezcladora, pues ello anulará la garantía. Solución de problemas NOTA: Consulta la sección de piezas de repuesto de este manual para ver un dibujo detallado que muestra la ubicación de las piezas enumeradas a continuación. -
Page 19: Piezas De Repuesto
Piezas de repuesto Las etiquetas de identi cación de la mezcladora pueden encontrarse en la entrada de agua caliente. Pieza Descripción Número de pieza Pieza Descripción Número de pieza FastMount™ RP56096 Cabezal rociador RP38297* y manguera Bloque RP70421 Llave RP13461* Aro tórico RP60002 Tapa... - Page 20 ¿Problemas, preguntas o piezas faltantes? Antes de regresar a la tienda, llama al servicio al cliente de Glacier Bay de lunes a viernes entre 8 a.m. y 7 p.m. y los sábados entre 9 a.m. y 6 p.m.(hora estándar del Este) 1-855-HD-GLACIER (1-855-434-5224) HOMEDEPOT.COM/GLACIERBAY...
Need help?
Do you have a question about the 67737-0001 and is the answer not in the manual?
Questions and answers