Advertisement
Advertisement
Table of Contents

Related Manuals for OPTIX RVC1150/T


Summary of Contents for OPTIX RVC1150/T
- Page 1 MODEL : RVC1150/T Top/Bottom Mount Camera QUALITY PRODUCTS FOR THE PROFESSIONAL INSTALLER...
- Page 2 MODEL : RVC1150/T Table of Contents INTRODUCTION Contents INSTALLATION/QUICKSTART Wiring...
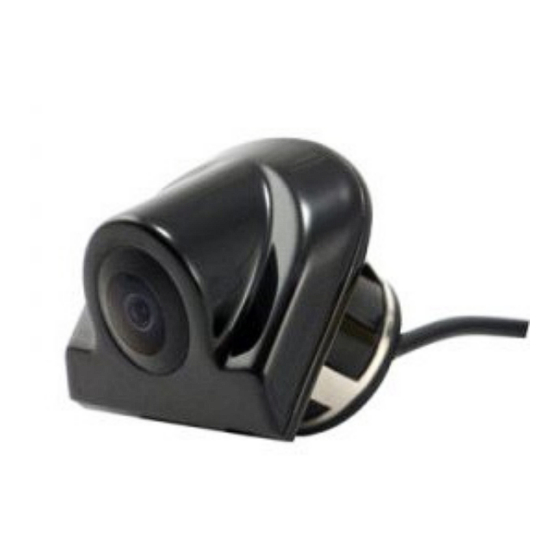
- Page 3 MODEL : RVC1150/T INTRODUCTION Congratulations on your purchase of the Optix “Top or Bottom View Camera”. With camera installed, you are able to have a great visual of what is on the behind your vehicle while driving or going in reverse. Contents: 1- Camera Bottom or Top 1- Hole saw 1- Hardwire plug 1- Power Plug Monitor Not Included...
- Page 4 MODEL : RVC1150/T INSTALLATION/QUICK START 1. These cameras are top or bottom cameras depending on part number. Angles can not be adjusted, there for they can only be mounted upside down or right side up. Most installers like to mount this right above the license plate or on the very top of the vehicle. This is an OEM like camera and mounting is up to customer’s preference. 2. Route wires into the vehicle and attach the video wire to your DVR, Splitter, Switcher or directly to your monitor. Make sure cables are not being pinched. If you purchased the RVC1150T you have a pair of wire loops on the camera wire. Please use the notes bellow to assist you with functions of those loops. RVC1150T LOOPS: Green cut - Lines Monitor Not Included Green not cut – No lines White cut – Upside down view / Top mount White not cut – Normal view / Bottom mount Camera Specifications: • Works with PAL and NTSC • 120 degree viewing angle • IP67-IP68 Water-Proof Accele Electronics will not be responsible for damages caused to your car • 0.2 Lux/F 1.8 due to improper installation. For complete owners manual please visit • Current Cosumption 300mA https://accele.com/product/t-rvc1150-t/ Thank you for being a valued customer of ACCELE ELECTRONICS...
Need help?
Do you have a question about the RVC1150/T and is the answer not in the manual?
Questions and answers