Table of Contents
Advertisement
OWNER'S MANUAL
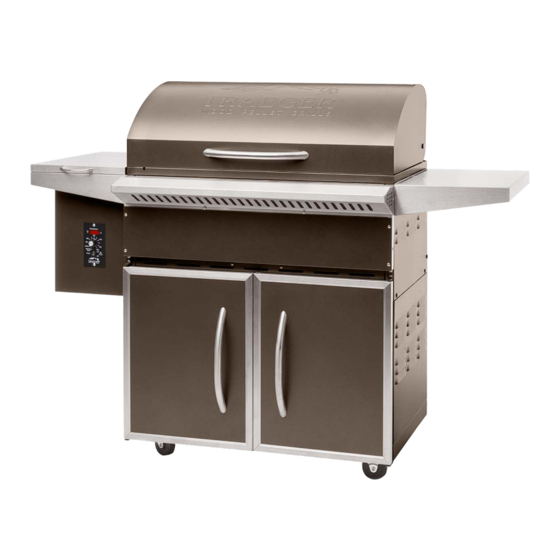
TFS60LZC
RESIDENTIAL PELLET GRILL-SMOKER
FOR OUTDOOR USE ONLY!
"TASTE THE DIFFERENCE"
Please read this entire manual before assembly, installation of your Traeger Pellet Grill.
Failure to follow these instructions could result in property damage, bodily injury or even
death. Contact your local building or fire official about restrictions and installation
inspection requirements in your area.
SAVE THESE INSTRUCTIONS
Advertisement
Table of Contents

Related Manuals for Traeger TFS60LZC


Summary of Contents for Traeger TFS60LZC
- Page 1 FOR OUTDOOR USE ONLY! “TASTE THE DIFFERENCE” Please read this entire manual before assembly, installation of your Traeger Pellet Grill. Failure to follow these instructions could result in property damage, bodily injury or even death. Contact your local building or fire official about restrictions and installation inspection requirements in your area.
- Page 2 WARNING! Use ONLY TRAEGER BRAND BBQ WOOD PELLETS, which are specifically made to work in our Grills. Traeger wood pellets are rated for 8500 BTU per LBS with an ash content of 2%. CAUTION! Always store wood pellets in a dry location, away from heat-producing appliances and other fuel containers.
-
Page 3: Section One: Assembly Instructions
With proper set-up, operation and maintenance, the Grill will provide you with delicious food and with years of cooking enjoyment. Assembly of the grill is required. Follow the assembly instruction provided in the TFS60LZC packaging. Removal of the Porcelain Grills, Drip Pan, Heat Baffle, and Grease Bucket will be required for initial firing and whenever the Grill runs out of pellets along with periodic maintenance. - Page 4 Insert drip pan into the firebox with the small flange of the Drip Pan to the left side onto the holder. Insert the large flange into the V in the Grease Drain. Center the Drip pan from front to back of the Firebox. (See FIGURE B) FIGURE B Insert Grease Bucket onto the tab located on the inside of the lower cabinet from the grease Drain.
-
Page 5: Section Two: Initial Firing Instructions
Look to see if the Hot Rod is getting hot (it will start to turn red). CAUTION! Do not touch it. Turn the Temperature/dial to SHUT DOWN CYCLE. 4) Fill the Pellet Hopper with TRAEGER BBQ PELLETS. WARNING! Use only TRAEGER BRAND BBQ PELLETS, which are specifically made to work in our Grills. -
Page 6: Section Three: Subsequent Start-Up
Once the Hot Rod is disconnected, replace the Hopper Bottom Panel and plug the Power Cord back into an appropriate, grounded electrical outlet. 2) Open the Pellet Hopper and fill with TRAEGER BBQ PELLETS. WARNING! USE ONLY TRAEGER BRAND BBQ WOOD PELLETS, which are specifically made to work in our Grills. - Page 7 3) Remove the Porcelain Grills, Grease Drain Pan and Heat Baffle to expose the Firepot In the bottom of the Grill. 4) Pour 1/2 cup of TRAEGER BBQ PELLETS into the Firepot. 5) Squirt 2 tablespoons of Alcohol Gel fire lighter into the Firepot on top of the Pellets.
-
Page 8: Carbon Monoxide
SMOKE setting can also be used to “hold” foods at approximately 180 to 200 degrees F. 2) Your TRAEGER PELLET GRILL should never be moved while it is hot. If you are transporting your Grill in a vehicle after cooking on it, make sure the fire is completely out and the Grill is COLD before placing it in any vehicle. - Page 9 Carbon monoxide is especially toxic to mother and child during pregnancy, infants, the elderly, smokers and people with blood or circulatory problems, such as anemia or heart disease. 9) CAUTION! Grease fires are caused by not properly maintaining the Grill by failing to clean your Grease Drain Pan, V-shaped Grease Drain and Grease Drain Tube on a consistent basis.
-
Page 10: Section Five: Maintaining Your New Grill
Pellet Hopper. Wood pellets, when wet, expand greatly and will jam your Auger. A TRAEGER GRILL COVER to protect the Grill is highly recommended! Covers are available from your Traeger Dealer, or log on to our Web Site –... -
Page 11: Disposal Of Ashes
5) We recommend keeping a long-handled cleaning brush near the Grill. After removing your food, give the Porcelain Grill a quick brushing. It takes only a minute and it will be ready the next time you want to use the Grill. Be careful not to burn yourself. -
Page 12: Section Six: Frequently Asked Questions
If the Auger Drive Motor is operating (check the small fan blade on the back of the motor), the problem is in the Three Speed or Digital Control, which will need to be replaced. Contact your Traeger Dealer or the Traeger Parts Department (SECTION SEVEN) to place an order. - Page 13 3) Replace the Heat Baffle, Grease Drain Pan and the Porcelain Grill and initiate start- up procedure. 4) If this didn’t remedy the problem, contact Traeger Technical Support (SECTION SEVEN) for additional troubleshooting help. WITH THE TRAEGER DIGITAL CONTROL, WHAT DIAL SETTING IS...
- Page 14 WHERE CAN I GET A NEW PART FOR MY GRILL? Check with your Traeger Dealer. They may have the part in stock or can order the part for you. Or you can contact the Traeger Parts Department (SECTION SEVEN) to place an order.
-
Page 15: Section Seven: Traeger Support
SECTION SEVEN: TRAEGER SUPPORT Parts are identified by number on the following COMPONENT DIAGRAM PAGE. To order parts: Call, E-mail or write to your Traeger Dealer or Traeger Pellet Grills. Please provide your name, phone number, address, Model and Serial Number of the Grill (located on a label inside the Hopper Lid or inside a Door), along with the part identification number from the Component Diagram. - Page 16 TFS60LZC COMPONENTS DIAGRAM HOPPER BURNER ASSEMBLY...
-
Page 17: Components Parts List
BCA289 LEFT SHELF ASSEMBLY SUB277 RIGHT SHELF ASSEMBLY SUB278 RIGHT DOOR ASSEMBLY BRONZE SUB724 LEFT DOOR ASSEMBLY BRONZE SUB686 HOPPER BURNER ASSEMBLY TFS60LZC SUB1017 FRONT COVER ASSEMBLY SUB260 FRONT COVER PANEL BRONZE BCA684 UPPER HINGE ASSEMBLY BRONZE SUB684 MAGNET CATCH...
Need help?
Do you have a question about the TFS60LZC and is the answer not in the manual?
Questions and answers