
Related Manuals for Hoover HV-D6FI


Summary of Contents for Hoover HV-D6FI
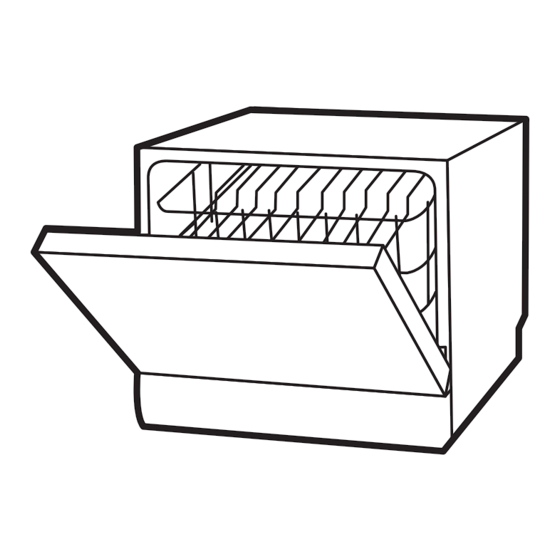
- Page 1 6 Place Dishwasher INSTRUCTION MANUAL MODEL: HV-D6FI *Please note, this dishwasher does NOT include a decorative door (front) panel - it will need to be supplied by the installer.
-
Page 2: Table Of Contents
Contents General Safety Instructions Product Overview Installation Features Instructions FAQs and Troubleshooting Guide Other Useful Information After Sales Support (AU) 1300 886 649 (NZ) 0800 836 761 | tempo.org/support... -
Page 3: General Safety Instructions
General Safety Instructions IMPORTANT SAFETY INSTRUCTIONS READ CAREFULLY AND KEEP FOR FUTURE REFERENCE Read this manual thoroughly before first use, even if you are familiar with this type of product. The safety precautions enclosed herein reduce the risk of fire, electric shock and injury when correctly adhered to. - Page 4 General Safety Instructions (Cont.) • Inserting/removing the plug: Before you insert or remove the plug, make sure the appliance is switched off and the power is switched off at the electrical outlet. Remove by grasping the plug, do not pull on the cord. CAUTION! •...
- Page 5 General Safety Instructions (Cont.) • Children should be supervised to ensure they do not play with the appliance. Close supervision is necessary when any appliance is used by or near children. WARNING! • Never leave the appliance unattended while in use. •...
-
Page 6: Product Overview
Product Overview Scope of delivery After Sales Support (AU) 1300 886 649 (NZ) 0800 836 761 | tempo.org/support... - Page 7 Product Overview (Cont.) 6 Place Dishwasher Spray arm Filter assembly Dispenser Cup rack Basket Cutlery rack Water supply and drain hoses (not pictured) Documentation (not pictured) Instruction manual Warranty card NOTE: There is NO decorative door panel (front panel) included with this product. It will need to be supplied separately.
- Page 8 Product Overview (Cont.) Control panel Table 1 Operation buttons Press this button to enter or exit the ready-to-use POWER state. Press this button to increase the delay start time by DELAY one hour, up to 24 hours. Press this button to select the appropriate washing PROGRAM program, the selected program indicator will light up.
- Page 9 Product Overview (Cont.) Table 2 Display indicators Rinse aid When the indicator is lit, the dishwasher is low on rinse aid and requires a refill. Warning indicators Water faucet When the indicator is lit, the water faucet is closed. Intensive For most heavily soiled crockery, such as pots, pans, casserole dishes and dishes that have been sitting with dried food on them for some time.
-
Page 10: Installation
Installation DANGER! Make sure your electrical power is disconnected before installing the dishwasher. Failure to do so can result in death or electric shock. IMPORTANT! All relevant pipes and electrical equipment should be installed by licensed plumbers, electricians or dishwasher installers. Make sure to use new water supply and drain hoses;... - Page 11 Installation (Cont.) Attaching the decorative door panel (not included) To install this unit Fig. 1 into a cabinet, ensure that the aperture has the dimensions outlined below (Fig. 1 and Electrical, drain band water supply line entrances, Fig. 2). both sides The weight of the decorative door Space of cabinet...
- Page 12 Installation (Cont.) Assemble the decorative panel onto the dishwasher, by first installing a screw between the cabinet base board and decorative panel, then pull glide from out door groove, case 8-screw between decorative panels and glide (Fig. 5 and Fig. 6). Fig.
- Page 13 Installation (Cont.) Install the adjustable feet into the unit base (Fig. 7). Install the dishwasher into the aperture, then adjust the screw feet until the bottom of the panel is aligned to the aperture base, then close the dishwasher (Fig. 8). Fig.
- Page 14 Installation (Cont.) Cold water connection Fig. 9 • Connect the cold water supply hose to a threaded 3/4” connector. During use, the dishwasher will heat up the water to the required temperature. Make sure the hose is not kinked or squashed and is fastened tightly in place (Fig.
- Page 15 Installation (Cont.) Fig. 10 Countertop Back of dishwasher Inlet pipe connector Drain pipe Drain pipe Mains cable 40 mm Drain hose connection Fig. 11 • The drain hose must be connected to the drain hose connector at the back of the dishwasher.
- Page 16 Installation (Cont.) Electrical connection Make sure that the electrical voltage and circuit frequency in your home correspond to those indicated on the appliance rating label and that the electrical system is sized for the maximum voltage on the rating plate. This appliance requires a 10 A fused, copper-wired electrical supply.
- Page 17 Installation (Cont.) Before first use After your new dishwasher has been installed, and before using it for the first time, make sure to check the following points to ensure safe and efficient operation: • Is the dishwasher level and properly installed? •...
-
Page 18: Features
Features Table 3 Wash programs and cycles Program Suitability Cycles Prewash (50ºC) For most heavily soiled crockery, Wash (55ºC) such as pots, pans, casserole Rinse dishes and dishes that have been Rinse sitting with dried food on them for Intensive Rinse (70ºC) some time. - Page 19 Features (Cont.) Detergent (pre / main) Running Time (min.) Energy (kWh) Water (L) 5 / 17.5 g 0.85 (or all-in-1) 5 / 17.5 g 0.65 (or all-in-1) 5 / 17.5 g 0.45 (or all-in-1) 22.5 g 0.65 22.5 g 0.65 15 g 0.32 After Sales Support...
-
Page 20: Instructions
Instructions the dishwasher Loading For best performance of your dishwasher, follow the loading guidelines in this manual. Before loading the dishwasher baskets: ATTENTION: It is not necessary to rinse the dishes under running water before you put them into the dishwasher. However, we recommend you scrape off any large amounts of leftover food and soften remnants of burnt food in pots and pans. - Page 21 Instructions (Cont.) Loading the dishwasher basket In order to maximise the performance of this dishwasher, please place the soiled plates with the dirtier side facing towards the spray arm. Ensure that no tableware sticks through the bottom of the basket to avoid blocking the moving spray arm. In order to allow the detergent dispenser to open freely, do not place any dishes with a diameter of more than 19 cm in front of it.
- Page 22 Instructions (Cont.) Dishwasher detergent WARNING! • Only use detergent specifically made for use in dishwashers. • Always add detergent just before starting the dishwasher, otherwise it could get damp and will not dissolve properly. It is also a hazard to leave detergent in the dispenser where children can reach it when the door is open.
- Page 23 Instructions (Cont.) The detergent dispenser Fig. 14: Push latch to open Fig. 15 Adding detergent The table on pages 18-19 lists the recommended amounts of detergent, generally around 15–22.5 g. However, water hardness and soiling levels affect the amount of detergent required, and there are various types of detergent tablet on the market, so always follow the detergent manufacturer’s recommendations on dosage.
- Page 24 Instructions (Cont.) Rinse aid Rinse aid is automatically released during the last rinse to prevent water from forming droplets on your dishes, which can leave spots and streaks. It also improves drying by allowing water to roll off the dishes. Your dishwasher is designed to use liquid rinse aid. CAUTION! Only use specific, branded rinse aid for your dishwasher.
- Page 25 Instructions (Cont.) When to refill the rinse aid dispenser Fill the rinse aid dispenser when the warning light on the control panel comes on. Alternatively, you can estimate the amount of rinse aid left in the dispenser by the colour of the optical level indicator, which is located next to the cap (see Fig. 15-C on page 23).
- Page 26 Instructions (Cont.) Running the dishwasher Starting a wash program • Open the door and draw out the basket. Remove the cutlery basket and load your cutlery, before placing this back into the main basket. Load your dishes and push the basket back into place in the dishwasher (see page 21 for details).
- Page 27 Instructions (Cont.) Forgot to add a dish? Additional dishes can be added any time before the detergent dispenser opens. • Open the door very slowly to pause the washing. • Add additional dishes. • Close the door. It will start running again after 10 seconds. WARNING! It is dangerous to open the door mid-cycle as hot water or steam may escape and scald you.
-
Page 28: Faqs And Troubleshooting Guide
FAQs and Troubleshooting Guide The table below lists possible causes and solutions for common problems you may encounter with the dishwasher. If you follow all the instructions below but still cannot solve a problem, please contact our after sales support centre. Table 4 Troubleshooting guide Problem... - Page 29 FAQs and Troubleshooting Guide (Cont.) Table 4 Troubleshooting guide Problem Possible cause Solution Use only specific dishwasher detergent to avoid suds. If this occurs, open the dishwasher and let the suds evaporate. Add 3–4 litres of cold water to the tub, close the door securely, then run any Inappropriate detergent program.
- Page 30 FAQs and Troubleshooting Guide (Cont.) Table 4 Troubleshooting guide Problem Possible cause Solution Load the dishwasher as suggested in Improper loading this manual. Increase the amount of rinse aid. Remove the cap from the rinse aid Too little rinse aid dispenser and set the dosage dial to a higher number.
- Page 31 FAQs and Troubleshooting Guide (Cont.) Error codes When there is a malfunction, some of the indicator lights on the control panel will start flickering in order to warn you that something is wrong. Table 5 Error codes Code Meaning Possible cause Faucet is not opened, or water intake is restricted, or water pressure is too low —...
-
Page 32: Other Useful Information
Other Useful Information The filter system The filter system in the base of the wash cabinet efficiently removes food particles from the wash water, allowing it to be recycled during the wash. It prevents larger remnants of food or other objects from getting inside the pump. The filter system consists of three filters: a coarse filter, main filter and fine filter. - Page 33 Other Useful Information (Cont.) WARNING! • When cleaning the filters take care not to contort their shape, which could compromise the washing performance. • Do not overtighten the filters. Put the filters back in sequence securely, otherwise coarse debris could get into the system and cause a blockage. •...
- Page 34 Other Useful Information (Cont.) Looking after your dishwasher • After every wash, turn off the water supply to the appliance and leave the door slightly ajar so moisture and odours are not trapped inside. • Before cleaning or performing maintenance, always unplug the dishwasher from the socket.
- Page 35 For more information about spare parts for the dishwasher, please contact our after sales support centre at tempo.org/support or on 1300 886 649. Technical specifications Table 6 Specifications Model Number HV-D6FI Capacity 6 place settings Rated voltage/frequency 220–240 V~ 50 Hz Power consumption 1170–1380 W...
- Page 36 Other Useful Information (Cont.) Responsible disposal Packaging materials are recyclable. Please dispose of them responsibly for recycling. At the end of its working life, do not throw this appliance out with your household waste. Electrical and electronic products contain substances that can have a detrimental effect on the environment and human health if disposed of inappropriately.
- Page 37 This page has been left blank intentionally. After Sales Support (AU) 1300 886 649 (NZ) 0800 836 761 | tempo.org/support...
- Page 38 This page has been left blank intentionally. After Sales Support (AU) 1300 886 649 (NZ) 0800 836 761 | tempo.org/support...
- Page 39 This page has been left blank intentionally. After Sales Support (AU) 1300 886 649 (NZ) 0800 836 761 | tempo.org/support...
- Page 40 Warranty returns Should you for any reason need to return this product for a warranty claim, make sure to include all accessories with the product. Product does not work? If you encounter problems with this product, or if it fails to perform to your expectations, make sure to contact our After Sales Support Centre on 1300 886 649 for advice.
Need help?
Do you have a question about the HV-D6FI and is the answer not in the manual?
Questions and answers