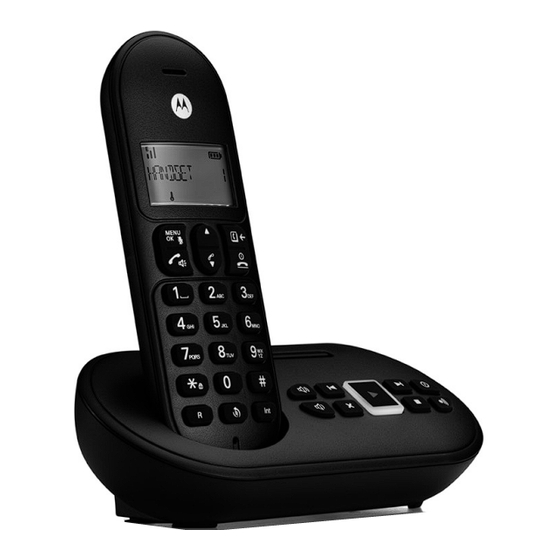
Motorola T1 Series Manual

Motorola T1 Series Manual

Digital cordless telephone with digital answering machine
Table of Contents

Advertisement

Digital Cordless Telephone
with Digital Answering
Machine
Motorola T1
Models: T111, T112, T113 and T114
Warning: Charge the handset for 16 hours before use.

Advertisement

Table of Contents
loading

Summary of Contents for Motorola T1 Series

  • Page 1 Digital Cordless Telephone with Digital Answering Machine Motorola T1 Models: T111, T112, T113 and T114 Warning: Charge the handset for 16 hours before use.
  • Page 2 Welcome... to your new Motorola T1 Digital Cordless Telephone with Digital Answering Machine! • Answering machine with up to 12 minutes recording time. • All handsets are fully cordless for locating anywhere within range. • 50 Name and Number phonebook.
  • Page 3 This user guide provides you with all the information you need to get the most from your phone. To set up your phone, follow the simple instructions in ‘Getting Started’, on the next few pages. IMPORTANT Only use the telephone line cord supplied. Got everything? •...
  • Page 4: Table Of Contents

    1. Getting started ..............6 2. Getting to know your phone ..........10 3. Using the phone ..............16 Switch the handset on / off ................16 Calls .......................16 3.2.1 Make a call ...................16 3.2.2 Preparatory dialling ................16 3.2.3 End a call .....................16 3.2.4 Receive a call ..................16 Adjust the earpiece volume................16 Mute .......................16...
  • Page 5 6. Clock & alarm ..............24 Set the date and time..................24 Set the alarm ....................24 Switch off alarm ring ..................24 7. Personal settings ..............25 Handset tones ....................25 7.1.1 Handset ringer volume ...............25 7.1.2 Handset ringer melody ...............25 7.1.3 Key beep .....................25 Base tones ......................25 7.2.1 Base ringer volume ................25...
  • Page 6: Getting Started

    1. Getting started IMPORTANT Do not place your T1 in the bathroom or other humid areas. Location You need to place your T1 base within 1.5 metres of the mains power and telephone wall socket so that the cables will reach. The socket-outlet should be installed near the equipment and should be easily accessible.
  • Page 7 Connecting the base 1. Plug the telephone line cord into the socket marked on the underside of the base. 2. Plug the power adaptor into the socket marked on the underside of the base and plug the other end into the mains power wall socket. Switch on the mains power. Installing and charging the handset 1.
  • Page 8 4. When the handset is fully charged, the icon will appear steady on the display. Plug the other end of the telephone line cord (make sure that one end is already plugged into the base) into the telephone wall socket. Connecting the handset and charger (for multi-pack only) If you have purchased a multiple pack, you will need to carry out this process for all the handsets and chargers.
  • Page 9 BATTERY PERFORMANCE In ideal conditions, fully charged batteries should give up to 10 hours talk time or up to 200 hours standby time on a single charge. Note that new batteries do not reach their full capacity until they have been put to normal use for several days.
  • Page 10: Getting To Know Your Phone

    2. Getting to know your phone Overview of your handset A Earpiece B Display See page 12 for an overview of the display icons. C Up During a call, press to increase earpiece volume. When the phone is ringing, press to increase the handset ringer volume. Press to scroll through the menu options, redial list, calls list and phonebook entries.
  • Page 11 D Menu / OK / Mute Press to open the Menu. Press to select menu options and to confirm a displayed option. During a call, press to turn mute on / off. E Talk / Hands-free Press to switch hands-free on or off during a call. Press to make and receive calls.
  • Page 12 Handset LCD Display Battery status Scrolls when charging Time or Handset name In standby mode, press and hold to switch handset idle screen between handset name or time. Signal icon ECO MODE is ON ECO PLUS is ON Handset ringer is off Indicates a missed call Steady when making an outgoing call Flashes to indicate an incoming or internal call...
  • Page 13 Battery is partially charged Battery is running low Flashes when battery is almost fully discharged For this feature to work, you must subscribe to Caller ID Service from your network operator. A subscription fee may be payable. This feature is dependent on your Network Service provider supporting the service. A subscription fee may be payable.
  • Page 14 H Page In standby mode, press to ring the handset(s) Press and hold to enter registration mode when registering handsets Stop Stops message playback. Navigating the menus Your T1 has an easy to use menu system. Each menu has a list of options, which you can see on the menu map on the following page.
  • Page 15 Menu map PHONEBOOK KEY TONE CHANGE PIN VIEW BASE TONE REGISTER ADD NEW RING VOLUME UNREGISTER EDIT RING MELODY RESET DELETE HANDSET NAME ANSW MACHINE DELETE ALL AUTO ANSWER PLAY CLOCK/ALARM LANGUAGE DELETE ALL DATE & TIME ADVANCED SET RECORD MEMO SET ALARM ECO MODE OGM SETTING...
  • Page 16: Using The Phone

    3. Using the phone NOTE The handset will automatically time the duration of all external calls. The call timer will display after the first 10 seconds of the call. When the call ends, the total duration of the talk time stays on the display for 3 seconds. Switch the handset on / off Press and hold to switch the handset on or off.
  • Page 17: Receive An Internal Call

    1. If only 2 handsets are registered to the base, press and the other handset rings automatically. 2. If more than 2 handsets are registered to the base press and scroll to the handset that is to be called then press 3.5.2 Receive an internal call When you receive an internal call, the icon flashes and the handset number that is calling...
  • Page 18: Answer A Call Hands-Free

    2. Press to switch the call between the earpiece and the loudspeaker. 3. Press to end the call. NOTE During a hands-free call, press to adjust the volume. 3.6.2 Answer a call hands-free 1. When the phone rings, press twice to answer the call. 3.6.3 Switch to hands-free during a call 1.
  • Page 19: Delete The Entire Redial List

    1. Press to open the Redial list. 2. Press and scroll DELETE ALL. 3. Press , the display shows CONFIRM?. 4. Press to confirm or to cancel. Lock / unlock the keypad You can lock the keypad so that it cannot be operated accidentally while carrying it around.
  • Page 20: Phonebook

    4. Phonebook You can store up to 50 names and numbers in the phonebook. Names can be up to 12 characters long and numbers up to 24 digits. Store a name and number If the T1 is connected to a switchboard, you may need to enter a pause in a stored number. This gives the switchboard time to find an outside line.
  • Page 21: View Or Dial An Entry

    View or dial an entry 1. Press . The icon is displayed. 2. Scroll to the entry you want. Enter the first letter of the name to search alphabetically. The first name that starts with this letter or the nearest letter in the alphabet will be displayed.
  • Page 22: Caller Id And The Calls List

    5. Caller ID and the Calls list IMPORTANT To use Caller ID, you must first subscribe to the service from your network provider. A subscription fee may be payable. To ensure that the caller’s name is displayed, make sure you have stored the full telephone number, including the area code in the phonebook.
  • Page 23: Copy A Calls List Number To The Phonebook

    3. Press to dial the displayed entry. 5.2.3 Copy a Calls list number to the phonebook 1. Press to open the Calls list. 2. Scroll to the entry you want. 3. Press and scroll SAVE NUMBER. 4. Press again. The display shows ENTER NAME.
  • Page 24: Clock & Alarm

    6. Clock & alarm Set the date and time 1. Press , scroll CLOCK/ALARM and press . The display shows DATE & TIME. 2. Press to select. 3. Enter the date (e.g. 27--08--17 for 27th of August 2017) and press to confirm.
  • Page 25: Personal Settings

    7. Personal settings Handset tones 7.1.1 Handset ringer volume The handset ring volume can be set to different volume levels. Choose from 5 volume levels or Off. 1. Press , scroll PERSONAL SET and press 2. The display shows HANDSET TONE, press 3.
  • Page 26: Base Ringer Melody

    2. Scroll BASE TONE, press 3. The display shows RING VOLUME, press 4. Press to select the volume (1 -5 or OFF) . 5. Press to confirm or to return to the previous menu. 7.2.2 Base ringer melody You can set different ringer melodies for your calls. Choose from 5 different ringer melodies.
  • Page 27: Language

    Language 1. Press , scroll PERSONAL SET and press 2. Scroll LANGUAGE and press 3. Press to select your preferred language. 4. Press to confirm or to return to the previous menu. Personal settings...
  • Page 28: Base Settings

    8. Base settings ECO mode Your T1 offers ECO mode function which reduces the transmitted power and energy consumption when switched on. To switch Eco mode on: 1. Press , scroll ADVANCED SET and press 2. The display shows ECO MODE and press 3.
  • Page 29: Recall Mode

    Recall mode This setting is useful to access certain network and PABX/switchboard services. The default recall time is suitable for your country and network operator. It is unlikely that you should need to change this setting unless advised to do so. 1.
  • Page 30: Register A Handset

    On the base: 1. Press and hold for 5 seconds until you hear a beep. The base will remain in registration mode for 90 seconds. On the handset: 1. If the handset is not register to a base press and then enter the 4 digit PIN code (default = 0000) and press 2.
  • Page 31: Default Settings

    2. Scroll RESET and press 3. The display shows RESET 4. Press to confirm or to return to the previous menu. Your T1 will restart automatically. NOTE Once reset the handset will prompt you to reset the date and time, see page 24. 8.10 Default settings Auto answer...
  • Page 32: Using The Answering Machine

    9. Using the answering machine The phone can digitally record up to 12 minutes of messages. As well as recording incoming messages, it can record memos for other users. The answering machine can be operated from: • the base • the handset •...
  • Page 33: Adjust The Speaker Volume

    5. During playback press to display a list of options. 6. Use the to change the options. • REPEAT press to repeat current message. • NEXT press to play next message. • PREVIOUS press to play previous message. • DELETE press to delete the current message.
  • Page 34: Record, Play Or Delete Your Own Outgoing Message

    9.6.3 Record, play or delete your own outgoing message 1. Press , scroll ANSW MACHINE and press 2. Scroll OGM SETTING and press 3. Press to select either ANSWER ONLY RECORD ALSO and press 4. Scroll to select either PLAY, RECORD USE DEFAULT and press...
  • Page 35: Remote Access On/Off And Change Remote Pin

    Press 1 for previous the message Press 7 to turn On the answering machine Press 2 to play messages Press 8 to stop message playback Press 3 to play the next message Press 9 to turn Off the answering machine Press 6 to delete the current message Remote access on/off and change remote PIN 1.
  • Page 36: Help

    10. Help No dial tone • Use only the telephone line cord supplied. • Check that the telephone line cord is connected properly. • Check that the mains power is connected properly and switched on. No display • Check that the batteries are inserted correctly and fully charged. Use only approved rechargeable batteries supplied.
  • Page 37 Handset does not ring • The handset ringer volume may be set to Off. Base does not ring • The base ringer volume may be set to Off. Noise interference on my phone or on other electrical equipment nearby • Place your T1 at least one metre away from electrical appliances or any metal obstructions to avoid any risk of interference.
  • Page 38: General Information

    11. General information IMPORTANT This equipment is not designed to make emergency telephone calls when the power fails. Alternative arrangements should be made for access to emergency services. This product is intended for connection to analogue public switched telephone networks and private switchboards in Europe.
  • Page 39 Installation Guidelines • Read and understand all instructions and save them for future reference. • Follow all warnings and instructions marked on the product. • Do not install this product near a bath tub, sink, or shower. • Operate this phone using only the power source that is indicated on the marking label.
  • Page 40 (“SUNCORP”) What Does this Warranty Cover? Subject to the exclusions contained below, SUNCORP warrants that this Motorola branded product (“Product”) or certified accessory (“Accessory”) sold for use with this product that it manufactured to be free from defects in materials and workmanship under normal consumer usage for the period outlined below.
  • Page 41 REPAIR OR REPLACEMENT PROVIDED UNDER THIS EXPRESS LIMITED WARRANTY IS THE EXCLUSIVE REMEDY OF THE CONSUMER, AND IS PROVIDED IN LIEU OF ALL OTHER WARRANTIES, EXPRESS OF IMPLIED. IN NO EVENT SHALL MOTOROLA OR SUNCORP BE LIABLE, WHETHER IN CONTRACT OR TORT (INCLUDING NEGLIGENCE)
  • Page 42 Use of Non-Motorola branded Products and Accessories. Defects or damage that result from the use of Non-Motorola branded or certified Products or Accessories or other peripheral equipment are excluded from coverage. Unauthorized Service or Modification. Defects or damages resulting from service, testing, adjustment, installation, maintenance, alteration, or modification in any way by someone other than Motorola, SUNCORP or its authorized service centers, are excluded from coverage.
  • Page 43 Declaration of Conformity (DoC) Suncorp declares that the following products: Brandname: Motorola Type: T111, T112, T113 and T114 Descriptions: DECT phone with telephone answering machine (T11x) and their multi-handset versions. to which this declaration related is in conformity with the essential requirements of the following directives of the Council of the European Communities: R&TTE Directive (1999/5/EC)
  • Page 44 Manufactured, distributed or sold by Suncorp Technologies Ltd., official licensee for this product. MOTOROLA and the Stylized M Logo are trademarks or registered trademarks of Motorola Trademark Holdings, LLC. and are used under license. All other trademarks are the property of their respective owners.

This manual is also suitable for:

T114T111T112T113

Table of Contents