Focusrite Clarett+ OctoPre - Audio Interface Manual
- User manual (20 pages)
Advertisement
- 1 OVERVIEW
- 2 GETTING STARTED
- 3 USING THE CLARETT+ OCTOPRE
-
4
EXAMPLE SETUPS
- 4.1 Clarett+ OctoPre with audio interface: OctoPre as clock leader
- 4.2 Clarett+ OctoPre with audio interface: audio interface as a clock leader
- 4.3 Clarett+ OctoPre with Red 8Line – SMUX-II and SMUX-IV modes
- 4.4 Clarett+ OctoPre with analogue mixing desk
- 4.5 Clarett+ OctoPre in ADAT-to-Line mode
- 4.6 Using Clarett+ OctoPre's inserts to record drums
- 5 CLARETT+ OCTOPRE TECHNICAL SPECIFICATIONS
- 6 TROUBLESHOOTING
- 7 COPYRIGHT AND LEGAL NOTICES
- 8 Documents / Resources
OVERVIEW
Introduction
Eight next-generation, high-headroom, low-noise, low-distortion Clarett+ mic preamps — featuring the unique all-analogue Air function — help you capture superbly clear recordings with precise clarity. The independent A-D and D-A converters with ultra-wide dynamic range let you hear the truth and bring you and your collaborators closer than ever to your music.
Clarett+ OctoPre is the studio upgrade that connects all your equipment and makes high-quality multitracking easy. Used in conjunction with Clarett+ 2Pre, Clarett+ 4Pre or Clarett+ 8Pre — connecting via ADAT — it's the ideal companion for any multi-channel recording session.
This User Guide provides a detailed explanation of the hardware to help you achieve a thorough understanding of the product's operational features. We recommend you take the time to read the Guide, so you are fully aware of all the possibilities the Clarett+ OctoPre has to offer.
Features
The Clarett+ OctoPre is an eight-channel preamplifier for use with microphones, line and instrument input signals. Both analogue and digital outputs are provided: the digital outputs are in ADAT format on optical TOSLINK connectors, which can be easily routed to any ADAT-equipped interfaces using optical cables. The Clarett+ OctoPre can transmit and receive eight channels of audio at sample rates of 44.1, 48, 88.2, or 96 kHz, or four channels at 176.4 or 192 kHz.
The Clarett+ OctoPre has eight next-generation, high-performance Clarett+ preamps to capture the clearest and most powerful audio with a preamp design that brings masses of headroom, low distortion and low noise.
The new and improved high-performance A-D and D-A converters deliver extremely low noise and high dynamic range audio, for making recordings that are more powerful than ever. Switchable channel inserts on every channel keep Clarett+ OctoPre at the centre of your creative process and its word clock input offers convenience and reliability for your system.
The ADAT inputs allow you to connect to an interface's ADAT output - such as on the Clarett+ 8Pre – to increase the number of output channels of your recording system.
Box Contents
Along with your Clarett+ OctoPre you should have:
- AC mains cable with IEC connector
Hardware Features
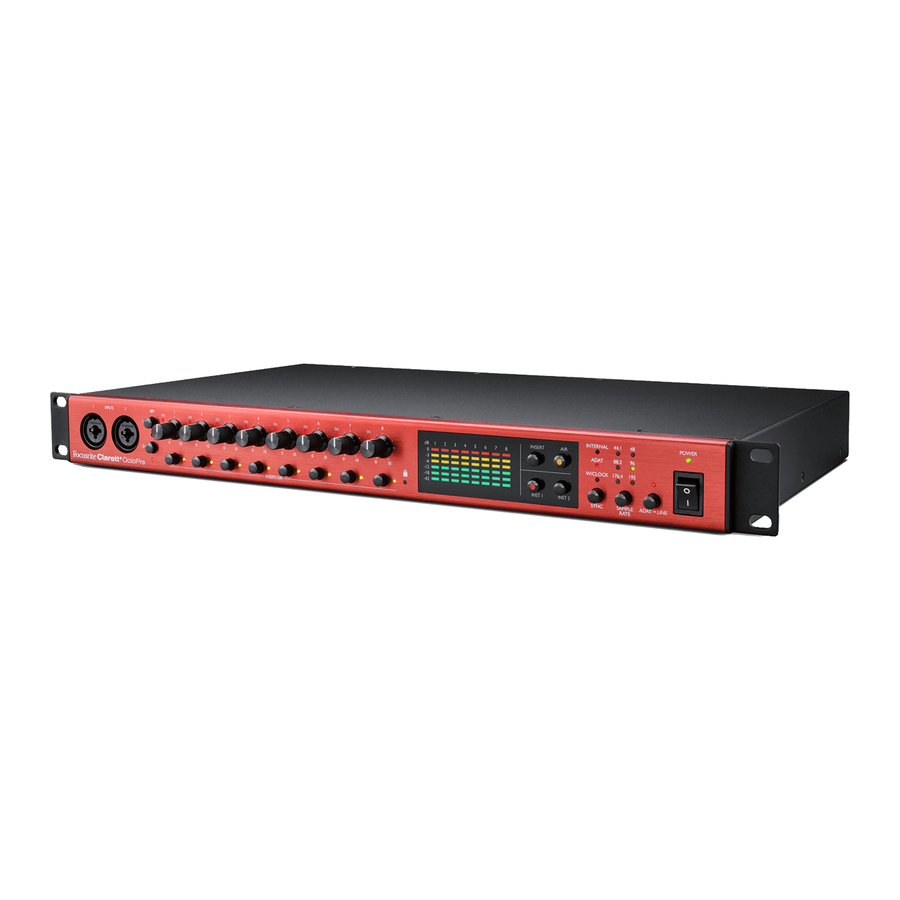
Front Panel

- INPUTS 1 & 2 – Combo XLR input sockets - connect microphones, instruments (e.g., guitar), or line level signals via XLR or ¼" jacks as appropriate. Either TRS (balanced) or TS (unbalanced) jack plugs can be used for instruments or line level signals.
- INST 1 & INST 2 – two switches to set Inputs 1 and 2 to "Instrument" mode. When INST is selected, the gain range and input impedance are altered (relative to LINE), and the input is made unbalanced. This optimises it for the direct connection of instruments via a 2-pole (TS) jack plug. When INST is off, the inputs are suitable for the connection of line level signals. Line level signals may be connected either in balanced form via a 3-pole (TRS) jack or unbalanced, via a 2-pole (TS) jack. Each switch has a red LED to confirm choice.
- 48V – two switches enabling 48 V phantom power at the Combo connectors' XLR contacts for mic inputs 1-4 and 5-8 respectively. (Note that inputs 3 to 8 are on the rear panel.) Each switch has a red LED to show when phantom power is enabled. Note that not all microphones require phantom power. If you are unsure whether your microphone needs it to work, please read the microphone documentation.
- Gain 1 to 8 – eight rotary controls: adjust input gain for signals at Inputs 1 to 8 respectively.
- O/L – each input channel has a red "overload" LED; this illuminates when the signal level reaches +19.5 dBu. Always adjust the level so the LED does not illuminate: to avoid clipping.
- INSERT/AIR – one switch per channel, which enables either the rear panel insert point for the channel, or the channel's AIR function, depending on the setting of the INSERT and AIR main switches [8]. Each switch has an associated LED, which illuminates green when INSERT is selected or yellow when AIR is selected.
- Meters – ten 6-segment LED meters indicating a) the signal levels of the eight analogue input signals (meters 1 to 8), and b) the signal levels at the MONITOR 1 and 2 outputs (meters L and R). The input meters show signal level after the input gain stage. The output meters show signal level before the monitor level control [10], which therefore does not affect their indication. The LEDs illuminate at -42 (green, "signal present"), -18 and -12 dBFS (green), -6 and -3 dBFS (yellow) and 0 dBFS (red). 0 dBFS implies digital clipping, and should always be avoided.
- INSERT and AIR function main switches: two switches with internal LEDs (INSERT = green, AIR = yellow) which determine the function of the per-channel INSERT/AIR switches [6].
- SAMPLE RATE – a switch which steps through the six sample rate settings. The current rate is shown by a green LED. The OctoPre stores the sample rate in use so it is retained through power cycles.
- SYNC – a switch which steps through three available digital sync sources (Internal, ADAT or Word clock), the current source being shown by one of the adjacent red LEDs. The OctoPre stores the Sync source in use so it is retained through power cycles.
![]() (Locked) – a green LED which confirms clock synchronisation, either to the Clarett+ OctoPre's internal clock or to an external digital input.
(Locked) – a green LED which confirms clock synchronisation, either to the Clarett+ OctoPre's internal clock or to an external digital input.- ADAT
![]() LINE – When disabled, input Channels 1 to 8 feed both the rear panel LINE OUTPUT connector (analogue) and the ADAT output ports (digital). When ADAT
LINE – When disabled, input Channels 1 to 8 feed both the rear panel LINE OUTPUT connector (analogue) and the ADAT output ports (digital). When ADAT![]() LINE mode is enabled, the signals present at the ADAT input ports are sent to the OctoPre's LINE OUTPUT connector. This allows you to add 8-channels of analogue outputs to your system. The red LED confirms this mode is enabled. In this mode, the analogue inputs (Channels 1 to 8) remain routed to the ADAT digital outputs. The mode in use is stored in memory so it is retained when the unit is switched off.
LINE mode is enabled, the signals present at the ADAT input ports are sent to the OctoPre's LINE OUTPUT connector. This allows you to add 8-channels of analogue outputs to your system. The red LED confirms this mode is enabled. In this mode, the analogue inputs (Channels 1 to 8) remain routed to the ADAT digital outputs. The mode in use is stored in memory so it is retained when the unit is switched off. - POWER – AC power switch and LED.
- Rack ears for mounting the Clarett+ OctoPre in a standard 19" equipment rack.
Rear Panel

- MIC/LINE INPUTS 3 to 8 – Combo XLR input sockets - connect further microphones or line level signals via XLR or ¼" jacks as appropriate. Either ¼" TRS (balanced) or TS (unbalanced) jack plugs can be used for line level signals.
- INSERTS 1 & 2 – two ¼" TRS jack sockets, providing an access point for connecting external processing equipment into Channels 1 and 2. The inserts are enabled by the front panel
INSERT/AIR switches [6] and [8], and are unbalanced. The sockets are wired as follows:Jack contacts Function Tip Send (output) Ring Return (input) Sleeve Ground Note that the front panel O/L LED [5] monitors signal level pre the insert send so excessive signal level is not sent to external equipment.
- INSERTS 3 to 8 – 6 x ¼" TRS jack sockets providing the insert points for Channels 3 to 8; these are electrically identical to [16].
- OPTICAL OUT – two TOSLINK connectors providing the digital outputs of the unit. Use of the two connectors is sample rate-dependent, as follows:
Sample Rate OUTPUT 1 (RH port) OUTPUT 2 (LH port) 44.1/48 kHz Channels 1 to 8 Channels 1 to 8 88.2/96 kHz Channels 1 to 4 Channels 5 to 8 176.4/192 kHz Channels 1 and 2 Channels 3 and 4 - OPTICAL IN – two TOSLINK connectors providing the digital inputs to the unit when used in the ADAT
![]() LINE mode. Note that these are NOT "digital" inputs to Channels 1 to 8, and signals applied at these ports do not pass through the AIR circuitry, nor are available at the inserts. Use of the two connectors is sample rate dependent, as [18].
LINE mode. Note that these are NOT "digital" inputs to Channels 1 to 8, and signals applied at these ports do not pass through the AIR circuitry, nor are available at the inserts. Use of the two connectors is sample rate dependent, as [18].
- LINE OUTPUTS 1 to 8 – eight balanced analogue line outputs on a 25-pin female D-sub connector. This connector is always active, and normally carries the outputs of Channels 1 to 8, enabling the Clarett+ OctoPre to be used as a stand-alone 8-channel analogue mic pre. In ADAT
![]() LINE mode, the connector carries the signals applied at the OPTICAL IN ports [19]. The pinout of the connector follows the "Tascam" standard for 8-channel analogue interfaces:
LINE mode, the connector carries the signals applied at the OPTICAL IN ports [19]. The pinout of the connector follows the "Tascam" standard for 8-channel analogue interfaces: Pin Function Pin Function 1 Output 8 'hot' (+) 14 Output 8 'cold' (-) 2 Output 8 Gnd 15 Output 7 'hot' (+) 3 Output 7 'cold' (-) 16 Output 7 Gnd 4 Output 6 'hot' (+) 17 Output 6 'cold' (-) 5 Output 6 Gnd 18 Output 5 'hot' (+) 6 Output 5 'cold' (-) 19 Output 5 Gnd 7 Output 4 'hot' (+) 20 Output 4 'cold' (-) 8 Output 4 Gnd 21 Output 3 'hot' (+) 9 Output 3 'cold' (-) 22 Output 3 Gnd 10 Output 2 'hot' (+) 23 Output 2 'cold' (-) 11 Output 2 Gnd 24 Output 1 'hot' (+) 12 Output 1 'cold' (-) 25 Output 1 Gnd 13 n/c
- WORD CLOCK OUTPUT – a BNC connector carrying the Clarett+ OctoPre's word clock; this may be used to synchronise other digital audio equipment.
- WORD CLOCK IN – a BNC connector for the connection of an external word clock signal; select by setting SYNC to W/CLOCK. Use this input if you have a Leader reference clock which provides synchronisation for all the digital audio devices in your studio.
- AC mains – standard IEC socket. The Clarett+ OctoPre is fitted with a "Universal" power supply, and will run from any AC mains voltage from 100 to 240 V, at 50 or 60 Hz.
GETTING STARTED
Registering your Clarett+ OctoPre
If you are having trouble with any of the steps below, please watch our video guide here:
focusrite.com/get-started/ClarettPlus-OctoPre.
- Go to focusrite.com/register/.

- If you do not have already have a Focusrite/Novation account, select CREATE AN ACCOUNT and follow the on-screen instructions.
- If you do have an account, log in and select REGISTER A NEW PRODUCT :

- Select your Clarett+ device from the Product drop-down list and enter the Serial Number of your device at the bottom of the page. The serial number of your Clarett+ OctoPre can be found on the underside of the unit. Then click Set Serial Number .
- Follow the rest of the on-screen instructions to finish registering your device.
- When the registration is complete, your Product will appear in your Account under the My Hardware tab.
- All your bundled software can be found under the My Software tab in your account.


USING THE CLARETT+ OCTOPRE
Combo Inputs
All eight analogue inputs use "Combo XLR" connectors. These accept male XLR connectors, TS (unbalanced) ¼" jacks or TRS (balanced) ¼" jacks.
When you use an XLR connector, the preamp automatically configures gain and impedance to receive microphone level signals. If using a ¼" plug, the preamp accepts balanced or unbalanced line level signals. When you enable INST mode (Channels 1 or 2), the 1/4" input is optimised for an unbalanced, high impedance signal.
Line Outputs
You can connect the line outputs of the Clarett+ OctoPre to the analogue line inputs of outboard equipment (or any other device), to use it either as an analogue, 8-channel microphone preamplifier, or as an analogue "break-out box" for ADAT signals when in ADAT LINE mode.
The outputs are balanced. Ready-made DB25-to-XLR or DB25-to-jack breakout cables are available from professional audio suppliers.
Digital Outputs
Use the OPTICAL OUT ADAT port(s) [18] to connect the Clarett+ OctoPre to the ADAT input(s) of an audio device using TOSLINK optical cable(s).
The ports can send eight channels of audio at 44.1 kHz or 48 kHz sample rate via a single optical cable. At these sample rates, the two ports carry the same eight channels.
At 88.2 kHz or 96 kHz sample rates, each port sends four channels. The right-hand port carries Channels 1 to 4, the left-hand port carries Channels 5 to 8; you need two TOSLINK cables to send all eight channels.
At 176.4 kHz or 192 kHz sample rates, each port can transmit two channels. The right-hand port carries Channels 1 and 2, the left-hand port carries Channels 3 and 4. The OctoPre is restricted to four channels of digital audio at these sample rates; the outputs of Channels 5 to 8 are not available via the ADAT ports.
Use the SAMPLE RATE switch [9] to select the sample rate frequency. It is essential the sample rate selected on the Clarett+ OctoPre matches the sample rate set on the receiving digital device.
Digital Synchronisation
Two synchronisation options are available:
Clarett+ OctoPre as clock leader
Connect the OctoPre to the receiving device via the OPTICAL OUT port(s) and ensure the receiving device is set to source its clock from its ADAT input (and the sample rates on both devices match).
On the OctoPre, SYNC should be set to INTERNAL and the  LED will illuminate.
An alternative method is to synchronise the receiving device to the Clarett+ OctoPre's WORD CLOCK OUT using a BNC cable. The receiving device's sync source will need to be set to its external word clock input.
Clarett+ OctoPre as clock follower
Connect the OctoPre to your interface via the OPTICAL OUT port(s) and connect a BNC cable from the digital system's word clock leader to the OctoPre's WORD CLOCK IN connector (also ensuring the sample rates on all devices match).
On the OctoPre, SYNC should be set to W/CLOCK and the LED will illuminate.
Digital Inputs
Use the OPTICAL IN ADAT port(s) [19] if you need to convert digital audio (e.g., the output of a DAW) to analogue, using the Clarett+ OctoPre's ADATLINE mode.
The right-hand port can receive eight channels of audio at 44.1 kHz or 48 kHz sample rate via a single optical cable.
At 88.2 kHz or 96 kHz sample rates, each port can receive four channels of audio. The right-hand port carries Channels 1 to 4, the left-hand port carries Channels 5 to 8; you need two TOSLINK cables to receive all eight channels.
At 176.4 kHz or 192 kHz sample rates, each port can receive two channels of audio. The right-hand port carries Channels 1 and 2, the left-hand port carries Channels 3 and 4. The OctoPre is restricted to four channels of digital audio at these sample rates.
Use the SAMPLE RATE switch [9] to select the desired frequency. It is essential the sample rate selected on the Clarett+ OctoPre matches the sample rate set on the transmitting digital device.
AIR mode
An important feature of all models in the Clarett+ range is the analogue preamplifier design. The circuitry includes an AIR function, individually selectable on each channel. AIR subtly changes the preamp's frequency response to model the impedance and resonance characteristics of Focusrite's classic transformer-based ISA mic preamps. When recording with microphones, you will notice an enhanced clarity and definition in the mid frequency range, just where it is most needed for vocals and many acoustic instruments.
Inserts
Each preamplifier channel includes a switchable insert point to connect external processing equipment such as compressors or noise gates. The insert includes a send and a return: with no jack in the INSERT socket, the channel signal path is uninterrupted. The insert send and return are both unbalanced. Use a TRS jack wired with the tip (send) and ring (return) of the jack wired to two separate cables; such cables (often referred to as 'Y-cables") are available from professional audio suppliers.
The insert point is post the AIR circuitry (external equipment will receive a signal modified by AIR) and post the front panel GAIN controls [4]. When using an insert point, try to adjust the input and output levels of the external processor so the return signal is about the same level as the send. If the external processor has too much gain, you run the risk of overload within the OctoPre, so use the channel meters [7] to check the return signal level.

With no jack inserted into the INSERT socket the channel path is uninterrupted.

With a TRS jack inserted into the INSERT socket: Tip is insert send Ring is insert return
Use the front panel INSERT/AIR buttons [6] to enable the insert point. (First select INSERT using the main switch [8].) The channel LED will illuminate green to confirm selection.
ADAT-to-Line mode
Selecting ADATLINE mode ([12] on the front panel) reassigns the eight sources feeding the analogue LINE OUTPUTS D-sub connector [20]. In normal operation, the mic preamplifier output channels are available at this D-sub connector; in ADATLINE mode, the ADAT digital signals at the OPTICAL IN port(s) feed the D-sub connector, after D-to-A conversion.

This mode allows you to use the Clarett+ OctoPre to connect an 8-channel ADAT format output (from a DAW, for example) to a set of analogue inputs. For example, you can send the channels from your DAW to outboard equipment to use as part of your mixing process.
When ADATLINE mode is enabled, the eight Clarett microphone preamplifiers are still operational, and their outputs remain available at the OPTICAL OUT ports.
EXAMPLE SETUPS
Clarett+ OctoPre with audio interface: OctoPre as clock leader

Here the OPTICAL OUT on the Clarett+ OctoPre is connected to OPTICAL IN on a Focusrite Clarett+ 8Pre audio interface with a single optical cable. Both units are running at 44.1 kHz sample rate. The OctoPre's clock source is set to INTERNAL, and the 8Pre is synchronised to it because its clock source is set to ADAT (via Focusrite Control).
This setup would, for example, enable up to 16 mic or line sources to be recorded in a DAW simultaneously, and would be ideal for recording a live band.
Clarett+ OctoPre with audio interface: audio interface as a clock leader

Here OPTICAL OUT on the Clarett+ OctoPre is connected to OPTICAL IN on a Focusrite Clarett+ 8Pre audio interface with a single optical cable. Both units are running at 44.1kHz sample rate. The OctoPre's clock source is set to W/CLOCK, and its WORD CLOCK IN input is connected to WORD CLOCK OUT on the Clarett+ 8Pre with a BNC cable. The Clarett+ 8Pre's clock source is set to INTERNAL (via Focusrite Control), making it the sync leader. It would also be appropriate for any other audio interface which has an ADAT input and a word clock output.
Clarett+ OctoPre with Red 8Line – SMUX-II and SMUX-IV modes

This example shows a similar setup as Example 2, but using a Focusrite Red 8Line audio interface running at a sample rate of 96 kHz ("SMUX-II" mode). Both units must be set to 96kHz; you need two optical cables, carrying four channels of audio each. The Red 8Line is the sync leader.
This setup is also applicable with 192 kHz sample rate ("SMUX-IV" mode); each optical cable will then carry two channels of audio.
The setup in this example would also be appropriate for any other 96/192 kHz-capable audio interface with two ADAT inputs and a word clock output.
Clarett+ OctoPre with analogue mixing desk

This setup uses the Clarett+ OctoPre's mic preamplifiers and AIR mode to provide a high quality "front end" for an analogue mixing desk. Use an 8-way loom to connect the OctoPre's LINE OUT socket to eight line inputs on the mixing desk; this will need a 25-way D-sub on one end and eight connectors appropriate to the desk's line inputs on the other. (Pre-made looms are available from professional audio suppliers).
This setup would also be appropriate to use the OctoPre as an input stage with any type of 8-channel analogue device.
Because the Clarett+ OctoPre's ADAT OUT ports are always active, you can also simultaneously record the performance on a DAW (or other recording device) with an ADAT interface.
Clarett+ OctoPre in ADAT-to-Line mode

This example shows how to connect a greater number of DAW tracks to an analogue mixing desk for mixdown. The 8 analogue outputs of a Red 8Line interface are connected to desk Channels 1 to 8. Connect the Red 8Line's OPTICAL OUT ports to the OPTICAL IN ports of two Clarett+ OctoPres and enable ADATLINE on both. A loom like in Example 4 is used to connect the two OctoPres to Channels 9 to 24 of the desk.
The Red 8Line would normally be the sync leader in this situation, so its clock source is set to Internal. The clock source on both Clarett+ OctoPres is set to ADAT, so both synchronise to the Red 8Line via the ADAT optical connections.
The setup in this example would allow you to send 16 DAW tracks to the desk if you only used one Clarett+ OctoPre.
The above channel counts are applicable at 44.1/48 kHz sample rate, providing a Focusrite Red 8Line the primary interface.
Using Clarett+ OctoPre's inserts to record drums

When recording acoustic drums, you can use dynamics control in various ways to get the sound you're after. Compression is often added to kick and snare drums to thicken the sound, while noise gates are effective on toms to minimise spillage between the drum mics.
Use looms with a TRS jack on one end wired to two XLRs, TRS jacks or TS jacks as appropriate to the outboard processors. The "tip" of the TRS jack at the OctoPre end should go to the input of the processor, the "ring" to the output.
CLARETT+ OCTOPRE TECHNICAL SPECIFICATIONS
Performance Specifications
| Sample Rates | |
| Supported sample rates | 44.1 kHz, 48 kHz, 88.2 kHz, 96 kHz, 176.4 kHz & 192 kHz |
| Microphone Inputs | |
| Frequency Response | 20 Hz – 20 kHz, +/-<0.03 dB; 20 Hz – 35 kHz, +/-<0.15 dB |
| Dynamic Range | 118 dB at minimum gain |
| THD+N | -110 dB @ -1 dBFS and 20 dB gain |
| Noise EIN | -129 dBu |
| Maximum input level | 18 dBu |
| Gain Range | 57 dB |
| Line Inputs | |
| Frequency Response | 20 Hz – 20 kHz, +/-<0.05 dB; 20 Hz – 35 kHz, +/-<0.15 dB |
| Dynamic Range | 118 dB at minimum gain |
| THD+N | -100 dB @ -1 dBFS and minimum gain |
| Maximum input level | 26 dBu |
| Gain Range | 57 dB |
| Instrument Inputs | |
| Frequency Response | 20 Hz – 20 kHz, +/-<0.04 dB; 20 Hz – 35 kHz, +/-<0.15 dB |
| Dynamic Range (Insert off) | 116 dB |
| THD+N | -96.5 dB @ -1 dBFS and minimum gain |
| Maximum input level | 15 dBu |
| Gain Range | 57 dB |
| Line and Monitor Outputs | |
| Frequency Response | 20 Hz – 20 kHz, +/-<0.02 dB; 20 Hz – 35 kHz, +/-<0.02 dB |
| Dynamic Range | 124 dB |
| THD+N | -106 dB |
| Maximum Output Level (0 dBFS) | 18 dBu |
Physical and Electrical Characteristics
| Analogue Inputs 1 & 2 | |
| Connectors | "Combo XLR" sockets on front panel; for Line use ¼" TRS jack, for Inst use ¼" TS jack. |
| Mic/Line switching | Automatic |
| Line/Instrument switching | via front 2 x front panel switches |
| Phantom power | +48V, switchable Chs. 1-4, 5-8 in groups |
| Analogue Inputs 3 to 8 | |
| Connectors | "Combo XLR" sockets on rear panel; for Line use ¼" TRS jack. |
| Mic/Line switching | Automatic |
| Phantom power | +48V, switchable Chs. 1-4, 5-8 in groups |
| Outputs | |
| Analogue outputs | 8 x balanced, on rear panel 25-way female D-sub |
| Other I/O | |
| ADAT I/O | 4 x TOSLINK optical connectors: 8 channels at 44.1/48 kHz (both ports) 8 channels at 88.2/96 kHz (Chs 1-4, 5-8) 4 channels at 176.2/192 kHz (Chs 1 & 2, 3 & 4) |
| Word clock output | 2.5V (correctly terminated); BNC connector |
| Word clock input | BNC connector |
| Weight and Dimensions | |
| W x D x H | 482 mm (1U) x 44.5 mm x 286 mm 19.0" (1U) x 1.75" x 11.3" |
| Weight | 4.15 kg (9.15 lbs) |
TROUBLESHOOTING
For help getting started with your Clarett+, please visit:
focusrite.com/get-started
If you have any questions or need any help at any time with your Clarett+, please visit our Help Centre.
Here you can also contact our support team:
support.focusrite.com
COPYRIGHT AND LEGAL NOTICES
Focusrite, Clarett and OctoPre are registered trade marks of Focusrite Audio Engineering Ltd. in the United States and other countries.
ADAT is a registered trademark of inMusic Brands in the US and other countries.
The Tascam is a proprietary format developed by the TEAC Corporation.
2022 © Focusrite Audio Engineering Limited. All rights reserved.
focusrite.com

Documents / Resources
References
![focusrite.com]() Getting started | Focusrite
Getting started | Focusrite![focusrite.com]() Please log in | Customer Portal
Please log in | Customer Portal![focusrite.com]() Getting started | Focusrite
Getting started | Focusrite![focusrite.com]() Homepage | Focusrite
Homepage | Focusrite
Download manual
Here you can download full pdf version of manual, it may contain additional safety instructions, warranty information, FCC rules, etc.
Download Focusrite Clarett+ OctoPre - Audio Interface Manual
Advertisement


Need help?
Do you have a question about the Clarett+ OctoPre and is the answer not in the manual?
Questions and answers