Daikin FVXS35KV1A Operation Manual
Hide thumbs
Also See for FVXS35KV1A:
- Operation manual (69 pages) ,
- Overview (22 pages) ,
- Service manual (22 pages)

Related Manuals for Daikin FVXS35KV1A


Summary of Contents for Daikin FVXS35KV1A
- Page 1 DAIKIN ROOM AIR CONDITIONER OPERATION MANUAL Enjoy year-round comfort. MODELS FVXS25KV1A FVXS35KV1A FVXS50KV1A FVXS25RV1A FVXS35RV1A FVXS45RV1A...
-
Page 3: Table Of Contents
CONTENTS READ BEFORE OPERATION Safety Precautions ......... 2 Names of Parts ..........4 Preparation before Operation......7 OPERATION AUTO · DRY · COOL · HEAT · FAN Operation ............. 10 Adjusting the Airflow Direction ..... 12 POWERFUL Operation ........ 14 OUTDOOR UNIT QUIET Operation..... -
Page 4: Safety Precautions
READ BEFORE OPERATION Safety Precautions • Keep this manual where the user can easily find it. • Read the precautions in this manual carefully before operating the unit. • The precautions described herein are classified as WARNING and CAUTION. They both contain important information regarding safety. - Page 5 • Do not block the air inlets nor outlets. Impaired airflow may result in insufficient performance or trouble. • Do not sit on the outdoor unit, put things on the unit, or pull the unit. Doing so may cause accidents, such as falling or toppling down, thus resulting in injury, product malfunctioning, or product damage.
-
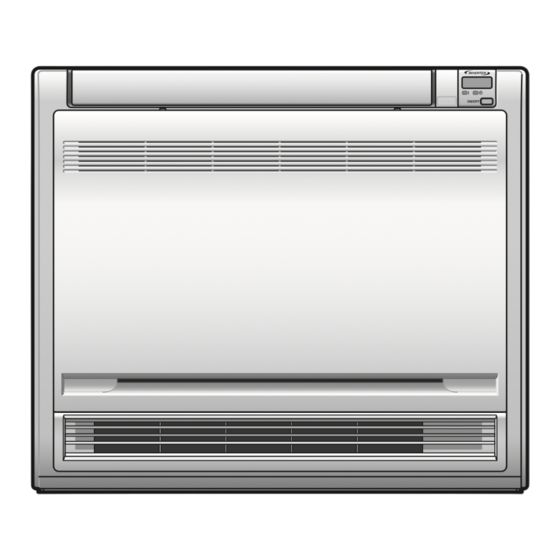
Page 6: Names Of Parts
Names of Parts ■ Indoor Unit ■ Opening the Front Panel How to open the front panel: (page 26.) Air outlet selection switch • This setting blows air from upper outlet only. This setting automatically decides a blow • pattern depending on mode and conditions. •... - Page 7 ■ Outdoor Unit ■ Indoor Unit 1. Titanium apatite photocatalytic • The operation mode refers to the following air-purifying filter: table. • These filters are attached to the inside of Temperature Mode Airflow rate the air filter. setting 2. Air outlet 22°C COOL AUTO...
- Page 8 Names of Parts ■ Remote Controller <Open the lid> <ARC452A2> 1. Signal transmitter: 8. QUIET button: • It sends signals to the indoor unit. OUTDOOR UNIT QUIET operation (page 15.) 2. Display: 9. ECONO button: • It displays the current settings. ECONO operation (page 16.) (In this illustration, each section is shown 10.
-
Page 9: Preparation Before Operation
Preparation before Operation ■ To set the batteries Position + and 1. Slide the front cover to take it off. – correctly! 2. Set two dry batteries AAA.LR03 (alkaline). 3. Set the front cover as before. Grip both sides of the front cover. - Page 10 Preparation before Operation ■ To set the clock 1. Press “CLOCK button”. “ ” is displayed. “ ” and “ ” blink. 2. Press “SELECT button” to set the current day of the week. 3. Press “CLOCK button”. “ ” blinks. 4.
- Page 11 ■ Turn the breaker on • After the power is turned on, the flap of the indoor unit opens and closes once to set the reference position. NOTE ■ Tips for saving energy • Be careful not to cool (heat) the room too much. Keeping the temperature setting at a moderate level helps save energy.
-
Page 12: Auto · Dry · Cool · Heat · Fan Operation
OPERATION AUTO · DRY · COOL · HEAT · FAN Operation The air conditioner operates with the operation mode of your choice. From the next time on, the air conditioner will operate with the same operation mode. ■ To start operation 1. - Page 13 ■ To change the airflow rate setting 5. Press “FAN setting button”. DRY operation AUTO or COOL or HEAT or FAN operation Five levels of airflow rate setting from “ ” to “ ” plus “ ” “ ” are available. The airflow rate setting is not variable.
-
Page 14: Adjusting The Airflow Direction
Adjusting the Airflow Direction You can adjust the airflow direction to increase your comfort. ■ To adjust the flap (horizontal blade) 1. Press “SWING button”. • “ ” is displayed on the LCD and the flap will begin to swing. 2. - Page 15 ■ Air outlet selection • Make air outlet selection according to what suits you. When setting the air outlet selection switch to • Air conditioner automatically decides the appropriate blowing pattern depending on the operating mode/situation. Mode Situation Blowing pattern When the operation is activated or Air is emitted from the upper and when the room is not fully cooled.
-
Page 16: Powerful Operation
POWERFUL Operation POWERFUL operation quickly maximizes the cooling (heating) effect in any operation mode. You can get the maximum capacity. ■ To start POWERFUL operation 1. Press “POWERFUL button”. • POWERFUL operation ends in 20minutes. Then the system automatically operates again with the previous settings which were used before POWERFUL operation. -
Page 17: Outdoor Unit Quiet Operation
OUTDOOR UNIT QUIET Operation OUTDOOR UNIT QUIET operation lowers the noise level of the outdoor unit by changing the frequency and fan speed on the outdoor unit. This function is convenient during night. ■ To start OUTDOOR UNIT QUIET operation 1. -
Page 18: Econo Operation
ECONO Operation ECONO operation is a function which enables efficient operation by limiting the maximum power consumption value. This function is useful for cases in which attention should be paid to ensure a circuit breaker will not trip when the product runs alongside other appliances. -
Page 19: Timer Operation
TIMER Operation Timer functions are useful for automatically switching the air conditioner on or off at night or in the morning. You can also use OFF TIMER and ON TIMER in combination. ■ To use OFF TIMER operation • Check that the clock is correct. If not, set the clock to the present time. - Page 20 TIMER Operation ■ To use ON TIMER operation • Check that the clock is correct. If not, set the clock to the present time. (page 8.) 1. Press “ON TIMER button”. “ ” is displayed. “ ” blinks. 2. Press “SELECT button” until the time setting reaches the point you like.
-
Page 21: Weekly Timer Operation
WEEKLY TIMER Operation Up to 4 timer settings can be saved for each day of the week. It is convenient if the WEEKLY TIMER is set according to the family’s life style. ■ Using in these cases of WEEKLY TIMER An example of WEEKLY TIMER settings is shown below. - Page 22 WEEKLY TIMER Operation ■ To use WEEKLY TIMER operation Setting mode • Make sure the day of the week and time are set. If not, set the day of the week and time. (page 8.) Program 1 Program 2 Program 3 Program 4 [Monday] 25˚C...
- Page 23 8. Press “SELECT button” to select the desired temperature. • The temperature can be set between 10°C and 32°C. Cooling: The unit operates at 18°C even if it is set at 10 to 17°C. Heating: The unit operates at 30°C even if it is set at 31 to 32°C.
- Page 24 WEEKLY TIMER Operation Copy mode • A reservation made once can be copied another day of the week. The whole reservation of the selected day of the week will be copied. Program 1 Program 2 Program 3 Program 4 [Monday] 25˚C 27˚C 6:00...
- Page 25 ■ Confirming a reservation • The reservation can be confirmed. Press “ button”. • The day of the week and the reservation number of the current day will be displayed. Press “SELECT button” to select the day of the week and the reservation number to be confirmed.
-
Page 26: Note For Multi System
Note for Multi System This system has one outdoor unit connected to multiple indoor units. ■ Selecting the operation mode room B room 1. With the priority room setting present but inactive or not present. When more than 1 indoor unit is operating, priority is C room D room given to the first unit that was turned on. - Page 27 ■ OUTDOOR UNIT QUIET operation (page 15.) 1. With the priority room setting present but inactive or not present. When using the OUTDOOR UNIT QUIET operation feature with the multi system, set all indoor units to OUTDOOR UNIT QUIET operation using their remote controllers. When clearing OUTDOOR UNIT QUIET operation, clear one of the operating indoor units using their remote controller.
-
Page 28: Care And Cleaning
CARE Care and Cleaning CAUTION Before cleaning, be sure to stop the operation and turn the breaker off. Units ■ Indoor unit and remote controller 1. Wipe them with dry soft cloth. ■ Front panel 1. Open the front panel. •... - Page 29 Filters 1. Open the front panel. (page 26.) 2. Remove the air filter. • Press the claws on the right and left of the air filter down slightly, then pull upward. 3. Take off the titanium apatite photocatalytic air-purifying filter. •...
- Page 30 NOTE • Operation with dirty filters: (1) cannot deodorize the air. (2) cannot clean the air. (3) results in poor heating or cooling. (4) may cause odour. • To order a titanium apatite photocatalytic air-purifying filter, contact the service shop where you bought the air conditioner.
-
Page 31: Troubleshooting
TROUBLESHOOTING Troubleshooting These cases are not troubles. The following cases are not air conditioner troubles but have some reasons. You may just continue using it. Case Explanation Operation does not start soon. • This is to protect the air conditioner. •... - Page 32 Case Explanation ■ After operation is stopped: The outdoor fan rotates while the air conditioner is not in • The outdoor fan continues rotating for another 60 seconds operation. for system protection. ■ While the air conditioner is not in operation: •...
- Page 33 Call the service shop immediately. WARNING ■ When an abnormality (such as a burning smell) occurs, stop operation and turn the breaker off. Continued operation in an abnormal condition may result in troubles, electric shocks or fire. Consult the service shop where you bought the air conditioner. ■...
- Page 34 Fault diagnosis. FAULT DIAGNOSIS BY REMOTE CONTROLLER In the ARC452A series, the temperature display sections on the main unit indicate corresponding codes. 1. When the TIMER CANCEL button is held down for 5 seconds, a “ ” indication flashes on the temperature display section.
- Page 36 The two-dimensional bar code is a manufacturing code. 3P278434-4C M16B095 (1608) HT...
- Page 37 DAIKIN ROOM AIR CONDITIONER OPERATION MANUAL MODELS FVXS60LVMA FVXS71LVMA FVXS50RV1A...
- Page 39 CONTENTS READ BEFORE OPERATION Safety Precautions ..............2 Names of Parts ................ 4 Preparation before Operation ..........8 OPERATION AUTO · DRY · COOL · HEAT · FAN Operation ...... 10 Adjusting the Airfl ow Direction ..........12 POWERFUL Operation ............14 OUTDOOR UNIT QUIET Operation ........
-
Page 40: Safety Precautions
Safety Precautions • Keep this manual where the user can easily fi nd it. • Read the precautions in this manual carefully before operating the unit. • The precautions described herein are classifi ed as WARNING and CAUTION. They both contain important information regarding safety. - Page 41 CAUTION • Do not block the air inlets nor outlets. Impaired airfl ow may result in insuffi cient performance or trouble. • Do not sit on the outdoor unit, put things on the unit, or pull the unit. Doing so may cause accidents, such as falling or toppling down, thus resulting in injury, product malfunctioning, or product damage.
-
Page 42: Names Of Parts
Names of Parts Indoor Unit Flap (horizontal blade) Page 12 Air outlet Model name plate Front panel Titanium apatite photocatalytic air-purifying fi lter • These fi lters are attached to the inside of the air fi lters. Air fi lter Air inlet Louvers (vertical blades) Page 12... - Page 43 Open the front panel • How to open the front panel: Page 26 Air outlet selection switch Page 13 • This setting blows air from upper outlet only. • This setting automatically decides a blow pattern depending on mode and conditions. •...
- Page 44 Names of Parts Remote Controller: ARC452A2 Signal transmitter Receiver Display (LCD) • It displays the current settings. • To use the remote controller, aim the (In this illustration, each section is transmitter at the indoor unit. If there shown with its displays on for the is anything blocking the signals purpose of explanation.) between the unit and the remote...
- Page 45 Open the front cover MODE selector button ECONO button • It selects the operation mode. • ECONO operation Page 16 (AUTO/DRY/COOL/HEAT/FAN) Page 10 SWING button • Adjusting the airfl ow direction Page 12 QUIET button • OUTDOOR UNIT QUIET operation Page 15 OFF TIMER button : WEEKLY button...
-
Page 46: Preparation Before Operation
Preparation before Operation To set the batteries Position Slide the front cover to take it off. – correctly! Set 2 dry batteries AAA.LR03 (alkaline). Grip both Set the front cover as before. sides of the front cover. To fi x the remote controller holder on the wall Set. - Page 47 To set the clock Press “ ” is displayed. “ ” and “ ” blink. Press to set the current day of the week. Press “ ” blinks. Press to set the clock to the present time. • Holding down button rapidly increases or decreases the time display. Press •...
-
Page 48: Auto · Dry · Cool · Heat · Fan Operation
AUTO · DRY · COOL · HEAT · FAN Operation The air conditioner operates with the operation mode of your choice. From the next time on, the air conditioner will operate with the same operation mode. To start operation Press and select an operation mode. - Page 49 To change the airfl ow rate setting Press DRY operation AUTO or COOL or HEAT or FAN operation Five levels of airfl ow rate setting from The airfl ow rate setting is not variable. “ ” to “ ” plus “ ”...
-
Page 50: Adjusting The Airfl Ow Direction
Adjusting the Airfl ow Direction You can adjust the airfl ow direction to increase your comfort. Adjusting the upper and lower airfl ow direction To adjust the fl ap (horizontal blade) Press “ • ” is displayed on the LCD and the fl ap will begin to swing. When the fl... - Page 51 Air outlet selection • Make air outlet selection according to what suits you. Page 5 When setting the air outlet selection switch to • Air conditioner automatically decides the appropriate blowing pattern depending on the operating mode/situation. Mode Situation Blowing pattern When the operation is activated or when the Air is emitted from the upper and lower air room is not fully cooled.
-
Page 52: Powerful Operation
POWERFUL Operation POWERFUL operation quickly maximizes the cooling (heating) effect in any operation mode. You can get the maximum capacity. To start POWERFUL operation Press during operation. • POWERFUL operation ends in 20 minutes. Then the system automatically operates again with the previous settings which were used before POWERFUL operation. -
Page 53: Outdoor Unit Quiet Operation
OUTDOOR UNIT QUIET Operation OUTDOOR UNIT QUIET operation lowers the noise level of the outdoor unit by changing the frequency and fan speed on the outdoor unit. This function is convenient during night. To start OUTDOOR UNIT QUIET operation Press “... -
Page 54: Econo Operation
ECONO Operation ECONO operation is a function which enables effi cient operation by limiting the maximum power consumption value. This function is useful for cases in which attention should be paid to ensure a circuit breaker will not trip when the product runs alongside other appliances. To start ECONO operation Press during operation... -
Page 55: Timer Operation
TIMER Operation Timer functions are useful for automatically switching the air conditioner on or off at night or in the morning. You can also use OFF TIMER and ON TIMER in combination. To use OFF TIMER operation • Check that the clock is correct. If not, set the clock to the present time. - Page 56 TIMER Operation To use ON TIMER operation • Check that the clock is correct. If not, set the clock to the present time. Page 9 Press “ ” is displayed. “ ” blinks. “ • ” and day of the week disappear from the LCD. Press until the time setting reaches the point you like.
-
Page 57: Weekly Timer Operation
WEEKLY TIMER Operation Up to 4 timer settings can be saved for each day of the week. It is convenient if the WEEKLY TIMER is set according to the family’s life style. Using in these cases of WEEKLY TIMER An example of WEEKLY TIMER settings is shown below. Example: The same timer settings are made for the week from Monday through Friday while different timer settings are made for the weekend. - Page 58 WEEKLY TIMER Operation To use WEEKLY TIMER operation Setting mode • Make sure the day of the week and time are set. If not, set the day of the week and time. Page 9 Program 1 Program 2 Program 3 Program 4 [Monday] 25°C...
- Page 59 Press to select the desired time. • The time can be set between 0:00 and 23:50 in 10 minute intervals. • To return to the mode setting, press • Go to STEP when setting the OFF TIMER. Press • The time will be set. “...
- Page 60 WEEKLY TIMER Operation Copy mode • A reservation made once can be copied another day of the week. The whole reservation of the selected day of the week will be copied. Program 1 Program 2 Program 3 Program 4 [Monday] 25°C 27°C 6:00...
- Page 61 Confi rming a reservation • The reservation can be confi rmed. Setting Displays Normal display Confi rmation display Press • The day of the week and the reservation number of the current day will be displayed. Press to select the day of the week and the reservation number to be confi...
- Page 62 WEEKLY TIMER Operation To deactivate WEEKLY TIMER operation Press while “ ” is displayed on the LCD. “ • ” will disappear from the LCD. • The TIMER lamp goes off. • To reactivate the WEEKLY TIMER operation, press again. •...
- Page 63 The reservations for each day of the week • This function can be used for deleting reservations for each day of the week. • It can be used while confi rming or setting reservations. Press • The day of the week and the reservation number will be displayed. Press to select the day of the week to be deleted.
-
Page 64: Care And Cleaning
Care and Cleaning CAUTION Before cleaning, be sure to stop the operation and turn the breaker off. Units Indoor unit and remote controller Wipe them with dry soft cloth. Front panel Open the front panel. • Slide the 2 stoppers on the left and right sides inward until they click. - Page 65 Filters Open the front panel. Page 26 Remove the air fi lter. • Press the claws on the right and left of the air fi lter down slightly, then pull upward. Take off the titanium apatite photocatalytic air-purifying fi lter. •...
- Page 66 Care and Cleaning Air Filter Wash the air fi lter with water or clean them with vacuum cleaner. • If the dust does not come off easily, wash them with neutral detergent thinned with lukewarm water, then dry them up in the shade.
- Page 67 NOTE • Operation with dirty fi lters: cannot deodorize the air, cannot clean the air, results in poor heating or cooling, may cause odour. • To order a titanium apatite photocatalytic air-purifying fi lter, contact the service shop where you bought the air conditioner. •...
-
Page 68: Troubleshooting
Troubleshooting These cases are not troubles. The following cases are not air conditioner troubles but have some reasons. You may just continue using it. Case Explanation Operation does not start soon. • • When ON/OFF button was pressed soon This is to protect the air conditioner. after operation was stopped. - Page 69 Case Explanation After operation is stopped: • The outdoor fan continues rotating for another 60 seconds for system protection. The outdoor fan rotates while the air While the air conditioner is not in operation: conditioner is not in operation. • When the outdoor temperature is very high, the outdoor fan starts rotating for system protection.
- Page 70 Troubleshooting Call the service shop immediately. WARNING When an abnormality (such as a burning smell) occurs, stop operation and turn the breaker off. Continued operation in an abnormal condition may result in troubles, electric shocks or fi re. Consult the service shop where you bought the air conditioner. Do not attempt to repair or modify the air conditioner by yourself.
- Page 71 Fault diagnosis by remote controller • In the ARC452A series, the temperature display sections on the main unit indicate corresponding codes. When is held down for 5 seconds, a “ ” indication fl ashes on the temperature display section. Press repeatedly until a continuous beep is produced.
- Page 72 The two-dimensional bar code is a manufacturing code. 3P278434-5C M16B096 (1608) HT...
Need help?
Do you have a question about the FVXS35KV1A and is the answer not in the manual?
Questions and answers
I would like to set a timer every day but pressing a square icon button (between "weekly" and "copy" ) doesn't change screen at all.