Table of Contents
Advertisement
Operating Instructions
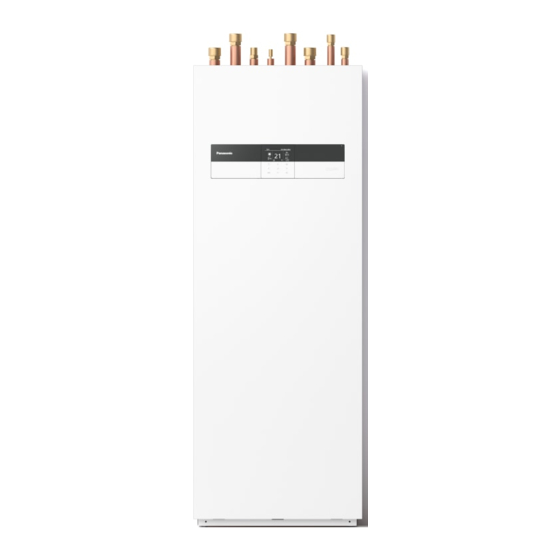
Air-to-Water Hydromodule + Tank
Model No.
Indoor Unit
WH-ADC0309K3E5
WH-ADC0309K6E5
WH-ADC0309K3E5AN
WH-ADC0309K6E5AN
Outdoor Unit
WH-UDZ03KE5
WH-UDZ05KE5
WH-UDZ07KE5
WH-UDZ09KE5
ENGLISH
Before operating the system, please read these
operating instructions thoroughly and keep them
for future reference.
WEB-ACXF55-34130-EN
Advertisement
Table of Contents

Related Manuals for Panasonic WH-ADC0309K6E5


Summary of Contents for Panasonic WH-ADC0309K6E5
- Page 1 Operating Instructions Air-to-Water Hydromodule + Tank Model No. Indoor Unit WH-ADC0309K3E5 WH-ADC0309K6E5 WH-ADC0309K3E5AN WH-ADC0309K6E5AN Outdoor Unit WH-UDZ03KE5 WH-UDZ05KE5 WH-UDZ07KE5 WH-UDZ09KE5 ENGLISH Before operating the system, please read these operating instructions thoroughly and keep them for future reference. WEB-ACXF55-34130-EN...
-
Page 2: Table Of Contents
Thank you for purchasing Panasonic product. Installation Instructions attached. Serial number and production year please refer to name plate. Table of contents Safety precautions ............4-16 For installer Remote Controller buttons and display .....17-18 5 Installer setup > System setup ......31-41 Initialization ..............19... - Page 3 Before use, make sure the system has been installed correctly by an authorised dealer according to the given instructions. • Panasonic Air-to-Water is a split system, consisting of two units: indoor and outdoor units. The indoor unit consist of the hydromodule and 200L sanitary water tank. •...
-
Page 4: Safety Precautions
Safety precautions To prevent personal injury, injury to others WARNING or property damage, please comply with the following: Incorrect operation due to failure to follow instructions below may cause harm or Indoor unit and outdoor unit damage, the seriousness of which is classifi ed This appliance can be used by as below: children aged from 3 years and above... - Page 5 Do not insert your fi ngers or It is strongly recommended that Install other objects into the Air to Residual Current Device (RCD) water indoor or outdoor unit, on-site to prevent electric shock and/ rotating parts may cause injury. or fi re. Before obtaining access to Do not touch the outdoor unit during terminals, all supply circuits must be...
- Page 6 Safety precautions Remote Controller CAUTION Do not wet the Remote Controller. Failure to do so may result in electric Indoor unit and outdoor unit shock and/or fi re. Do not wash the indoor unit with Do not press the buttons on the water, benzine, thinner or scouring Remote Controller using hard and powder to avoid damage or corrosion...
- Page 7 Precaution for using R32 WARNING refrigerant The basic installation work procedures are This appliance is fi lled with R32 the same as conventional refrigerant (R410A, (mild fl ammable refrigerant). R22) models. If the refrigerant is leaked and Since the working pressure is exposed to an external ignition higher than that of refrigerant R22 source, there is a risk of fi...
- Page 8 Safety precautions • Any part of refrigerating circuit c) Able to understand and to apply in (evaporators, air coolers, AHU, practice the requirements in the condensers or liquid receivers) or national legislation, regulations piping should not be located in the and Standards;...
- Page 9 1. Installation (Space) 2. Servicing • Product with fl ammable refrigerants, 2-1. Service personnel shall be installed according to the • The system is inspected, regularly minimum room area, A (m²) supervised and maintained by mentioned in Installation Instructions. a trained and certifi ed service •...
- Page 10 Safety precautions 2-2. Work 2-3. Checking for presence of • Prior to beginning work on systems refrigerant containing fl ammable refrigerants, • The area shall be checked with an safety checks are necessary to appropriate refrigerant detector prior ensure that the risk of ignition to and during work, to ensure the is minimised.
- Page 11 2-5. No ignition sources 2-7. Checks to the refrigerating • No person carrying out work in equipment relation to a refrigerating system • Where electrical components are which involves exposing any pipe being changed, they shall be fi t work that contains or has contained for the purpose and to the correct fl...
- Page 12 Safety precautions 2-8. Checks to electrical devices 3. Repairs to sealed components • Repair and maintenance to electrical • During repairs to sealed components shall include initial components, all electrical supplies safety checks and component shall be disconnected from the inspection procedures.
- Page 13 4. Repair to intrinsically safe 7. The following leak detection components methods are deemed acceptable • Do not apply any permanent for all refrigerant systems inductive or capacitance loads to • No leaks shall be detected using the circuit without ensuring that detection equipment with sensitivity this will not exceed the permissible to detect leakage of 5g/year of...
- Page 14 Safety precautions 8. Removal and evacuation 9. Charging procedures • When breaking into the refrigerant • In addition to conventional circuit to make repairs – or for charging procedures, the following any other purpose – conventional requirements shall be followed. procedures shall be used.
- Page 15 10. Decommissioning h) Do not over fi ll cylinders. (No • Before carrying out this procedure, more than 80 % volume liquid it is essential that the technician charge). is completely familiar with the i) Do not exceed the maximum equipment and all its details.
- Page 16 Safety precautions 12. Recovery • The recovered refrigerant shall be • When removing refrigerant from returned to the refrigerant supplier a system, either for servicing or in the correct recovery cylinder, and decommissioning, it is recommended the relevant Waste Transfer Note good practice that all refrigerants are arranged.
-
Page 17: Remote Controller Buttons And Display
Remote Controller buttons and display The LCD display as shown in this manual are for instructional purpose only, and may differ from the actual unit. Buttons / Indicator Quick Menu button Back button Returns to the previous screen LCD Display (Actual - Dark background with white icons) Main Menu button For function setup... - Page 18 Remote Controller buttons and display Display Mode selection AUTO • Depending on the preset outdoor COOL • COOL operation is either turned temperature, the system selects ON or OFF. HEAT or * COOL operation • The outdoor unit provides cooling mode.
-
Page 19: Initialization
Initialization Before starting to install the various menu settings, please initiate the Remote Controller by selecting the language of operation and installing the date and time correctly. When power is turned on for the fi rst time, it becomes the setting screen automatically. It can also be set from personal setting of the menu. -
Page 20: Quick Menu
Quick Menu After the initial settings have been completed, you can select a quick menu from the following options and edit the setting. to select menu. Press to display the quick menu. Press to turn on/off the select menu. Quick Menu Force DHW Powerful Quiet... -
Page 21: How To Use The Quick Menu
How to use the Quick Menu Force DHW Select this icon to turn the Tank DHW on or off. Press to confi rm your selection. • Force DHW is turned off. • Force DHW is turned on. Note: • Force DHW is disabled when Force Heater is turned on. •... - Page 22 How to use the Quick Menu Quiet Select this icon to operate quietly. Press to confi rm your selection. (The quiet operation starts approximately 1 minute after is pressed.) • Quiet mode is set off. • The Quiet mode operates at level 1. •...
- Page 23 Force Heater Select to force the Heater on. Press to confi rm your selection. (The Force Heater mode starts approximately 1 minute after is pressed.) • Force Heater is turned off. • Force Heater is turned on. Note: • Force Heater is disabled whenever operation is already on and “Disabled due to operation ON!”...
- Page 24 How to use the Quick Menu Weekly Timer Select this icon to delete (cancel) or change the pre-set Weekly Timer. Press to confi rm your selection. • Timer is not ON. • Timer is set. After 1 sec delay. Select “Yes”. •...
- Page 25 Force Defrost Select to defrost the frozen pipes. Press to confi rm your selection. (When the mode is accepted, below screen will be displayed.) Error Reset Select to restore the previous settings when error has occurred. Press to confi rm your selection. (When the mode has been accepted, below screen will be displayed.) •...
-
Page 26: Menus
Menus For user Select menus and determine settings according to the system available in the household. All initial settings must be done by an authorised dealer or a specialist. It is recommended that all alterations of the initial settings are also done by an authorised dealer or a specialist. -
Page 27: Quiet Priority
Menu Default Setting Setting Options / Display Quiet priority • To select priority during Quiet mode between Sound and Capacity. • If Sound priority is selected, unit will operate in quiet Sound condition only. Sound Capacity • If Capacity priority is selected, unit will operate in quiet condition but it will prioritize on providing required capacity at... -
Page 28: System Check
Menus For user Menu Default Setting Setting Options / Display 2 System check Energy monitor Present Present or historical chart of Select and retrieve energy consumption, generation or COP. Historical chart Total consumption (1year) Select and retrieve • COP= Coeffi cient of Performance. •... -
Page 29: Personal Setup
Menu Default Setting Setting Options / Display 3 Personal setup Remote control No. • To display remote control number of a particular remote RC No. 10:34am,Mon controller so that installer and RC-1 end user are well informed. Select and retrieve •... -
Page 30: Language
Menus For user Menu Default Setting Setting Options / Display Language ENGLISH / FRANÇAIS / DEUTSCH / Sets the display language for ITALIANO / ESPAÑOL / DANISH / the top screen. SWEDISH / NORWEGIAN / POLISH / CZECH / NEDERLANDS / TÜRKÇE / SUOMI / MAGYAR / SLOVENŠČINA / HRVATSKI / LIETUVIŲ... -
Page 31: For Installer
Menus For installer Menu Default Setting Setting Options / Display 5 Installer setup System setup Optional PCB connectivity To connect to the external PCB required for servicing. • If the external PCB is connected (optional), the system will have following additional functions: Control over 2 zones (including the swimming pool and the function to heat water in it). -
Page 32: Dhw Capacity
Menus For installer Menu Default Setting Setting Options / Display DHW capacity To select tank heating capacity to variable or standard. Variable capacity heat up tank with fast mode and keep the tank Variable temperature with effi cient mode. While standard capacity heat up tank with rated heating capacity. - Page 33 Menu Default Setting Setting Options / Display Yes Auto To select a bivalent connection to allow an additional heat Set outdoor source such as a boiler to heat- temperature for up the buffer tank and domestic -5 °C hot water tank when heatpump turn ON Bivalent connection.
- Page 34 Menus For installer Menu Default Setting Setting Options / Display Delay timer to stop the bivalent heat 0:30 source (in hour and minutes). Control pattern Advanced parallel DHW Yes • DHW Tank is activated only after selecting “Yes”. Delay timer to start the bivalent heat 0:30 source...
- Page 35 Menu Default Setting Setting Options / Display Yes Smart After selecting for the external pump Energy price Electricity Bivalent connection 10:34am,Mon 0.0 * / kWh Electricity price 1 - There are total 10 different prices can be set Range: (0~999.9 /kWh) for Electricity: Steps: ±0.1 /kWh...
- Page 36 Menus For installer Menu Default Setting Setting Options / Display Yes Smart After selecting for the external pump Schedule Season setting Season 1 : Dec (Refers to Winter Bivalent connection 10:34am,Mon season) Schedule Season 2 : Mar (Refers to Spring Season setting season) Schedule setting...
-
Page 37: External Sw
Menu Default Setting Setting Options / Display - Range of start time displayed can be in “24h” Season 1 10:34am,Mon or “am/pm” format depend on setting of Pattern 1: Start time “Clock format”. Range: (0.00~23.00) Steps: ±1hour 3.00 Select Confirm - Range of electricity price is 0 ~ 10 which Season 1 10:34am,Mon... -
Page 38: External Error Signal
Menus For installer Menu Default Setting Setting Options / Display Yes After selecting the tank T ON temperature Set T OFF 5 °C temperature Yes After selecting the tank T ON temperature T OFF temperature Set Antifreeze 5 °C temperature Yes After selecting the tank T ON temperature T OFF temperature... -
Page 39: Heat-Cool Sw
Menu Default Setting Setting Options / Display 5.17 Heat-Cool SW 5.18 Force heater To turn on Force heater either manually (by default) or automatically. Manual 5.19 Force defrost If auto selection is set, outdoor unit will start defrost operation Manual if long heating hour operate during low outdoor temperature. -
Page 40: External Meter
Menus For installer Menu Default Setting Setting Options / Display 5.24 External meter Heat-cool meter : No External meter 10:34am,Mon To set which external meter * Tank meter : No to be used depends on meter Heat-Cool meter Elec. meter HP : No Tank meter connection. -
Page 41: Electrical Anode
Menu Default Setting Setting Options / Display Elec. meter 3 (Reserve) - Set Elec. meter 3 (Reserve) to Yes when this electricity meter is connected. - It is to measure energy consumption * This data will be displayed only on Cloud system. -
Page 42: 6 Installer Setup Operation Setup
Menus For installer Menu Default Setting Setting Options / Display 6 Installer setup Operation setup To access to the four major 4 main modes functions or modes. Heat / * Cool / * Auto / Tank Heat To set various water & ambient Water temp. -
Page 43: Cool
Menu Default Setting Setting Options / Display Outdoor temp. for heating OFF Temperature for 24 °C heating OFF T for heating ON Set T for heating * This setting will not 5 °C available to set when pump fl owrate set to Max. -
Page 44: Auto
Menus For installer Menu Default Setting Setting Options / Display Water temp. for cooling ON Cooling ON temperatures in Compensation curve compensation curve or direct input. Water temp. for cooling ON Compensation curve Input the 4 temperature points X axis: 20 °C, 30 °C (2 on horizontal X Y axis: 15 °C, 10 °C axis, 2 on vertical Y... -
Page 45: Tank
Menu Default Setting Setting Options / Display Outdoor temp. for (Cool to Heat) Set outdoor temperature for 10 °C switching from Cool to Heat. Tank Setting functions for the tank. Floor operation time (max) / Tank heat up time (max) / Tank re-heat temp. -
Page 46: 7 Installer Setup Service Setup
Menus For installer Menu Default Setting Setting Options / Display Sterilization: Boiling temp. Set boiling 65 °C temperatures for sterilize the tank. Sterilization: Ope. time (max) Set sterilizing time 0:10 (in hours and minutes) 7 Installer setup Service setup Pump maximum speed To set the maximum speed of Setting the fl... -
Page 47: Service Contact
Menu Default Setting Setting Options / Display Service contact To set up to 2 contact names Service engineer’s name and contact number. and numbers for the User. Contact 1 / Contact 2 Contact 1 / Contact 2 Contact name or number. Name / phone icon Input name and number Contact name: alphabet a ~ z. -
Page 48: Cleaning Instructions
Cleaning instructions To ensure optimal performance of the system, cleaning has to be carried out at regular intervals. Consult an authorised dealer. • Disconnect the power supply before cleaning. • Do not use benzine, thinner or scouring powder. • Use only soap ( pH7) or neutral household detergent. - Page 49 Maintenance FILLING THE CIRCUIT SYSTEM If the pressure is too low in the CIRCUIT system, it needs to be topped up. See the Installer Manual for more information. VENTING THE CIRCUIT SYSTEM In event of repeated fi lling of the CIRCUIT system, or if bubbling sounds are heard from the indoor module, the system may need venting.
-
Page 50: Troubleshooting
Troubleshooting The following symptoms do not indicate malfunction. Symptom Cause Water fl owing sound during operation. • Refrigerant fl ow inside the unit. Operation is delayed a few minutes • The delay is a protection for the compressor. after restarting. Outdoor unit emits water/steam. - Page 51 Below is a list of error codes that may appear on the display when there is some trouble with the system setting or operation. When the display shows an error code as indicated below, contact the number registered in the Remote Controller or a nearest authorised installer.
-
Page 52: Information
• Do not use other remote control, communication and operation device not specifi ed by an authorised dealer or specialist. • Use under the agreement of “Terms of Service” and “Handling of Personal Information” of Panasonic Smart Application. • For extended non-use of Panasonic Smart Application, disconnect the network adaptor from the device. - Page 53 Symbols: Explanation of symbols that may be present in this manual. This symbol shows that this This symbol shows that the equipment uses a fl ammable Operation Instructions should refrigerant. If the refrigerant be read carefully. is leaked, together with an WARNING external ignition source, there is a possibility of ignition.
- Page 54 Memo...
- Page 55 Memo...
- Page 56 1006, Oaza Kadoma, Kadoma City, Panasonic Testing Centre Osaka 571-8501, Japan Winsbergring 15, 22525 Hamburg, Germany Contact in the UK: Panasonic UK, a branch of Panasonic Marketing Europe GmbH Website: http://www.panasonic.com Maxis 2, Western Road, Bracknell, Berkshire, RG12 1RT © Panasonic Corporation 2022...
Need help?
Do you have a question about the WH-ADC0309K6E5 and is the answer not in the manual?
Questions and answers