Table of Contents
Advertisement
Installation, Operation, and Maintenance
Water Source Heat Pump
Axiom™ Horizontal/Vertical —
EXH/EXV, DXH/DXV
0.75 to 6 Tons – 60 Hz, High Efficiency and Two-
Stage High Efficiency
Model Numbers:
DXHG 024-070 - 60 Hz
DXVG 024-070 - 60 Hz
EXHG 009-070 - 60 Hz
EXVG 009-070 - 60 Hz
Only qualified personnel should install and service the equipment. The installation, starting up, and servicing of heating, ventilating, and air-conditioning equipment
can be hazardous and requires specific knowledge and training. Improperly installed, adjusted or altered equipment by an unqualified person could result in death or
serious injury. When working on the equipment, observe all precautions in the literature and on the tags, stickers, and labels that are attached to the equipment.
May 2023
SAFETY WARNING
WSHP-SVX014J-EN
Advertisement
Table of Contents

Related Manuals for Trane Axiom EXH Series


Summary of Contents for Trane Axiom EXH Series
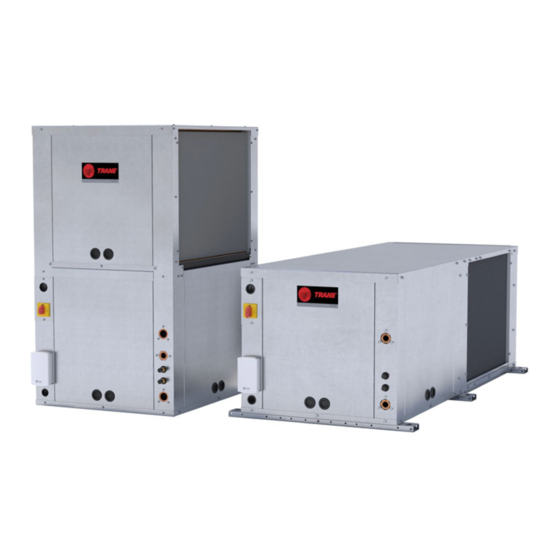
- Page 1 Installation, Operation, and Maintenance Water Source Heat Pump Axiom™ Horizontal/Vertical — EXH/EXV, DXH/DXV 0.75 to 6 Tons – 60 Hz, High Efficiency and Two- Stage High Efficiency Model Numbers: DXHG 024-070 - 60 Hz DXVG 024-070 - 60 Hz EXHG 009-070 - 60 Hz EXVG 009-070 - 60 Hz SAFETY WARNING Only qualified personnel should install and service the equipment.
- Page 2 (HCFCs). Not all refrigerants containing these compounds bump cap, fall protection, electrical PPE and arc have the same potential impact to the environment. Trane flash clothing). ALWAYS refer to appropriate advocates the responsible handling of all refrigerants.
- Page 3 EXH/DXH in the Unit Dimensions chapter. Copyright • Updated the Electrical data tables and Wiring Diagram chapter. This document and the information in it are the property of Trane, and may not be used or reproduced in whole or in WSHP-SVX014J-EN...
-
Page 4: Table Of Contents
Table of Contents Model Number Description ....6 Low Voltage Wiring (AC) Requirements ......27 EXVH/DXVH Models . - Page 5 Table of Contents Water Pressure Drop..... . 59 Deluxe Controls ......63 Water Volume .
-
Page 6: Model Number Description
Model Number Description EXVH/DXVH Models Digits 1–3 — Unit Configuration Digit 13 — Freeze Protection Digit 23 — Unit Mounted Disconnect EXV = High Efficiency Vertical A = 20°F Freezestat (For Glycol Loop) 0 = No Unit Mounted Disconnect DXV = Two-stage High Efficiency Vertical B = 35°F Freezestat (For Water Loop) 2 = Unit Mounted Disconnect EXH = High Efficiency Horizontal... -
Page 7: Overview Of Manual
Overview of Manual Note: One copy of this document ships inside the control model number, serial number, electrical characteristics, panel of each unit and is customer property. It must refrigerant charge, and other pertinent unit data. be retained by the unit’s maintenance personnel. Compressor Nameplate This booklet describes proper installation, operation, and maintenance procedures for air cooled systems. -
Page 8: General Information
The out. The system’s electric heat source will continue to be Trane microprocessor board is factory wired to a terminal utilized for primary heating until the loop temperature rises plug to provide all necessary terminals for field connection. - Page 9 General Information above 60°F. Once the loop temperature rises above 60°F, Table 2. Refrigerant charge (EXH/EXV) (continued) the boilerless controller returns the unit to normal Heat Pump w/ HGR compressor heating operation and locks out the electric Model (60 Hz) Heat Pump (oz)/Kg) (oz)/Kg) heater.
-
Page 10: Pre-Installation
Pre-Installation WARNING • Do not remove damaged material from the receiving location. Take photos of the damage, if possible. The Fiberglass Wool! owner must provide reasonable evidence that the Exposure to glass wool fibers without all necessary damage did not occur after delivery. PPE equipment could result in cancer, respiratory, •... - Page 11 Pre-Installation • Make provisions for continuous venting of the covered • Store units in the normal UP orientation to maintain oil units to prevent moisture from standing on the unit(s) in the compressor. surfaces. Wet interior unit insulation can become an •...
-
Page 12: Unit Dimensions
Unit Dimensions Service Clearances operation and maintenance of such equipment. Local codes may require more clearance to electrical equipment. Per NEC requirements, 36 inches of access and working Check all code requirements prior to unit installation. space shall be provided and maintained around all control boxes and electrical equipment to permit ready and safe A minimum 14–inch clearance for servicing the unit is Figure 1. - Page 13 Unit Dimensions A 24–inch clearance from other mechanical and electrical equipment (where Figure 2. Clearance – EXVG/DXVG 0.75 to 6 tons shown) is recommended for most unit configurations. This will enable panel removal from the unit for service/maintenance. The 24–inch side clearance on EXVG/DXVG 0.75 to 6T models is for optimal access only.
-
Page 14: Unit Dimensions
Unit Dimensions Unit Dimensions Figure 3. Left return/back supply (EXHG/DXHG) Dimensional data left return/back supply 1.04 NOMINAL FILTER SIZE BACK LEFT SIDE FRONT HI VOLT DISCONNECT SWITCH LOCATION NOMINAL FILTER SIZE 11.62 MOUNTING LOCATION LOW VOLT 3.30 2.56 DRAIN 1.36 RIGHT SIDE Table 4. - Page 15 Unit Dimensions Figure 4. Left return/right supply (EXHG/DXHG) Dimensional data left return/right supply 1.04 NOMINAL FILTER SIZE FRONT BACK LEFT SIDE HI VOLT NOMINAL DICONNECT FILTER SWITCH SIZE LOCATION MOUNTING 11.62 LOCATION LOW VOLT 3.30 2.56 1.36 DRAIN RIGHT SIDE Table 5.
- Page 16 Unit Dimensions Figure 5. Right return/left supply (EXHG/DXHG) Dimensional data right return/left supply 1.56 NOMINAL FILTER SIZE 1.04 BACK LEFT SIDE FRONT HI VOLT DISCONNECT SWITCH NOMINAL LOCATION FILTER SIZE MOUNTING 11.62 LOCATION LOW VOLT 3.30 2.56 DRAIN 1.36 RIGHT SIDE Table 6.
- Page 17 Unit Dimensions Figure 6. Right return/back supply (EXHG/DXHG) Dimensional data right return/back supply NOMINAL FILTER SIZE 1.04 BACK LEFT SIDE FRONT HI VOLT DISCONNECT SWITCH LOCATION NOMINAL FILTER SIZE 11.62 MOUNTING LOCATION LOW VOLT 3.30 2.56 1.36 DRAIN RIGHT SIDE Table 7.
- Page 18 Unit Dimensions Figure 7. Left return/top supply (EXVG/DXVG) NOMINAL FILTER SIZE LEFT SIDE FRONT RIGHT SIDE NOMINAL FILTER SIZE HI VOLT DISCONNECT SWITCH LOCATION DRAIN 11.0 MOUNTING LOCATION LOW VOLT 1.75 Table 8. Dimensional data left return/top supply (EXVG/DXVG) Duct Cabinet Blower Opening Hi Volt Nominal Filter Duct Collar Location...
- Page 19 Unit Dimensions Figure 8. Right return/top supply (EXVG/DXVG) NOMINAL FILTER SIZE LEFT SIDE FRONT RIGHT SIDE NOMINAL FILTER SIZE HI VOLT DISCONNECT SWITCH LOCATION DRAIN 11.0 MOUNTING LOCATION LOW VOLT 1.75 Table 9. Dimensional data right return/top supply (EXVG/DXVG) Duct Cabinet Blower Opening Hi Volt Nominal Filter Duct Collar Location...
- Page 20 Unit Dimensions Figure 9. Left return/back supply (EXVG/DXVG) Dimensional data left return/back supply NOMINAL FILTER SIZE BACK LEFT SIDE FRONT NOMINAL FILTER SIZE HI VOLT DISCONNECT SWITCH LOCATION DRAIN 10.87 8.00 LOW VOLT 2.55 1.81 RIGHT SIDE Table 10. Dimensional data left return/back supply (EXVG/DXVG) Duct Duct Collar Depth...
- Page 21 Unit Dimensions Figure 10. Right return/back supply (EXVG/DXVG) NOMINAL FILTER SIZE Dimensional data right return/back supply BACK FRONT LEFT SIDE NOMINAL FILTER SIZE HI VOLT DISCONNECT SWITCH LOCATION DRAIN 10.87 8.00 LOW VOLT 2.55 1.81 RIGHT SIDE Table 11. Dimensional data right return/back supply (EXVG/DXVG) Duct Duct Collar Depth...
- Page 22 Unit Dimensions Figure 11. Waterside economizer (EXHG/DXHG) 2" AIR FILTER (1.38 FOR 1") 2" AIR FILTER (1.38 FOR 1") 2.38 2.38 3.40 3.40 4.25 4.25 Table 12. Dimensional data waterside economizer (EXHG/DXHG) Pipe Size WSE Dimensions Unit Depth Height Depth W/Piping Width EXHG DXHG...
- Page 23 Unit Dimensions Table 13. Waterside economizer weights and part numbers - horizontal (continued) Weight w/out H Weight w/H Unit Model Waterside Economizer EX/DXHG060-070 LR WSHPECN00021 EXHG009-012 RR WSHPECN00023 EXHG015 RR WSHPECN00024 EX/DXHG018-024 RR WSHPECN00025 EX/DXHG030-036 RR WSHPECN00026 EX/DXHG042-048 RR WSHPECN00027 EX/DXHG060-070 RR WSHPECN00028 Figure 12.
- Page 24 Unit Dimensions Figure 13. Waterside economizer (EXVG/DXVG) Table 15. Dimensional data waterside economizer (EXVG/DXVG) Piping Location Pipe Size WSE Size Drain Unit Cabinet Height Height Height Depth Height NPTI NPTI Width Width Width Width Width Width EXVG009-012 18.25 17.75 20.75 7.88 0.63 4.25...
- Page 25 Unit Dimensions Figure 14. Waterside economizer coil piping diagram Unit WSE Coil WSE Coil Unit Water Outlet Inlet Water Outlet Inlet Unit Heat Coil Exchanger Port A Port B 3 Way Valve Please match the entering water port marking with the marking label Port AB on the valve prior...
-
Page 26: Weights
Weights Table 17. Unit weights DXH 2 to 6 tons (Approximate) Table 20. Unit weights EXH 0.75 to 6 tons (Approximate) (continued) Shipping Weight Unit Weight with pallet (lbs) without pallet (lbs) Shipping Weight Unit Weight EXH (60 Hz) with pallet (lbs) without pallet (lbs) Table 18. -
Page 27: Installation
Installation Main Electrical WARNING Proper Field Wiring and Grounding WARNING Required! Hazardous Voltage! Failure to follow code could result in death or serious Failure to disconnect power before servicing could injury. result in death or serious injury. All field wiring MUST be performed by qualified Disconnect all electric power, including remote personnel. -
Page 28: Supply-Air Ductwork
Installation Supply-Air Ductwork Figure 17. Flexible return-air connector (field provided) Horizontal DXH and EXH units require duct flanges to be field installed. The duct flange ships in a box on the side of the unit. Install the flange with (8) 3/8 in. (213 mm) factory supplied screws. - Page 29 Installation Figure 18. Return-air duct panel Unit Top 3 3/4" Duct Panel with 1 1/2"-Flange Table 21. Ducted panel - return air A (in.) B (in.) Unit Size Duct Collar Part Number EXVG009-012 18.50 16.50 WSHPPND00002 EXVG015 20.00 17.50 WSHPPND00003 EXVG018-024, DXVG024 23.00 18.50...
-
Page 30: Ducted Filter Rack
Installation Ducted Filter Rack When it is necessary to have filter access at the unit in a ducted return, a ducted filter rack is available. This option allows access to the filter at the unit. Vertical unit filter racks are available in right or left access configurations. Horizontal units are available in bottom access configuration. -
Page 31: Condensate Drain Connection
Installation Supply Pipe Connections Notes: • Rods must be perpendicular to the mounting Figure 21. Supply/return pipe connections holes in the base rail of the horizontal unit. • For 0.75 to 6 ton EXHF and DXHF models, follow pitching instructions from previous generation IOM. -
Page 32: Field Installed Power Wiring
Installation that may have occurred due to increased heat. Repair A field supplied disconnect switch must be installed at or as required. near the unit in accordance with the National Electric Code (NEC latest edition). 5. Open the system at the lowest point for the initial blow down (making sure the make up water is equal to the Location of the applicable electric service entrance for water being dumped). -
Page 33: Thermostat Location
Installation Thermostat Location Location of the thermostat or zone sensor is an important element of effective room control. Figure 23. Thermostat/sensor location Areas where the thermostat or zone sensor should not be located include: • Behind doors or corners • Near hot or cold air ducts •... - Page 34 COMM module to service technicians. Symbio 400-B/UC400-B Compatible X13651467020 Communication Module • Sold in packs of 12 • Provides local RJ22 connection to Trane® service tools for easy, low cost maintenance. X13511529010 Zone Sensor • Symbio 400-B/UC400-B compatible •...
- Page 35 Installation Table 24. Zone sensor selection for use with Symbio™ 400-B/Tracer® UC400-B controller (continued) Description Sensor Part Number X1379084501 Zone Sensor • Symbio 400-B/UC400-B compatible • External setpoint adjustment wheel • ON and CANCEL buttons • Fan switch AUTO-OFF X1379044401 Temperature and relative humidity sensor •...
-
Page 36: Controls Using 24 Vac
Installation Table 25. Wireless zone sensor selection for use with Symbio 400-B/UC400-B controller Description Sensor Part Number X13790955010 Trane Air-Fi® WCS-SD (display) • Symbio 400-B/UC400-B Compatible • Easy-to-use interface for clear and simple monitoring and control X13790956010 Trane Air-Fi WCS-SB (base) •... - Page 37 Installation Figure 25. Low voltage single wire connection Figure 27. Deluxe controls Make connection for a single-wire by inserting a single wire after stripping off the coating. Figure 26. Low voltage stranded wire connection Figure 28. TP1 connection type Present on all 0.5 to 5 ton H/V units. Follow the steps to connect the stranded wire: 1.
- Page 38 Installation Figure 29. Deluxe controls with WSE or DX two-stage Figure 32. Deluxe controls general alarm and compressor disable 1 - (Y2)Compressor/Cool stage 2 Deluxe board (1U1) connections AL1, AL2 - Alarm Contact output CD1, CD2 - Compressor Disable input (24Vac) Figure 30.
-
Page 39: External Smoke Detection Wiring To
Installation External Smoke Detection Wiring Figure 33. ECM control box to Unit Deluxe Controller To inhibit operation of the compressor and fan for a safety shutdown, it is necessary to break the wire (21X) from the 24 Volt transformer to the 1TB1 terminal block. This can be done with the dry contacts of a relay. -
Page 40: Waterside Economizer Installation
Installation Waterside Economizer fasteners (total of four for each bracket). The engagement hole locations and L-Bracket can be seen Installation in the Figure 36, p. 40 WARNING Figure 36. Step 2 Hazardous Voltage! Failure to disconnect power before servicing could result in death or serious injury. - Page 41 Table 27. Economizer part numbers pipe and dripping on the floor. Supply-Air Unit Part Number Notes: Arrangement • Trane does not provide insulation on the EXVG009-012 WSHPECN00016 economizing piping package. The insulation EXVG015 WSHPECN00017 must be field provided and field installed. •...
- Page 42 Installation Figure 39. Step 1 Figure 41. Step 3 4. Install the braided hose connecting point A (leaving the WSE) to point B (entering the WSHP). Connect the supply water to point D and the return water to point C. 2.
- Page 43 Table 28. Economizer part numbers pipe and dripping on the floor. Supply-Air Unit Part Number Notes: Arrangement • Trane does not provide insulation on the EXVG009-012 WSHPECN00002 economizing piping package. This insulation EXVG015 WSHPECN00003 must be field provided and field installed. •...
-
Page 44: Sequence
Waterside Economizer Start-Up Sequence 1. Set the thermostat to the highest position. 6. Leave unit off for approximately FIVE minutes to allow for pressure equalization. 2. Set the thermostat system switch to COOL with the fan control to AUTO. The compressor should NOT run. 7. - Page 45 Waterside Economizer Start-Up Sequence Table 30. Waterside economizing three-way valve specifications (EXHG/EXVG units) (continued) Valve Close-off Valve Pres. Rating Valve Temp. Range Unit Size Valve Conn. Size Actuator pressure Non-spring return type 24 Vac +/- 20% EXHG 042-070 EXVG 0°F to 250°F -18°C to 600 psi 200 psi 1 FPT...
-
Page 46: Electrical Data
Electrical Data Table 31. Electrical data - 0.75 to 6 tons, EX*009-070 Maximum Minimum Total Unit Blower Motor Blower Motor Overcurrent Comp RLA Comp LRA Circuit Model No. Unit Volts Protective Ampacity Device EXV/H009 208-230/60/1 27.0 15/15 EXV/H009 265/60/1 22.0 EXV/H012 208-230/60/1 27.0... - Page 47 Electrical Data Table 32. Electrical data - 2 to 6 tons, DX*024-070 Maximum Minimum Total Unit Blower Motor Blower Motor Overcurrent Comp RLA Comp LRA Circuit Model No. Unit Volts Protective Ampacity Device DXV/H024 208-230/60/1 13.3 11.7 58.3 17/17 25/25 DXV/H024 265/60/1 10.5...
- Page 48 Electrical Data Table 33. EXV/H and DXV/H electric duct heater data (0.75 to 6 tons) (continued) Amps MODEL EH Size Volts EXV/H036 Medium 265/60/1 34.5 High EXV/H036 265/60/1 13.7 51.8 EXV/H036 208-230/60/3 4.9/6.0 13.6/15.1 EXV/H036 Medium 208-230/60/3 8.2/10.0 22.7/25.1 High EXV/H036 208-230/60/3 12.3/15.0...
- Page 49 Electrical Data Table 33. EXV/H and DXV/H electric duct heater data (0.75 to 6 tons) (continued) Amps MODEL EH Size Volts EXV/H070 460/60/3 EXV/H070 Medium 460/60/3 11.5 High EXV/H070 460/60/3 13.8 17.3 DXV/H024 Medium 208-230/60/1 3.3/4.0 15.7/17.4 DXV/H024 Medium 265/60/1 13.8 DXV/H024 Medium...
- Page 50 Electrical Data Table 33. EXV/H and DXV/H electric duct heater data (0.75 to 6 tons) (continued) Amps MODEL EH Size Volts DXV/H070 Medium 208-230/60/3 8.2/10.0 22.7/25.1 High DXV/H070 208-230/60/3 12.3/15.0 34.1/37.7 DXV/H070 460/60/3 DXV/H070 Medium 460/60/3 11.5 High DXV/H070 460/60/3 13.8 17.3 Note: Electric heat performance table with heat rise data...
-
Page 51: Pre-Start Checklist
Pre-Start Checklist Before energizing the unit, the following system devices • Are the low/high-side pressure temperature caps must be checked: secure and in place? • Is the high voltage power supply correct and in • Are all the unit access panels secure and in place? accordance with the nameplate ratings? •... -
Page 52: Start-Up
Start-Up Initial Unit Start-Up Table 35. Checklist (continued) Note: Start-up with the heat pump thermostat is included MODE Heat Cool below: Supply-air 1. Set the thermostat to the highest position. temperature DB/WB _______F _______F 2. Set the thermostat system switch to COOL with the fan Temperature _______F _______F... - Page 53 Start-Up Table 36. Operating pressures in cooling/heating for DX* units Operating Data Entering Cooling Heating Water Temp Water Flow Suction Discharge Suction Discharge Entering Model Water Temp Air Temp Water Temp Air Temp (GPM) Pressure Pressure Pressure Pressure Water Temp Rise (°F) Drop (°F DB) Drop (°F)
- Page 54 Start-Up Table 36. Operating pressures in cooling/heating for DX* units (continued) Operating Data Entering Cooling Heating Water Temp Water Flow Suction Discharge Suction Discharge Entering Model Water Temp Air Temp Water Temp Air Temp (GPM) Pressure Pressure Pressure Pressure Water Temp Rise (°F) Drop (°F DB) Drop (°F)
- Page 55 Start-Up Table 37. Operating pressures in cooling/heating for EX* units Operating Data Entering Cooling Heating Water Water Temp Suction Discharge Water Air Temp Suction Discharge Water Air Temp Flow Model Entering Pressure Pressure Temp Rise Drop (°F Pressure Pressure Temp Rise (°F (GPM) Water...
- Page 56 Start-Up Table 37. Operating pressures in cooling/heating for EX* units (continued) Operating Data Entering Cooling Heating Water Water Temp Suction Discharge Water Air Temp Suction Discharge Water Air Temp Flow Model Entering Pressure Pressure Temp Rise Drop (°F Pressure Pressure Temp Rise (°F (GPM)
- Page 57 Start-Up Table 37. Operating pressures in cooling/heating for EX* units (continued) Operating Data Entering Cooling Heating Water Water Temp Suction Discharge Water Air Temp Suction Discharge Water Air Temp Flow Model Entering Pressure Pressure Temp Rise Drop (°F Pressure Pressure Temp Rise (°F (GPM)
- Page 58 Start-Up Table 37. Operating pressures in cooling/heating for EX* units (continued) Operating Data Entering Cooling Heating Water Water Temp Suction Discharge Water Air Temp Suction Discharge Water Air Temp Flow Model Entering Pressure Pressure Temp Rise Drop (°F Pressure Pressure Temp Rise (°F (GPM)
-
Page 59: Water Pressure Drop
Start-Up Table 37. Operating pressures in cooling/heating for EX* units (continued) Operating Data Entering Cooling Heating Water Water Temp Suction Discharge Water Air Temp Suction Discharge Water Air Temp Flow Model Entering Pressure Pressure Temp Rise Drop (°F Pressure Pressure Temp Rise (°F (GPM) -
Page 60: Water Volume
Start-Up Water Volume The information below is provided for use in calculating glycol requirements for the unit. Table 42. Water volume for DX* units Water Side Water Side Water Side Volume Unit Size Volume (in Volume (ft (gallons) DXV/H024 118.6 0.069 0.513 DXV/H036... -
Page 61: Maintenance
Maintenance WARNING Table 45. Filter sizing EX* models Hazardous Service Procedures! Filter Size (Nominal) inches Size Failure to follow all precautions in this manual and on EXHG the tags, stickers, and labels could result in death or 16 x 19 serious injury. -
Page 62: Condensate Trap
Maintenance WARNING Table 46. Water quality (continued) Hazardous Chemicals! Scaling Amount Failure to follow this safety precaution could result in Less than 25 ppm Sulfates death or serious injury. Coil cleaning agents can be either acidic or highly alkaline and can burn severely Less than 125 ppm Chlorides if contact with skin or eyes occurs. -
Page 63: Troubleshooting
Troubleshooting Deluxe Controls WARNING Hazardous Service Procedures! Troubleshooting units which contain the deluxe control option may be made easy by using the three LEDs (light Failure to follow all precautions in this manual and on emitting diodes). These LEDs are provided for indicating the tags, stickers, and labels could result in death or the operating mode of the controller. - Page 64 Troubleshooting Table 48. Troubleshooting table (continued) Heat- Cool- Problem Cause Correction Defective compressor overload Replace (if external) Defective compressor contactor Replace Supply Voltage too low Correct Blower runs, but compressor does Defective compressor capacitor Replace Defective windings Replace Limit switches open Check cause/Replace or repair Dirty filter Replace/clean...
- Page 65 Troubleshooting Table 48. Troubleshooting table (continued) Heat- Cool- Problem Cause Correction Undercharged Locate leak, repair and recharge Restricted thermal expansion valve Repair / replace Low suction pressure Inadequate air flow Check, clean blower and coil Dirty filter Clean/replace Inadequate GPM Increase GPM Inadequate GPM Increase GPM...
-
Page 66: Wiring Diagrams
Wiring Diagrams This section contains wiring diagrams and isolation valve Note: For field installed valves, wires 91B, 92B and 93B wiring connections. are coiled behind control box. For field-provided two wire valves connect to wires 91B and 93B. Table 49. Isolation valve wiring connections Note: Wiring diagrams can be accessed via e-Library by Control Type entering the diagram number in the literature order... -
Page 67: Warranty Information
Warranty Information Standard Warranty Extended Warranty The standard water-source heat pump warranty is Trane’s The optional extended warranty is a second through fifth year warranty. The time starts at the end of the standard 1 parts-only warranty, running 12 months from startup, not to exceed 18-months from shipment. - Page 68 For more information, please visit trane. com or tranetechnologies.com. Trane has a policy of continuous product and product data improvements and reserves the right to change design and specifications without notice. We are committed to using environmentally conscious print practices.
Need help?
Do you have a question about the Axiom EXH Series and is the answer not in the manual?
Questions and answers