Table of Contents
Advertisement
Advertisement
Table of Contents

Related Manuals for Lydsto R5


Summary of Contents for Lydsto R5
- Page 1 Lydsto Sweeping and Mopping Robot R5 Instruction manual...
-
Page 3: Table Of Contents
Tips Please read through this manual before using the product, and keep it properly. Table of contents Product introduction � Install � Direction for use � Connect APP �� Daily maintenance �� Basic specification �� �� Trouble removal �� Safety information ��... -
Page 4: Product Introduction
Product introduction Host On off button / Cleaning / Pause Short press to start cleaning / Pause · Long press to turn on / off · Recharge / Pause Short press to recharge / Pause · Laser head impact sensor Laser ranging sensor Indicator light Blue: Normal working... - Page 5 Product introduction Sensor and structure Drop off sensor Buttons Laser sensor Charge touch spot Universal wheel Surface cover Side brush Battery cover Driving wheel Main brush Bumper Pull-back duct Pull-back duct box Charge touch spot �...
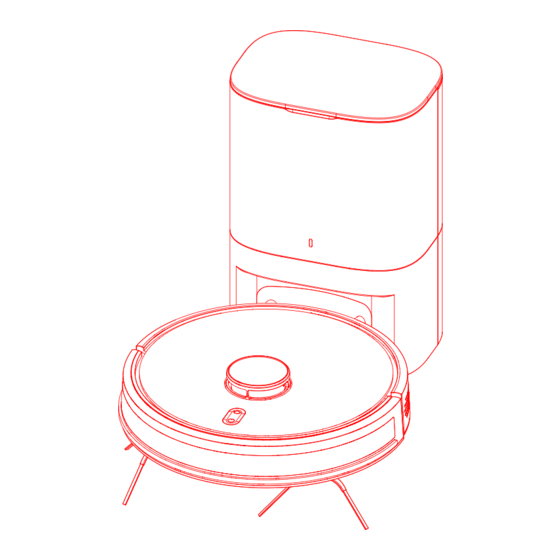
- Page 6 Product introduction Dust collector bin Power Indicator light Top cover White light: Normal working, full charge Red light: Abnormity Extinguish: No power Power Indicator light Signal transmitting area Suction inlet Charging pole plate �...
- Page 7 Product introduction Accessories list Dust collector bin×1 Mop×1 Disposable mop Dust bag×2 Water dust cloth×5 integrated box×1 Left side brush×2 HEPA filter screen×2 Cleaning brush×1 Mop cloth support×1 Right side brush×2 �...
-
Page 8: Install
Install 1.Before starting the machine, please clean the scattered wires, hard objects, sharp objects (such as nails and glass) on the ground and remove the toppable, fragile, valuable and potentially dangerous objects. Avoid personal injury or property damage caused by machine entanglement, jamming, dragging or collision. 2、... - Page 9 Install 2.Place the dust collection treasure against the wall, and ensure that there are no obstacles within 0.5 meters on both sides and 1.5 meters in front. Please wrap the excess wire around the winding board and plug it in. Adjacent to wall Note: Sunlight will interfere with the return signal, which may cause the host to fail to return...
- Page 10 Install 5.Start up and charging Long press the ( ) button to start up, wait for the indicator light to be steady on, and charge the host with the dust collector. The language prompt "Charging" indicates successful charging. Note: The device cannot be started due to insufficient power supply. Please place the host on the dust collector and the device will start up automatically.
-
Page 11: Direction For Use
Direction for us Start up/off Charging Long press ( ) buttons for 3 seconds, indicator lights Automatic mode: After cleaning, the master will on, start up successful. automatically return to the dust collector to charge. When machine stand by, long press ( ) buttons for 3 Manual mode: In the paused state, press the ( ) seconds, indicator lights off, machine shutdown. - Page 12 Direction for us Automatic cleaning After starting up, the machine will first plan the cleaning path in the way of edge and then in the way of arch filling, orderly and efficient cleaning of the whole house. After cleaning, the device will automatically return to the dust collector bin to charge (the default cleaning mode of the machine).
-
Page 13: Connect App
Connect APP Lydsto APP can be downloaded from Apple APP market The product has been connected to MIJIA. It can be controlled by MIJIA APP and interconnected with other products.Scan the QR code, download and install MIJIA APP. or Google APP market. -
Page 14: Daily Maintenance
Daily maintenance Side brush Main brush (recommended cleaning once a week) (recommended cleaning once a week) 1. Turn the machine over and press the buckle on the 1. Turn the machine over and pull out the edge brush main brush cover to take out the cover. vertically. - Page 15 Daily maintenance Dust box and filter screen Clean the dust box (recommended to be cleaned after each cleaning) (recommended cleaning once a week) 1. Press the button at the back of the machine 1. After a long time of use, remove the filter mesh, HEPA and take out the dust box....
- Page 16 Daily maintenance Use of water tank Do not use the mop function on the carpet. After the mop is completed, please empty the water tank and remove the rag in time. Installing the water tank Assembly Add water Installing mop Start mopping ��...
- Page 17 Daily maintenance Clean the laser detection sensor Clean the charging contact of the host (once a month is recommended) (once a month is recommended) Clean cliff sensor (monthly cleaning Clean the dust collector signal transmitting area and is recommended) charging contact (once a month is recommended) ��...
- Page 18 Daily maintenance Dust bag replacement: When the device indicates that the dust bag is full, replace the dust bag in time. Dust bags for wear and tear, can be purchased in the official designated channels. 1.Open the top cover 2.Lift up the dust bag 3、...
- Page 19 Daily maintenance Clean the dust collector dust path and filter port If the dust collecting treasure has poor dust collecting effect after replacing the dust bag, it is recommended to unplug the power plug and reverse the device to check whether the dust channel is blocked by foreign matter. Please use a screwdriver to remove the transparent cover of the dust passage and clean out foreign bodies.
-
Page 20: Basic Specification
Basic specification Host Specification YM-R5-B03、 YM-R5-W03、 Product model YM-R5-B01、 YM-R5-W01 Shape size 320X320X93mm Battery 4S1P 2600mAh lithium battery 14.4V Rated voltage Rated power Charging time Dust bag capacity Dust collector bin Specification Shape size 336*227*165mm Rated input 110-120V~/220-240V~ Rated output 0.6A... -
Page 21: Faq
Type of Problem The Solution If the battery is low, place the device on the dust collector, align it with the contact point, and the device will start up automatically. The machine freezes/ If the ambient temperature is lower than 0 ° C, use it in an environment ranging from 0 ° C to 40 ° C. cannot be turned on Please check whether the power plug of the device is properly connected and confirm that the power supply of the socket is normal. -
Page 22: Trouble Removal
Trouble removal Prompt tone The Solution Please reinstall the 2-in-1 tank and start again Cleaning will be triggered when the water tank is removed. Please reinstall the tank. Pick up the device, or the device is suspended in the air, please move the device to a flat Please start the device on the level ground ground before starting. -
Page 23: Safety Information
Safety information Restrictions Plastic bags are dangerous! Keep plastic bags out of the reach of infants and children to avoid suffocation. on use This product is designed only for cleaning the floor in the home environment. Do not use it outdoors (such as open balcony), in places other than the floor (such as sofa), or in commercial or industrial environment. - Page 24 Safety information Battery and Even if the product has been seriously damaged, it is strictly forbidden to burn the product, because the product battery may cause charging explosion. Do not use the batteries, chargers and dust collection charging piles of any third party. Do not disassemble, repair or refit the battery and dust collection charging pile without permission.
- Page 25 FCC Radiation Exposure Statement The device has been evaluated to meet general RF exposure requirement. The device can be used in fixed/mobile ( min��cm) exposure condition without restriction. Manufacturer: Guangdong Yimu Technology Co., Ltd. Address: Room ���,Building �,No.���,Changdong Road,Changping Town,Dongguan, Website: www.lydsto.com Guangdong,China...
Need help?
Do you have a question about the R5 and is the answer not in the manual?
Questions and answers