
Related Manuals for RADLEY 1262-801


Summary of Contents for RADLEY 1262-801
- Page 1 7.5A 3 X 21" BELT SANDER OWNER’S MANUAL 3 Year Limited Warranty on tool 3042597 JD3764U...
-
Page 2: Product Specifications
PRODUCT SPECIFICATIONS PRODUCT NAME NA1150-000 Rating 120V, 60Hz, AC Amperes 7.5 A Sanding belt speed 552-812 ft/min (no load) Sanding belt size 3 x 21" Weight 7lbs (3.19 kg) NEED ASSISTANCE? Call us on our toll free customer support line: 1-866-349-8665 (Monday through Friday 9am - 5pm Eastern Time) Technical questions •... -
Page 3: Table Of Contents
1262-801 7.5A 3 X 21" BELT SANDER TABLE OF CONTENTS Product Specifications ......................1 Table of Contents ........................2 General Safety Warnings ....................... 3 Specific Safety Rules ......................6 Guidelines for Extension Cords ................... 7 Symbols ........................... 8 Know Your Belt Sander ......................9 Assembly and Operating .................... -
Page 4: General Safety Warnings
GENERAL SAFETY WARNINGS WARNING: Before using this tool or any of its accessories, read this manual and follow all Safety Rules and Operating Instructions. The important precautions, safeguards and instructions appearing in this manual are not meant to cover all possible situations. - Page 5 1262-801 7.5A 3 X 21" BELT SANDER WARNING: Read all safety warnings and instructions. Failure to follow the warnings and instructions may result in electric shock, fire and/or serious injury. Save all warnings and instructions for future reference. WORK AREA SAFETY Keep work area clean and well lit.
- Page 6 control of the power tool in unexpected situations. Dress properly. Do not wear loose clothing or jewellery. Keep your hair, clothing and gloves away from moving parts. Loose clothes, jewellery or long hair can be caught in moving parts. If devices are provided for the connection of dust extraction and collection facilities, ensure these are connected and properly used.
-
Page 7: Specific Safety Rules
1262-801 7.5A 3 X 21" BELT SANDER SPECIFIC SAFETY RULES WARNING: Know your belt sander. Read the Owner’s Manual carefully. Learn the tool’s applications and limitations, as well as the specific potential hazards related to this tool. Following this rule will reduce the risk of electric shock, fire, or serious injury. -
Page 8: Guidelines For Extension Cords
the dust collected in the vacuum. Do not continue to use a worn, torn or clogged sanding belt. The sanded surface will be rough and the motor will become overloaded. EXTENSION CORD SAFETY Make sure your extension cord is the proper size. When using an extension cord, be sure to use one heavy enough to carry the current the tool will draw. -
Page 9: Symbols
1262-801 7.5A 3 X 21" BELT SANDER WARNING: Some of the following symbols may appear on the sander. Study these symbols and learn their meaning. Proper interpretation of these symbols will allow for Three-phase alternating Volts current with neutral Amperes... -
Page 10: Know Your Belt Sander
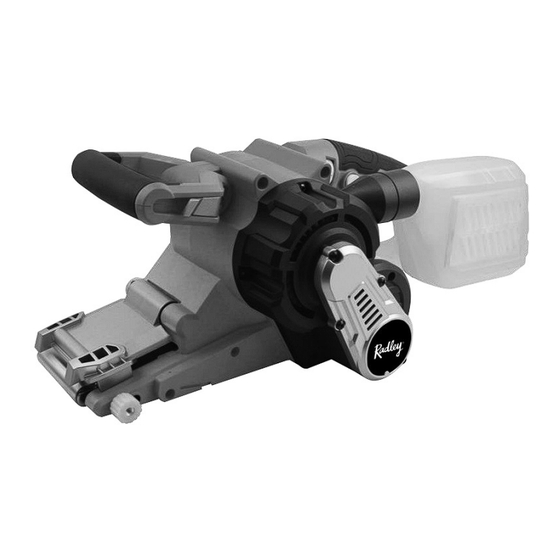
1. Adjustable front handle 2. Clamping holes 3. Speed control wheel 4. Trigger switch lock-on button 5. Rear handle 6. Vacuum port 7. Dust box 8. Motor vents 9. Belt tension release lever on opposite side of base 10. Belt tracking knob 11. -
Page 11: Assembly And Operating
1262-801 7.5A 3 X 21" BELT SANDER ASSEMBLY AND OPERATING INSTALLING THE DUST BOX OR ATTACHING A VACUUM HOSE To install the dust box, insert the front of the dust box (1) into the dust port (2) (Fig. 1). NOTE: Twisting the dust box slightly as it is being inserted into the dust port will ensure it is fully inserted and will stay in place. -
Page 12: Variable Speed Control
2. Release the trigger switch while continuing to press the lock-on button. Then stop pressing the lock-on button. The sander will continue to run. 3. To turn the sander OFF, squeeze the trigger switch then release it. Fig. 3 Fig. 4 VARIABLE SPEED CONTROL The speed of the sander can be increased or decreased by rotating the speed control wheel (3) (Fig. -
Page 13: Adjusting The Sanding Belt Tracking
1262-801 7.5A 3 X 21" BELT SANDER NOTE: The hinged front sanding belt cover may be lifted up for easier access to the front roller. 2. Slide the sanding belt (3) off the rear roller (4) and the front roller (5). -
Page 14: Selecting The Correct Sanding Belt
SELECTING THE CORRECT SANDING BELT The belt sander is designed to quickly remove large amounts of materials. Selecting the correct sanding belt will allow the belt sander to work more efficiently and produce the desired surface finish. Typical sanding belt grades are: Coarse (40 grit) Medium (80 and 100 grit) Fine (120 grit) -
Page 15: Sanding Rough Wood Surfaces Or Removing Paint
1262-801 7.5A 3 X 21" BELT SANDER 1. Squeeze the trigger switch and check to make sure the sanding belt is tracking in the centre of the sanding belt rollers. Adjust if necessary (Fig. 6). 2. Carefully lower the tool until the sanding belt contacts the workpiece (Fig. 8). -
Page 16: Sanding Concave Surfaces
SANDING CONCAVE SURFACES Use the front sanding belt roller to sand concave surfaces (Fig. 10). NOTE: Use only slight pressure on the sander. Be careful to keep the sander moving while using the front roller only. The sander will easily gouge the workpiece if too much pressure is applied or if the sander is not kept moving. -
Page 17: Maintenance
1262-801 7.5A 3 X 21" BELT SANDER MAINTENANCE WARNING: When servicing this tool, use only identical replacement parts. The use of any other part may create a hazard or cause product damage. DO NOT use solvents when cleaning plastic parts. Plastics are susceptible to damage from various types of commercial solvents and may be damaged by their use. -
Page 18: Exploded View
EXPLODED VIEW 37 38 72 73... -
Page 19: Parts Listing
1262-801 7.5A 3 X 21" BELT SANDER PARTS LIST WARNING: When servicing, use only original equipment replacement parts. The use of any other parts may create a safety hazard or cause damage to the belt sander. Any attempt to repair or replace electrical parts on this belt sander may create a safety hazard unless repairs are performed by a qualified technician. - Page 20 Key # Part # Part Name Quantity 3120060070 Belt tracking knob 2050050056 Torsion spring 4010010106 Bearing 627-2RS 2040040126 Belt wheel shaft 4010010031 Bearing 626-2Z 2040080056 Big gear 2030020123 Washer ø10.5xø20x1.5 2040290104 Drive wheel shaft 1061040007 Switch 1250010003 Terminal block 4030010099 Screw ST3.9x14 2030050002 Cord clamp...
-
Page 21: Warranty
WARRANTY RADLEY 7.5A BELT SANDER WARRANTY If this Radley Tool fails due to a defect in material or workmanship within three years from the date of purchase, return it to any Home Hardware store with the original bill of sale for exchange. Two years for battery and charger. This warranty does not include expendable parts including but not limited to blades, brushes, belts and light bulbs. - Page 23 1262-801 7.5A 3 X 21" BELT SANDER...
- Page 24 © 2021 Home Hardware Stores Limited Made in China 1-866-349-8665 Customer Service/Tech Support This Radley® product carries a three (3) year LIMITED warranty against defects in workmanship and materials. See Owner’s Manual for full details. READ ALL INSTRUCTIONS BEFORE FIRST USE.
Need help?
Do you have a question about the 1262-801 and is the answer not in the manual?
Questions and answers