Table of Contents
Advertisement
Quick Links
Advertisement
Table of Contents

Related Manuals for Lenovo PB2-670Y


Summary of Contents for Lenovo PB2-670Y
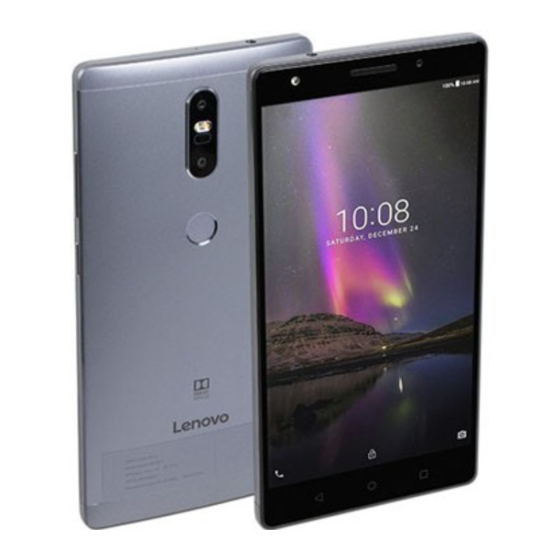
- Page 1 Lenovo PHAB2 Plus User Guide V1.0 Lenovo PB2-670M Lenovo PB2-670Y...
- Page 2 Note: Lenovo PB2-670M supports LTE Band 1, 2, 3, 5, 7, 8, 20, and 38, 40, 41(Narrow band); Lenovo PB2-670Y supports LTE Band 2, 4, 5, 7, 12, 13, 17; but in some countries LTE is not supported. To know if your device works with LTE networks in your country, contact your carrier.
-
Page 3: Home Screen
to stop running the app. to stop running all the apps. Home button: Tap to return to the default home screen. Back button: Tap to return to the previous page or exit the current app. Home screen The home screen is the starting point for using your device. For your convenience, the home screen is already set up with some useful apps and widgets. -
Page 4: Screen Lock
In edit mode, you can do any of the following: If you have many screens and you want to move one home screen, press and hold a screen until it enlarges slightly, drag it to the new location, and then release it. To add a widget to the home screen, tap WIDGETS, swipe up or down to locate the widget that you want, press and hold the widget until it pops out, drag it to where you want to place it, and then release it. -
Page 5: Usb Connection
Figure 1: Notification Figure 2: Quick Settings You can do any of the following: To see notifications, swipe down from the top of the screen. To close the Notification panel, swipe up from the bottom of the screen. To dismiss a notification, swipe left or right across the notification. To dismiss all notifications, tap at the bottom of the Notification panel. -
Page 6: Making A Call
Calls Making a call Dialing a number manually 1. Open the Phone app. 2. Tap to display the dialpad if necessary. 3. Enter the phone number that you want to dial, and then tap Calling from the call log 1. Open the Phone app. 2. - Page 7 Contacts Creating a contact 1. Open the Contacts app. 2. Tap 3. Enter the contact information. 4. Tap Searching for a contact 1. Open the Contacts app. 2. Do one of the following: Scroll the Contacts list up or down to locate the desired contact. , and then enter the contact name or initials.
-
Page 8: Camera Basics
Camera Camera basics You can use the Camera app to take photos and record videos. to take a photo. to record a video. It is recommended to choose a landscape mode to better experience Dolby Audio Capture 5.1. Tap the photo or video thumbnail to view the photo or video in the Gallery app. For more information, see Gallery. -
Page 9: Taking A Screenshot
to get into AR mode, tap the circular image on the left, and insert animated virtual objects into your photos and videos. For best results, please aim the camera directly at a flat surface. You can choose a cat, a dog, a dinosaur or a fairy; choose one of your favorite then tap to take a photo. -
Page 10: Viewing Photos And Videos
Photos Viewing photos and videos 1. Open the Photos app. 2. Tap an album. 3. Tap a photo or video to view it in full screen mode. 4. Do any of the following: To see the next or previous photo or video, swipe left or right. To view a video, tap a image with sign. -
Page 11: Wlan Connection
Network WLAN connection Turning the WLAN connection on or off Do one of the following: Go to the Quick Settings panel, and then tap the WLAN switch to turn the WLAN connection on or off. Tip: In the Quick Settings panel, you can press and hold the WLAN switch to go to the WLAN setting panel. - Page 12 Note: Tell your friends the Network SSID and password, and they can connect to your network.
-
Page 13: Visiting Websites
Tip: You do not need to enter a full website address with "http://" to access the website. For example, to visit http://www.lenovo.com, enter "www.lenovo.com" in the address box and tap 3. When viewing a web page, do any of the following: >... - Page 14 Settings Setting the date and time 1. Go to Settings > Date & time. 2. Do any of the following: To use the network date and time, go to Automatic date & time > Use network-provided time. To use the GPS-Provided date and time, go to Automatic date & time > Use GPS-provided time >...
- Page 15 Fingerprint You can put your finger on the fingerprint sensor to unlock your phone quickly. Note: In some countries, you can use your fingerprint to authorize payment. Adding a fingerprint You can add more than one fingerprint. 1. Go to Settings > Security > Fingerprint. 2.
-
Page 16: Important Safety And Handling Information
Do not disassemble or modify your device Your device is a sealed unit. There are no end-user serviceable parts inside. All internal repairs must be done by a Lenovo-authorized repair facility or a Lenovo-authorized technician. Attempting to open or modify your device will void the warranty. - Page 17 The charging device shows signs of physical damage. You want to clean the charging device. Warning: Lenovo is not responsible for the performance or safety of products not manufactured or approved by Lenovo. Use only approved Lenovo ac adapters and batteries. Caution about high volume usage Warning:exposure to loud noise from any source for extended periods of time may affect your...
-
Page 18: Electronic Emission Notices
Wash hands after handling. Explosive atmospheres Do not charge or use the Lenovo Phone in any area with a potentially explosive atmosphere, such as at a fueling area, or in areas where the air contains chemicals or particles (such as grain, dust, or metal powders). - Page 19 Consult an authorized dealer or service representative for help. Lenovo is not responsible for any radio or television interference caused by unauthorized changes or modifications to this equipment. Unauthorized changes or modifications could void the user’s authority to operate the equipment.
-
Page 20: Environmental, Recycling, And Disposal Information
Lenovo encourages owners of information technology (IT) equipment to responsibly recycle their equipment when it is no longer needed. Lenovo offers a variety of programs and services to assist equipment owners in recycling their IT products. For information on recycling Lenovo products, go to http://www.lenovo.com/recycling. - Page 21 European Union This Lenovo product, with included parts (cables, cords, and so on) meets the requirements of Directive 2011/65/EU on the restriction of the use of certain hazardous substances in electrical and electronic equipment (“RoHS recast” or “RoHS 2”).
-
Page 22: Export Classification Notice
Vietnam Circular 30/2011/TT-BCT (“Vietnam RoHS”). European Union Lenovo products sold in the European Union, on or after 3 January 2013 meet the requirements of Directive 2011/65/EU on the restriction of the use of certain hazardous substances in electrical and electronic equipment (“RoHS recast” or “RoHS 2”). -
Page 23: Troubleshooting
Export Classification Control Number (ECCN) of 5A992.c. It can be re-exported except to any of the embargoed countries in the EAR E1 country list. Troubleshooting Insufficient memory prompt appears during app installation Please free up some memory and try to install again. The touch screen does not work or is not sensitive Please hold down the On/Off button for about 8 seconds to shutdown the device or hold down the On/Off button for about 10 seconds to restart the device.
Need help?
Do you have a question about the PB2-670Y and is the answer not in the manual?
Questions and answers