Table of Contents
Advertisement
PLA Series
Powerline Ethernet Adapters
PLA4101, PLA4111, PLA4201, PLA4201 v2, PLA5205, PLA5215,
PLA5206, PLA5405, PLA5256, PLA5456, PLA5206 v2
Utility Version 7.0.2
Edition 6, 05/2016
Default Network Name: HomePlugAV
Quick Start Guide
User's Guide
www.zyxel.com
Questo manuale d'istruzione è fornito da trovaprezzi.it. Scopri tutte le offerte per
cerca il tuo prodotto tra le
migliori offerte di Wireless e Bluetooth
Copyright © 2016 ZyXEL Communications Corporation
ZyXEL PLA5456
o
Advertisement
Table of Contents
Troubleshooting

Related Manuals for ZyXEL Communications PLA5205


Summary of Contents for ZyXEL Communications PLA5205
- Page 1 Wireless e Bluetooth PLA Series Powerline Ethernet Adapters PLA4101, PLA4111, PLA4201, PLA4201 v2, PLA5205, PLA5215, PLA5206, PLA5405, PLA5256, PLA5456, PLA5206 v2 Utility Version 7.0.2 Edition 6, 05/2016 Default Network Name: HomePlugAV Quick Start Guide User’s Guide...
- Page 2 IMPORTANT! READ CAREFULLY BEFORE USE. KEEP THIS GUIDE FOR FUTURE REFERENCE. Note: This guide is a reference for a series of products. Therefore some features or options in this guide may not be available in your product. Screenshots and graphics in this book may differ slightly from your product due to differences in your product firmware or your computer operating system.
-
Page 3: Table Of Contents
Table of Contents Table of Contents Table of Contents ..........................3 Part I: User’s Guide ................... 5 Chapter 1 Introducing the PLA ..........................6 1.1 Overview .............................6 1.2 LEDs ..............................7 1.3 Standby Mode (Power Saving Mode) ....................9 1.4 Ways to Manage the PLA ........................9 1.5 Expand Your Network with the PLA ....................9 1.6 Security .............................10 1.6.1 Passwords ..........................10... - Page 4 Table of Contents 3.2.2 Installing the Utility ........................25 Chapter 4 The Configuration Utility........................28 4.1 Overview ............................28 4.1.1 Powerline Network Security .....................28 4.1.2 Device Access Key (DAK) .......................29 4.2 Starting the Configuration Utility ......................29 4.3 Network Info Screen .........................29 4.3.1 Icon View ..........................30 4.3.2 List View ..........................31 4.4 Configuration Screen ........................32 4.5 Advanced Screen...
-
Page 5: Part I User's Guide
User’s Guide... -
Page 6: Chapter 1 Introducing The Pla
HomePlug AV standard specifies how network devices communicate using standard electrical wiring. This User’s Guide covers the following models: Table 1 PLA Comparison Table 1 PORT/FEATURE PLA4101 PLA4111 PLA4201 PLA4201 v2 PLA5205 PLA5215 10/100 Base-T Ethernet port(s) Gigabit Ethernet port(s) AC Pass-Through Reset/Encrypt Button... -
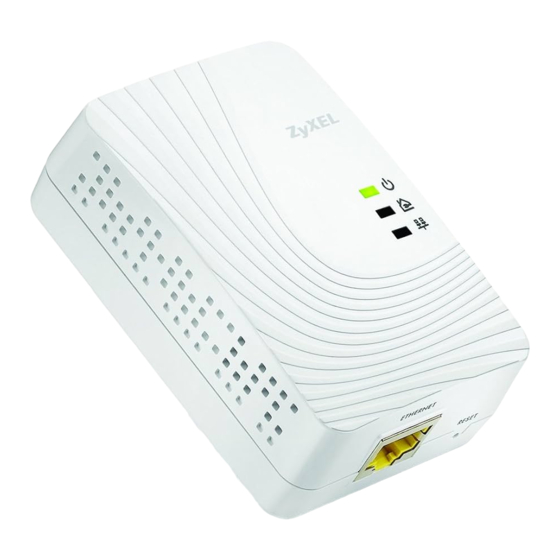
Page 7: Leds
Chapter 1 Introducing the PLA Note: In this guide RESET/ENCRYPT refers to the ENCRYPT button in PLAs that have separate RESET and ENCRYPT buttons. You can directly plug an electrical device (such as a router or computer) into PLAs with an AC power pass-through socket to supply power to the device. - Page 8 Chapter 1 Introducing the PLA Table 3 LEDs: 200 Mbps Models (continued) LIGHTS ICON COLOR STATUS DESCRIPTION HomePlug Green The PLA detects another powerline adapter. The data transfer rate is greater than 40 Mbps. Amber The PLA detects another powerline adapter. The data transfer rate is between 12~40 Mbps.
-
Page 9: Standby Mode (Power Saving Mode)
Chapter 1 Introducing the PLA 1.3 Standby Mode (Power Saving Mode) Your PLA is a certified green product. It goes into standby mode when there is no Ethernet connection. When you plug the PLA into an electric socket, it waits for an Ethernet connection. When no connection is detected after three minutes, the Power LED blinks indicating that it is going into standby mode. -
Page 10: Security
Chapter 1 Introducing the PLA Figure 2 Expand Your Network with the PLA Connect your PLA to an Internet gateway such as a modem and plug it into an ordinary power outlet in your home. Plug a second PLA into another power outlet and connect a computer to the PLA for Internet access. -
Page 11: Setting Up Security
Chapter 1 Introducing the PLA 1.6.2 Setting Up Security The ENCRYPT feature automatically sets up security on your powerline network. Use this feature if your powerline devices have the RESET/ENCRYPT button. Alternatively, use the ZyXEL PLA Series Configuration utility to set up security on the PLA. Although the PLA is a “plug-and-play”... -
Page 12: The Reset/Encrypt Button
H A PT ER The RESET/ENCRYPT Button Use the RESET/ENCRYPT button to automatically set up a secure powerline connection between your powerline devices. Note: In this guide RESET/ENCRYPT refers to the ENCRYPT button in PLAs that have separate RESET and ENCRYPT buttons. 2.1 RESET/ENCRYPT Button Overview The RESET/ENCRYPT button allows you to set up a secure powerline connection with other HomePlug AV compliant powerline devices which also support the ENCRYPT feature. - Page 13 Chapter 2 The RESET/ENCRYPT Button Figure 3 ENCRYPT Connection Procedure press 0.5 ~ 3 seconds press 0.5 ~ 3 seconds within 2 minutes Note: The RESET/ENCRYPT button’s location varies for each Powerline model. Note: Check the lights on the two powerline devices. The power ( ) and HomePlug ( lights should be on while the devices are connecting.
-
Page 14: Removing A Device From A Powerline Network
Chapter 2 The RESET/ENCRYPT Button Figure 4 Adding More Powerline Adapters to Your Network A OR B A OR B OR C This sets up your powerline network between your powerline devices. 2.3 Removing a Device from a Powerline Network Suppose you want to remove PLAs (C) and (D) from the following powerline network. -
Page 15: Multiple Separate Powerline Networks
Chapter 2 The RESET/ENCRYPT Button 2.4 Multiple Separate Powerline Networks You can use the RESET/ENCRYPT button to create multiple separate powerline networks. Use the RESET/ENCRYPT button on only two PLAs at a time. Press the RESET/ENCRYPT button on powerline devices E and F for 0.5 to 3 seconds. This must be done within 2 minutes (120 seconds) of pressing the RESET/ENCRYPT button on the first PLA. -
Page 16: Plas With Separate Reset And Encrypt Buttons
Chapter 2 The RESET/ENCRYPT Button The following table summarizes the actions that occur when the RESET/ENCRYPT button is pressed for specific lengths of time. Table 6 RESET/ENCRYPT HOMEPLUG LIGHT TIME ACTION POWER LIGHT BEHAVIOR BEHAVIOR 0.5 to 3 Create a powerline network The power ( ) light blinks The HomePlug (... -
Page 17: Reset Button Behavior
Chapter 2 The RESET/ENCRYPT Button 2.6.2 RESET Button Behavior Use a pointed device such as a pin to reset the Network Name back to default HomePlugAV. Table 8 RESET Button HOMEPLUG LIGHT TIME ACTION POWER LIGHT BEHAVIOR BEHAVIOR 1 to 3 Clear all user-entered The power ( ) light blinks... -
Page 18: Part Ii: Technical Reference
Technical Reference... -
Page 19: Installing The Utility
H A PT ER Installing the Utility This chapter guides you through the installation of the configuration utility for your PLA. 3.1 Windows This section uses the Windows XP screens as an example to show you how to install the Windows vesion of the ZyXEL PLA Series Configuration utility. - Page 20 Chapter 3 Installing the Utility Otherwise, the WinPcap setup wizard runs automatically. Click Next to continue. Review the license agreement, and click I Agree to proceed. Select Automatically start the WinPcap driver at boot time if you want to start WinPcap automatically when the computer boots.
- Page 21 Chapter 3 Installing the Utility Select I want to manually reboot later, and click Finish to exit the wizard. A prompt appears asking you to install the .NET Framework version 4. Review Microsoft’s License Agreement, select I have read and accept the license terms. and click Intall to proceed. Note: If you already have .NET Framework version 4 installed on your computer this step can be skipped.
- Page 22 Chapter 3 Installing the Utility The next screen allows you to see the progress of the installation. Click Finish to close the window. PLA Series User’s Guide...
- Page 23 Chapter 3 Installing the Utility The utility installation wizard runs automatically. Click Yes or Next to continue through the initial screen. Click Cancel only if you want to abort the installation. Click Install to install the utility to the default folder. PLA Series User’s Guide...
- Page 24 Chapter 3 Installing the Utility Figure 7 Install Destination Folder 10 The screen shows you the progress of the installation. Figure 8 Utility Installation Process 11 Click Finish to exit the wizard. PLA Series User’s Guide...
-
Page 25: Macintosh (Mac)
Chapter 3 Installing the Utility Figure 9 Installation Complete Note: You may be asked to restart your computer when the installation is complete. Click “Yes” to restart your computer. If you select “No, I will restart my computer later”, you will not be able to launch the utility until after a restart of your computer. 3.2 Macintosh (Mac) This section uses the Mac OS X 10.8 screens as an example to show you how to install the Mac vesion of the ZyXEL PLA Series Configuration utility. - Page 26 Chapter 3 Installing the Utility Click Install to install the utility to the default folder, or click Change Install Location ... to specify a different location on your computer. When the installation is finished, a screen appears to confirm the PLA Series Configuration Utility has been successfully installed to your computer.
- Page 27 Chapter 3 Installing the Utility After installing the utility, you can find the utility icon in your Applications folder. If you are running Mac OS X 10.7 or later, you can also see the utility icon in the Launchpad screen. PLA Series User’s Guide...
-
Page 28: The Configuration Utility
H A PT ER The Configuration Utility 4.1 Overview This chapter shows you how to use the ZyXEL PLA Series Configuration utility (or utility) to secure, manage and set up Quality of Service (QoS) on your powerline network. The PLA is designed as a plug-and-play network expanding solution. This means that once you complete your hardware connections, the PLAs in your network (without additional configuration) are able to communicate with each other by sending and receiving information over your home’s electrical wiring (A). -
Page 29: Device Access Key (Dak)
Chapter 4 The Configuration Utility For the powerline adapters to communicate with each other they all need to use the same network name. This network name allows the powerline adapters to understand the encrypted information sent in the powerline network. By default the PLAs are all configured with the network name HomePlugAV, this allows you to simply plug the devices in and not worry about setting up security. -
Page 30: Icon View
Chapter 4 The Configuration Utility You can select to view the connection status represented by icons ( ) or view transmission/ receiving rates in a list ( 4.3.1 Icon View Use the up/down arrow or just click a device icon at the left side to select a powerline adapter in your network. -
Page 31: List View
Chapter 4 The Configuration Utility Figure 14 Network Info Screen (Icon) > Info 4.3.2 List View Figure 15 Network Info Screen (List) The following table describes the labels in this screen. Table 9 Network Info Screen (List) LABEL DESCRIPTION Adapter This field identifies which powerline network information is displayed. -
Page 32: Configuration Screen
Chapter 4 The Configuration Utility Table 9 Network Info Screen (List) (continued) LABEL DESCRIPTION Select a powerline adapter from the drop-down box. The information provided in the following table reflects transmission rate information about the powerline adapters which communicate in your powerline network. The powerline adapters listed in this table are all the powerline adapters in your powerline network except the selected powerline adapter. - Page 33 Chapter 4 The Configuration Utility Figure 16 Configuration Screen The following table describes the labels in this screen. Table 10 Configuration Screen LABEL DESCRIPTION Network Use this to select which powerline network information is displayed. Different powerline Topology networks are identified by the Ethernet interface (network card) connected directly to the PLA.
-
Page 34: Advanced Screen
Chapter 4 The Configuration Utility Table 10 Configuration Screen (continued) LABEL DESCRIPTION DAK Password DAK (Device Access Key) password is used to verify that you are authorized to perform changes on a remote device. You can find the DAK password printed on a sticker on the bottom of your PLA. - Page 35 Chapter 4 The Configuration Utility Allocate priority settings based on application type as follows. Table 11 Priority Settings PRIORITY LEVEL APPLICATION High Voice Application Medium Video and Audio Applications Normal Data Applications Data Applications The figure below shows an example powerline home network connected to the Internet. •...
-
Page 36: About Screen
Chapter 4 The Configuration Utility Figure 18 Advanced Screen The following table describes the labels in this screen. Table 12 Advanced Screen LABEL DESCRIPTION Adapter This field identifies which powerline network information is displayed. Different powerline networks are identified by the Ethernet interface (network card) on your computer which is connected directly to a powerline adapter. - Page 37 Chapter 4 The Configuration Utility Figure 19 About Screen The following table describes the labels in this screen. Table 13 About Screen LABEL DESCRIPTION Utility version This field displays the software version of the configuration utility. Released This field displays the date when the utility was released. Close Click the button in upper right corner to close the About window.
-
Page 38: Powerline Network Setup Tutorial
H A PT ER Powerline Network Setup Tutorial 5.1 Overview Use this tutorial to expand your existing powerline network. After setting up your first home powerline network (instructions for that are in the Quick Start Guide for your ZyXEL powerline adapter) you may want to extend the network or create a new one by adding additional powerline adapters. -
Page 39: Accessing Your Powerline Adapter
Chapter 5 Powerline Network Setup Tutorial 5.3 Accessing Your Powerline Adapter Plug the powerline adapter you want to add to your network into a power socket and, if needed, switch the power socket on. Figure 20 Plug Your Powerline Adapter into a Power Socket Connect the powerline adapter to your computer. - Page 40 Chapter 5 Powerline Network Setup Tutorial Figure 22 Add a Printer to Your Powerline Network Note: You do not need to know the network name of the new adapter to add it to your network. Connect your computer to the powerline adapter you want to add to your network and open the ZyXEL PLA Series Configuration utility (see Section 5.3 on page 39).
-
Page 41: Setting Up A New Network With A New Adapter
Chapter 5 Powerline Network Setup Tutorial Figure 24 Adding an Adapter to an Existing Network Click Write and click OK on the pop-up. Figure 25 Network Name Pop-up Your new adapter will now have the same Network Name as your existing network and so has now joined your existing network. - Page 42 Chapter 5 Powerline Network Setup Tutorial Figure 26 Add New Adapters to Make a Second Network Connect your new powerline adapter and open the configuration utility as shown in Section 5.5 on page 41. The screen shown below appears. Type a Network Name that is different from the Network Name for your existing network. Make sure you use the same new Network Name for all new adapters you want to add to your new network.
-
Page 43: Splitting A Network Into Two Networks
Chapter 5 Powerline Network Setup Tutorial 5.6 Splitting a Network into Two Networks This section shows you how to split your existing network into two networks. This is useful if you want to set up a second powerline network in your home, for example, in your study connecting a laptop and printer. - Page 44 Chapter 5 Powerline Network Setup Tutorial Figure 29 Adding an Adapter to Your New Network Click Save. • If you do not type the DAK password or type it incorrectly the following pop-up appears. Click OK and type the DAK Password correctly in the DAK Password field. Figure 30 Incorrect DAK or No DAK •...
-
Page 45: Troubleshooting
Chapter 5 Powerline Network Setup Tutorial Go back to step in this section to set the same, new Network Name for all remote adapters you want to add to your new network. Check you have added the adapters correctly by changing the network name for the local adapter. All adapters with the new Network Name now appear in the list of adapters on your network. -
Page 46: Chapter 6 Troubleshooting
H A PT ER Troubleshooting This chapter offers some suggestions to solve problems you might encounter. 6.1 Power and Light Problems The PLA does not turn on. None of the lights turn on. Disconnect and re-connect the PLA. Remove the powerline adapter from the outlet. Then connect an electrical device that you know works into the same power outlet. -
Page 47: Configuration Utility Problems
Chapter 6 Troubleshooting Make sure that all your powerline adapters are HomePlug AV compliant. Check the package it came in or ask your vendor. This PLA can not detect earlier versions of HomePlug powerline adapters such as HomePlug 1.0 or 1.0.1. (Although they can coexist on the same electrical wiring without interfering with each other.) Make sure that the powerline adapters on your network are all on the same electrical wiring. -
Page 48: Powerline Problems
Chapter 6 Troubleshooting 6.3 Powerline Problems The signal on my powerline network is weak. Your powerline adapters may be connected to electrical surge protectors. Connect them to standard power outlets. Your powerline adapters may be located close to large appliances such as refrigerators or air- conditioners that cause interference with the powerline signal. - Page 49 Chapter 6 Troubleshooting The POWER light blinks two times quickly then pauses, before repeating. The ENCRYPT process has failed. Press the RESET/ENCRYPT button on both devices for 5 to 8 seconds, then try to reconnect. The POWER lights on both devices blink when I press the RESET/ENCRYPT buttons, but the HomePlug light does not turn on.
-
Page 50: Appendix A Customer Support
• Brief description of the problem and the steps you took to solve it. Corporate Headquarters (Worldwide) Taiwan • ZyXEL Communications Corporation • http://www.zyxel.com Asia China • ZyXEL Communications (Shanghai) Corp. ZyXEL Communications (Beijing) Corp. ZyXEL Communications (Tianjin) Corp. • http://www.zyxel.cn India • ZyXEL Technology India Pvt Ltd • http://www.zyxel.in Kazakhstan •... - Page 51 • ZyXEL Singapore Pte Ltd. • http://www.zyxel.com.sg Taiwan • ZyXEL Communications Corporation • http://www.zyxel.com/tw/zh/ Thailand • ZyXEL Thailand Co., Ltd • http://www.zyxel.co.th Vietnam • ZyXEL Communications Corporation-Vietnam Office • http://www.zyxel.com/vn/vi Europe Austria • ZyXEL Deutschland GmbH • http://www.zyxel.de PLA Series User’s Guide...
- Page 52 • http://www.zyxel.by Belgium • ZyXEL Communications B.V. • http://www.zyxel.com/be/nl/ • http://www.zyxel.com/be/fr/ Bulgaria • ZyXEL България • http://www.zyxel.com/bg/bg/ Czech Republic • ZyXEL Communications Czech s.r.o • http://www.zyxel.cz Denmark • ZyXEL Communications A/S • http://www.zyxel.dk Estonia • ZyXEL Estonia • http://www.zyxel.com/ee/et/ Finland •...
- Page 53 • http://www.zyxel.pl Romania • ZyXEL Romania • http://www.zyxel.com/ro/ro Russia • ZyXEL Russia • http://www.zyxel.ru Slovakia • ZyXEL Communications Czech s.r.o. organizacna zlozka • http://www.zyxel.sk Spain • ZyXEL Communications ES Ltd • http://www.zyxel.es Sweden • ZyXEL Communications PLA Series User’s Guide...
- Page 54 Appendix A Customer Support • http://www.zyxel.se Switzerland • Studerus AG • http://www.zyxel.ch/ Turkey • ZyXEL Turkey A.S. • http://www.zyxel.com.tr • ZyXEL Communications UK Ltd. • http://www.zyxel.co.uk Ukraine • ZyXEL Ukraine • http://www.ua.zyxel.com Latin America Argentina • ZyXEL Communication Corporation • http://www.zyxel.com/ec/es/ Brazil •...
- Page 55 Appendix A Customer Support • http://www.zyxel.com/me/en/ North America • ZyXEL Communications, Inc. - North America Headquarters • http://www.zyxel.com/us/en/ Oceania Australia • ZyXEL Communications Corporation • http://www.zyxel.com/au/en/ Africa South Africa • Nology (Pty) Ltd. • http://www.zyxel.co.za PLA Series User’s Guide...
- Page 56 Appendix A Customer Support PLA Series User’s Guide...
-
Page 57: Appendix B Legal Information
The contents of this publication may not be reproduced in any part or as a whole, transcribed, stored in a retrieval system, translated into any language, or transmitted in any form or by any means, electronic, mechanical, magnetic, optical, chemical, photocopying, manual, or otherwise, without the prior written permission of ZyXEL Communications Corporation. Published by ZyXEL Communications Corporation. All rights reserved. - Page 58 Appendix B Legal Information Industry Canada RSS-GEN & RSS-247 statement • This device complies with Industry Canada license-exempt RSS standard(s). Operation is subject to the following two conditions: (1) this device may not cause interference, and (2) this device must accept any interference, including interference that may cause undesired operation of the device.
- Page 59 Appendix B Legal Information Deutsch Hiermit erklärt ZyXEL, dass sich das Gerät Ausstattung in Übereinstimmung mit den grundlegenden Anforderungen (German) und den übrigen einschlägigen Bestimmungen der Richtlinie 1999/5/EU befindet. Eesti keel Käesolevaga kinnitab ZyXEL seadme seadmed vastavust direktiivi 1999/5/EÜ põhinõuetele ja nimetatud direktiivist (Estonian) tulenevatele teistele asjakohastele sätetele.
- Page 60 Appendix B Legal Information The Belgian Institute for Postal Services and Telecommunications (BIPT) must be notified of any outdoor wireless link having a range exceeding 300 meters. Please check http://www.bipt.be for more details. Draadloze verbindingen voor buitengebruik en met een reikwijdte van meer dan 300 meter dienen aangemeld te worden bij het Belgisch Instituut voor postdiensten en telecommunicatie (BIPT).
- Page 61 Appendix B Legal Information • Do not allow anything to rest on the power adaptor or cord and do NOT place the product where anyone can walk on the power adaptor or cord. • Please use the provided or designated connection cables/power cables/ adaptors. Connect it to the right supply voltage (for example, 110V AC in North America or 230V AC in Europe).
- Page 62 Appendix B Legal Information Environmental Product Declaration PLA Series User’s Guide...
- Page 63 Appendix B Legal Information 台灣 以下訊息僅適用於產品具有無線功能且銷售至台灣地區 第十二條 經型式認證合格之低功率射頻電機,非經許可,公司,商號或使用者均不得擅自變更頻率、加大功率或變更原設計之特性及功能。 第十四條 低功率射頻電機之使用不得影響飛航安全及干擾合法通信;經發現有干擾現象時,應立即停用,並改善至無干擾時方得繼續使用。 前項合法通信,指依電信法規定作業之無線電通信。 低功率射頻電機須忍受合法通信或工業、科學及醫療用電波輻射性電機設備之干擾。 用 20cm 計算 MPE 能符合 1 mW/cm2 電磁波曝露量 MPE 標準值 1mW/cm2,送測產品實測值為: _XX_mW/cm2 無線資訊傳輸設備忍受合法通信之干擾且不得干擾合法通信;如造成干擾,應立即停用, 俟無干擾之虞,始得繼續使用。 無線資訊傳設備的製造廠商應確保頻率穩定性,如依製造廠商使用手冊上所述正常操作, 發射的信號應維持於操作頻帶中 以下訊息僅適用於產品操作於 5.25-5.35 秭赫頻帶內並銷售至台灣地區 • 在 5.25-5.35 秭赫頻帶內操作之無線資訊傳輸設備,限於室內使用。 以下訊息僅適用於產品屬於專業安裝並銷售至台灣地區 • 本器材須經專業工程人員安裝及設定,始得 設置使用,且不得直接販售給一般消費者 安全警告...
- Page 64 Appendix B Legal Information Registration Register your product online to receive e-mail notices of firmware upgrades and information at www.zyxel.com for global products, or at www.us.zyxel.com for North American products. Open Source Licenses This product contains in part some free software distributed under GPL license terms and/or GPL like licenses. Open source licenses are provided with the firmware package.
-
Page 65: Index
Index Index Encrypt Button encryption 9, 28 about screen AC Pass-Through Advanced Encryption Standard, see AES 10, 28 AES (Advanced Encryption Standard) Guide Quick Start applications HomePlug AV standard certifications viewing configuration screen configuration utility connections overview contact information installation procedure copyright 19, 25... - Page 66 Index using the utility maximum PHY rate multiple networks receive rate related documentation RESET Button Reset Button RESET/ENCRYPT Button Combination network example Manage network information Separate Network Name network name security 10, 11, 28 passwords other documentation standby mode (power saving mode) starting the utility pass-through passwords...
- Page 67 Index PLA Series User’s Guide...
Need help?
Do you have a question about the PLA5205 and is the answer not in the manual?
Questions and answers