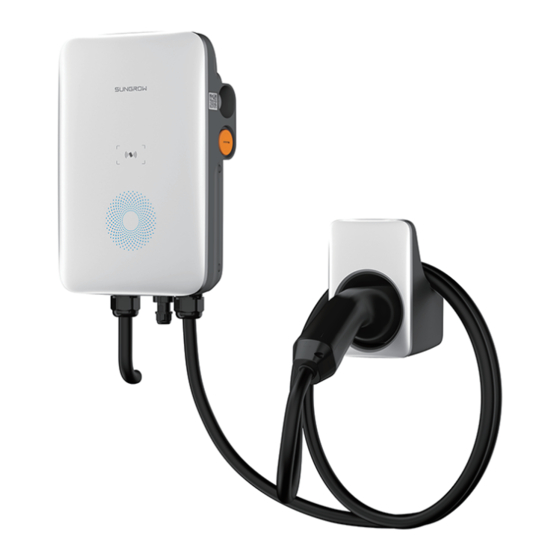
Sungrow AC007UK-01 Quick Installation Manual
Ac charger
Hide thumbs
Also See for AC007UK-01:
- User manual (44 pages) ,
- User manual (60 pages) ,
- Quick installation manual (11 pages)
Advertisement
Available languages
Available languages
Quick Links
Advertisement

Summary of Contents for Sungrow AC007UK-01
- Page 1 Quick Installation Guide AC Charger AC007UK-01 www.sungrowpower.com...
- Page 2 Before installing the equipment, check whether the goods are complete and consistent with the order, and whether there is obvious damage according to the packing List. Contact the shipping company or SUNGROW directly in case of any damage or incompleteness.
- Page 3 Bitte lesen Sie das Benutzerhandbuch und die relevanten Normen und Spezifikationen sorgfältig durch, bevor Sie in Betrieb nehmen. Sie können die Informationen erhalten, indem Sie sich auf der Sungrow Support-Plattform unter http://support.sungrowpower.com/ anmelden oder den QR-Code an der Seite des Produkts oder auf der Rückseite der Schnellinstallationsanleitung scannen.
- Page 4 Veuillez lire attentivement le manuel d’emploi, les normes et spécifications pertinentes avant toute opération. Vous pouvez obtenir les informations en vous connectant à la plate-forme de soutien de SUNGROW via le lien (http://support.sungrowpower.com/) ou en balayant le code QR sur le côté du produit ou sur la couverture arrière du manuel de montage rapide.
- Page 5 Lea detenidamente el manual de usuario y las normas y especificaciones pertinentes antes de comenzar cualquier operación. Puede consultar la información a través de iniciar sesión en la plataforma de apoyo de SUNGROW por http://support.sungrowpower.com/ o escanear el código QR figurado en la cara lateral del producto o en la contraportada de la guía de instalación rápida.
- Page 6 Leggere attentamente il Manuale utente e le norme e le specifiche correlate prima di eseguire qualsiasi operazione. È possibile ottenere le informazioni accedendo alla piattaforma di supporto Sungrow all’indirizzo http://support.sun- growpower.com/ o scansionando il codice QR sul lato del prodotto o sulla copertina posteriore della Guida per l’installazione rapida.
- Page 7 elektrycznej. Pśxjbed{fojf!epuzd{ ądf!!cf{qjfd{f』tuxb [BHSP ŻFOJB VXBHB JOGPSNBDKB...
- Page 8 Leia o manual do usuário e as normas e especificações relevantes com cuidado antes de realizar qualquer operação. Você pode obter as informações entrando na plataforma de suporte da Sungrow através do link http://support.sungrowpower.com/ ou digitalizando o código QR do lado do produto ou na contracapa das instruções de instalação rápida.
- Page 9 Lees de gebruikershandleiding en de relevante normen en specificaties zorgvuldig door voordat u enige handeling verricht. U kunt de informatie verkrijgen door in te loggen op het Sungrow support platform via http://support.sun- growpower.com/ of door het scannen van de QR code op de zijkant van het product of op de achterflap van de snelle installatie instructie.
- Page 10 Innan utrustningen installeras, kontrolleras huruvida varorna är fullständiga och stämmer överens med beställningen, och huruvida uppenbara skador finns i enlighet med packlistan. Kontakta fraktbolaget eller SUNGROW direkt vid eventuella skador eller ofullständigheter. Kablar som används för laddning måste vara intakta och välisolerade. Använd isoleringsverktyg och bär personlig skyddsutrustning.
- Page 11 Tarkista ennen kuin laitteen asentamista pakkausluettelon avulla, ovatko tavarat ehjiä ja tilauksen mukaisia ja onko ilmeisiä vaurioita. Jos jokin osa on vaurioitunut tai puuttuu, ota suoraan yhteyttä varustamoon tai SUNGROW´hun. Latauslaitteessa käytettävien kaapeleiden on oltava ehjiä ja hyvin eristettyjä. Käytä eristystyökaluja ja henkilökohtai- sia suojavarusteita.
- Page 12 Scope of delivery/Lieferumfang/Portée de la livraison/Alcance de entrega/ Contenuti/Zakres dostawy/Escopo de entrega/Omvang van de levering/ Leveransens omfattning/Toimituksen sisältö Charger×1 Socket-out×1 Backplate ×1 Upper hanging plate×1 Lower hanging plate×2 Screw for plates×4 Combination screw×11 (for pile-mounted) Pile accessories×1 Expansion screw×7 L-shaped wrench (optional) Gereedschap/Verktyg/Työkalut Cable drilling tool:...
- Page 13 Afmetingen en gewicht/Dimensioner och vikt/Mitat ja paino 205mm 92.4mm Name AC007UK-01 Cable connection/Anschluss des Kabels/Connexion par câble/ Afmetingen en gewicht/Kabelanslutning/Kaapelin liitäntä Note: cable shall be connected before the charger is installed. Cable cross section: 5×2.5mm ① Remove the back cover.
- Page 14 ④ Connect the cable. ⑤ Install the back cover. 3+0.2N•m 0.5+0.1N•m RJ45 terminal components Connect to an inverter or other communication device. Note: Crimp the blue wire and the blue-white wire to the crystal head.The blue line (PIN4) connects to 485B, and the blue-white line (PIN5) connects to 485A.
- Page 15 ① Install the backplate. Backplate Tapping screw ② Install the socket-out .(It is recommended that the socket-out be installed at the lower right side of the charger, with a linear distance of about 20cm from the charger. The actual situation on site shall prevail.)...
- Page 16 Wall-mounted installation effect ③ Charger installation. digram. 1.2+0.1N•m 1.2+0.1N•m Pile-mounted charger installation (optional)/ Installation des Ladegeräts auf einem Pfosten (optional)/ Montage d’un chargeur monté sur pieu (en option)/ Instalación de cargador montado en poste(opcional)/ Installazione del caricabatterie su palo (opzionale)/ Op palen gemonteerde laderinstallatie (optioneel)/ Pålmonterad laddarinstallation (tillval)/ Asennuspylvääseen asennettavan latauslaitteen asennus (valinnainen)
- Page 17 ④ Install the upper hanging plate and lower hanging Pile installation effect digram. plate. 1.2+0.1N•m Inspection before commissioning/Inspektion vor der Inbetriebnahme/ Contrôle avant mise au point/Inspección antes de la puesta en marcha/ Inspektion före idriftsättning/Tarkastus ennen käyttöönottoa Judgment Item Install an individual 30mA tape A residual current protection device to the utility grid.
- Page 18 Commissioning/Inbetriebnahme/Mise au point/Puesta en marcha/ Käyttöönotto Step 1 Confirm that all inspected items meet the requirements before commissioning; Step 2 Close the the cable inlet leakage protection circuit breaker; Step 3 Power on the charger: about one minute of power-on self-test time; Step 4 After power-on self-test, observe the status of the indicators.
- Page 19 More information in the QR code or at http://support.sungrowpower.com/ Specifications subject to change without notice.


Need help?
Do you have a question about the AC007UK-01 and is the answer not in the manual?
Questions and answers