Sign In
Upload
Download
Table of Contents
Contents
Add to my manuals
Delete from my manuals
Share
URL of this page:
HTML Link:
Bookmark this page
Add
Manual will be automatically added to "My Manuals"
Print this page
×
Bookmark added
×
Added to my manuals
Manuals
Brands
Zotac Manuals
Desktop
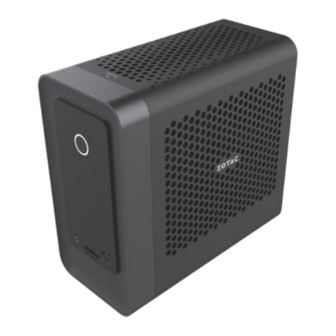
ZBOX MAGNUS ONE
User manual
Zotac ZBOX MAGNUS ONE User Manual
Hide thumbs
Also See for ZBOX MAGNUS ONE
:
User manual
(38 pages)
,
Quick start manual
(57 pages)
1
2
Table Of Contents
3
4
5
6
7
8
9
10
11
12
13
14
15
16
17
18
19
20
21
22
23
24
25
26
27
28
29
30
31
page
of
31
Go
/
31
Contents
Table of Contents
Bookmarks
Table of Contents
Table of Contents
Product Specifications
Safety Information
Setting up Your System
Care During Use
Welcome
Package Contents
Getting to Know Your ZOTAC ZBOX
Front View
Rear View
Installing Hardware
Installing a Graphics Card (Optional)
Installing a Memory Module
Installing M.2 SSD Module
Installing a Hard Disk / SSD
Setting up Your ZOTAC ZBOX
Installing Drivers and Software
Installing an Operating System
Installing System Drivers
Installing the Killer Control Center
Using Your ZOTAC ZBOX
Configuring a Wireless Connection
Configuring Audio Output
FCC Compliance Statement
Advertisement
Quick Links
1
Product Specifications
2
Installing a Graphics Card (Optional)
3
Setting up Your Zotac Zbox
Download this manual
Table of
Contents
Previous
Page
Next
Page
1
2
3
4
5
Advertisement
Table of Contents
Need help?
Do you have a question about the ZBOX MAGNUS ONE and is the answer not in the manual?
Ask a question
Questions and answers
Related Manuals for Zotac ZBOX MAGNUS ONE
Desktop Zotac ZBOX Magnus One Quick Start Manual
(57 pages)
Desktop Zotac ZBOX MAGNUS ONE User Manual
(38 pages)
Desktop Zotac ZBOX miniHTPC User Manual
(18 pages)
Desktop Zotac ZBOX MI551 Quick Start Manual
(57 pages)
Desktop Zotac ZBOX M Series Quick Start Manual
(57 pages)
Desktop Zotac ZBOX C Series Quick Start Manual
(57 pages)
Desktop Zotac ZBOX M Series User Manual
(21 pages)
Desktop Zotac ZBOX M Series Quick Start Manual
(58 pages)
Desktop Zotac ZBOX M Series User Manual
(23 pages)
Desktop Zotac ZBOX MI648 Quick Start Manual
(57 pages)
Desktop Zotac ZBOX MI672 User Manual
(23 pages)
Desktop Zotac ZBOX MI660nani Quick Start Manual
(58 pages)
Desktop Zotac ZBOX M Series User Manual
(23 pages)
Desktop Zotac ZBOX MI351 User Manual
(23 pages)
Desktop Zotac ZBOX M Series Quick Start Manual
(58 pages)
Desktop Zotac ZBOX Magnus E Series User Manual
(21 pages)
This manual is also suitable for:
Zbox magnus one erp74070c
Zbox-erp74070c
Table of Contents
Save PDF
Print
Rename the bookmark
Delete bookmark?
Delete from my manuals?
Login
Sign In
OR
Sign in with Facebook
Sign in with Google
Upload manual
Upload from disk
Upload from URL


Need help?
Do you have a question about the ZBOX MAGNUS ONE and is the answer not in the manual?
Questions and answers