Advertisement
Advertisement
Table of Contents

Related Manuals for Simder MIG 140


Summary of Contents for Simder MIG 140
- Page 1 MIG Welding Machine OPERATING MANUAL MIG 140 MIG Welding Machine...
- Page 2 SAFETY RULES The equipment must be used only for the purpose it was designed for. Using it in any other way could result in damage or injury. Only trained and certified welder should use this equipment. Operators should respect the safety of others. Prevention against electric shock Equipment should be installed by a certified welder and operated in accordance with current operating standards.
- Page 3 Prevention against Burns and Radiation Arc rays from the welding process produce intense, visible and invisible (ultraviolet and infrared) rays that can burn eyes and skin. Wear an approved welding helmet fitted with a proper shade of filter lens to protect your face and eyes when welding or watching.
- Page 4 RF Declaration Difficulties may arise in assuring class A electromagnetic compatibility for systems installed in domestic locations due to conducted and radiated emissions. In the case of electromagnetic problems, it is the responsibility of the user to resolve the situation. It may be necessary to shield the equipment and fit suitable filters on the mains supply.
-
Page 5: Table Of Contents
Contents 1. PREFACE...........................5 General..............................5 Introduction............................. 5 Technical Specifications........................6 Overview of Machine..........................7 2. INSTALLATION......................8,9 3. OPERATION........................10 4. TROUBLE SHOOTING....................11 5. MAINTENANCE......................12 www.ssimder.com... -
Page 6: Preface
1. PREFACE 1.1 General Congratulations on choosing MIG welding machine. Used correctly, our products can significantly increase the productivity of your welding, and provide years of economical service. This operating manual contains important information on the use, maintenance and safety of our product. -
Page 7: Technical Specifications
1.3 Technical Specifications Models MIG-140 220V MIG-140M 110V/220V Parameters Rated Input Voltage (V) 220±15% 220±15% 110±15% Input Frequency (Hz) 50/60 50/60 MMA:5@220V MMA:5 MMA:5@110V Rated Power (KV.A) MIG:4 MIG:4@220V MIG:4@110V MMA:21.7@220V MMA:21.7 MMA:45.5@110V Rated Input Current(A) MIG:17.4 MIG:17.4@220V MIG:36.4@110V No-load Voltage (V) MMA:20-120 MMA:20-120 Rated Output Current(A) -
Page 8: Overview Of Machine
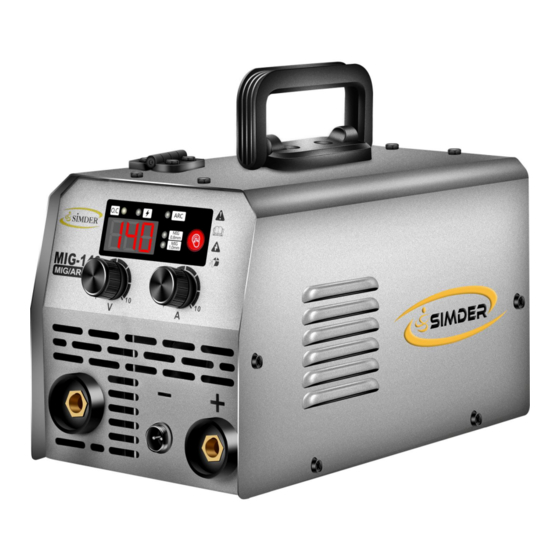
1.4 Overview of machine... -
Page 9: Installation
2.INSTALLATION Unpacking Check the packaging for any signs of damage. Carefully remove the machine and retain the packaging until the installation is complete. Location The machine should be located in a suitable position and environment. Care should be taken to avoid moisture, dust, steam, oil or corrosive gases. - Page 10 MMA Welding 1. Connect the electrode holder to the “-” negative terminal on the left side of the front panel, and tighten it clockwise; 2. Connect the ground clamp to the “+” positive terminal on the front panel, and tighten it clockwise, then clamp the ground clamp to the work-piece.
-
Page 11: Operation
3.OPERATION Before starting any welding activity ensure that you have suitable eye protection and protective clothing. Also take the necessary steps to protect any persons within the area. 3.1 MMA Welding Mode After connecting the welding leads as detailed you will need to switch the power switch on the back panel to “ON”... -
Page 12: Trouble Shooting
4.TROUBLE SHOOTING In the event of a failure of the machine, contact an authorized service agent. The following operation requires sufficient professional knowledge on electric aspects and comprehensive safety knowledge. Make sure the input cable of the machine is disconnected from the electricity supply and wait for 5 minutes before removing the machine covers Before taking your unit for servicing, check the list below. -
Page 13: Maintenance
5.Maintenance The utilization level of the power source and its working environment should be taken into consideration in planning the frequency of maintenance of the machine. Appropriate use and preventive maintenance guarantee the trouble-freest use of the equipment. This allows you to avoid interruptions in use and increases the productivity of the machine.
Need help?
Do you have a question about the MIG 140 and is the answer not in the manual?
Questions and answers
necesito saber como conecto la maquina y el hilo
To connect the Simder MIG 140 machine and the wire for MIG welding:
1. Install the flux core wire on the spindle adapter.
2. Connect the ground clamp to the “+” positive terminal on the front panel, tighten it clockwise, and clamp it to the workpiece.
3. Connect the MIG torch to the “–” negative terminal on the left side.
4. Connect the two-core control switch to the 2-pin connector in the middle of the panel.
5. Plug in the machine, turn on the power, and select the proper MIG welding mode.
To feed the wire:
- Feed the wire through the guide tube into the drive wheel.
- Clamp it in place.
- Pull the trigger on the MIG gun to advance the wire through the torch.
This answer is automatically generated