Samsung WD9 T Series Manual
Hide thumbs
Also See for WD9 T Series:
- User manual (238 pages) ,
- User manual (72 pages) ,
- User manual (72 pages)
Table of Contents
Advertisement
Quick Links
Washing Machine
•
Congratulations on your new Samsung washing machine. This manual contains important information on the
installation, use, and care of your appliance. Read this manual thoroughly before using the washing machine to
ensure that you know how to safely and efficiently operate the features and functions that your new washing
machine offers.
•
For detailed instructions on installation and cleaning of the washing machine and ecodesign information
(according to (EU)2019/2023), visit the Samsung website (http://www.samsung.com), go to Support > Support
home, and then enter the model name. Or, download and install the SmartThings app on your mobile device, and
then open HomeCare Wizard in SmartThings for tips and guides.
•
To check the product's model name, see the label enclosed with the product or attached to the product.
What's included
02
03
04
05
06
07
08
09
Spanner
Accessories (not supplied)
•
Stacking kit : SK-DH
‐
Staking kit is required to stack a dryer on a washing machine.
NOTE
•
Spanner: For removing the shipping bolts and levelling the washing machine.
•
Bolt caps: For covering the holes after removing the shipping bolts. The provided number of bolt caps (3 to 6)
depends on the model.
•
Hose guide: For hanging the drain hose in the drainpipe or wash-basin.
•
Cold/Hot water hose: For supplying water to the washing machine. (Hot water hoses is for applicable models
only.)
U-PJT_COMBO-AD_SimpleUX_MANUAL_DC68-04198A-04_EN.indd 1
Models: WD1*T****** / WD9*T****** / WD8*T****** / WD7*T******
01
Bolt caps
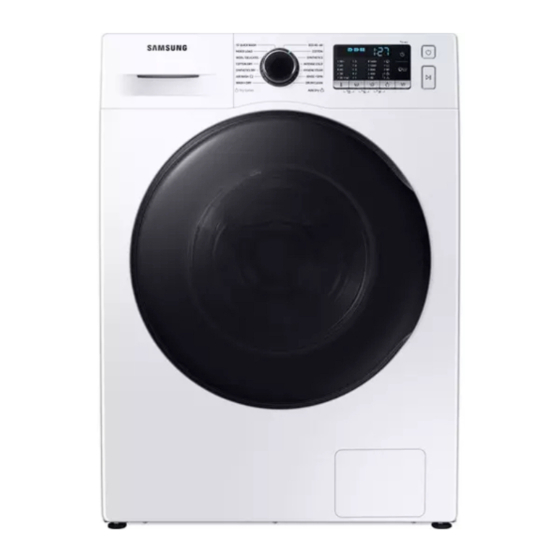
01 Auto dispenser
02 Release lever
03 Detergent drawer
04 Control panel
05 Door
10
06 Drum
07 Debris filter
08 Emergency drain tube
09 Filter cover
11
10 Worktop
11
12 Drain hose
12
13 Levelling feet
13
Hose guide
Cold water hose
Power plug
Hot water hose
2022/7/11 9:47:31
Advertisement
Table of Contents

Related Manuals for Samsung WD9 T Series


Summary of Contents for Samsung WD9 T Series
- Page 1 Models: WD1*T****** / WD9*T****** / WD8*T****** / WD7*T****** • Congratulations on your new Samsung washing machine. This manual contains important information on the installation, use, and care of your appliance. Read this manual thoroughly before using the washing machine to ensure that you know how to safely and efficiently operate the features and functions that your new washing machine offers.
-
Page 2: Safety Information
Safety information Important safety symbols What the icons and signs in this user manual mean: WARNING Hazards or unsafe practices that may result in severe personal injury, death and/or property damage. CAUTION Hazards or unsafe practices that may result in personal injury and/or property damage. NOTE Indicates that a risk of personal injury or material damage exists. - Page 3 For use in Europe: This appliance can be used by children aged from 8 years and above and persons with reduced physical, sensory or mental capabilities or lack of experience and knowledge if they have been given supervision or instruction concerning use of the appliance in a safe way and understand the hazards involved.
- Page 4 11. Lint must not to be allowed to accumulate around the tumble dryer. (not applicable for appliances intended to be vented to the exterior of the building) 12. Adequate ventilation has to be provided to avoid the back flow of gases into the room from appliances burning other fuels, including open fires.
- Page 5 21. The appliance must not be installed behind a lockable door, a sliding door or a door with a hinge on the opposite side to that of the tumble dryer, in such a way that a full opening of the tumble dryer door is restricted.
-
Page 6: Critical Installation Warnings
Critical installation warnings WARNING The installation of this appliance must be performed by a qualified technician or service company. • Failure to do so may result in electric shock, fire, an explosion, problems with the appliance, or injury. The appliance is heavy, therefore take care when lifting it. Plug the power cord firmly into a wall socket that meets local electrical specifications. -
Page 7: Installation Cautions
Following the repair by a non-authorized service provider, self-repair or non-professional repair of the product, Samsung is not liable for any damage to the product, any injury or any other product safety issue caused by any attempt to repair the product which does not carefully follow these repair and maintenance instructions. Any damage to the product caused by an attempt to repair the product by any person other than a Samsung certified service provider will not be covered by the warranty. -
Page 8: Usage Cautions
• Failure to do so may result in electric shock or fire. If any foreign substance enters into the appliance, unplug the power cord and contact your nearest Samsung Customer Service. • This may result in electric shock or fire. - Page 9 Using the appliance for business purposes qualifies as an appliance misuse. In this case, the appliance will not be covered by the standard warranty provided by Samsung and no responsibility can be attributed to Samsung for malfunctions or damages resulting from such misuse.
- Page 10 • If rust starts appearing on the surface of the drum, apply a (neutral) cleansing agent to the surface and use a sponge to clean it. Never use a metal brush. Do not use dry cleaning detergent directly and do not wash, rinse, or spin laundry contaminated by dry cleaning detergent.
-
Page 11: Critical Cleaning Warnings
This product and its electronic accessories should not be mixed with other commercial wastes for disposal. For information on Samsung’s environmental commitments and product regulatory obligations, e.g. REACH, WEEE or Batteries, visit our sustainability page available via www.samsung.com English 11 U-PJT_COMBO-AD_SimpleUX_MANUAL_DC68-04198A-04_EN.indd 11... -
Page 12: Declaration Of Conformity
Declaration of conformity Hereby, Samsung declares that this radio equipment is in compliance with Directive 2014/53/EU and with the relevant statutory requirements in the UK. The full text of the EU declaration of conformity and the UK declaration of conformity is available at the following internet address: The official Declaration of conformity may be found at http://www.samsung.com, go to Support >... -
Page 13: Installation Requirements
Before using the washing machine for the first time, check all connections at the water valve and taps for any leaks. Drain Samsung recommends a standpipe 60-90 cm high. The drain hose must be connected through the hose clip to the standpipe, and the standpipe must fully cover the drain hose. - Page 14 Flooring For best performance, the washing machine must be installed on a solid floor. Wood floors may need to be reinforced to minimise vibration and/or unbalanced loads. Carpeting and soft tile surfaces do not resist vibrations well and may cause the washing machine to move slightly during the spin cycle. CAUTION Do NOT install the washing machine on a platform or a poorly supported structure.
- Page 15 STEP 2 Remove the shipping bolts Unpack the product package and remove all shipping bolts. Insert the bolt caps (B) into the holes (marked with circles in the figure). NOTE The number of shipping bolts may differ depending on the model. WARNING •...
- Page 16 If there is a water leak, stop operating the washing machine and disconnect it from the electrical supply. Then, contact a local Samsung service centre in case of a leak from the water hose, or contact a plumbing technician in case of a leak from the water tap.
- Page 17 STEP 5 Position the drain hose The drain hose can be positioned in three ways: 60 cm Over the edge of a wash basin In a drain pipe In a sink drain pipe branch CAUTION Remove the lid on the sink drain pipe branch before connecting the drain pipe to it. STEP 6 Power on Plug the power cord into a wall socket protected by a fuse or circuit breaker.
-
Page 18: Run Calibration
Run Calibration • Initial setup includes the calibration process which comes after the language selection. You must proceed calibration before using the washing machine. • Empty the drum, and then tap to start calibration. • When calibration is complete, power turns off and then turns on automatically. •... - Page 19 Setting the amount of detergent/softener input Follow these instructions to increase or decrease the amount of detergent/softener dispensed automatically. Med. Dose per Wash Eco 40-60 For optimal performance ‘OK’ to set auto dispense Tap . Turn the Navigation dial to select Dose Per Wash or Dose Per Rinse. •...
- Page 20 Operations For detailed information on using the washing machine, see the provided one-sheet manual. (Washing machine operation guide) NOTE The cycle and function names that appeared in this manual may differ from your product. Cycle and Option list Cycle Eco 40-60 AI Wash Cotton 15’...
- Page 21 System Functions Tap and hold for 3 seconds to enter the system functions menu to change the following options. Water Hardness Softener AI Pattern Alarm Calibration Wi-Fi Language Factory Reset • Alarm: You can turn on or off the melody of cycle completion. However, the other sounds stay active. •...
-
Page 22: Smart Control
This appliance supports the Wi-Fi 2.4 GHz protocols. Download On an app market (Google Play Store, Apple App Store, Samsung Galaxy Apps), find the SmartThings app with a search term of “SmartThings”. Download and install the app on your device. -
Page 23: Maintenance
Maintenance For instructions on cleaning the washing machine, please visit the website on the cover of this manual and check the web manual. Cleaning Detergent drawer While holding down the release lever on the inner of the drawer, pull the detergent drawer to remove. Open the cover and clean inside the auto detergent/softener compartments with water. - Page 24 Debris filter Turn off the washing machine, and unplug the power cord. Drain the remaining water inside the drum. (For details, refer to the Emergency drain section.) Open the filter cover. Turn the debris filter knob to the left, and drain off the remaining water. Clean the debris filter using a soft brush.
-
Page 25: Troubleshooting
Troubleshooting If there is any problem, check the information message on the LCD screen and follow the on-screen instructions. If the problem persists, please contact the service center. Checkpoints If you encounter a problem with the washing machine, first check the table below and try these suggestions. Problem Action •... - Page 26 Problem Action • Make sure the washing machine is installed on a level, solid floor that is not slippery. If the floor is not level, use the levelling feet to adjust the height of the washing machine. • Make sure the shipping bolts are removed. •...
- Page 27 Problem Action • Plug the power cord into a live electrical outlet. • Check the fuse or reset the circuit breaker. • Close the door and tap to start the washing machine. For your safety, the washing machine will not tumble or spin unless the door is closed. •...
- Page 28 • Samsung is not liable for any damage to the product, any injury, or any other product safety issue caused by a repair which does not follow the instructions in these Repair Guides. Any damage to the product caused by an attempted repair (by anyone other than a Samsung certified service provider) will also not be covered by the warranty.
-
Page 29: Protecting The Environment
Specifications Protecting the environment • This appliance is manufactured from recyclable materials. If you decide to dispose of this appliance, please observe local waste disposal regulations. Cut off the power cord so that the appliance cannot be connected to a power source. - Page 30 “*” Asterisk(s) means variant model and can be varied (0-9) or (A-Z). Type Front loading washing machine Model name WD1*T***** A (Width) 600 mm B (Height) 850 mm C (Depth) 600 mm Dimensions 690 mm (WD**T*8****, WD**T*5****) 680 mm (WD**T*3****, WD**T*0****) 1120 mm Water pressure 50-1000 kPa...
- Page 31 “*” Asterisk(s) means variant model and can be varied (0-9) or (A-Z). Type Front loading washing machine WD8*T7***** WD8*T9***** WD8*T6***** Model name WD8*T8***** WD8*T5***** WD8*T4***** A (Width) 600 mm 600 mm B (Height) 850 mm 850 mm C (Depth) 600 mm 600 mm 690 mm (WD**T*8****, 690 mm (WD**T*8****,...
- Page 32 “*” Asterisk(s) means variant model and can be varied (0-9) or (A-Z). Type Front loading washing machine Model name WD7*T****** A (Width) 600 mm B (Height) 850 mm C (Depth) 550 mm Dimensions 630 mm (WD**T*5****) 620 mm (WD**T*3****, WD**T*0****) 1070 mm Water pressure 50-1000 kPa...
Need help?
Do you have a question about the WD9 T Series and is the answer not in the manual?
Questions and answers